Introduction
Features

SET Video Review


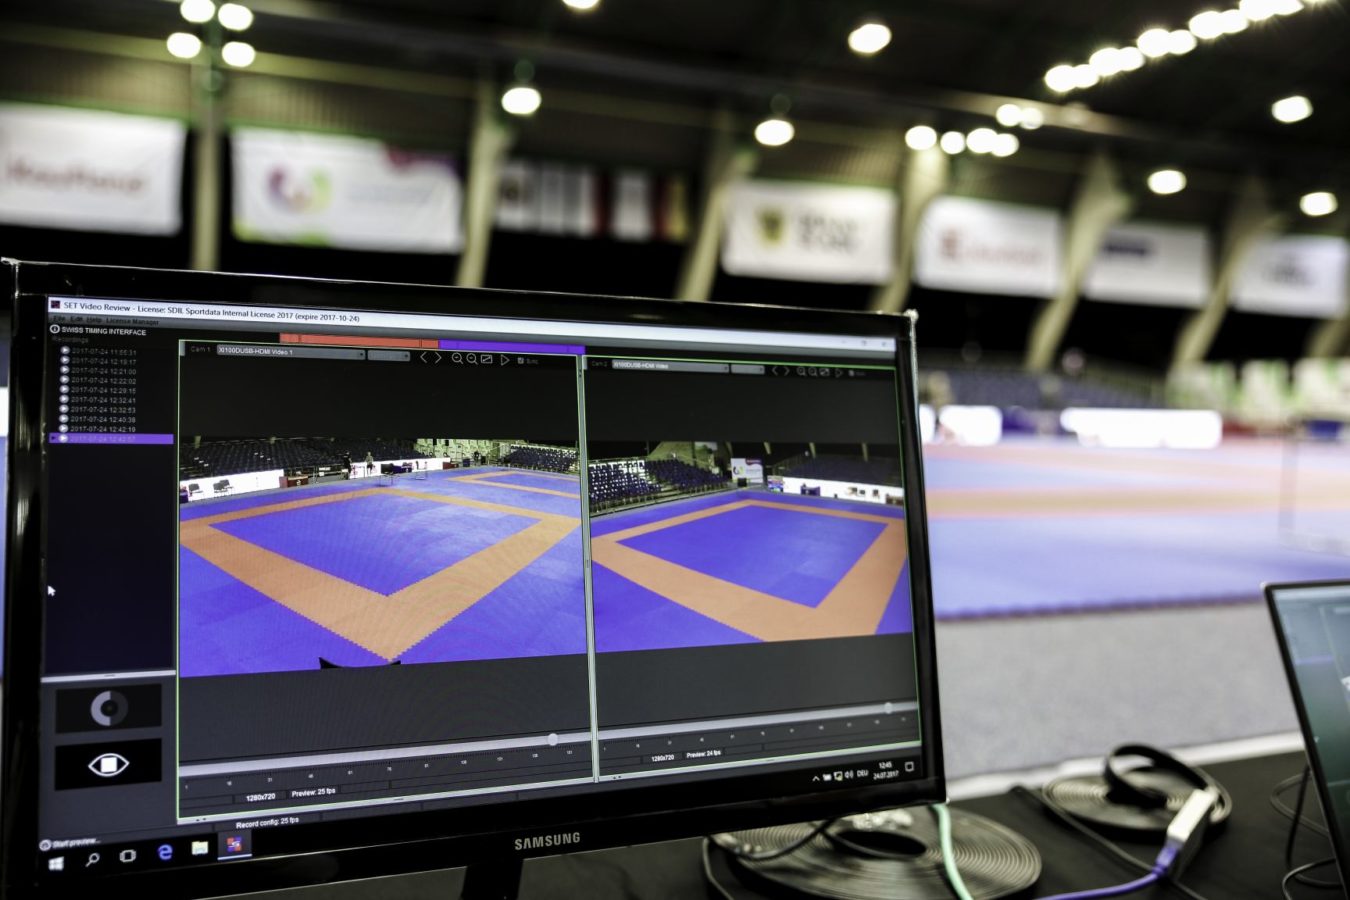
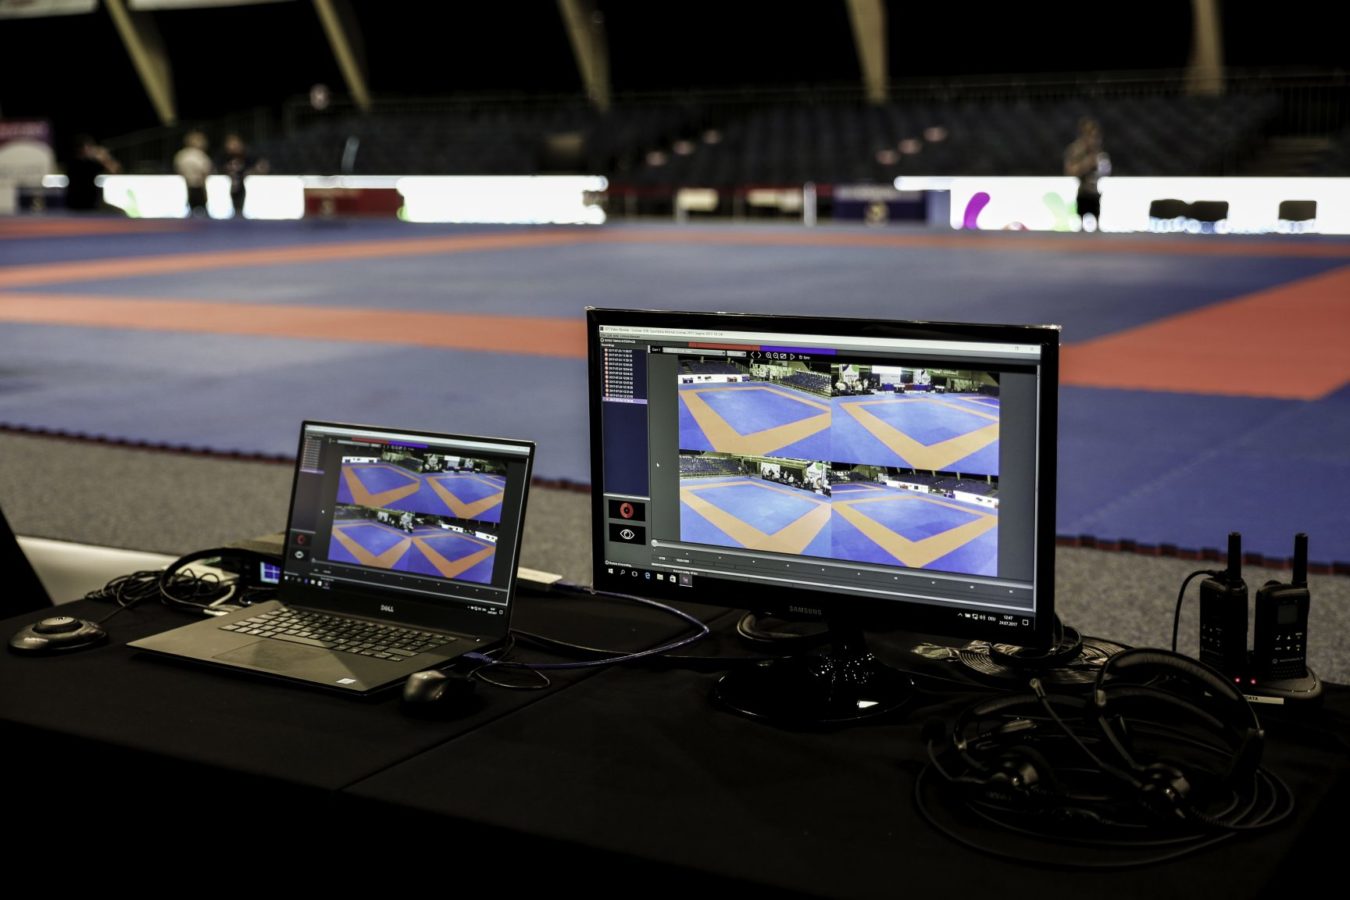

- Instant replay of up to 4 video sources in Full HD. Simultaneously!
- Support for DirectShow cameras, capture devices (USB, PCIe, TB) and IP cameras
- Extremely performant and synchronized frame-by-frame analysis
- High quality recordings through JPEG based video capture technology
- Flexible archiving, importing and exporting functionalities
- Control via mouse, keyboard or special input devices like the Contour Design ShuttleXpress or ShuttlePRO.
- Highly efficient and user friendly interface
- Integrated into the SET software framework
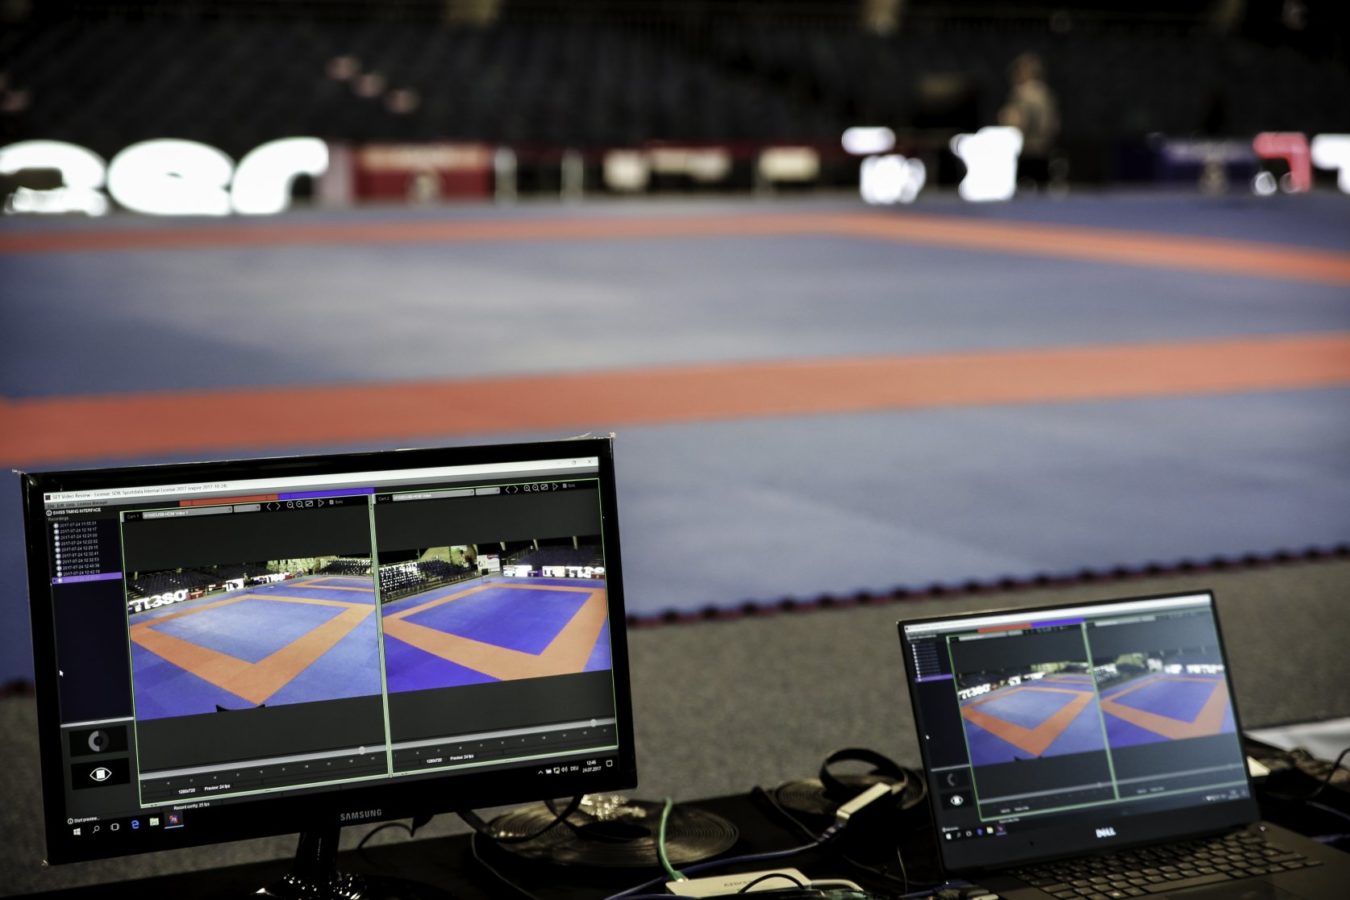
- Support for 4-in-1 video sources by auto-zooming in fullscreen mode
- Storage type independent
Maximize the quality of match-winning decisions or motion analysis
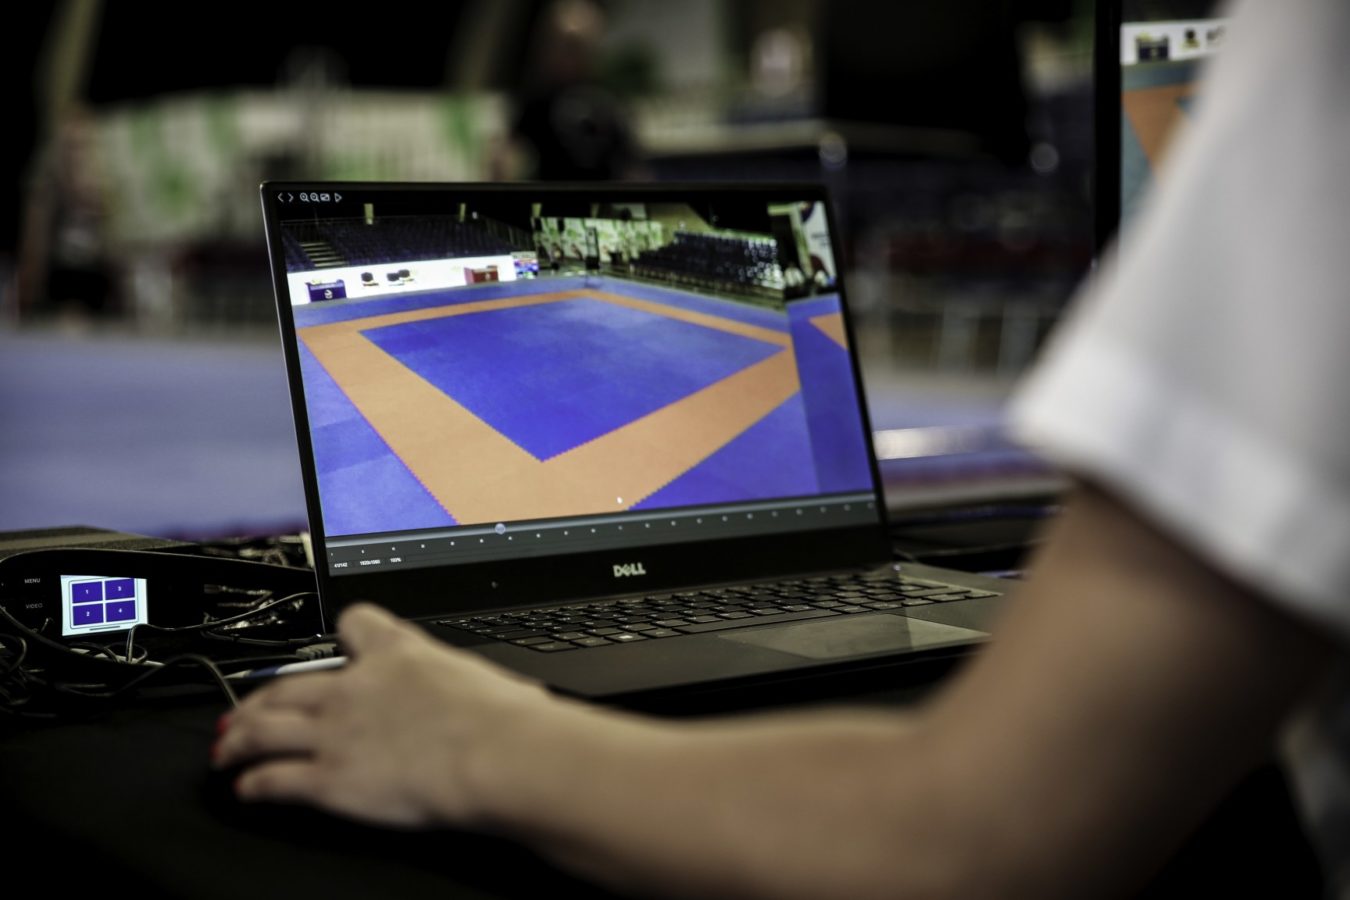
.. in any kind of sport! With a frame-by-frame analyzing system like SET Video Review, no important moments will be missed any more. Providing simultaneous recording of up to 4 video sources, combined with synchronized playback offers incredible possibilities when reviewing all kinds of situations in fast- or slow motion.
Professional instant replay by efficiency and integration
A simple but powerful user interface is essential to guarantee a gapless and stable instant replay system. SET Video Review was designed and built from scratch following those principles – and considering the full integration into the world of Sportdata Event Technology, this makes SET Video Review to a unique but affordable solution.
Wide application field by flexibility
No matter if you prefer to use professional video equipment or low cost consumer cams: SET Video Review handles different input sources like DirectShow cameras, capture devices or IP cameras – even in a combined setup! Additionally, all recordings are independent from your storage type – meaning that even shared network recordings are no problem.
Optimized user experience with specialized controllers
To complete the provided methods of user interaction – aiming to satisfy requirements of the real enthusiasts out there – SET Video Review supports professional hardware controllers like the Contour Design ShuttleXpress or ShuttlePRO. Of course, controlling via mouse and/or keyboard also enables to use the complete set of features by default.
Supported Platforms
- Microsoft Windows 7 or higher – 64 bit
Right now SET Video Review is available for Microsoft Windows. Versions supporting MacOS and Linux are under development.
System Requirements
System requirements
| 1 X HD (720/50P) |
2 X HD (720/50P) |
4 X FULL HD (1080/30P) OR 1 X 4K UHD (3840/30P) |
|
|---|---|---|---|
| OPERATING SYSTEM | Microsoft Windows 7 or higher, 64 bit | Microsoft Windows 7 or higher, 64 bit | Microsoft Windows 7 or higher, 64 bit |
| MAIN MEMORY (RAM) | 4 GB | 8 GB | 8 GB |
| CPU | i3 last generation or higher, Dual-Core, 2.5 GHz | i5 last generation or higher, Dual-Core, 3 GHz | i7 last generation or higher, Quad-Core, 3.5 GHz |
| STORAGE TYPE | HDD (SATA 3), SSD, Network share (GbE), .. | HDD (SATA 3), SSD, Network share (GbE), .. | SSD (NVMe preferred) |
| STORAGE USAGE | ~150 MB per recorded minute | ~375 MB per recorded minute | ~800 MB per recorded minute |
Installation
Download
SET Video Review can be downloaded from here:
https://set.sportdata.org/wp/index.php/category/downloads/
Installer
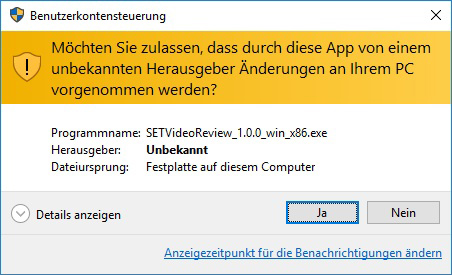
After downloading, please run the executable installer file. The installation process needs admin rights exclusively to write into the ProgramFiles directory – so you can safely confirm the appearing User Account Control <UAC> dialog.
If Windows SmartScreen shows an alert, just continue with execution as follows:
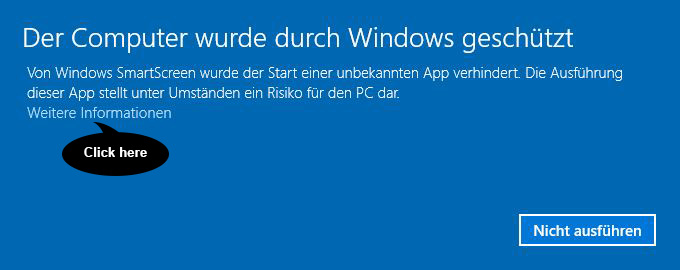
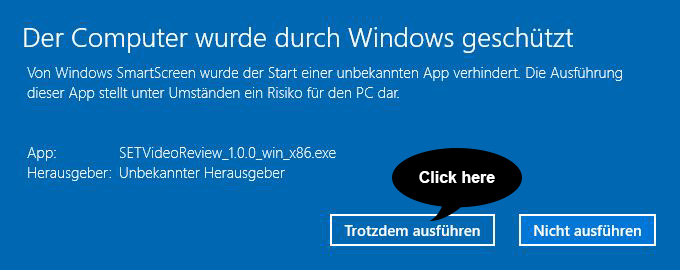
Then just follow the installation instructions, which will guide you through the complete installation process.

Please observe, that you will be asked to select an installation folder twice:
- The first one is for the Software itself (usually: “C:\ProgramFiles\SET Video Review”)
- and the second one for the recordings, exports and archives to be stored. (usually: “C:\ProgramData\SET Video Review”)
It is not recommended to store the recordings in the ProgramFiles Directory – so please use the preselected ProgramData directory, or select something like your personal video directory for example. It is advisable to choose fast storage types like SSDs, but generally you can select any storage type you prefer (see System Requirements).
License
To activate SET Video Review you have to obtain a license via the sportdata online shop:
https://set.sportdata.org/wp/index.php/product-category/set-software/single-products/video-review/
You can choose between a 3-year, 1-year or event based license. For all license types the software can be installed and used on as many computers as you want. When the license period has expired, SET Video Review will run in DEMO mode again. The DEMO mode has no functional limitations, but recordings can be no longer than 15 seconds.
You will receive a license file after purchasing one of the licenses mentioned above. This file is needed to activate SET Video Review and unlock the recording-time limitation. Therefore, open SET Video Review and start the License Manager via the top menu bar. Follow the instructions of the License Manager and select the received license file when requested. If the selected license file is valid, the License Manager confirms the successful activation and SET Video Review is ready to be used without any limitations.
Use
User Interface
Overview
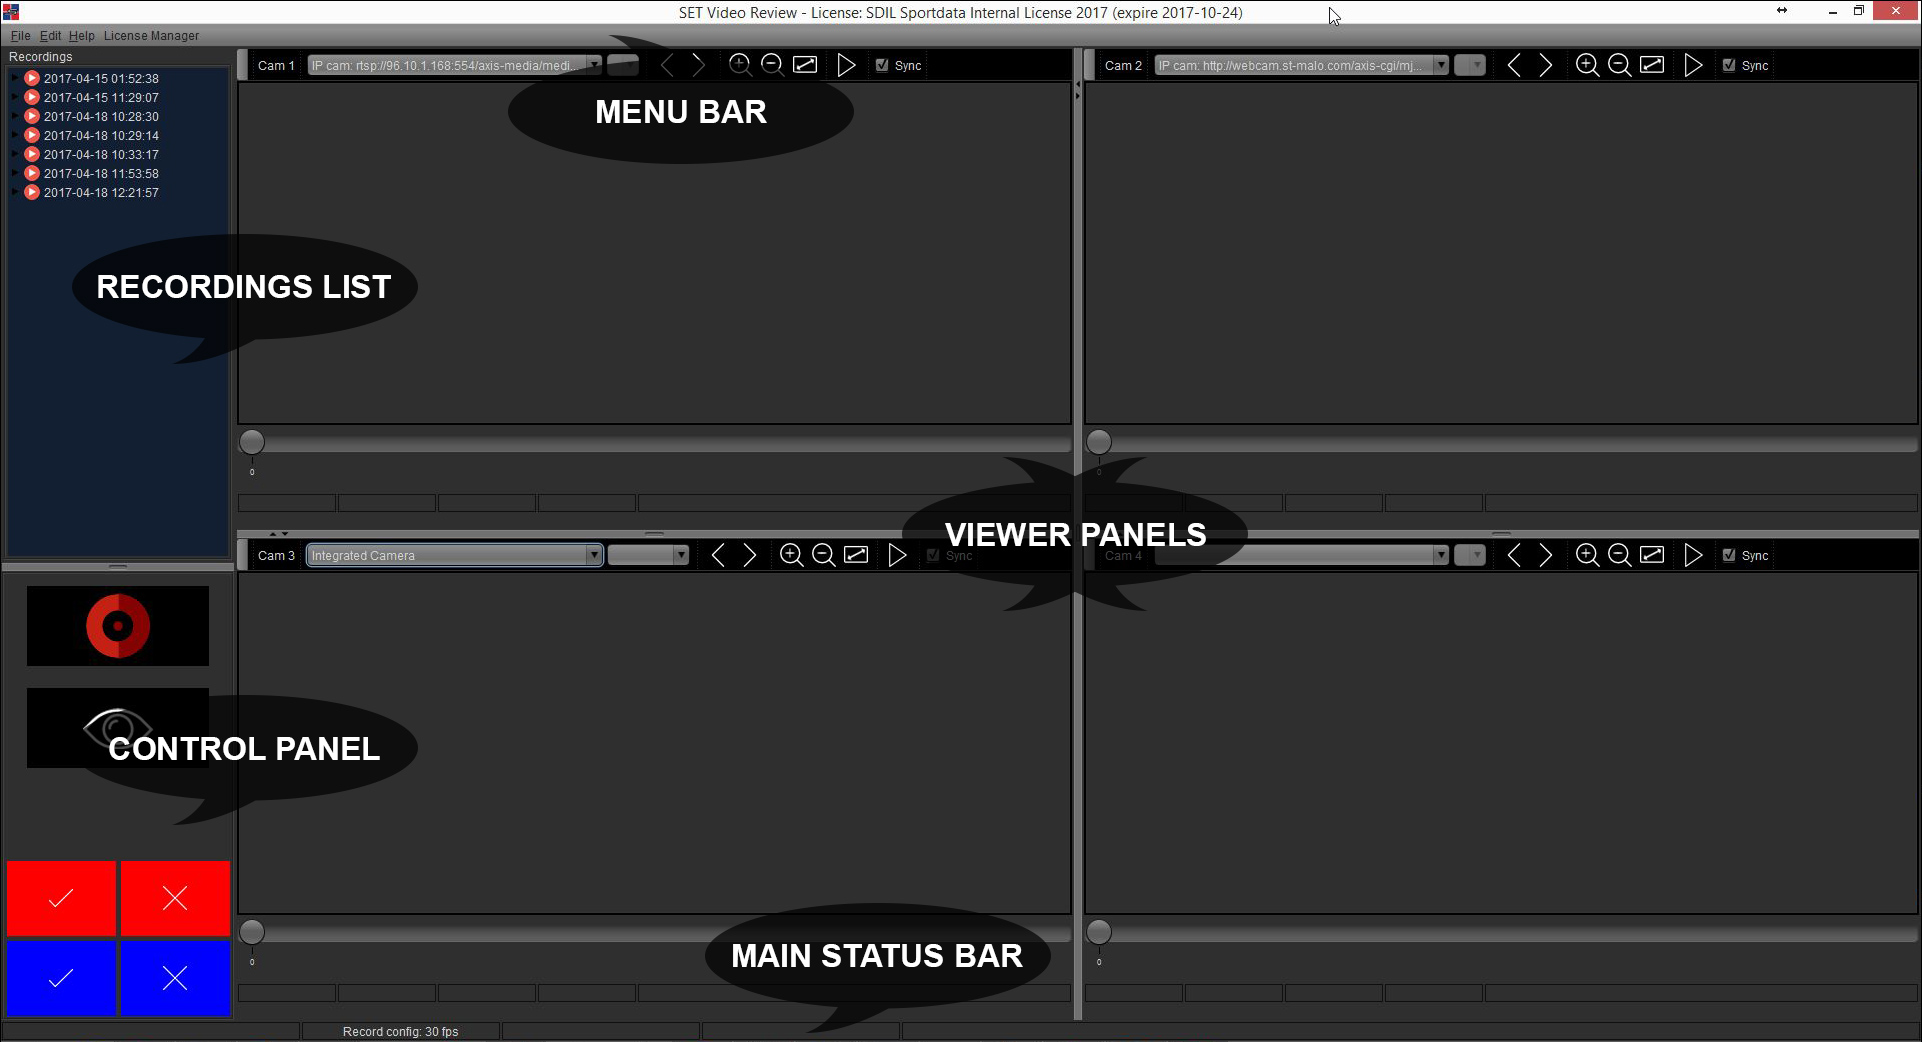
The following screenshot defines the main user interface components of SET Video Review. Each component is described more detailed in the subsequent chapters.
Menu Bar
File
 Import – Copies recordings from a different location into the current Recording Directory. Only complete recordings can be imported, not the single camera subdirectories. So always select the parent directory with a 13-digit number (which is a timestamp) as its name (For example: “1488874114825”). Multiple selections are supported too.
 Close – Prompts to shut down SET Video Review.
Edit
 Refresh – Reloads the Recordings List and the cameras.
 Preferences – Opens the Preferences window.
Help
 Content
  About – Information about SET Video Review.
License Manager
 License Manager – Starts the SET Video Review License Manager.
Viewer Panel
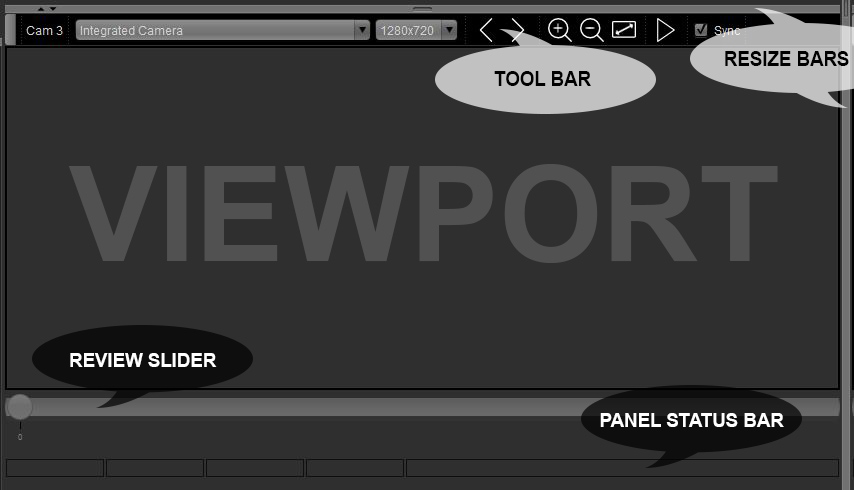
The four Viewer Panels are used for Preview, Recording and Review. The following screenshot shows one Viewer Panel and defines its components.
Tool Bar
| UI component | Description | Usage |
 |
The complete Toolbar can be undocked to enlarge the viewport | Preview, Recording, Review |
 |
Camera Picker to select the desired device | Preview, Recording |
 |
Resolution Picker to select the desired camera resolution | Preview, Recording |
 |
Backward/Forward Buttons for frame-by-frame analysis
Shortcut: Left and Right Arrow Key |
Review |
 |
Zoom Buttons to zoom-in, zoom-out and fit to the viewport size
Shortcut: Zoom in +, Zoom out – |
Review |
 |
Play/Pause Button for controlling video playback
Shortcut: P for Play and Stop |
Review |
 |
Sync Checkbox en-/disables the Review synchronization between Camera Panels | Review |
Resize Bar
The Resize Bars can be used to resize the four Viewer Panels or to selectively hide them. For resizing just put the mouse cursor over the desired Resize Bar and drag it into the preferred direction. Obviously, the horizontal Resize Bar is for adjusting the Viewer Panel’s height and the vertical Resize Bar for adjusting the Viewer Panel’s width. Hiding can be done/undone by clicking on the small arrows ![]() inside the Resize Bars.
inside the Resize Bars.
Review Slider
The Review Slider is controlling images shown in the viewport of the corresponding Viewer Panel. It represents the position in the recorded video and enables Reviews in slow- or fast-motion by dragging it back and forth. The labels under the Review Slider show the incremental numbers of the recorded images.
Panel Status Bar
Useful information concerning a current task are displayed in the Panel Status Bar of each active Viewer Panel. For more details see the Preview, Recording and Review sections.
Viewer Window
The Viewer Window basically has the same controls than the Viewer Panels, except the two pickers and the Sync Checkbox. The Viewer Window appears when double-clicking into the viewport of a Viewer Panel and is usually used in (borderless) fullscreen mode.
Recordings List
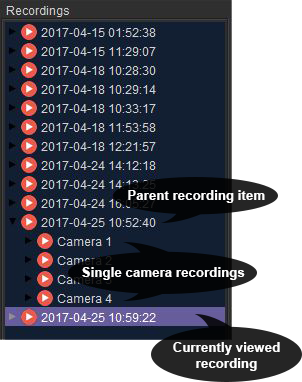
All recordings stored in the configured Recording Directory are listed in the Recordings List on the left. As recognizable in the picture below, every parent item consists of up to four camera recordings, which are made visible by expanding the parent item. The parent item is named with the date and time of the recording being started.
A right-click on a parent recording item (or multiple selected items) shows a popup menu with the following entries:
 Delete (DEL key) – Deletes the complete recording(s) (all containing camera recordings).
 Archive – Moves the complete recording(s) (all containing camera recordings) to a desired location. Later importing via File – Import is possible.
A right-click on a single camera recording shows a popup menu with the following entries:
- Delete (DEL key) – Deletes a single (or multiple) camera recording(s).
 Export – Generates an MP4 file of the selected camera recording, stored to the desired location. Multi-selection is not supported yet.
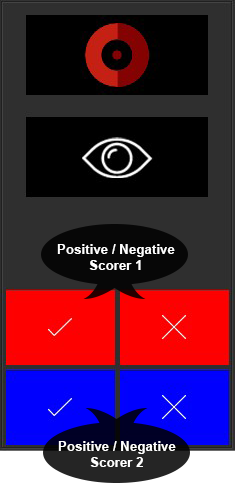
Control Panel
The Control Panel consists of the start/stop Recording Button ![]()
![]() and Preview Button
and Preview Button ![]()
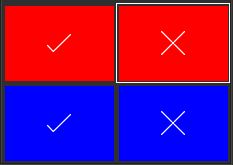
![]() , as well as the four SET Result Tracker buttons to submit review decisions. See more detailed instructions on how to use them in the Use sections.
, as well as the four SET Result Tracker buttons to submit review decisions. See more detailed instructions on how to use them in the Use sections.
Main Status Bar
The Main Status Bar shows global information like the current usage mode (Review, Recording, etc.), configured FPS, exporting status, etc.

Preview
The first step before getting productive should be ensuring that everything is set up correctly. Therefore, SET Video Review provides the Preview mode. It connects to the selected camera and shows the live video stream without recording it to your storage device. So, if the Preview works without any problems, most likely the Recording also will succeed. But please note, that the Preview mode is not supposed to estimate the system performance (due to not reading/writing any data to storage).
Step by step
- Select the desired device from the Camera Picker
- Select the desired resolution from the Resolution Picker (except for IP cams)
- Click the Preview button
 in the Control Panel to start the Preview
 - If the connection succeeds the Viewer Panel becomes green bordered and you should see the live video.
- To stop the Preview, click the same button again.

If problems occur, see the Troubleshooting.
Viewer Status Bar

Record
If the Preview works, SET Video Review is basically ready to start recording – providing that the Recording directory is set correctly, of course.
Step by step
- Perform the Preview step, if not already done.
- Click the Record Button
 (or SPACE key) to start recording.
 - Click the same button again
 (or SPACE key) to stop recording.
Viewer Status Bar

Attention: A high number of dropped frames per second indicate an overloaded system. See Troubleshooting.
Review
After the Recording process, SET Video Review immediately starts the Review mode. The Viewer Panel(s) automatically show(s) the current recording and sets the Review Slider position to:
NumberOfImages – configuredFPS * 7
So now the Review process can be started by the user. Basically, three different workflows are common to be used – exclusively or in combination:
Working with the fullscreen Viewer Window
One method of operating is by using the fullscreen Viewer Window. It can be configured via the Preferences to be viewed completely borderless and/or automatically resizing the current recording to fit into the Viewer Window’s viewport.
Usually (e.g. when doing (time) critical video reviews on sport events) the responsible reviewer decides upon the best view, which then is made fullscreen by double-clicking into the viewport of the chosen Viewer Panel. After a decision is made (or whatever is required), the Recording can be started directly via the SPACE key. Alternatively, the Viewer Window can be closed by doubleclicking into the viewport or pressing the ESC key – followed by clicking the Record Button ![]() to start Recording.
to start Recording.
Working on the single Viewer Panels
Directly using the single Viewer Panels enables multi-angle reviews or analyzations. The Sync Checkbox ![]() additionally allows to synchronize the Viewer Panels. So for example altering the Review Slider position, viewing important moments frame-by-frame or starting a playback – everything (except zooming) will be applied to all synced Viewer Panels simultaneously.
additionally allows to synchronize the Viewer Panels. So for example altering the Review Slider position, viewing important moments frame-by-frame or starting a playback – everything (except zooming) will be applied to all synced Viewer Panels simultaneously.
Working with four-in-one video material
If specific hardware setups deliver four-in-one video material, the appropriate Preferences option “Quarter view in fullscreen mode” should be selected. With this option enabled, opening the fullscreen Viewer Window automatically zooms to the quarter where the corresponding double-click occurred.
SET
SET Video Review is fully integrated into the SET Software Framework. Thus, if you’re using it for instant replay, it is possible to directly track results via a connected SET Point Panel. The Point Panel then can use its built-in visualization to view the result on any kind and number of display units, while besides storing all the information in the central SET database automatically.
Requirements: “Show SET result tracker” checkbox is selected and a valid “SET Client VR Result URL” is set in the Preferences
Step by step
- Ensure correct SET Preferences and a working network connection.
- After a decision has been made, click the appropriate Result Tracker Button in the Control Panel.
- Watch the Main Status Bar for relevant information
SET Point Panel integration
This section shows how the result tracking feature of SET Video Review is integrated in SET Point Panel. So, the following screenshots come from SET Point Panel – not from SET Video Review itself!
Moreover, the SET main software supports electronic Video Review Requests by Coaches via the SET Scoring App (Android Application)
Exemplary sport: WKF Karate
Point Panel VR-Status Icon
The VR icon in SET Point Panel shows if the red/blue coach is allowed to do a protest. (If enabled in SET: Settings->PointPanel)
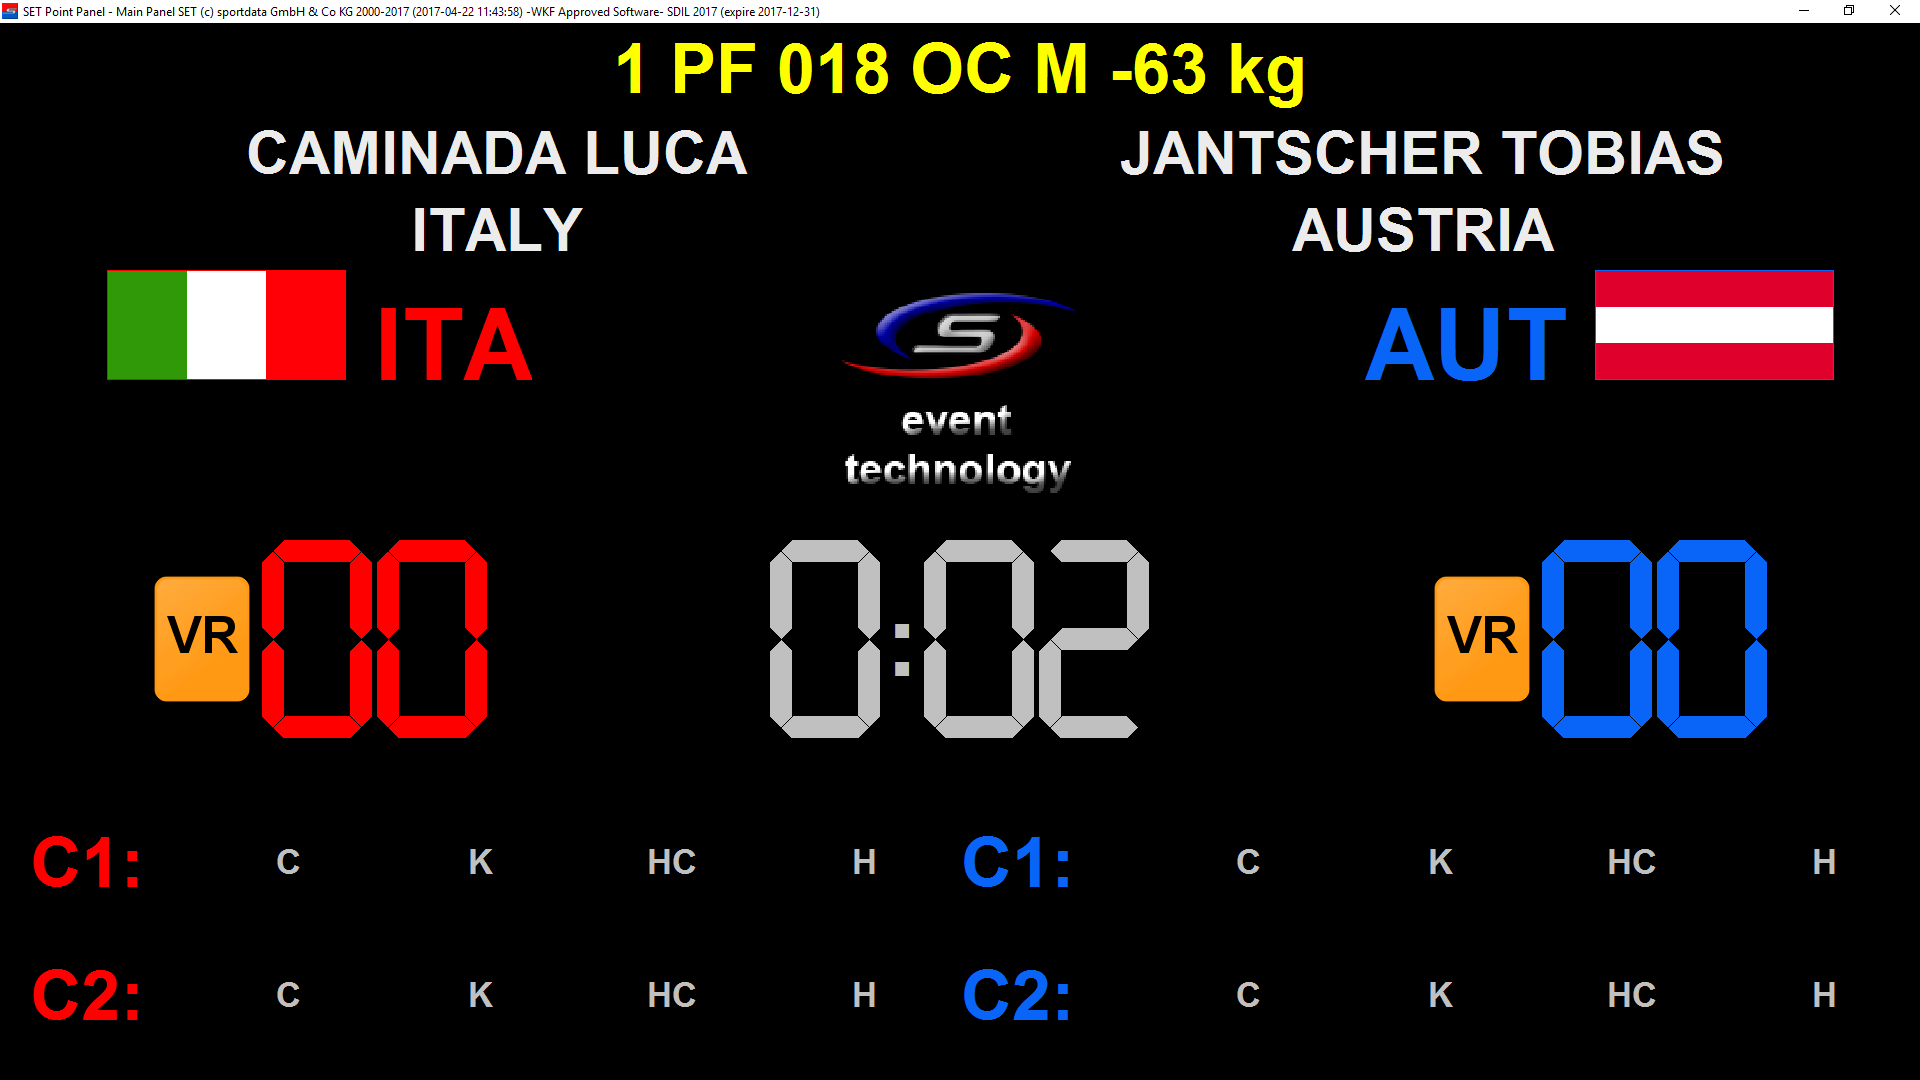
Point Panel VR Action View
If a video review is requested, the screens show the VR View, including the kind of score requested – as well as the result (Accepted/Denied) submitted by SET Video Review.


Troubleshooting
Preview
Preferred camera resolution is not listed in the Resolution Picker
- → The selected device does not support the resolution, so a different one must be chosen.
Connection failed
- The Viewer Panel becomes red bordered and will probably show an error message in the Viewer Status Bar. Common reasons and possible solutions are:
- Device(s) powered off → Check power status and switch off/on if necessary.
- Cable/Wireless connection problem → Unplug/plug cables or switch WLAN off/on if necessary.
- Wrong FPS configuration → Check the camera’s FPS support and change the Preferences.
- Device is currently used in another application (e.g. Skype) → Close all not needed applications.
Viewer Panel shows black image instead of live video
- Capture devices sometimes send black still images when not receiving any input signal → Check the HDMI/SDI/.. cables delivering the source video signal.
Record
Recording performance is low (e.g. indicated by high number of dropped or duplicated frames)
- System performance too low → Check the System Requirements. Choose lower resolution and/or lower FPS and/or decrease number of cameras.
- Another task slows down your computer in the background → Close all not needed applications and watch out for CPU intensive tasks e.g. with the help of the Windows Task Manager.
- If tasks named ‘ffmpeg.exe’ are running while SET Video Review is NOT RECORDING and NO EXPORT was made, please 1) close SET Video Review and 2) close the ffmpeg.exe task(s).
- Recording performance is low although Preview is working well → This can happen because the Preview is NOT an indicator for a sufficient system performance! (due to not reading/writing any data from/to the storage device)
Connection failed
- … see ‘Connection failed’ in the Preview Troubleshooting above.
Viewer Panel shows black image instead of live video
- Capture devices sometimes send black still images when not receiving any input signal → Check the HDMI/SDI/.. cables delivering the source video signal.
Preferences
General
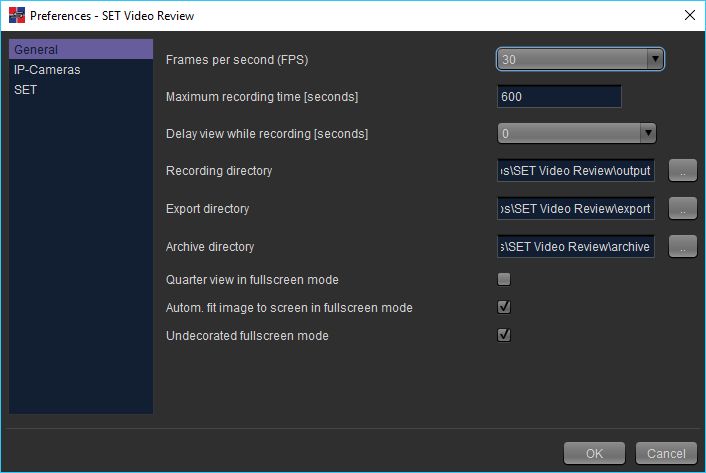
Frames per second (FPS)
Determines the preferred number of recorded images per second for all video sources.
Please note that a camera might not support your configured FPS. In this case, the recording will not succeed – indicated by a red bordered recording panel and an error message at the panel’s bottom.
Maximum recording time [seconds]
After the maximum recording time, SET Video Review stops the recording to avoid wasting disk space.
Delay view while recording [seconds] (new in v 1.1.)
Set the number of seconds of view delay while recording. This allows you to review actions quickly without stopping the recording.
Recording directory
Path to the directory storing the recordings as JPEG files in an accurately defined folder structure.
Export directory
Path to the directory storing MP4 exports. You will be prompted before each export though, using the configured export directory as a starting point.
Archive directory
Path to the directory storing recording archives. You will be prompted before each archiving process though, using the configured archive directory as a starting point.
Quarter view in fullscreen mode
This option is useful for hardware setups merging four video sources to one single input signal: Opening the fullscreen mode while reviewing automatically zooms to the quarter where the corresponding double-click occurred.
Autom. fit image to screen in fullscreen mode
When opening the fullscreen mode while reviewing, the zoom factor is automatically adjusted to maximize the image size of the recording without cropping it.
Undecorated fullscreen mode
Hides the window borders to maximize the available viewport of the review fullscreen mode.
IP Cameras
SET Video Review supports wired (LAN) or wireless (WLAN) IP cameras using various protocol types and codecs. IP cams must be added manually via Edit – Preferences by providing the camera URLs in the IP-Camera section.
Adding new cams is done by entering a URL in the URL text field at the bottom and clicking the Add button. If the URL is valid, it is listed in the area above. After closing the Preferences window, the newly configured IP cams will be added to the Cam dropdown lists.
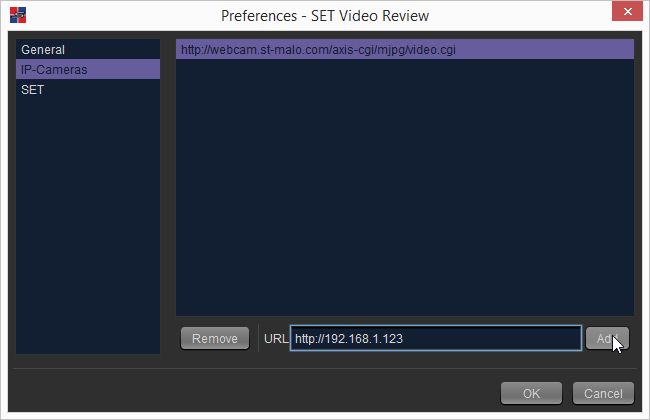
To remove a cam, select the appropriate cam in the list and click Remove.
Parameterization
Configuring IP cams by using parameters is possible by adding so called GET parameters directly to the URL.
The support and correct use of those parameters depends on the camera type and model. So please read the camera’s manual or ask the manufacturer how to configure the camera by using GET parameters.
Examples (unspecific):
Configured resolution: http://my.webcam.com/mjpg/video.mjpg?resolution=1280×720
With credentials: https://admin:password@192.168.1.123/cgi-bin/video.cgi
Examples (specific):
RTSP, public AXIS webcam: rtsp://96.10.1.168:554/axis-media/media.amp?videocodec=h264
HTTP, public AXIS webcam: http://96.10.1.168/mjpg/video.mjpg
Supported protocols & codecs
SET Video Review makes use of the powerful FFmpeg project, and thus profits from its numerous supported protocols and codecs.
To mention only a few important ones:
Protocols: HTTP, RTSP, …
Codecs: MJPEG, H.264, …
For more information see:
https://www.ffmpeg.org/ffmpeg-protocols.html
https://www.ffmpeg.org/ffmpeg-codecs.html
SET
SET Video Review is fully integrated into the SET Software Framework. Thus, if you’re using it for instant replay, it is possible to directly track results via a connected SET Point Panel. The Point Panel then can use its built-in visualization to view the result on any kind and number of display units, while besides storing all the information in the central SET database automatically. See how the Point Panel looks like in the Use – SET section.
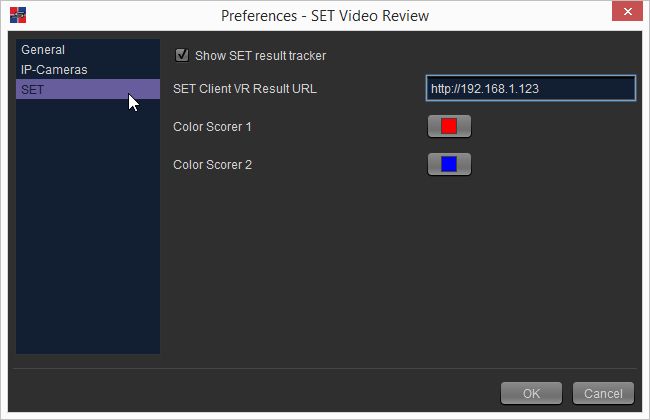
Show SET result tracker
Shows/hides the result tracker buttons in the bottom-left corner of the main window.
SET Client VR Result URL
Defines the SET client (running a Point Panel) to receive the result information sent by SET Video Review.
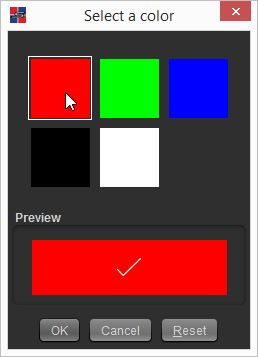
Color Scorer 1
Defines the color of the two top buttons viewed in the main window.
Use the color-chooser button of the Preferences window’s SET section to select a color and click OK.
Color Scorer 2
Defines the color of the two bottom buttons (Scorer 2).