Network setup

Interactive Demo


What is a network?

A network is a system that connects devices such as computers, smartphones, printers and other electronics allowing them to communicate to sharing information or resources such as files.


Types of network

LAN: Local Area Network

A network confined to a small geographic area, like a home, office or school. It allows devices within the area to connect and communicate with each other.

WLAN: Wireless Local Area Network

A type of LAN that uses wireless (Wi-Fi) connections instead of cables to connect devices.

WAN: Wide Area Network

A network that spans a large geographical area, such as a city, country or even globally. The internet is an example of a WAN, connecting multiple LANs together.


IP Address

An IP address (Internet Protocol Adress) is a unique identifier assigned to each device on a network, enabling it to communicate with other devices. There are two ways of obtaining IP Address:

1. Dynamic IP Address (DHCP): Assigned automatically by the router. It can change every time the device reconnects to the network.

2. Static IP Address: Device has manually assigned and does not change, making it suitable for devices that need a fixed address.

Tip: During events is highly recommendable to use static IPs for the important laptops (server, areas, info screens) so we can have full control on the network.

An IP address is made up of four “groups” (technically called octets), separated by dots. Each group is a number between 0 and 255. Generally, the first three groups represent the network address (which is the same for all devices), while the last group is unique to each device.

Example of a LAN connected to internet.


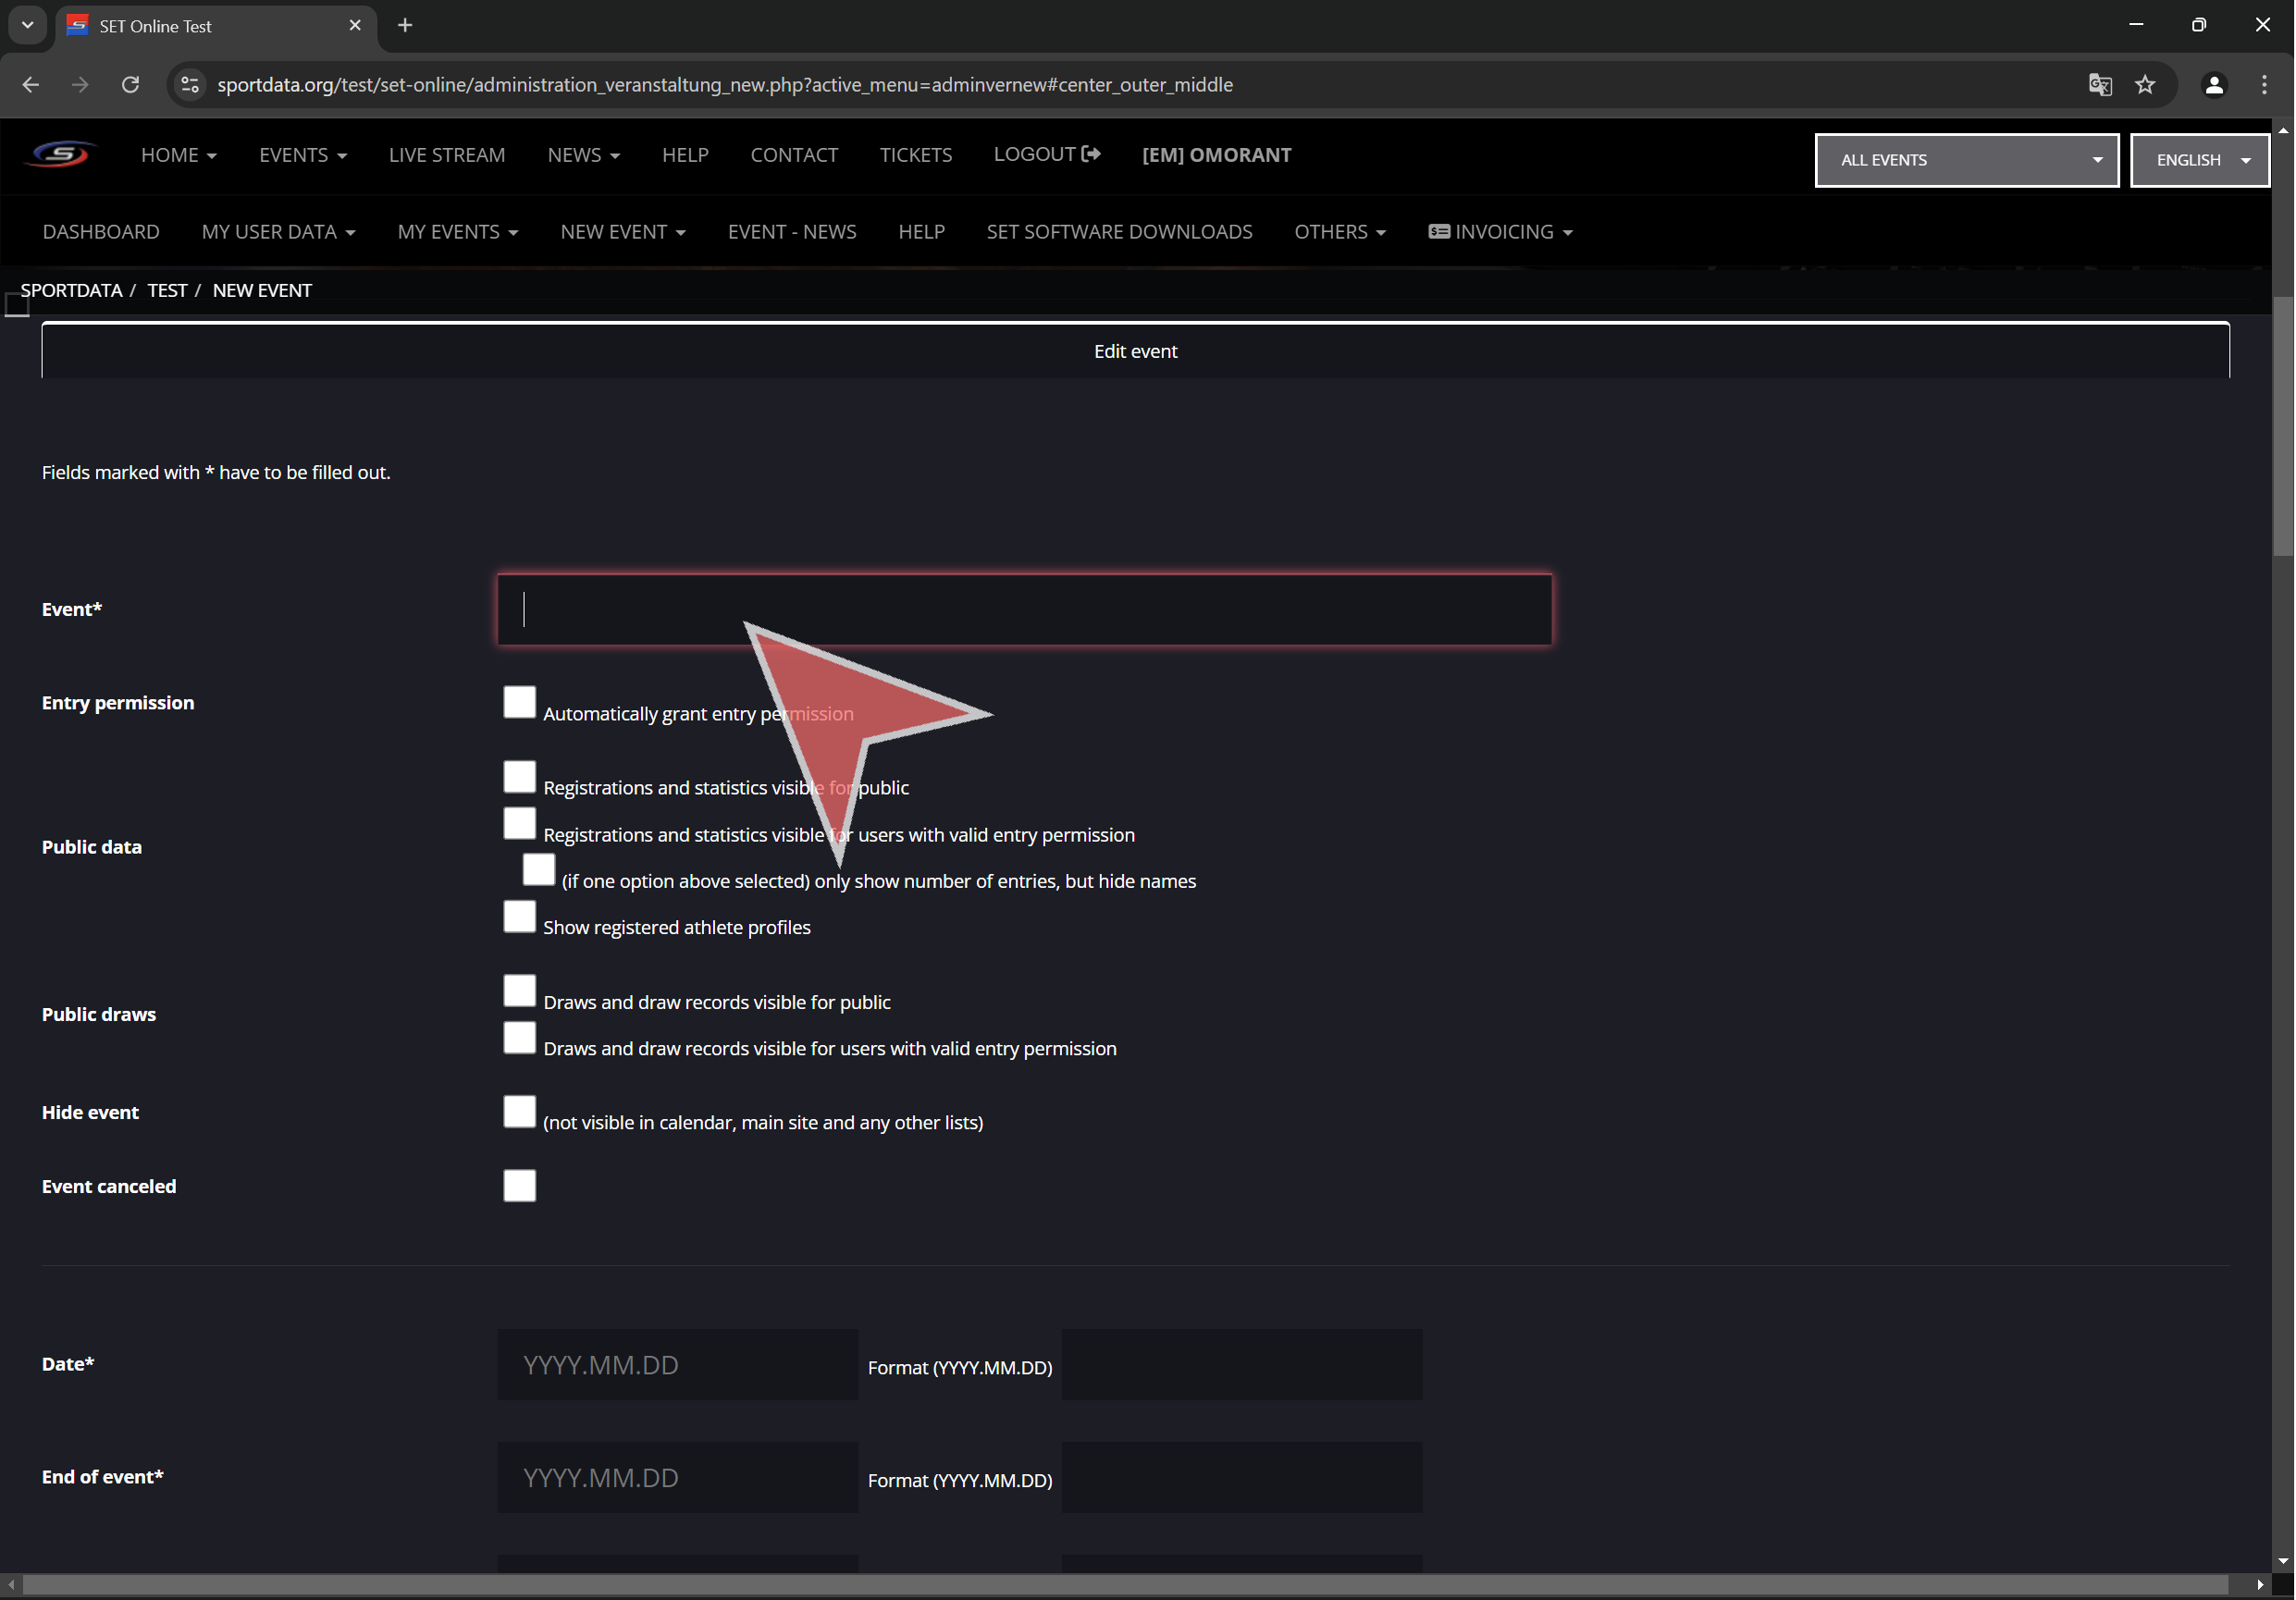
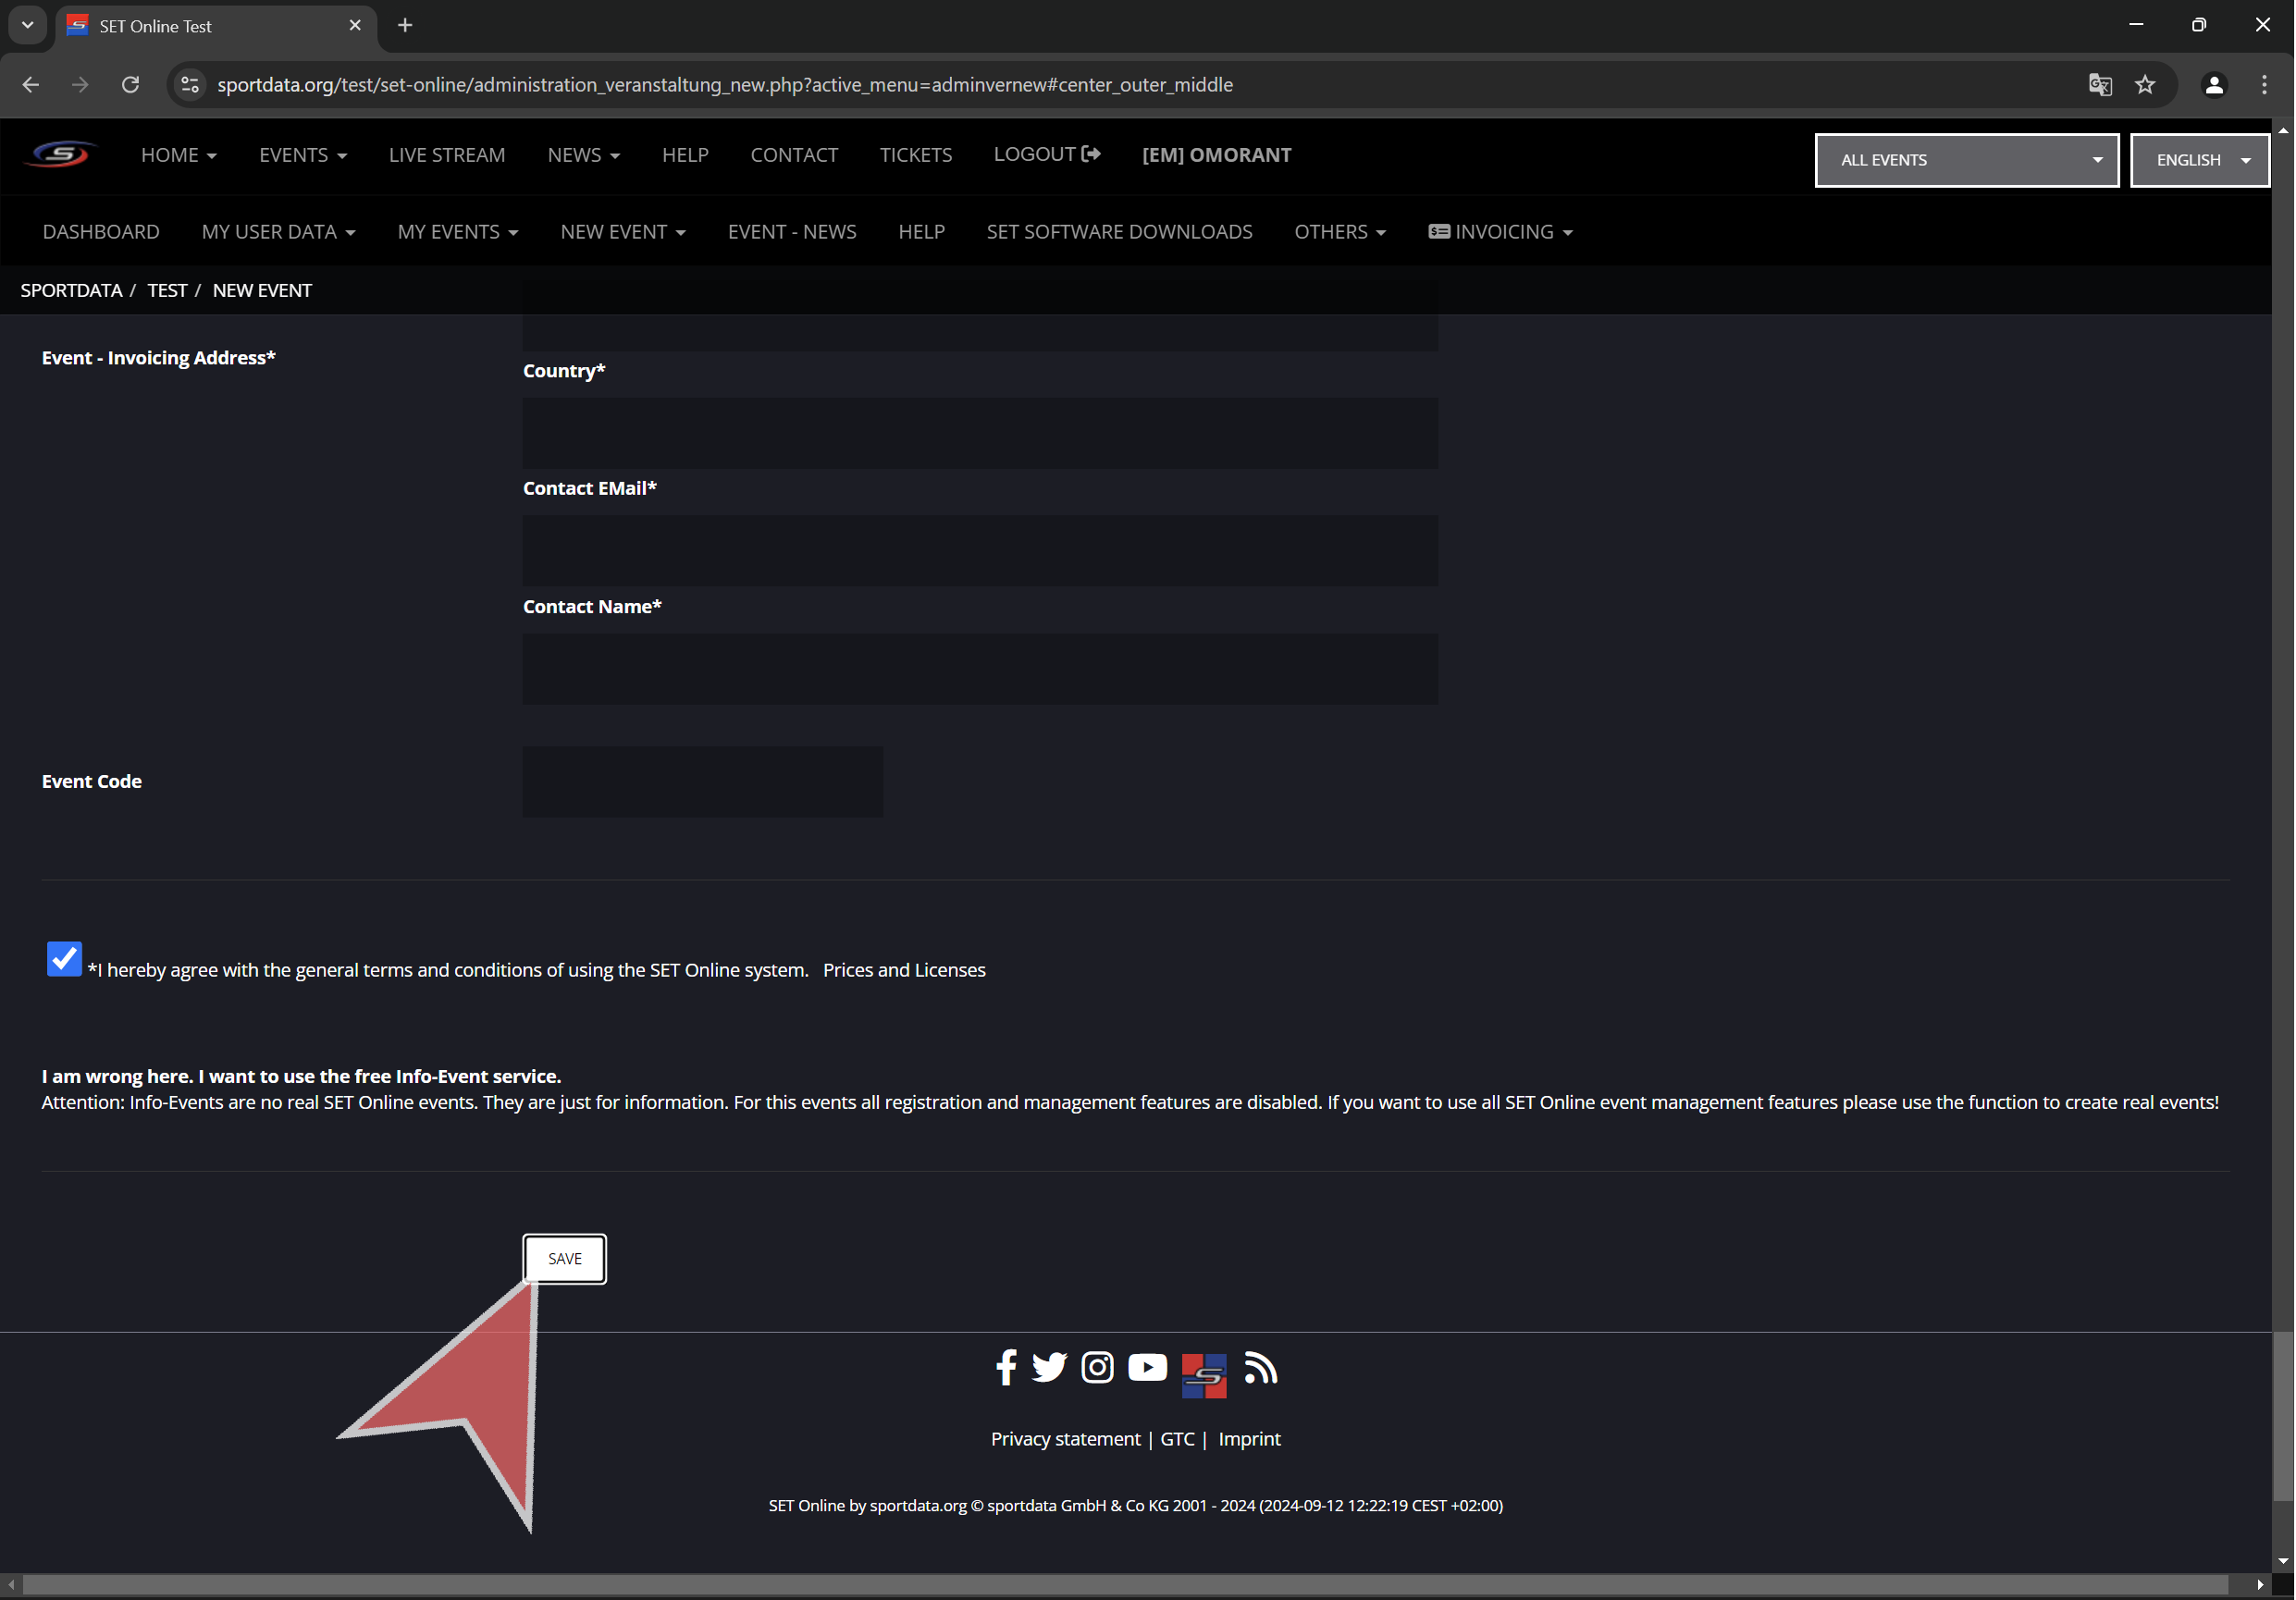
How to setup static IP Address

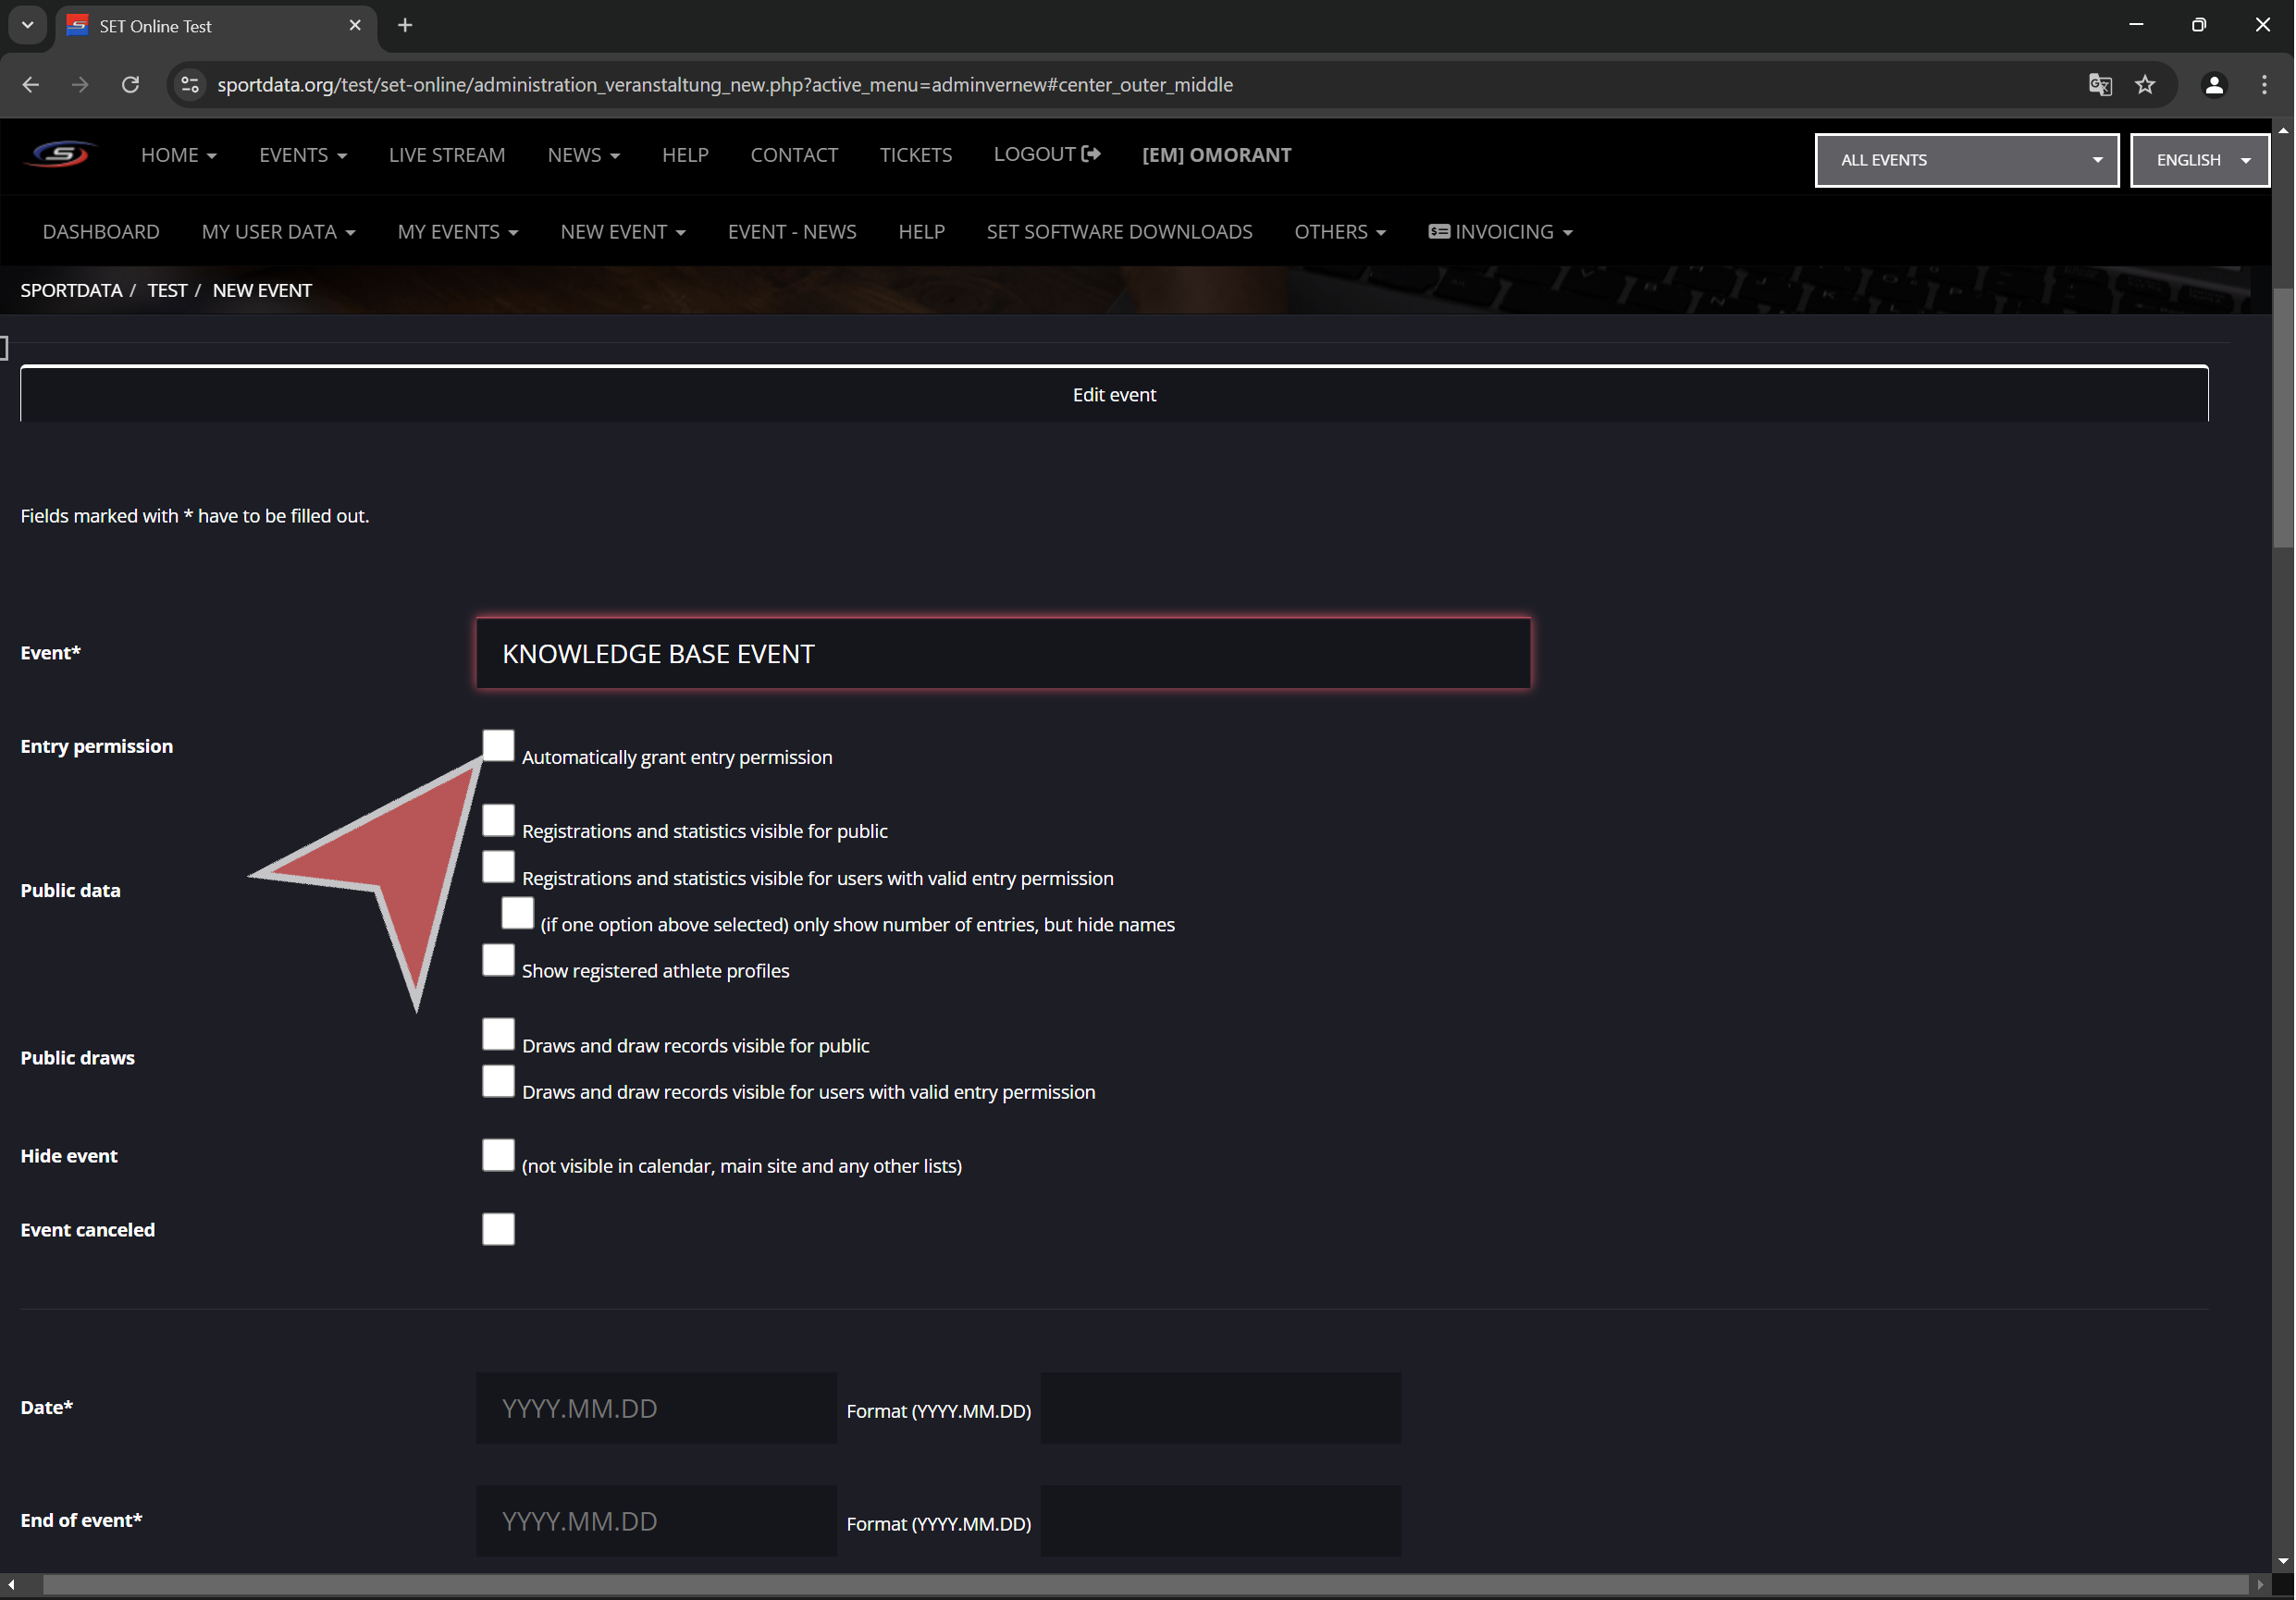
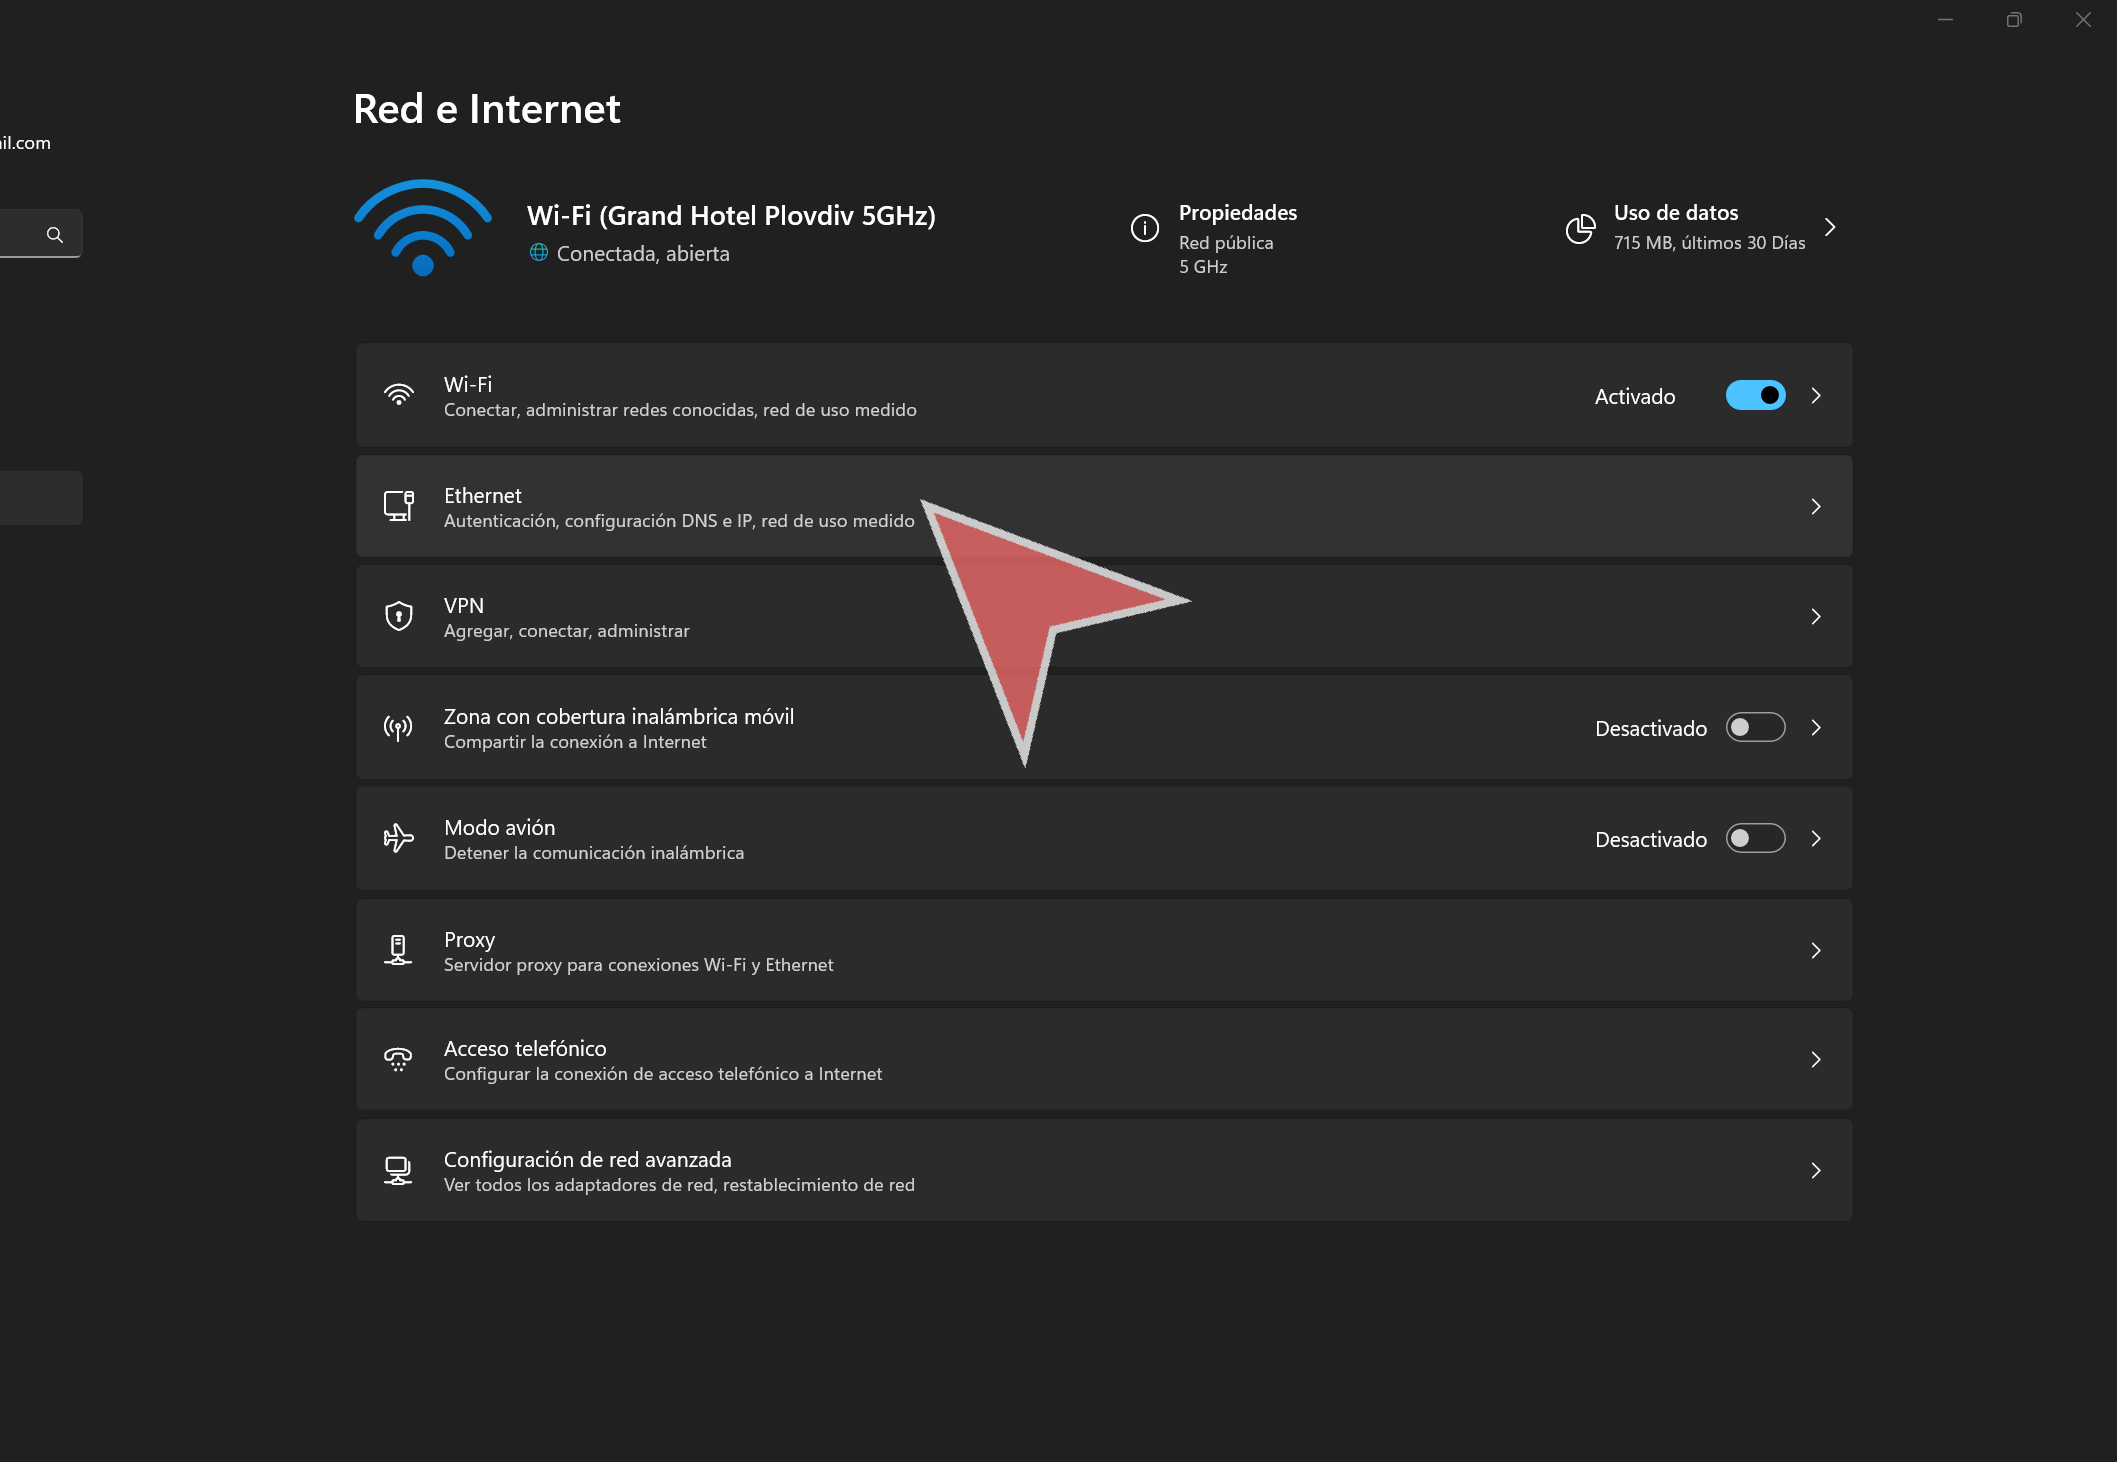
Right-click on the network icon in the system tray (bottom right of the taskbar). Select Network and internet settings.

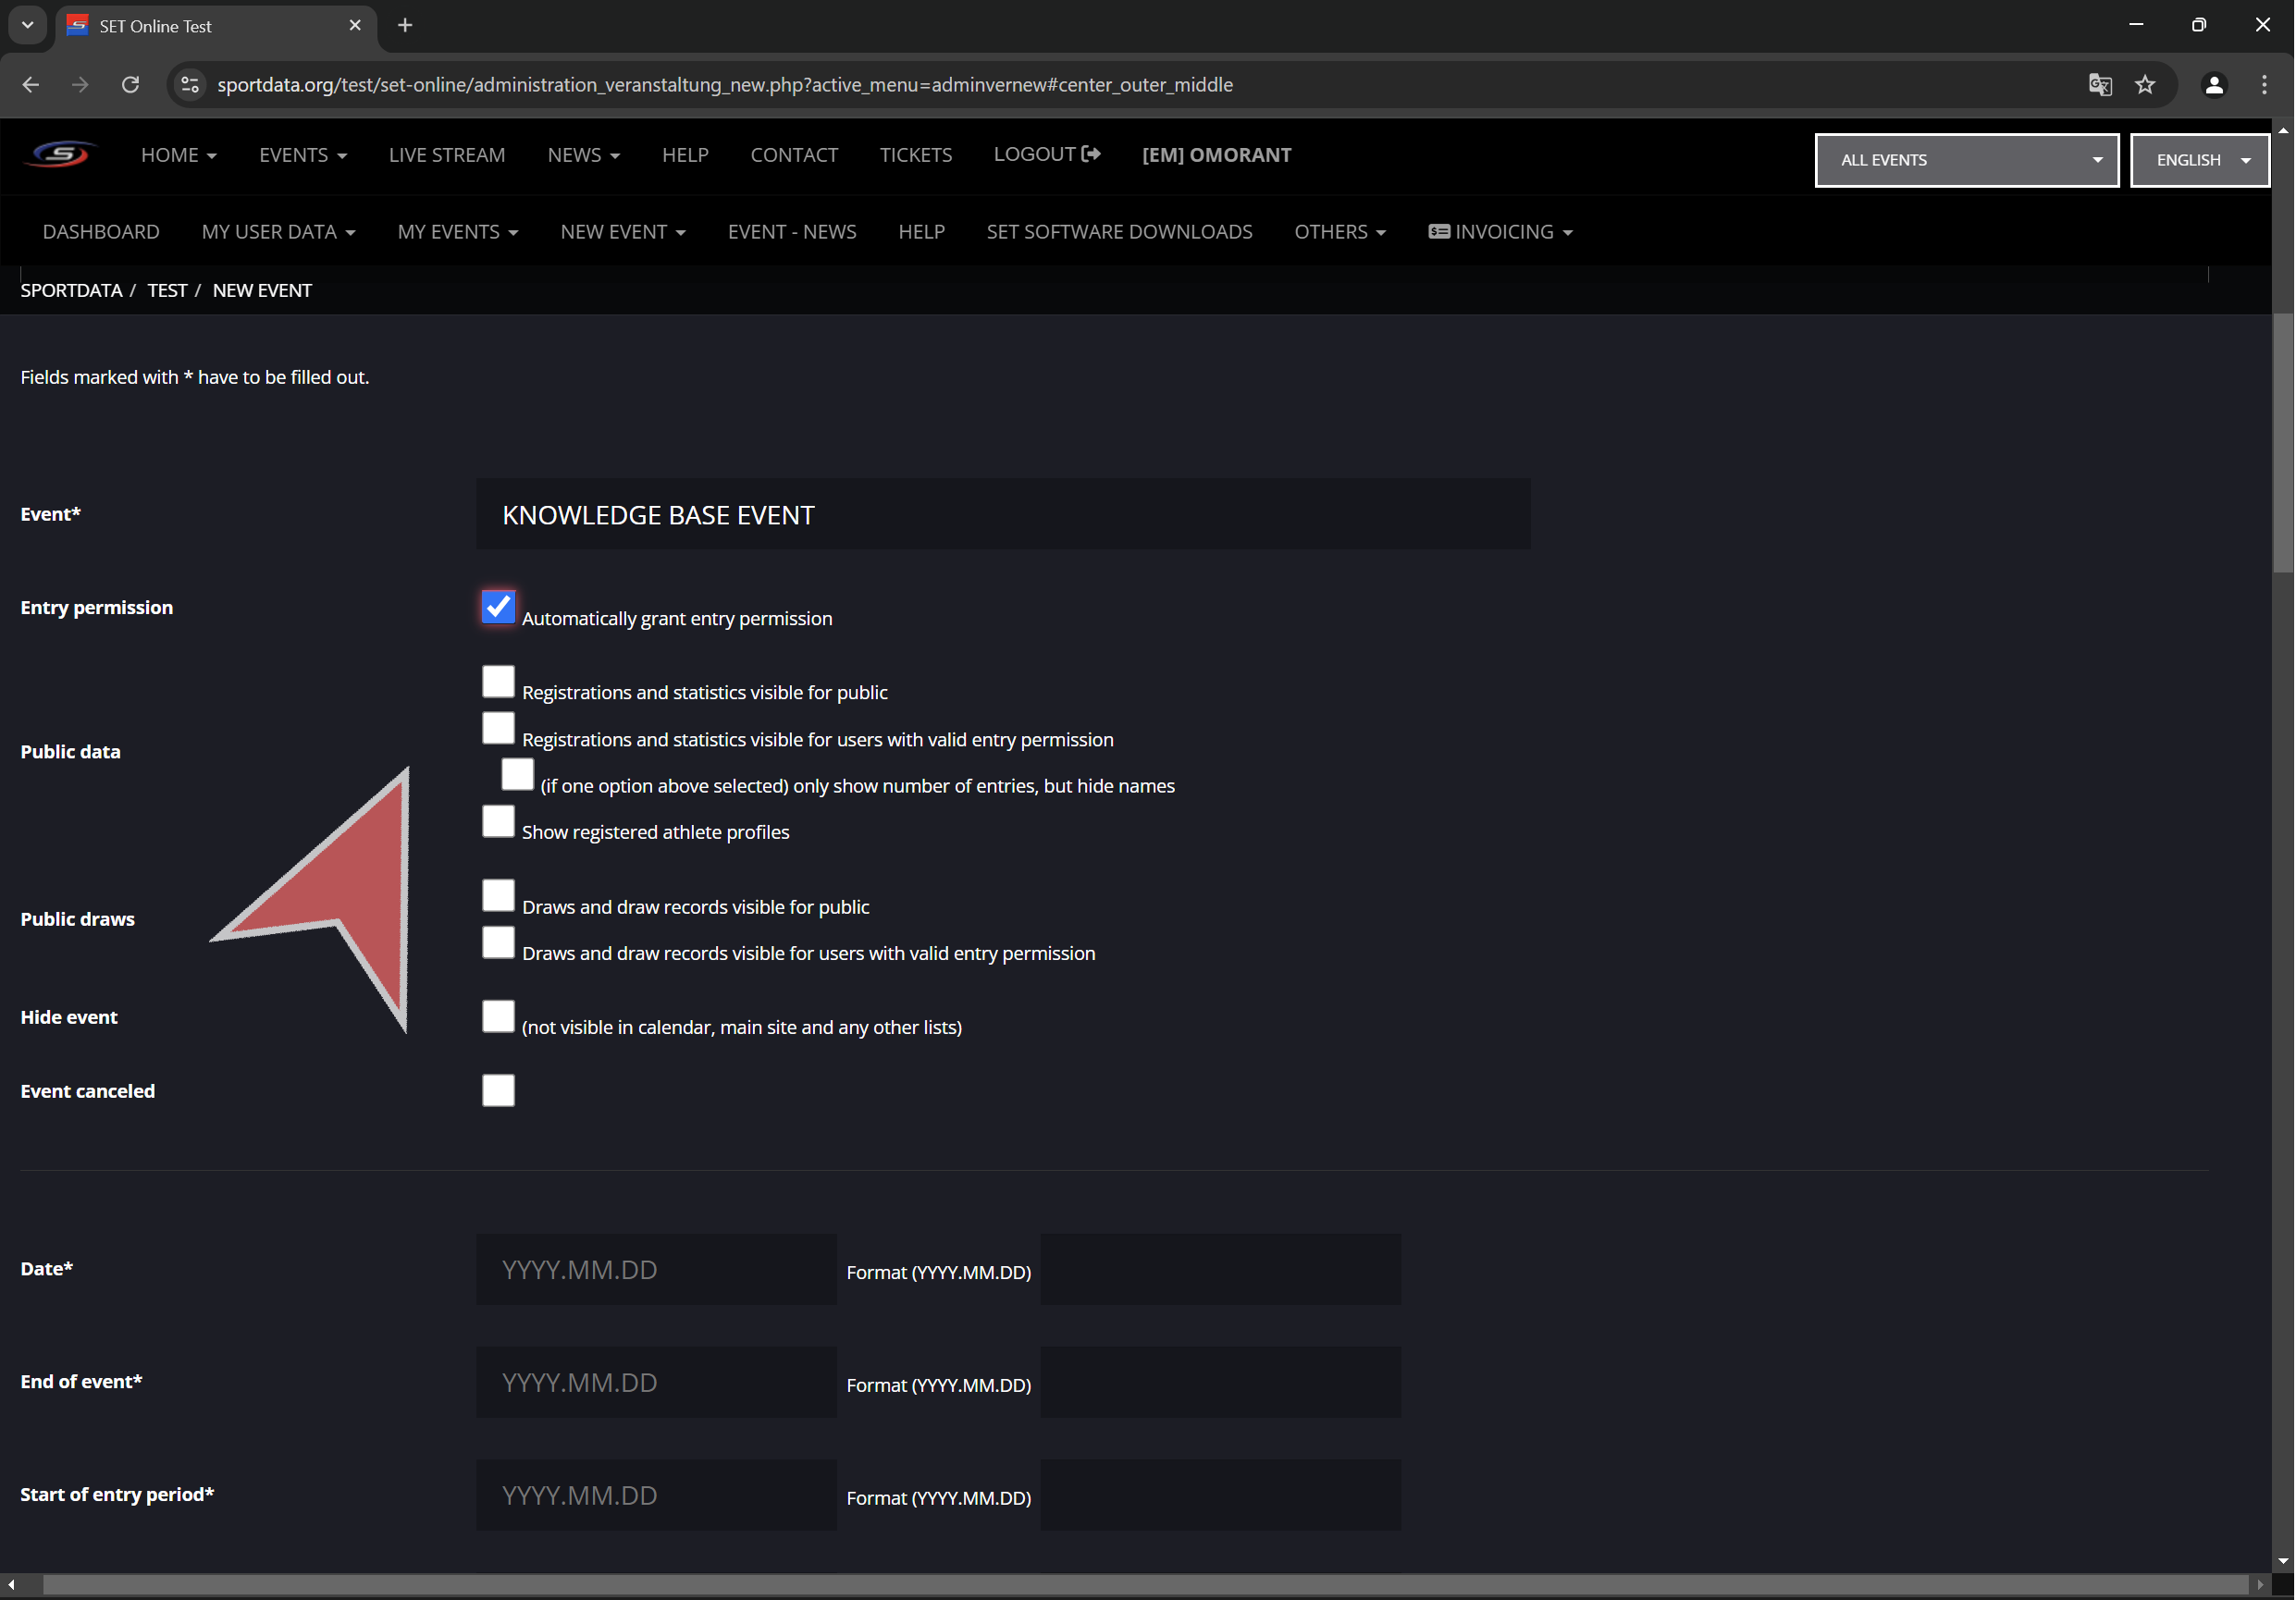
Click on the “Ethernet” section if you are connected via cable, or on “Wi-Fi” if you wish to set up a static IP for a wireless connection.

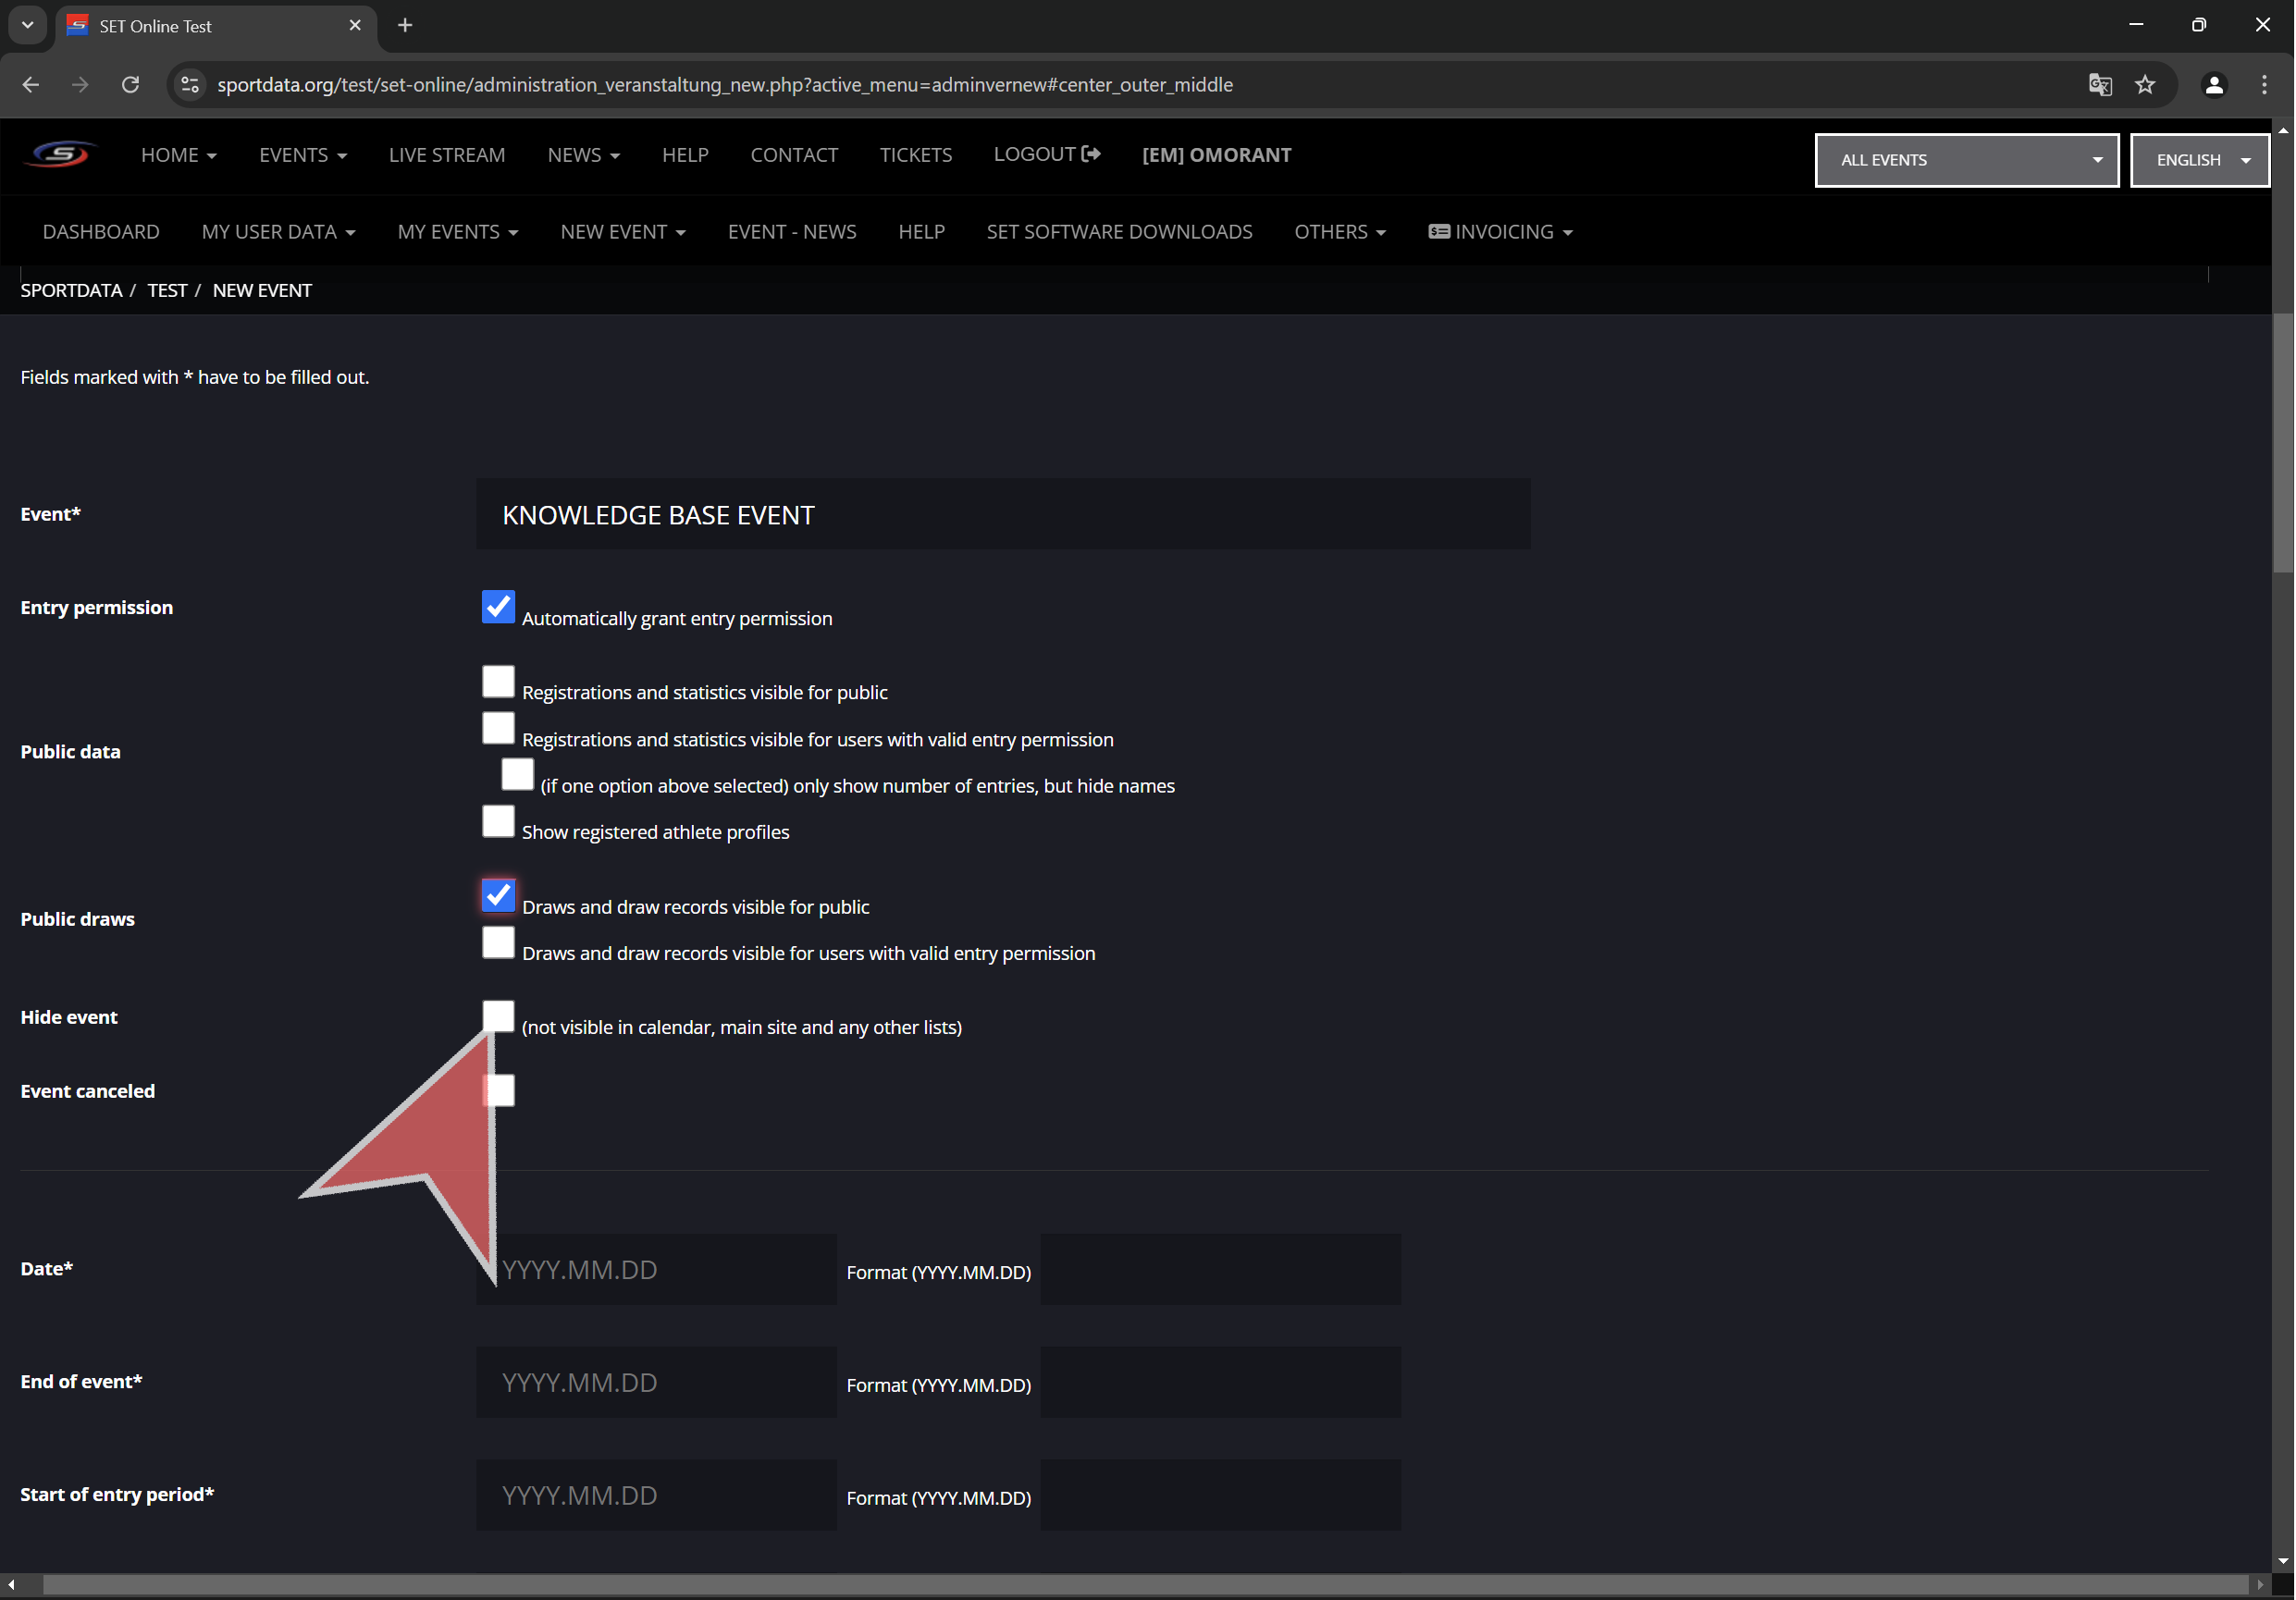
Click on “Edit” in the IP Address assignment section.

In the dropdown menu, select “Manual”.

Click on the “IPv4” button to access the IP settings.

In the “IP Address” field, type the desired IP address.

In the “Subnet Mask” field, type “255.255.255.0”.

In the “Gateway” field, type the router’s IP address.

Typically, this is the network address followed by “.1”. For example, it would be “192.168.1.1” for this network.

In the “Primary DNS” field, type “8.8.8.8”.

Click on “Save”.


Test a network – Ping command

The ping command is a network utility used to test the connection between your device and another device. It sends small “packets” of data to the target device and measures how long it takes to receive a response. This helps diagnose network issues and test network configurations.

Press the Windows key and type “cmd” to open the Windows Command Prompt.

To use it, type “ping” followed by the IP address you want to test the connection with and hit the Enter key to execute the command.

If you see “Response timeout,” “Cannot reach destination address,” or any similar error, it means your device cannot connect to the specified device. This could indicate a network issue or that the target device is offline.

At the end, you will see statistics including the number of packets sent, packets received, packets lost, and the average response time. These details help assess the quality and stability of the connection.

An example of a successful ping command would show a response and response time.

For a wired LAN, the average response time of a healthy network should be 1ms or less.

Create an event online

Interactive demo

Login

Go to sportdata.org in the desired system and click “Login”.

Click “Event Manager Login” and type in your username and password.

Click in “New event” > “New event”.

Basic settings

Type in the event name.

If the checkbox “Automatically grant entry permission” is selected, clubs can directly register entries without asking for permission to the event manager/s.

Public data visibility settings.

Draws visibility settings.

Hide event. This will hide event from all views and lists. Only event managers with access to this event can see it when logged in.

Check “event canceled” if the event got cancelled after creating it.


Date settings

“Date” is the event start date. Usually is first day of competition.

“End of event” is the last day of the event. Also the calendar picker can be used to input dates.

“Start of entry period” is the registration opening date.

Time can be selected or typed in.

“End of entry period” is the registration deadline.

Time can be selected or typed in.

Select the timezone where the event will take place.


Other settings

Input the event contact email. This mail will be shown to clubs that have any questions regarding the event.

Select event type by clicking “Type”. Select between tournament, seminar, League or other.

Select the country where the event will take place.

Select event currency.

Input the address of the event.


Registration mode

Select “Same year” or “Exact day” for the desired registration mode. This is the way that competitor ages are calculated. Exact day will check how many years old is the athlete in the first day of event.

Same year will check how many years will have the athlete at the end of the year.

Example: event date 2024-11-22, competitor birth date 2004-10-15.

If the exact day is selected then competitor will be computed as 19 year old.

If the same year is selected then competitor will be computed as 20 year old.

If exact day is selected, is possible to change cut-off date. Which means will take this date instead of the first day of event.

Select this checkbox if is desired to use 2 cut-off dates (the one set up here and the one set up in each category).


Registration limits

Select countries allowed to register to the event.

Select these options if live info will be uploaded.

Waiting list options.

Waiting list visibility.

Overall limited number of entries for athletes, coaches, referees and officials.

Limited number of entries per club for individual categories, team categories, coaches, referees and officials.

Select maximum number of starts per athlete. This is the maximum number of categories that an athlete can be registered in.

Maximum number of entries by country in individual categories.


Public information.

Click “Custom Information” to open a text editor. This text (is also possible to give format and put images) will be public in the main event page.

Click “Social Links”. Here can be set up the links of social networks such as Facebook, Youtube, Instagram, etc. Also a website can be set up. This will be public in the main event page.


Invoicing details

Input invoice details for the sportdata online fee invoice that will be sent to the event manager.

Agree the terms and conditions of SET Online systems.

Finally, click in “Save” to create the event.

How to operate SET Video Review

Interactive demo

Recording

Click the red button or press Spacebar to start recording.

While recording press “M” key to save markers.

Click the “Stop” button or press Spacebar to stop recording.


Review

Markers can be seen in the timeline.

The left tree shows all video playbacks.

Click in any to play it.

Inside video playbacks it is possible to see each camera.

Click in “Fullscreen” to see a camera in full screen.
Then doubleclick or “Escape” to close it.

Use the bottom slidebar to move frame by frame.

Click in right arrow button to go one frame forward.

Click in left arrow button to go one frame back.

Click in “+” to zoom in the video playback.

Click in “-” to zoom out the video playback.

Click “Play” button to play video playback at normal speed.

Click “Pause” button to pause the video playback.

If “Sync” checkbox is selected, the camera video playback will be synchronized with the others.

Install and setup SET Video Review

Interactive demo

Download and install SET Video Review

Next, go to set.sportdata.org and click on “Downloads” and “SET Video Review”

Click in “DOWNLOAD SET Video Review” button.

Open the downloaded file and click in “Next”.

Click in “Next”.

Click in “Install”.

Click in “Finish”


Install License

Open SET Video Review. Click in “Install” to install license.

Click in “Next”.

Click in “…” to select the license file. Once selected click in “Install certificate”.


Setup a camera

Select number of cameras to show: Click in “View > Camera Windows” and select desired number.

To setup a camera, click in the settings icon.

Select the camera.

Select the resolution


Settings overview

Click in “Edit > Preferences”.

Default directories for recording, exporting and archiving. SET Video Review will use them to store all necessary files.

Recording settings such as FPS, max. recording time, etc.

Operator view settings.

IP Cameras input.

To Setup an IP camera, put the Camera URL in the text input and click in “Add”. This url depends on the camera brand and model. Can be found in its configuration.

Interfaces with other software such as SET.

Click “OK” to save settings.

IP Cameras are added to the camera list.

Press space or the red button to start recording and you are ready to work!

Check article about how to operate SET Video Review.

How to set up SET PSS (live data)

This article explains how to set up SET PSS sender which is set up in the timing and scoring laptop. This allows, for example, to show live time and match info in SET Activity Monitor.

Interactive Demo

Set up PSS sender in area laptop

Click in “Panels” and select “Data services”.

Maximize the panel.

Expand “SET – PSS” in order to set it up.

Input the target IP (normally connected to information screen) and port “23456”.

That’s the laptop’s ip address where to send live match data.

Click “Add”. You can add as many devices as needed.

Finally, click “Start” to start sending PSS.

Open activity monitor in laptop connected to info screen

Click “Panels” and select “SET Monitor”

Click “Search” to look for all areas being used.

You can remove any of them using “Remove”.

Click “SET Activity Monitor” to open it. It will show the live time from the areas sending PSS.