
Resources
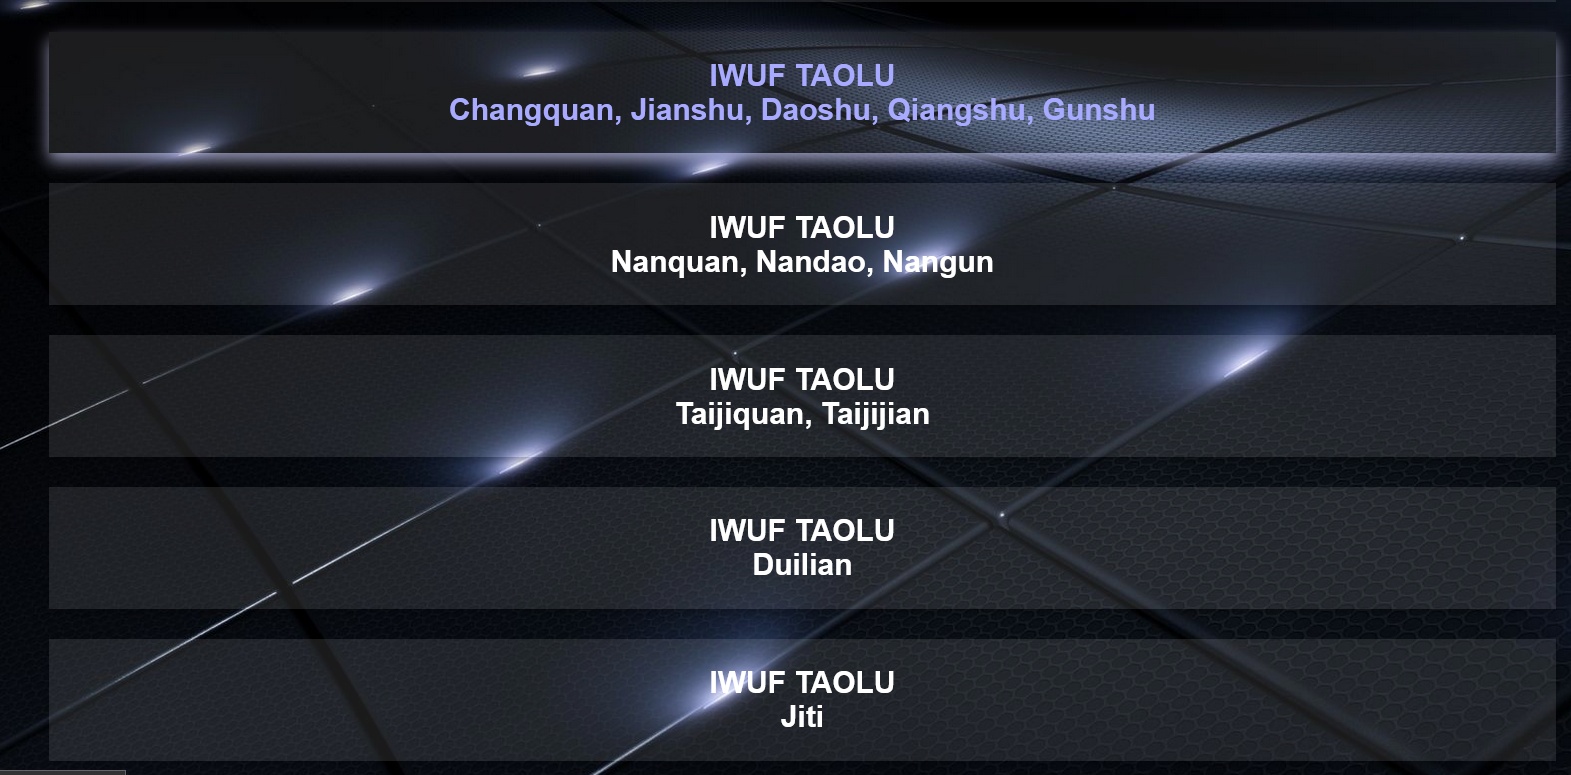
Supported Styles (with and without Difficulty)
- Changquan, Jianshu, Daoshu, Qiangshu & Gunshu
- Nanquan, Nandao & Nangun
- Taijiquan & Taijijian
- Duilian
- Jiti
SET: set Draw Mode and Draw Mode Option
Make sure the Draw Mode of the Categories are set to “Point table” and the Draw Mode Option is set to “Points->IWUF TAOLU”.

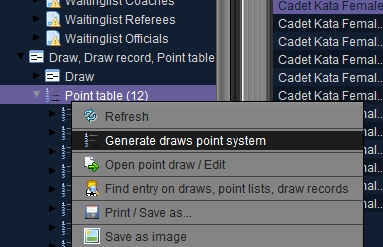
SET: Generate Draws / Start Lists
Right click on the Point table node in the Main Tree Menu and select “Generate draws point system”. Select the categories you want to generate the draws for from the list.

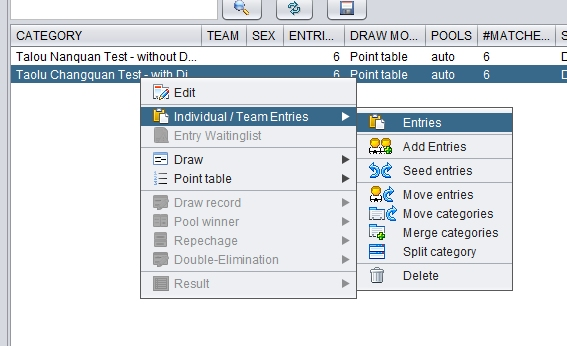
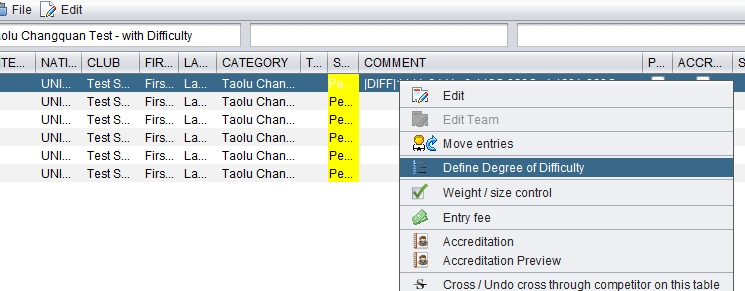
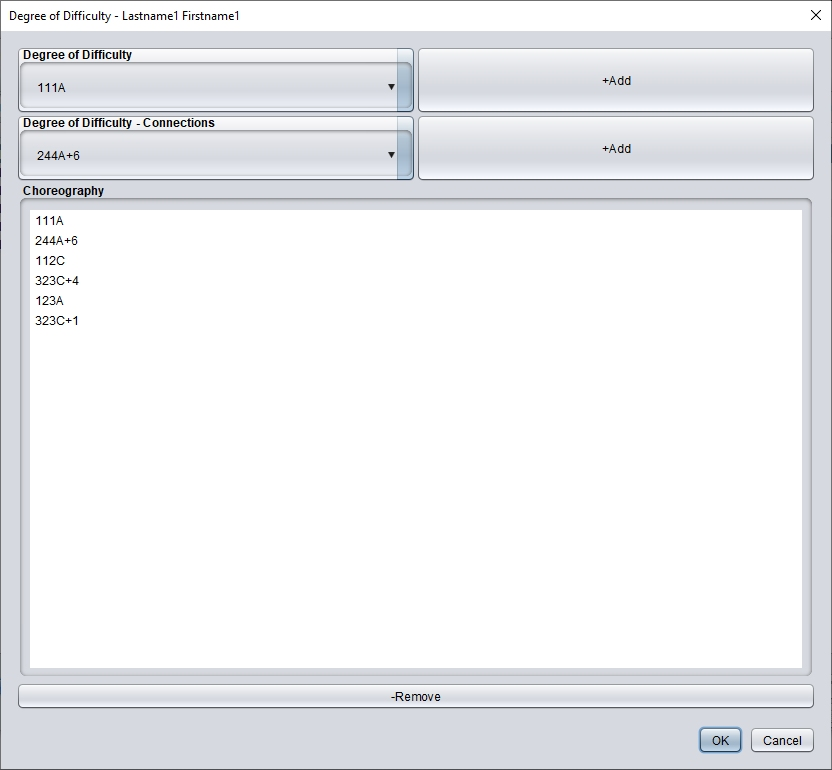
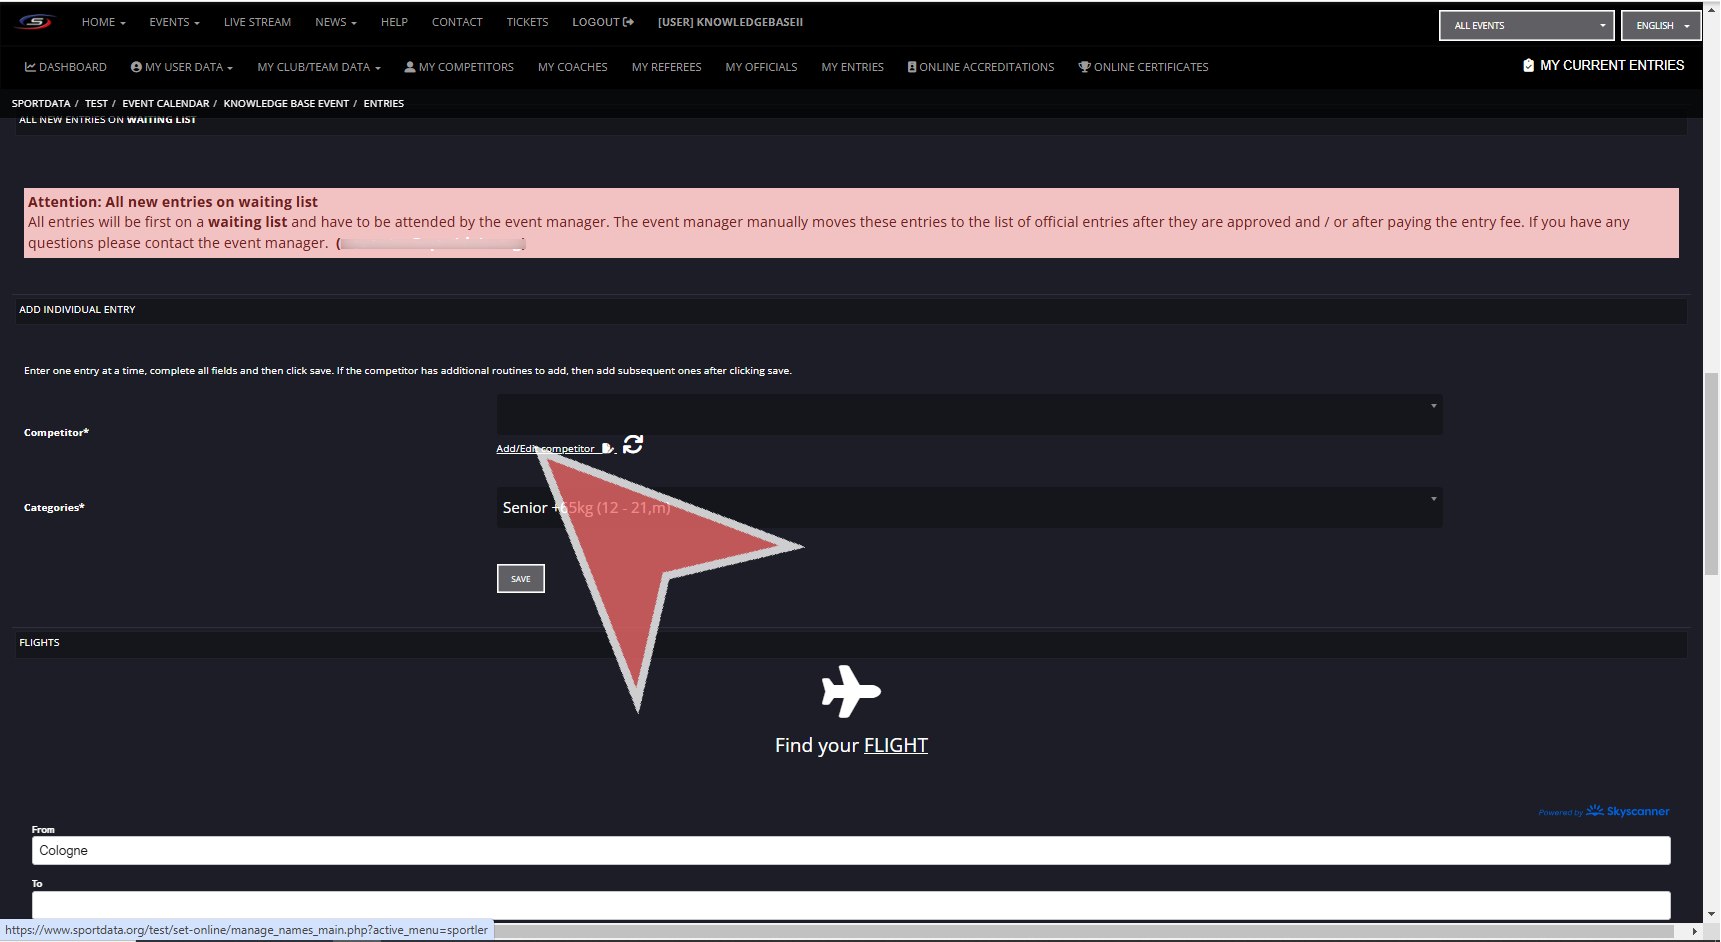
SET: set Diffuculty and Connections for registered Athletes
Open the list of Entries and right click on the Athlete you want to set the Difficulty and Connections information. Select the Diff. and Connection codes and save them.
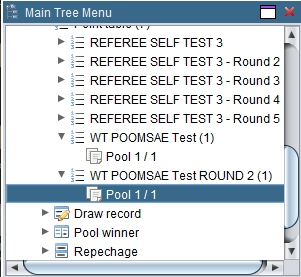
SET: TAOLU Point Draw/List
Open one generated and saved Pool/Group

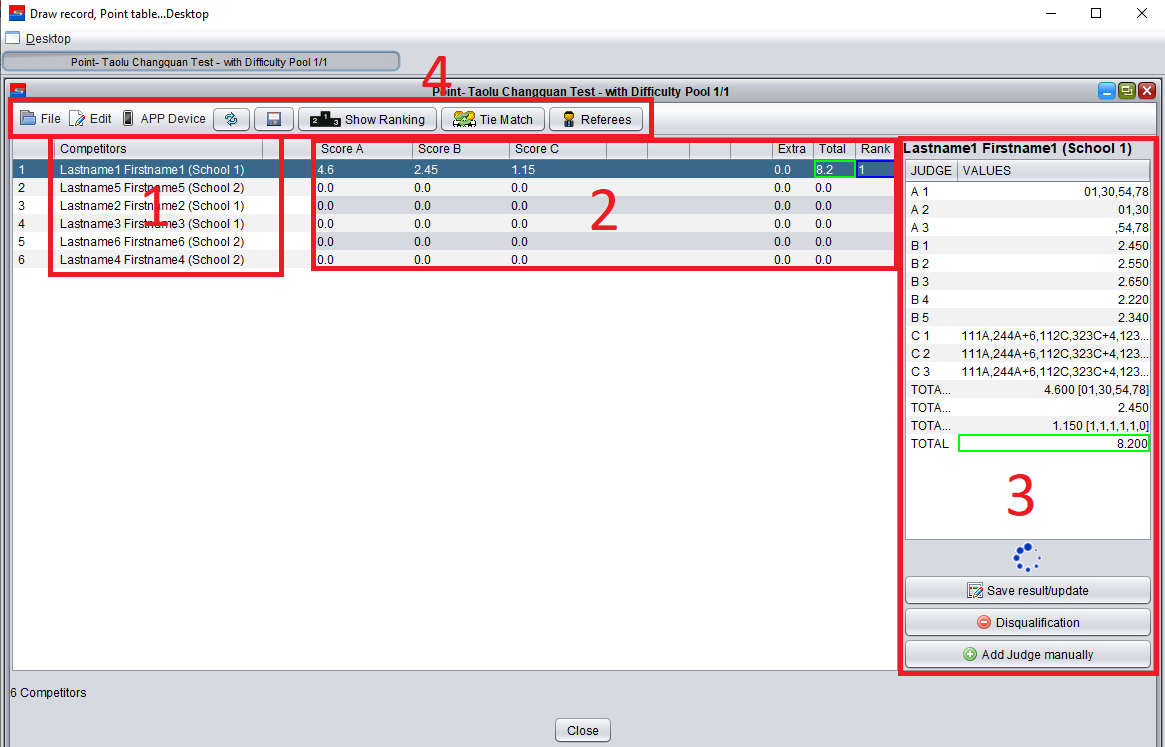
- List of entries
- Double click on one name in order to Show the Match on the screen
- Right click for the context menu which allows same actions, as well as to add and remove entries manually
- Results are generally saved automatically. This can be manually triggered as well by selecting the Save ALL Results link. If results are available, according to the IWUF rules, they will be shown on the screen
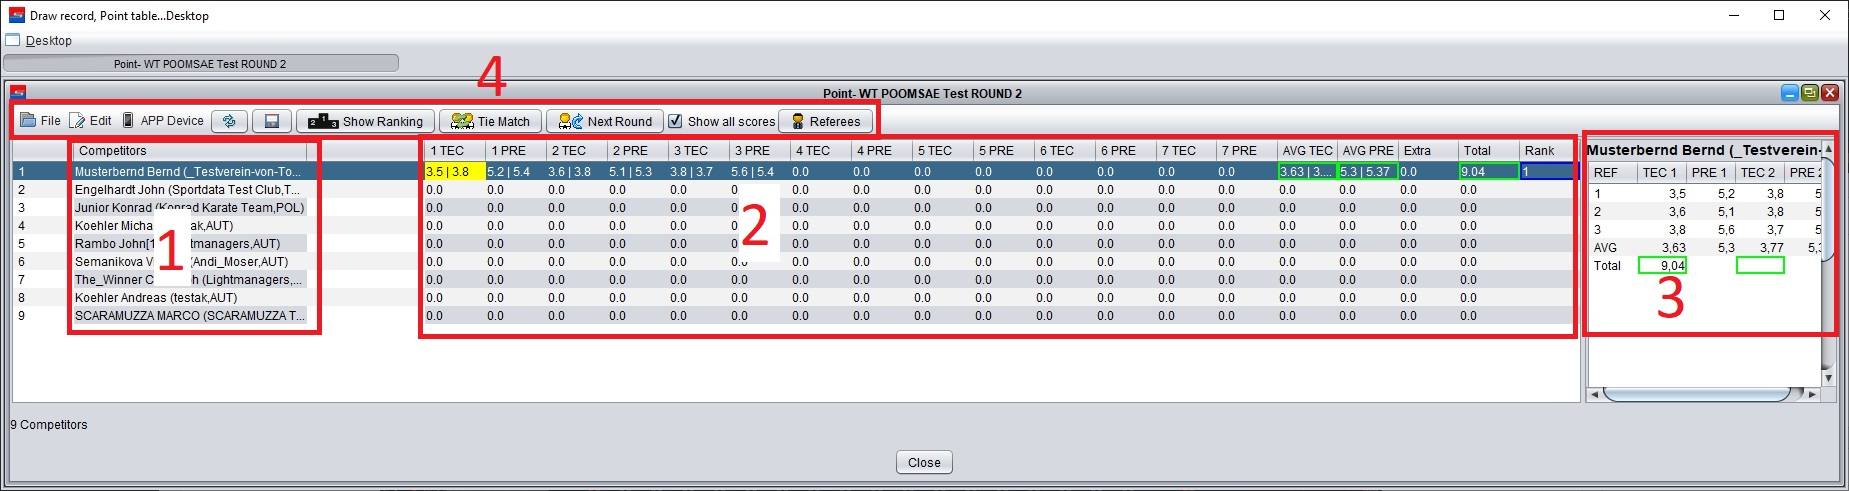
- Table of scores
- All scores from all Group A, B and C Judges are saved in this rows
- Right click inside the scores row and select “Restore Saved Scores” in order to load the saved scores into the Judge Scores list. This allows to modify already saved scores manually
- Right click inside the scores row and select “Show points” in order to display the scores for this athlete in the Show Match windows
- Manual and Electronic Score Calculation Panel: See image below
- Any score entered for a competitor or team, Manual Score or Electronic Scores, are collected ,show and computed here
- Scores can be entered manually here
- Press “Add Judge manually” in order to manually add a Referee to the score list
- Double click a list cell in order to enter an new score manually
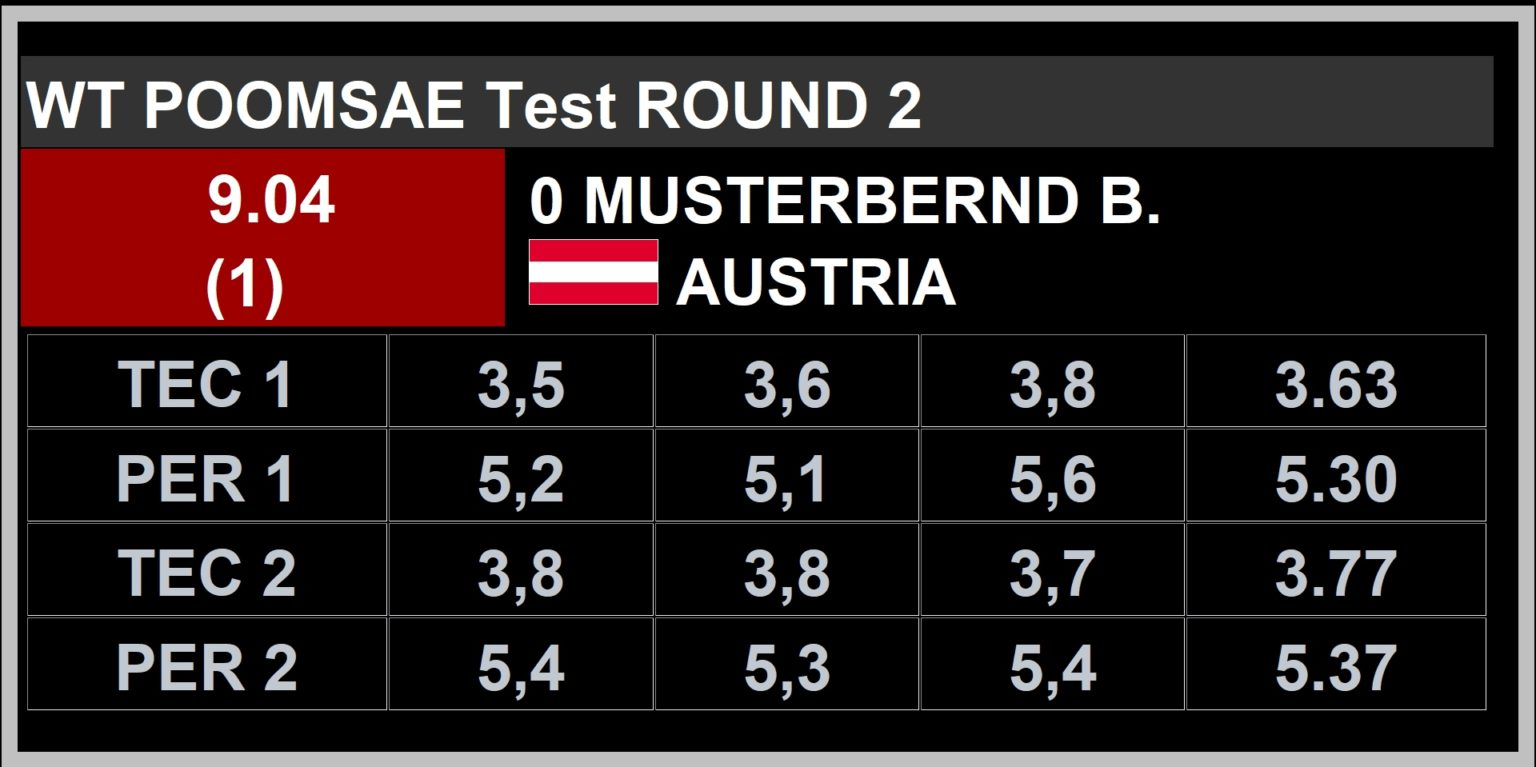
- In order to save the final scores, click on Save result/update. If the Show Match window is open, all scores, the total score and rank are shown on the screen
- Total scores and ranks are also shown on the SET Activity Monitor.
- If an athlete gets disqualified, just click the Disqualification button, this will set all scores of the athlete to 0
- Additional Buttons
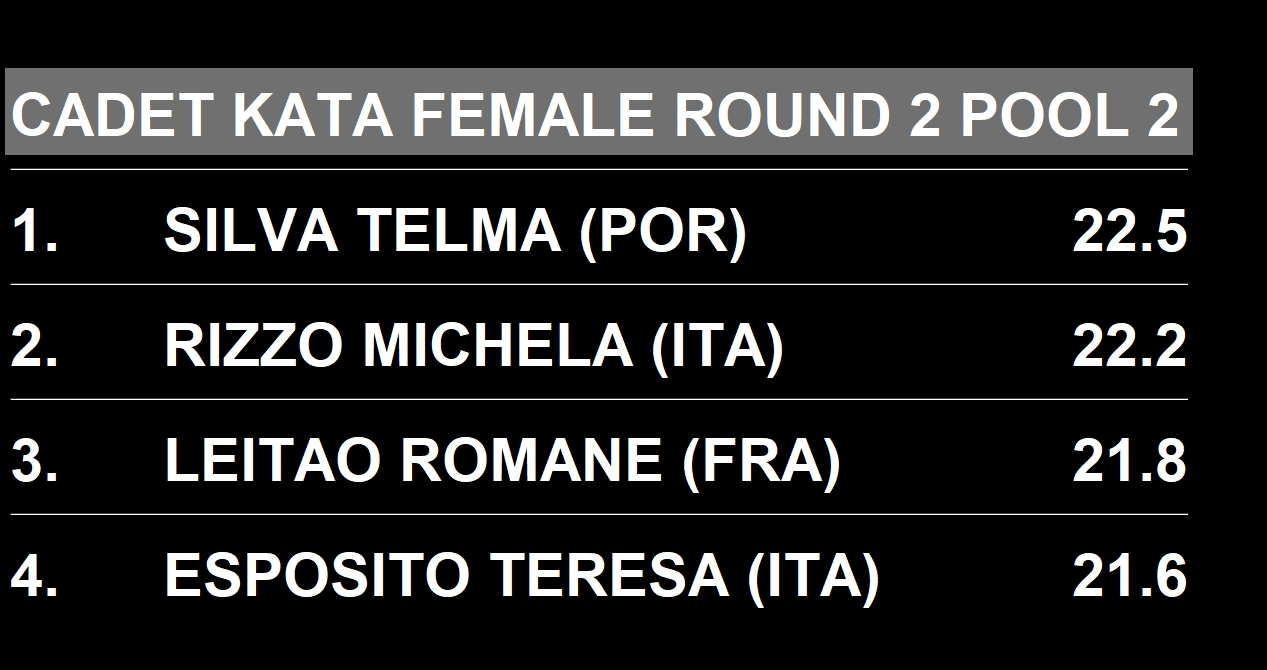
- Show Ranking: Show the Top 4 ranked during the competition and the first 8 athletes/teams before the competition. You should show the ranking after each athlete, in order to allow the Audience to follow the competition.
- Tie Match: in case of a tie (Athletes have the same score and rank), this button copies the athletes with the same rank to a new list, in order to perform a new Tie Match. Ties are only resolved when it is required to determine which Competitor will go on to the next round – or to determine the result of a medal contest. After the additional match, the Extra Score field in the main table can be used to mark the winner of the tie match. A score of 0.001 should be entered for the athlete who won the Tie Match.
- Next Round: The operator/admin should be responsible to check if all results and scores are complete and he should also merge the Top athletes to the next round groups, by using the “Next Round” button. The final order of the athletes in the new groups are automatically managed by the software, according to the WT rules.
Manual and Electronic Score Calculation Panel

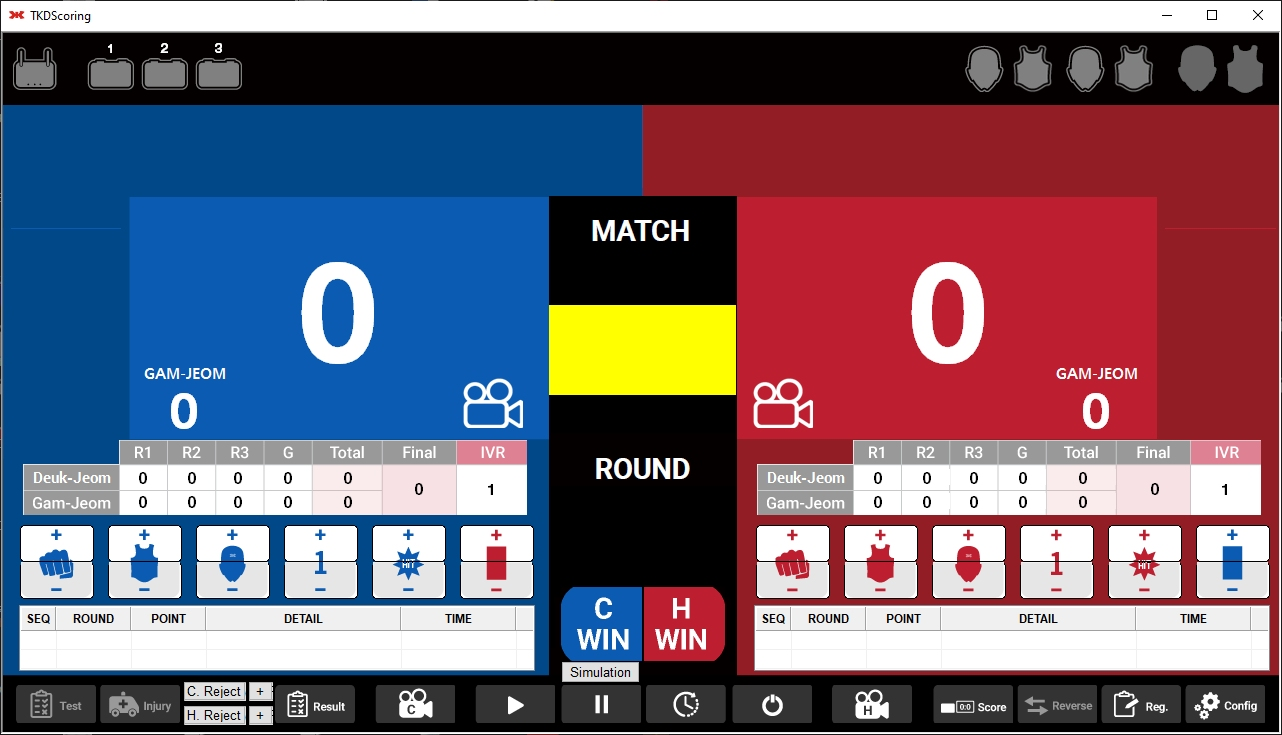
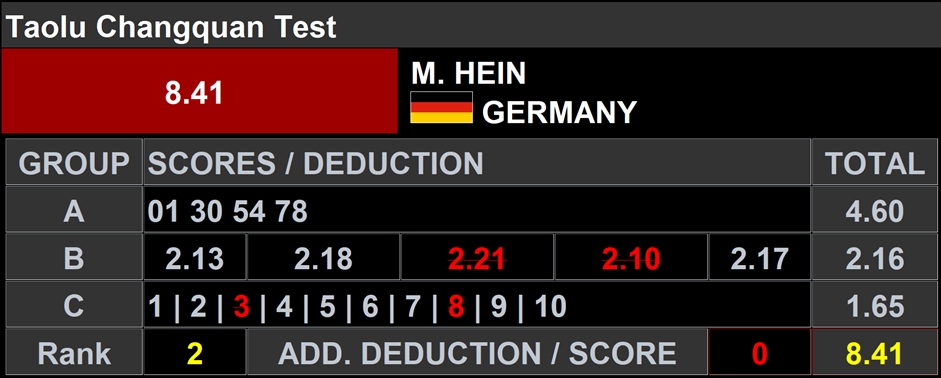
Scoreboard

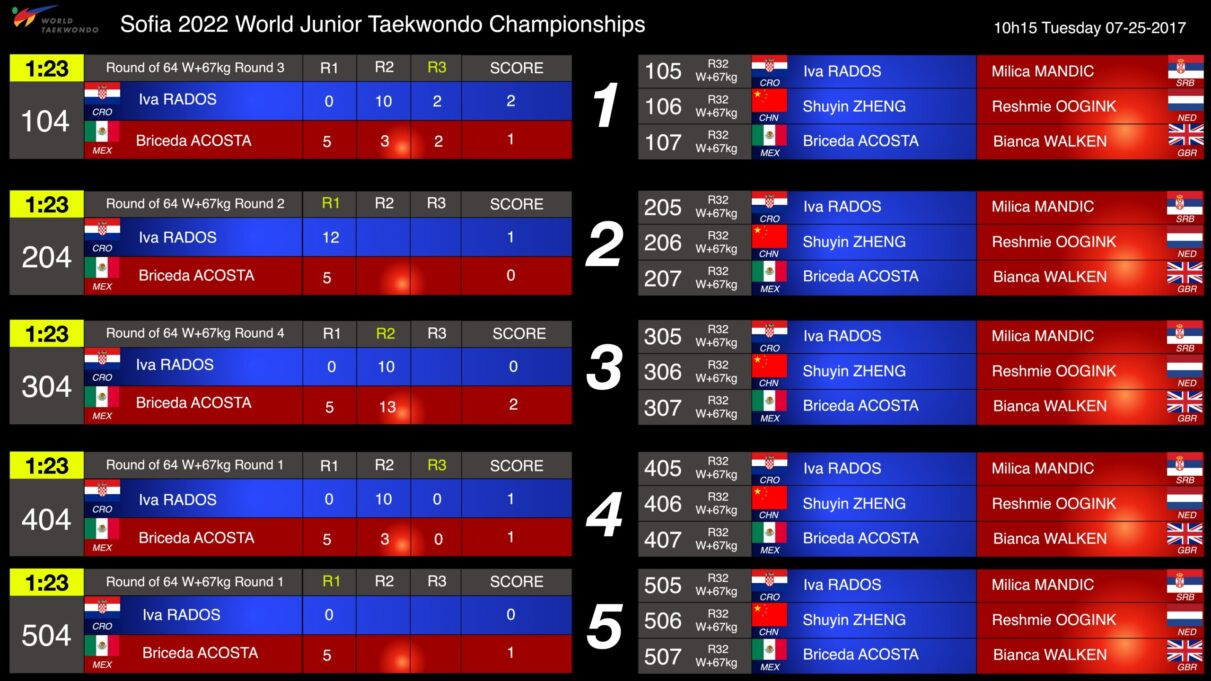
Show results

Groups, Rounds and Medal Matches
- After finishing a Qualification Round, the Operator/Admin can generate the next final round (if needed) groups by using the “Next round” button
- The system automatically know how to create and name new categories for the next rounds and merged groups
- Saving of results can be manually triggered as well by selecting the Save ALL Results link from the popup menu (right click a row). If results are available they will be shown on the screen
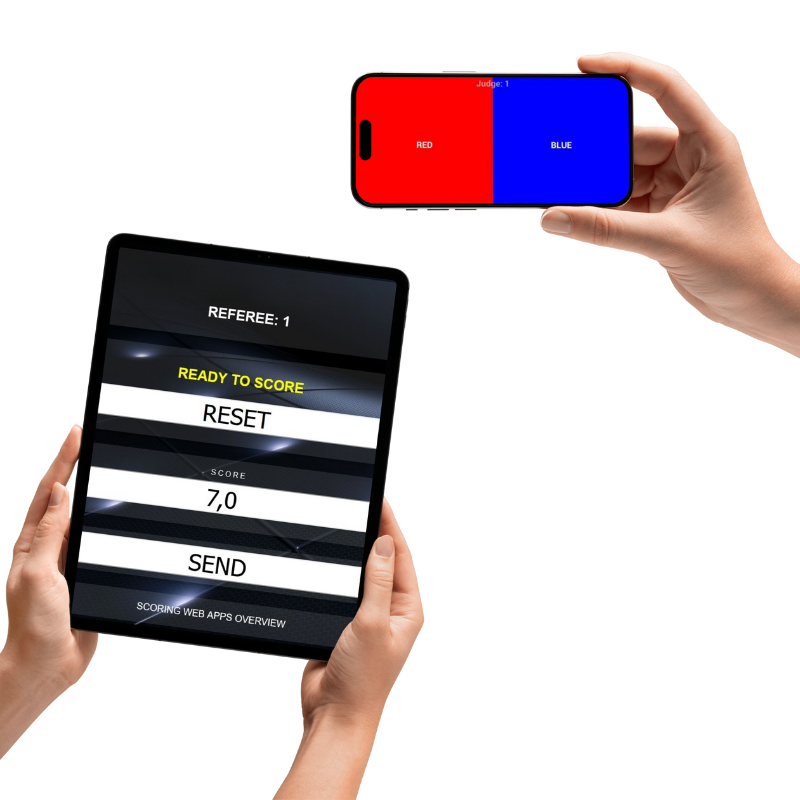
Using the SET Scoring App (for Browsers) for Electronic Scoring
Pre-Conditions
- All SET client laptops and the scoring devices have to be in the same network
- All SET clients laptops and scoring devices must have a static IP address
- Make sure to enable Javascript and Cookie support on the scoring device browser
- Make sure to use only one Browser for scoring (don’t mix different browsers). Pairing information are stored as Cookies on the scoring device Browser. Only the Browser on the scoring device used for pairing stores the paring information!
- Its recommended to use a wired local network. Alternatively (if stable and performance allows) you can use additional Wireless Repeaters on all Mats, in order to have better Wireless connection for the scoring devices.
- All SET client laptops must have disabled their firewall and any anti virus software
- Port 8080 needs to be use to communicate with the scoring devices, so make sure no other software or firewall is blocking this Port
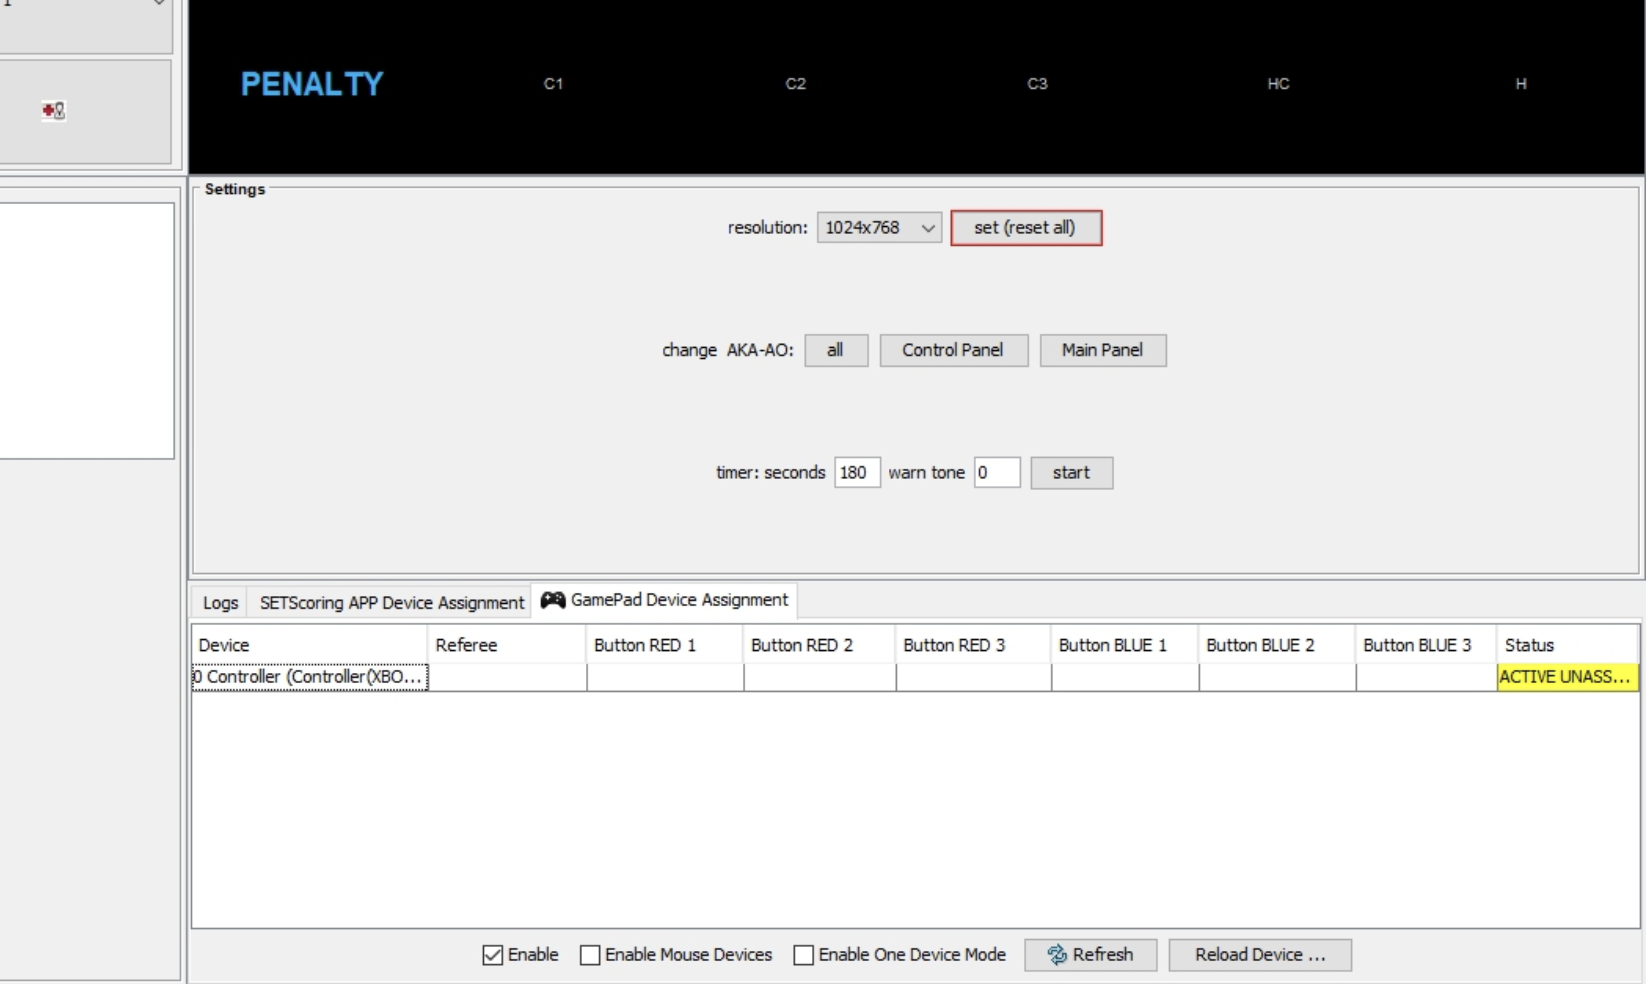
Pair the scoring devices with the client computer

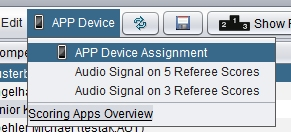
- Open the “APP Device Assignment”
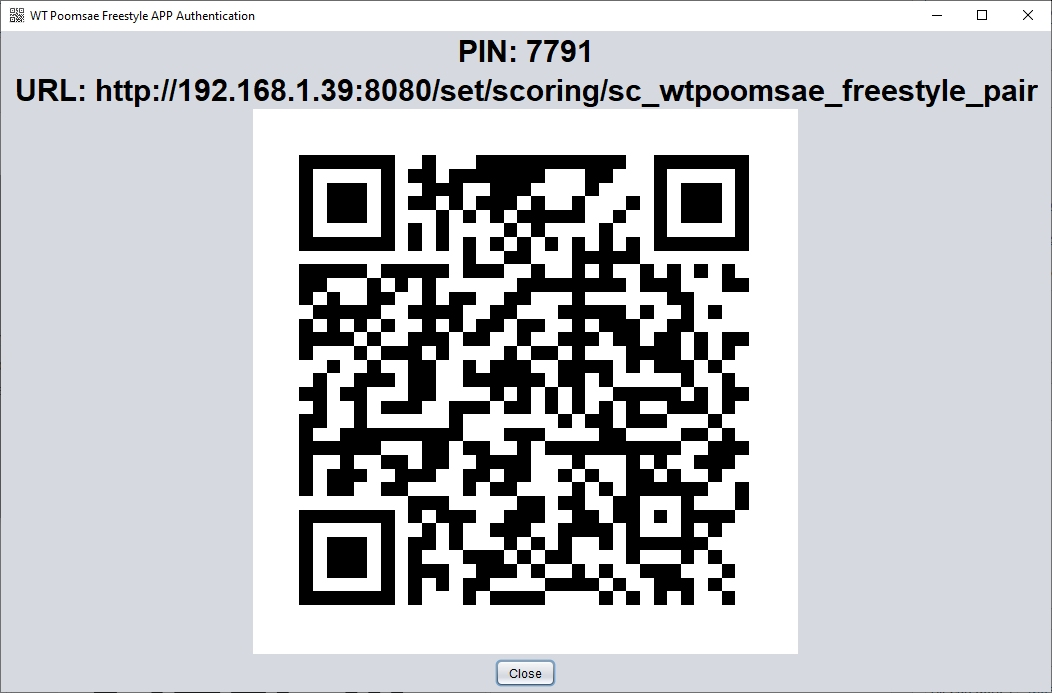
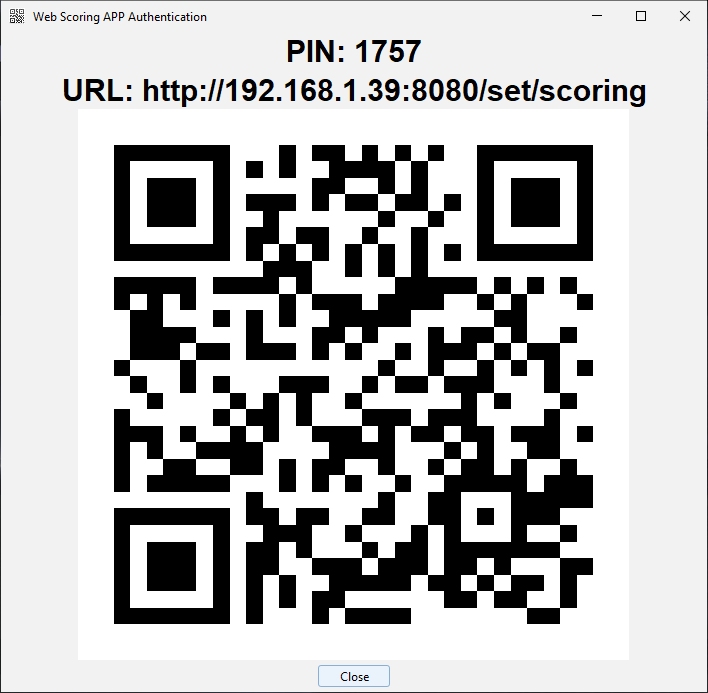
- Press the Authentication button
- This will create a new PIN code and QR Code for the authentication URL
Note: each time you open the Authentication window a new PIN code will be generated for security reasons - Scan the QR Code with a QR Code reader application on your scoring device. Alternatively open your scoring device browser and manually enter the URL.
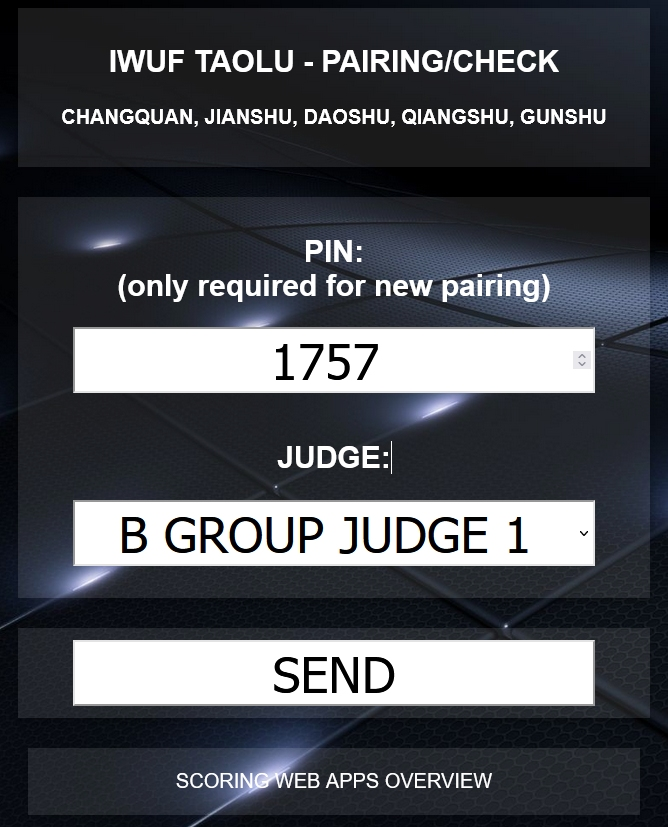
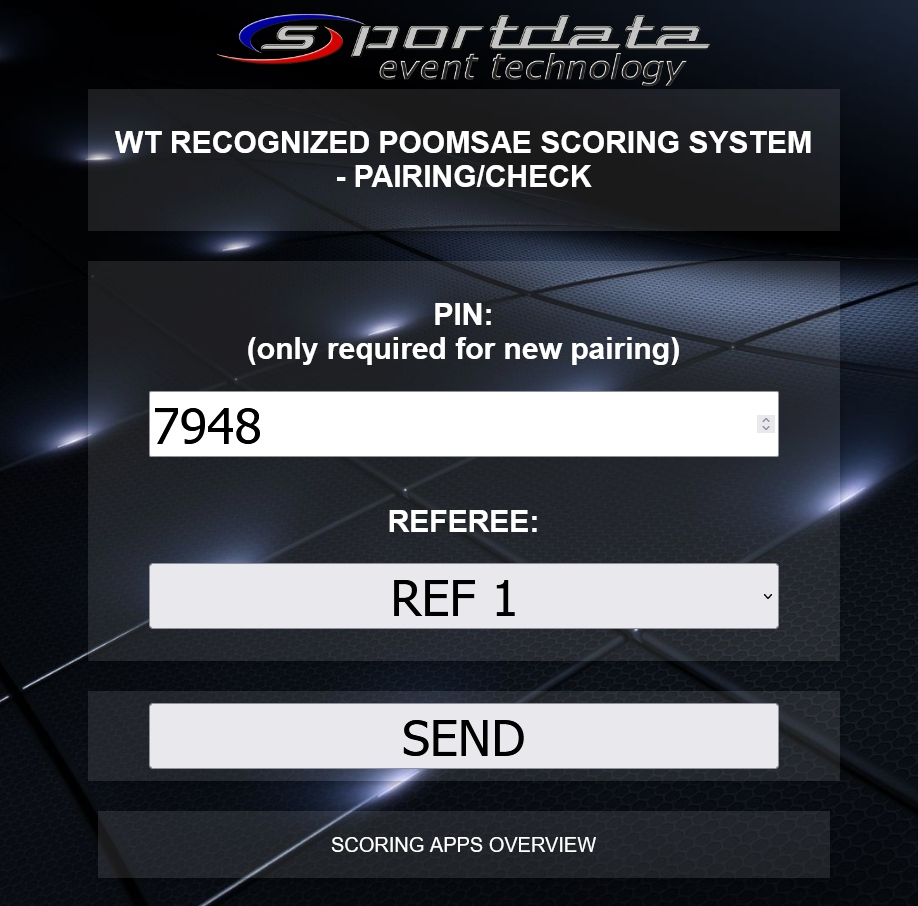
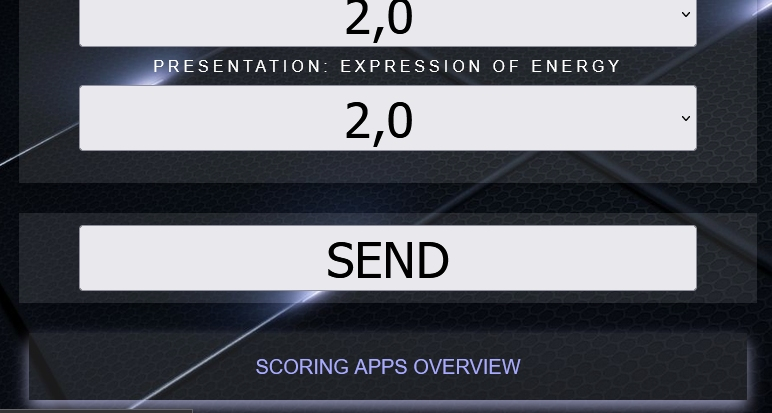
- Select the Style and Scoring System
- Send the Pin and select the Judge
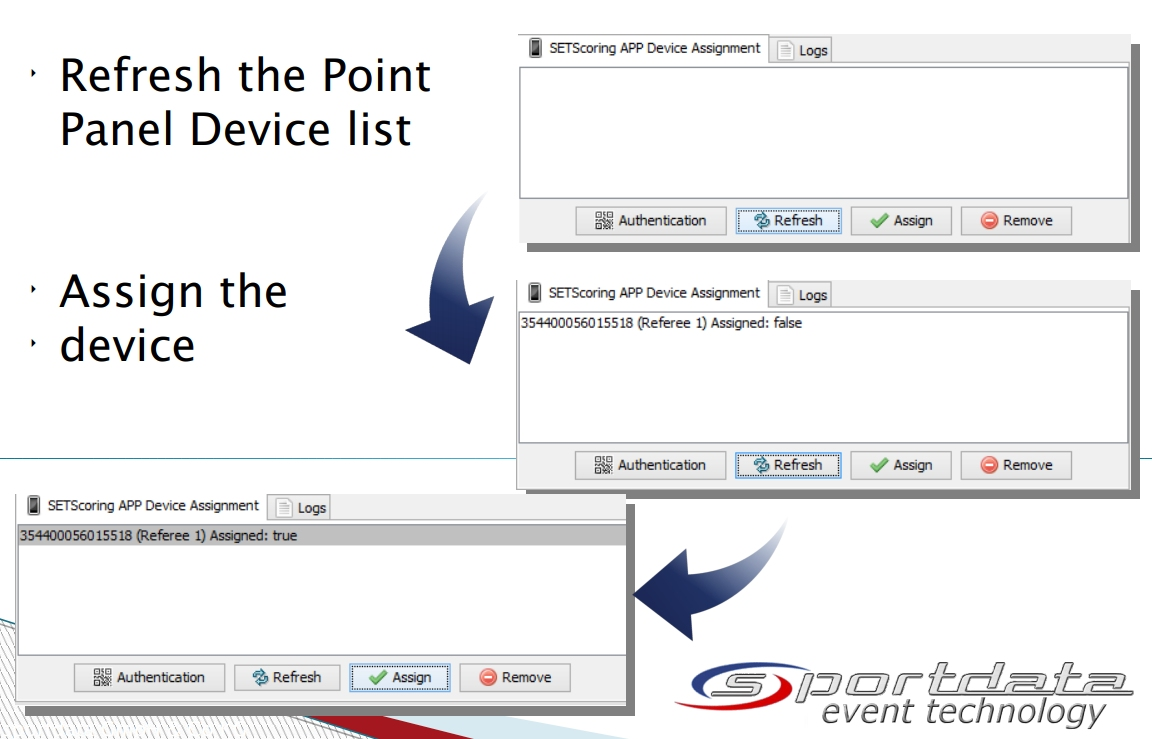
- Click on Refresh to see the Status of your Request Approval
- Press the RELOAD Button in the Browser of the scoring device. You are now ready to score!
- SEND: shows first a confirmation popup -> if confirmed sends all scores to the client computer
- RESET: sets all scores and fields back to the default values.
- RESET also get Athlete and Competition data, so make sure to see the correct Athlete data!


Recommended Hardware
Tablets
Huawei MediaPad T3 Wifi Tablet-PC


