Posted on Leave a comment

Guide to Running Events

Everything involved in running a competition on SET, in the order it happens — from creating the event online to the award ceremony on the last day. Each stage links to the article that covers it in full. The flow is the same whatever the sport.

The Golden Rule — read this before anything else

The database is the event. Back it up at every break point.

Entries, draws, results, accreditation and the timetable all live in one database. Losing it costs a competition day; copying it takes seconds. Back up after entries close, after the draw is generated, and at the end of every competition day — and point the automatic backup at a drive that is not the machine SET is running on. See Back up and restore the database.

00 Before the event

Platform · account · software

SET Pro gives you the online events platform, SET OVR (the desktop application), Timing & Scoring and Video Review. They activate when you create the event.

  1. Choose your event platform. WKF, WAKO, Ju-Jitsu, Taekwondo and the others each have their own. The platform decides the rule set, the category structure and the scoring panels available to you.
  2. Create an event manager account on that platform.
  3. Create the event online. This opens registration and activates the software.
  4. Install SET on every machine you will use, and check they are all on the same version.

The SET Pro Demo Platform gives full access to the events platform at no cost — use it to rehearse this flow before doing it on a real event.

In detailDownload and install SET · Mode selection during login

01 Build the event page

Categories · entry fees · documents · templates

Everything here happens online, before anyone arrives.

  1. Set up the categories. Add them, or copy the set from a previous event. Set the draw mode for each — elimination, round robin, pools, double elimination.
  2. Set entry fees. Fees are defined on the categories. The Entry Fee Model then decides how they combine — multi-entry discounts, a cap per club, early-bird or late pricing by date.
  3. Set up the accreditation categories for coaches, referees, officials and press, with their limits per team.
  4. Upload the programme documents competitors and clubs need.
  5. Design the accreditation and certificate templates, and generate the PDFs you will print on site.

In detailCreate the event’s categories · Edit categories · Entry fees · Generate an accreditation

02 Onsite registration

Import · entries · weigh-in · medical

  1. Export the online database and import it into SET OVR. From here the desktop application holds the event.
  2. Work the entries. Register late entries, validate what arrived, move people between categories.
  3. Run the weigh-in. Weight and size control shows each competitor against their category limits, with passport and medical checks alongside. A serial scale can feed the readings directly.
  4. Set entry status as competitors clear each desk. Access control filters on Approved, so a competitor left Pending will not scan in at the venue.

In detailExport and import the event · Entry list management · Register a new athlete · Moving and removing entries · Run the weigh-in · Connect an electronic scale

03 Categories, seeding and draws

Reshape · seed · draw · timetable

The order matters through this whole stage: reshape, then seed, then draw — each step reads what the one before it produced. Set up DTM before the match caller, and do not have both open at the same time.

  1. Reshape the categories. Merge the ones too small to run and split the ones too large for the session.
  2. Seed the entries. Seeding fixes chosen competitors onto set positions — every seed is a position the draw engine can no longer move.
  3. Generate the draws and point tables, with Automatically Save and Save Without Opening ticked.
  4. Save the draws as draw records. The draw record is what the scorekeeper works from, leaving the original draw untouched.
  5. Set up the match areas in DTM, including the match duration.
  6. Build the match caller — assign match numbers in the order bouts will run.
  7. Push the matches to the timetable, then export the schedules and upload the draws and timetable online.

In detailMove, merge and split categories · Seeding and random draw numbers · Generate draws and draw records · Build the match caller · Roll call

04 The tech table

Network · server · clients · power

  1. Build the local network. Server laptop, router, switch and LAN cables. Wired throughout.
  2. Give every important machine a static IP — the server, the mats and the information screens. Client stations, live data, the graphics feeds and the backup endpoint all address machines by IP.
  3. Test the latency. Ping between stations must return 1 ms or less.
  4. Import the event database and add the users the other stations will log in with.
  5. Set up the results and information laptops, and configure SET PSS for live data.
  6. Secure power and the printer.

In detailNetwork setup · Connect to a database · Set up SET PSS · Information monitors

05 Scoring tables

One station per mat

  1. Connect the LAN cable and test the latency to the server.
  2. Log in to FOP mode — Ring or Tatami. Without it, activities do not display in the online services.
  3. Assign the client name for this mat and open the panels the station needs. One client name per machine, or a mat shows another mat’s matches.
  4. Configure the point panel for the sport and rule set.
  5. Connect the scoreboard display and disable sleep mode on the TV.

In detailMode selection during login · Operate the scoreboard · Copy settings between machines

06 Scoring devices

Tablets · clickers · gamepads

How judges enter scores depends on the sport and the equipment. Clear the network first — devices talk to the Point Panel over port 8080.

DeviceSetup
TabletsWeb-Scoring App or the installed SET Scoring App, paired from the Point Panel
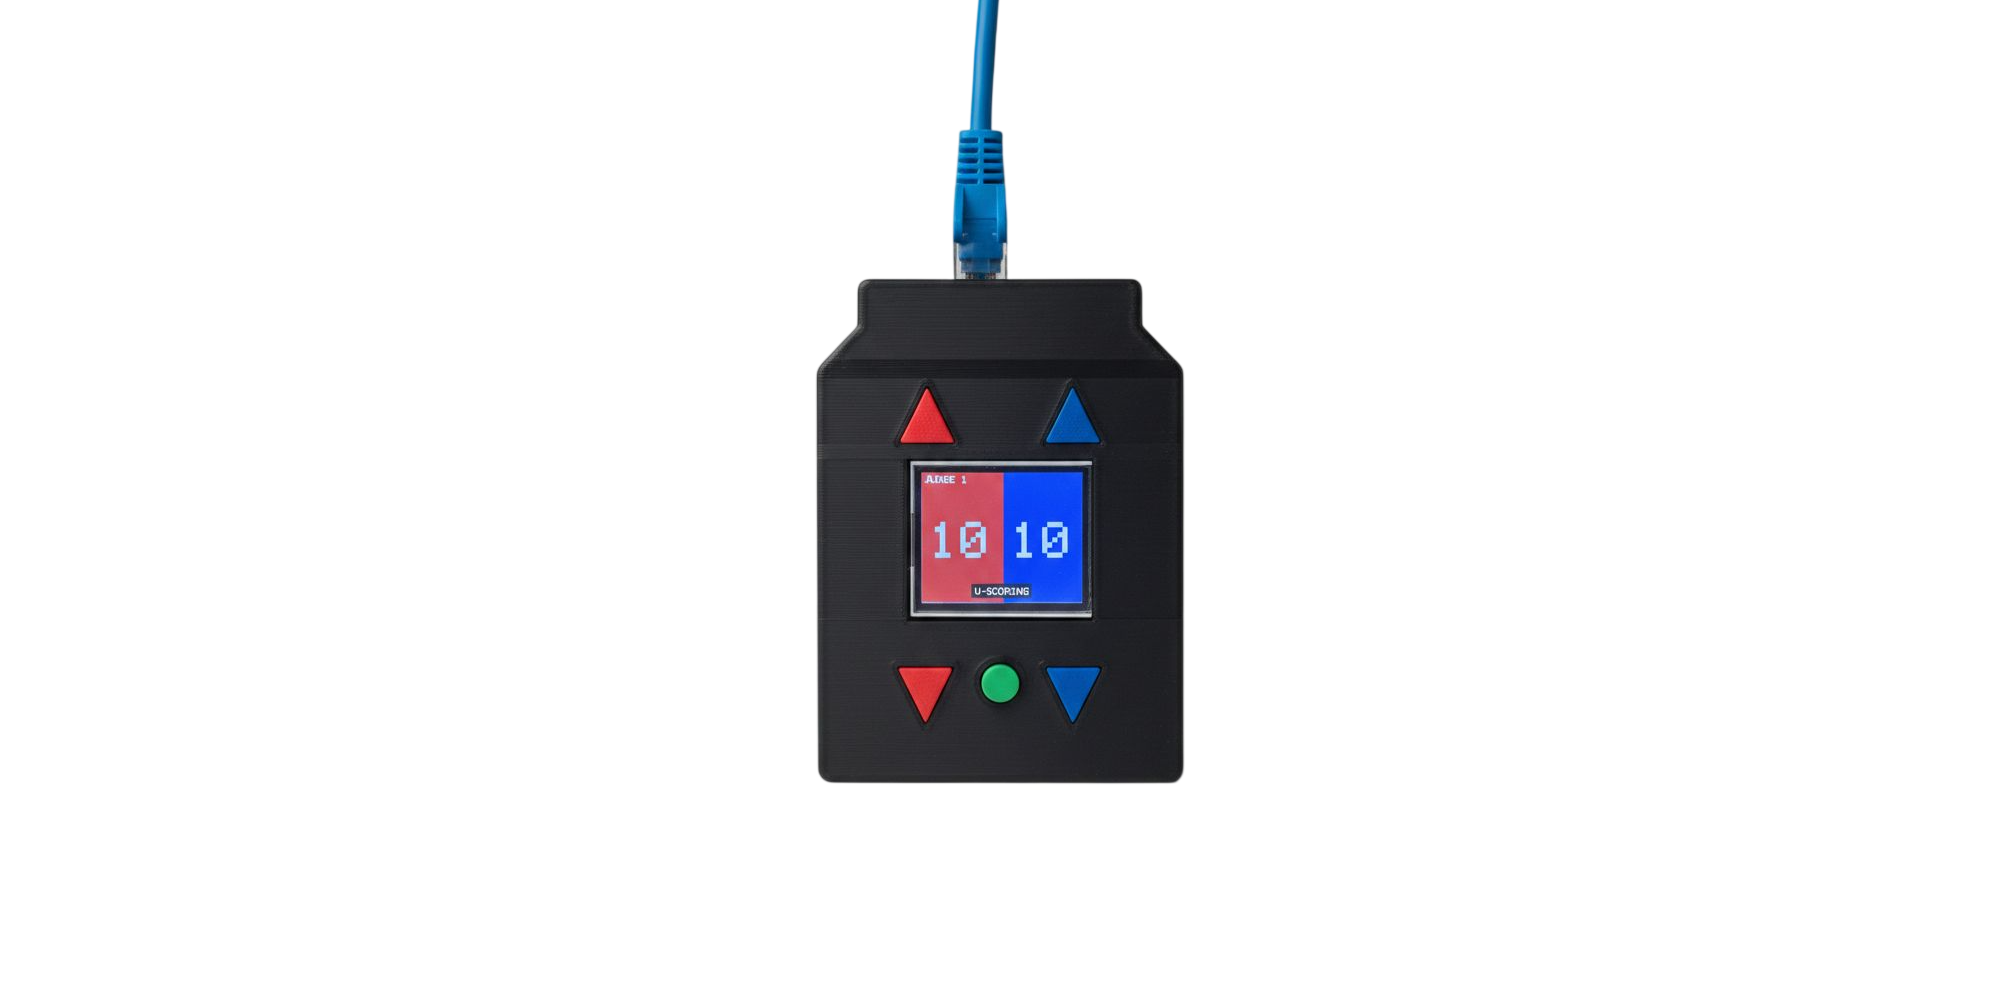
ClickersWeissBrand for WKF kumite, or V-Scoring — each with its own serial interface
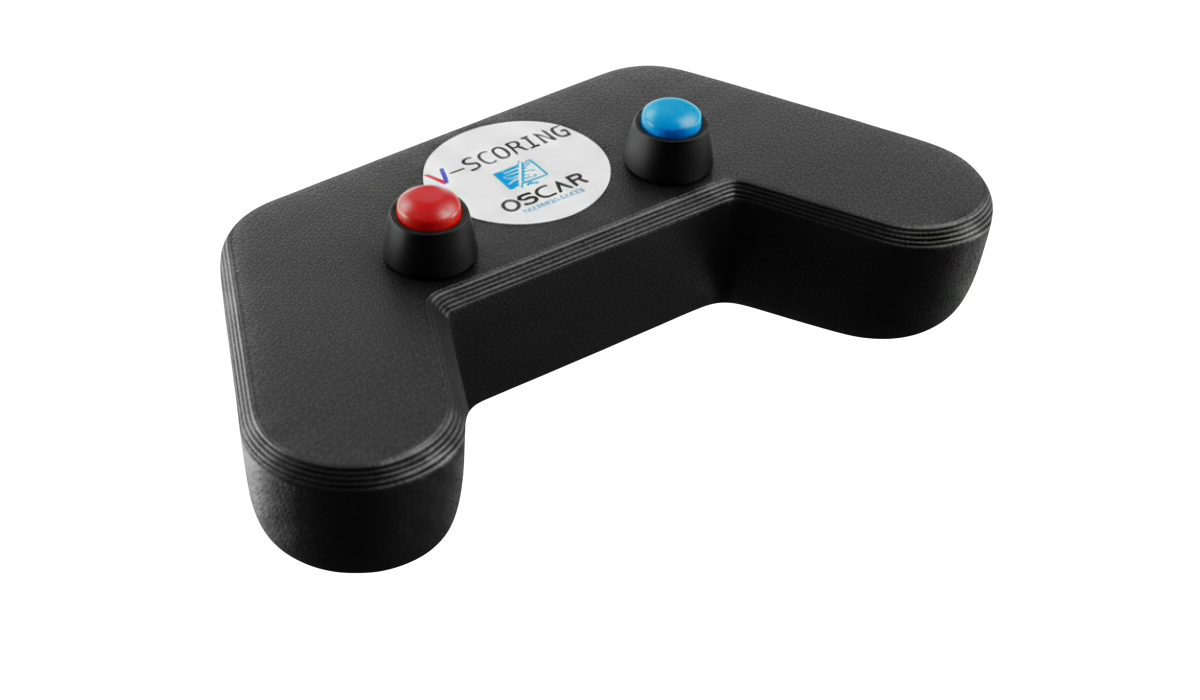
GamepadsX-Input controllers, identified then mapped button by button
Third-partyTaekwondo PSS, Schlierf.IT, ARBIM

In detailScoring devices · Use a barcode scanner

07 Video review

Replay · protests

  1. Install and configure the video review software and the Shuttle Express controller.
  2. Configure the VR interface in SET — one sender per mat, each with the right field-of-play number.
  3. Settle the quota rule — per category or per event. That is a competition-rules decision.
  4. Train the operators before the first session.

In detailVideo review · Referee Mode

08 Running the competition

Displays · monitoring · end of day

  1. Set up the information monitors and the live online information.
  2. Draw the referees for each session, if your event uses referee draws.
  3. Watch the results for accuracy and keep the schedule on track.
  4. Prepare the next day’s materials before you leave.
  5. Take the end-of-day exports — the database backup, the access control scan protocol and the referee deployment statistics. All three are far easier to produce on the day than to reconstruct afterwards.

In detailInformation monitors · Referee Mode · Publish to SET Online · Live streaming · Access control

09 Results and award ceremony

Placings · certificates · medals

  1. Check the placings. Places 5 and 7 fill automatically as competitors are eliminated; 1 to 4 appear once the final and bronze bouts are decided. Correct only what the draw cannot resolve.
  2. Print the official results and the certificates.
  3. Download the anthems before the ceremony block, not during it.
  4. Connect the laptop to the LED wall and operate the award ceremony manager.
  5. Upload the final results online and generate the result book.

In detailView and correct results · Award ceremony manager · Reports and the result book · Publish to SET Online

10 When something is wrong

First checks

SymptomCheck first
A station shows the wrong data, or a menu is missingPanels → User Info — database, event and mode
An action appears to do nothingThe Message Console, and whether anything is selected
A card will not scan at the gateQR code ticked when printed, and entry status Approved
A mat is behind, or the live blog is emptyThe station is in FOP mode and its client name is right
Graphics or live data stoppedThe machine’s IP address has not changed

In detailSession information and support

Applies to SET 12.2.0 (build 1, 2026-05-24).
Referee Mode

Referee Mode is SET’s interface for referee drawing — assigning officials to matches by drawing them against a configurable chain of impartiality rules, so no referee judges a bout involving their own club, region or nation.

The Golden Rule — match the filters to the event

The defaults are set for a national event. An international event needs more.

Out of the box only Competitor’s club and Different club are active, because at a national event every competitor and every referee shares a nationality — a nationality filter would exclude the whole panel. Club is the meaningful separation domestically. On an international event, turn Competitor’s nationality on before you draw anything.

01 Getting into Referee Mode

A login mode

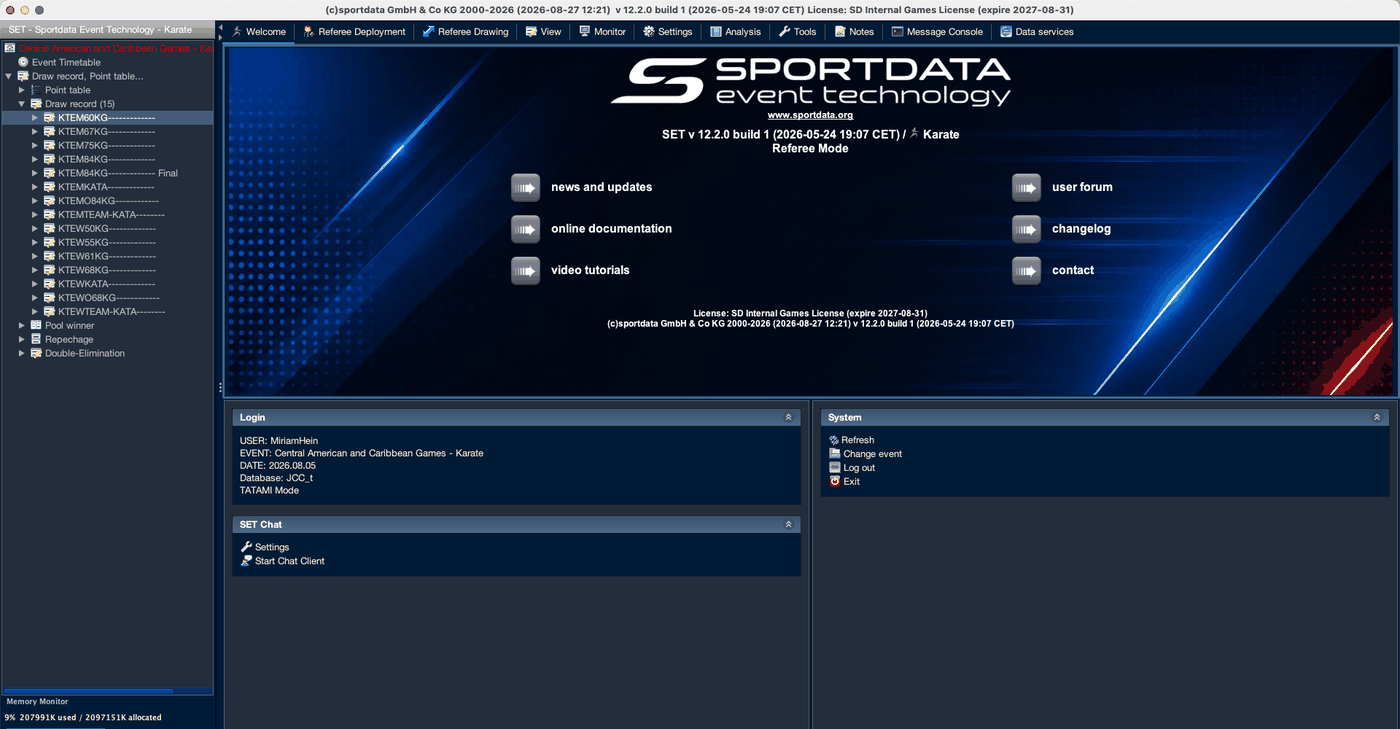
Referee Mode is chosen at sign-in, not from a menu. Log out of Administration Mode and select it when logging back in.

SET in Referee Mode
Fig 1The Administration menus are replaced by tabs: Deployment, Drawing, View, Monitor, Settings and Analysis.

02 Build the deployment

Area · day · session

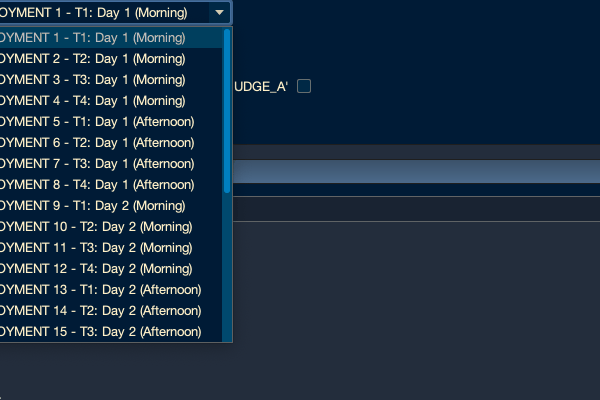
A deployment is one match area, on one competition day, in one session. SET generates the full set automatically — the total is areas × days × 2.

The deployment list
Fig 2Numbered area-first, then session, then day: 1–4 are the four areas on Day 1 morning, 5–8 the same areas that afternoon.
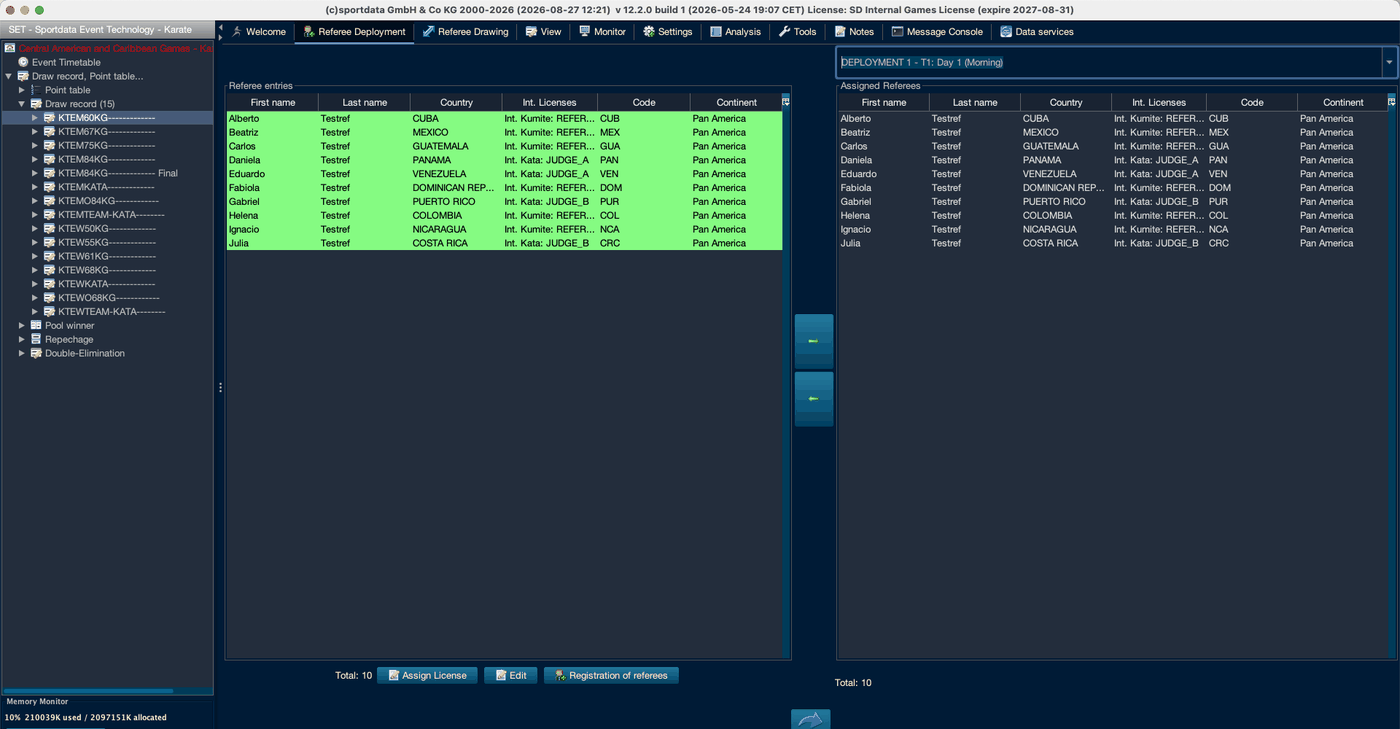
Referees assigned to a deployment
Fig 3Move referees across with the arrows. Rows turn green once assigned to the current deployment.
ButtonPurpose
Assign LicenseSets a referee’s international licence — what the licence filter reads
EditEdits the referee entry
Registration of refereesFor referees not yet in the event
Registering a batch

Panels → Import → Import Coach, Referee, Official Entry takes a semicolon-separated UTF-8 CSV. Column 13 carries the international licence and column 18 the region — both used by the filters.

03 Configure the draw

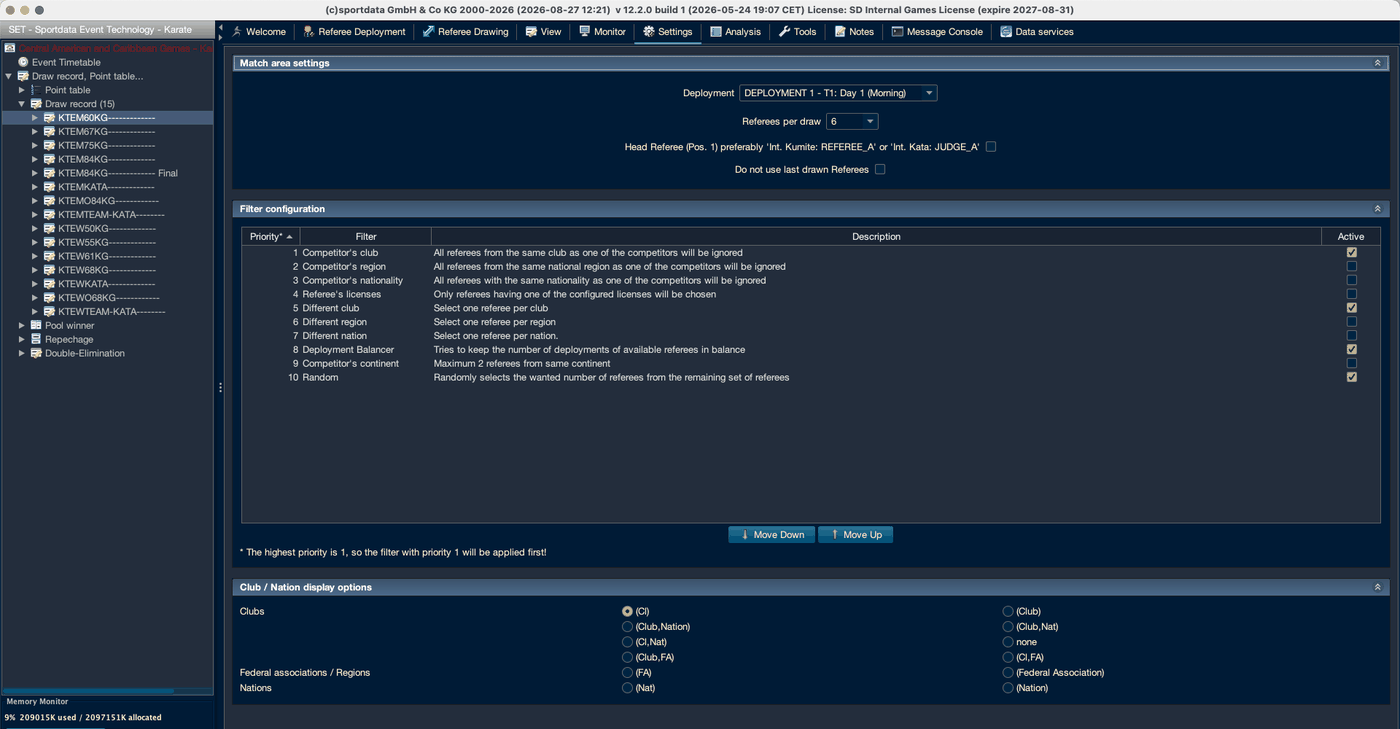
Settings

The Settings tab
Fig 4Match area settings above, the prioritised filter chain below.
SettingNotes
DeploymentSettings are per mat and session
Referees per drawPanel size. Six by default
Head Referee (Pos. 1)Puts a suitably licensed referee in position 1 — Int. Kumite: REFEREE_A or Int. Kata: JUDGE_A
Do not use last drawn RefereesStops consecutive matches getting the same panel

The filter chain

Each filter removes referees from the available set; whoever remains goes into the random selection. Priority 1 applies first — a filter can only exclude referees still in the set when it runs.

PriorityFilterEffectDefault
1Competitor’s clubIgnores referees from the same club as a competitorOn
2Competitor’s regionIgnores referees from the same national regionOff
3Competitor’s nationalityIgnores referees of the same nationalityOff — turn on for international events
4Referee’s licensesOnly referees holding a configured licenceOff
5Different clubAt most one referee per clubOn
6Different regionAt most one per regionOff
7Different nationAt most one per nationOff
8Deployment BalancerKeeps deployment counts levelOn
9Competitor’s continentMaximum 2 referees from the same continentOff
10RandomSelects the required number from those remainingOn
Random cannot be moved or deactivated

It is what makes the draw a draw rather than a selection.

Why nationality is off by default

At a national championship the competitors and the referees are all of one nationality. Switching that filter on would leave nothing to draw from. Club and region are what separate people at a domestic event; nationality and continent matter once the entry list is international.

Keep panels to seven or fewer

Above that SET warns that the monitor view has too little space and the layout breaks.

04 Draw the referees

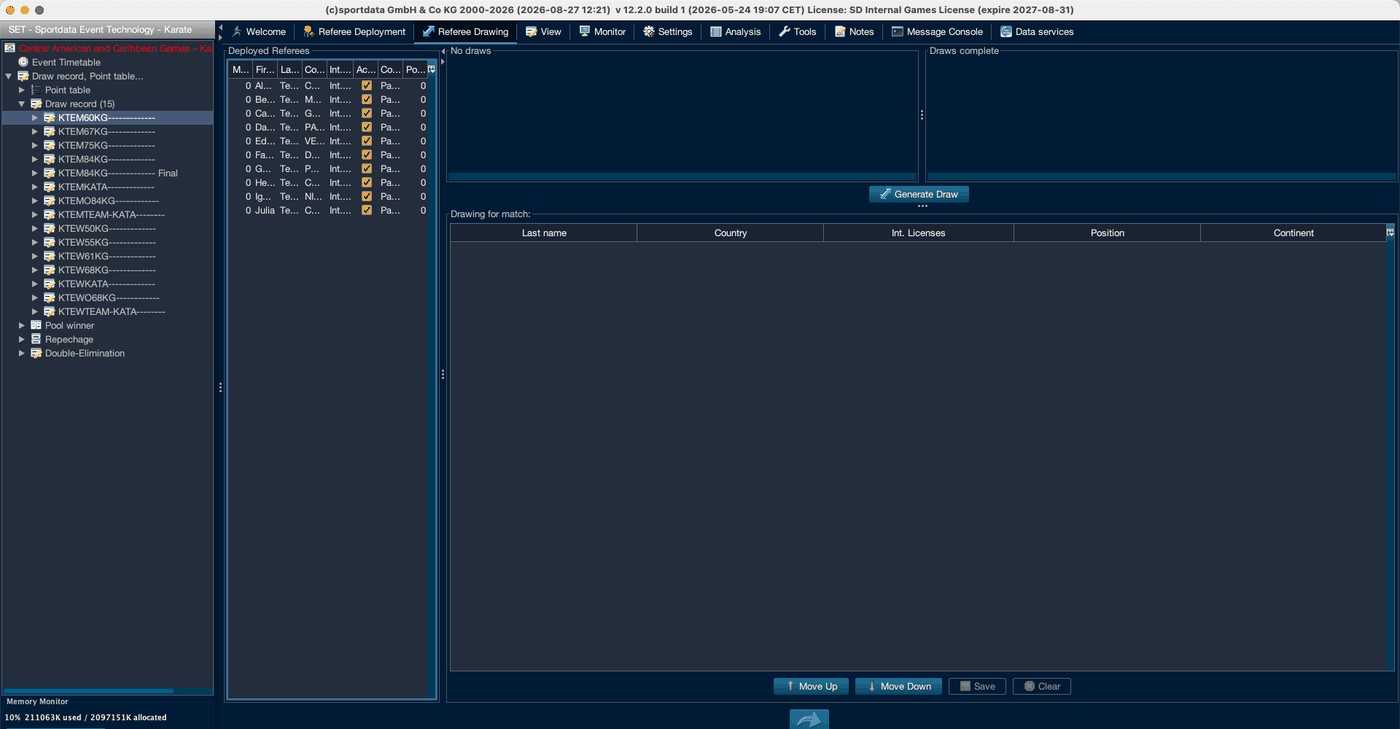
Drawing tab

The Referee Drawing tab
Fig 5Deployed Referees, then the matches needing a panel, then those already done, with Generate Draw between them.
Refresh first

The circular arrow at the foot is Refresh Matchlists. Deployed Referees stays empty until you press it, even after assigning referees.

Move Up and Move Down order the panel — position 1 is the Head Referee. Save commits the draw; Clear empties it. A completed draw can be shown on the monitor, edited or deleted.

SET guards the obvious mistakes: it warns if a referee is already assigned, if a referee is not active, if a draw already exists, and if you leave with unsaved changes. Where your filters would exclude a referee you picked by hand, it asks whether to continue anyway — an override, not a block.

05 The monitor

At the mat

The Monitor tab
Fig 6Start Monitor, Close Monitor and Automatic mode, which advances without operator input.

06 Documents

Analysis tab

DocumentContents
DeploymentThe roster per deployment — code, name, commission, country
Session Referee/Judge AssignmentsWho is assigned to which session
Referees – Number of Bouts StatisticsWorkload per official, with Judge, Referee and Bouts columns
Video Review StatisticProtest requests and outcomes
The bouts statistics is the balance evidence

The Deployment Balancer works to level those counts; this report is how you show that it did. Take it at the end of each session. It needs a referee selected first.

Draw forms print from reports/refereedraw/ — single match forms for kata and kumite, batch versions, a multi-match form, the deployment and match statistics. Each blank form carries the court number, pool, date, field position, both competitors and eight numbered referee positions.

Applies to SET 12.2.0 (build 1, 2026-05-24).
Access Control

The SET OVR Access Control Module is a comprehensive accreditation verification solution designed to manage entry points throughout an event venue. By validating accreditation badges in real time, operators can quickly confirm access permissions, prevent unauthorized entry, and monitor attendance across competition, operational, and restricted areas.

This guide provides an overview of the SET OVR Access Control Module and explains how to configure access points, validate accreditations, manage entry permissions, and monitor venue access efficiently during sporting events, multi-sport competitions or any event.

How to set up access control with SET OVR

Determine Roles

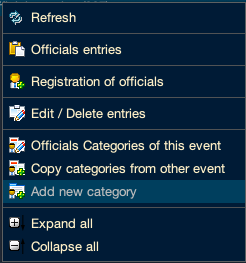
Default roles include athletes, coaches, referee, officials. To add custom roles, you can go to the main tree, right click on the officials and select add new category.

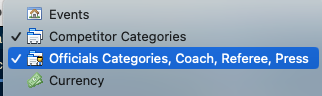
Or, you can go to Panels, and select Officials Categories, Coach, Referee, Press

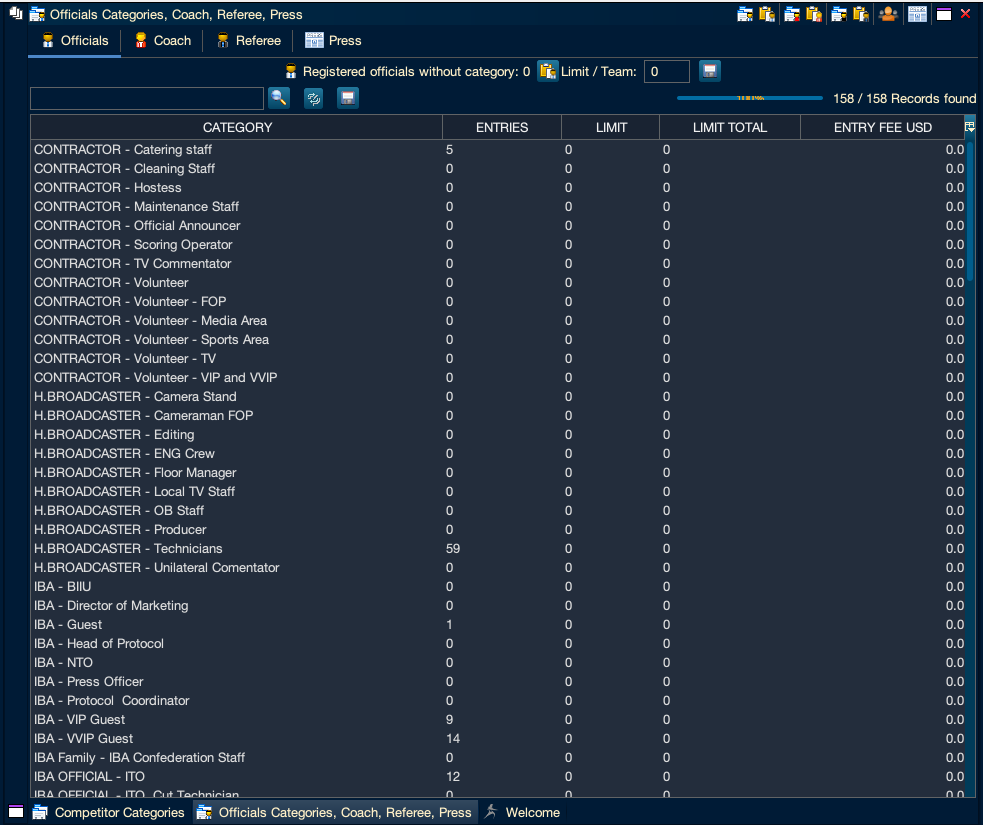
Select the 1st icon on the top right of the window called Officials Category and click Add New Category.

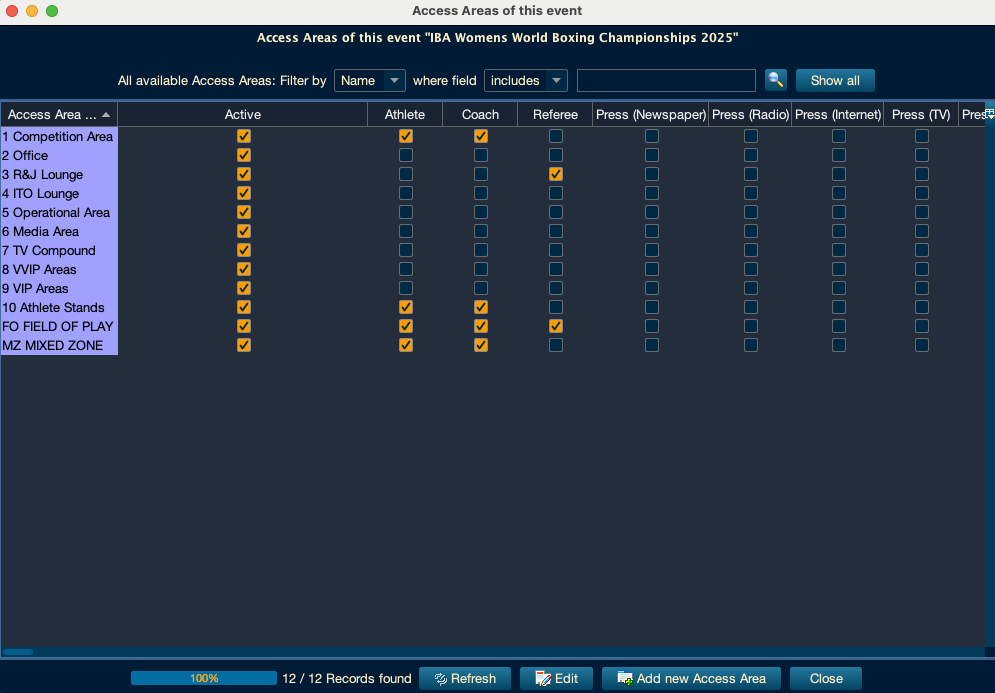
Add New Access Areas

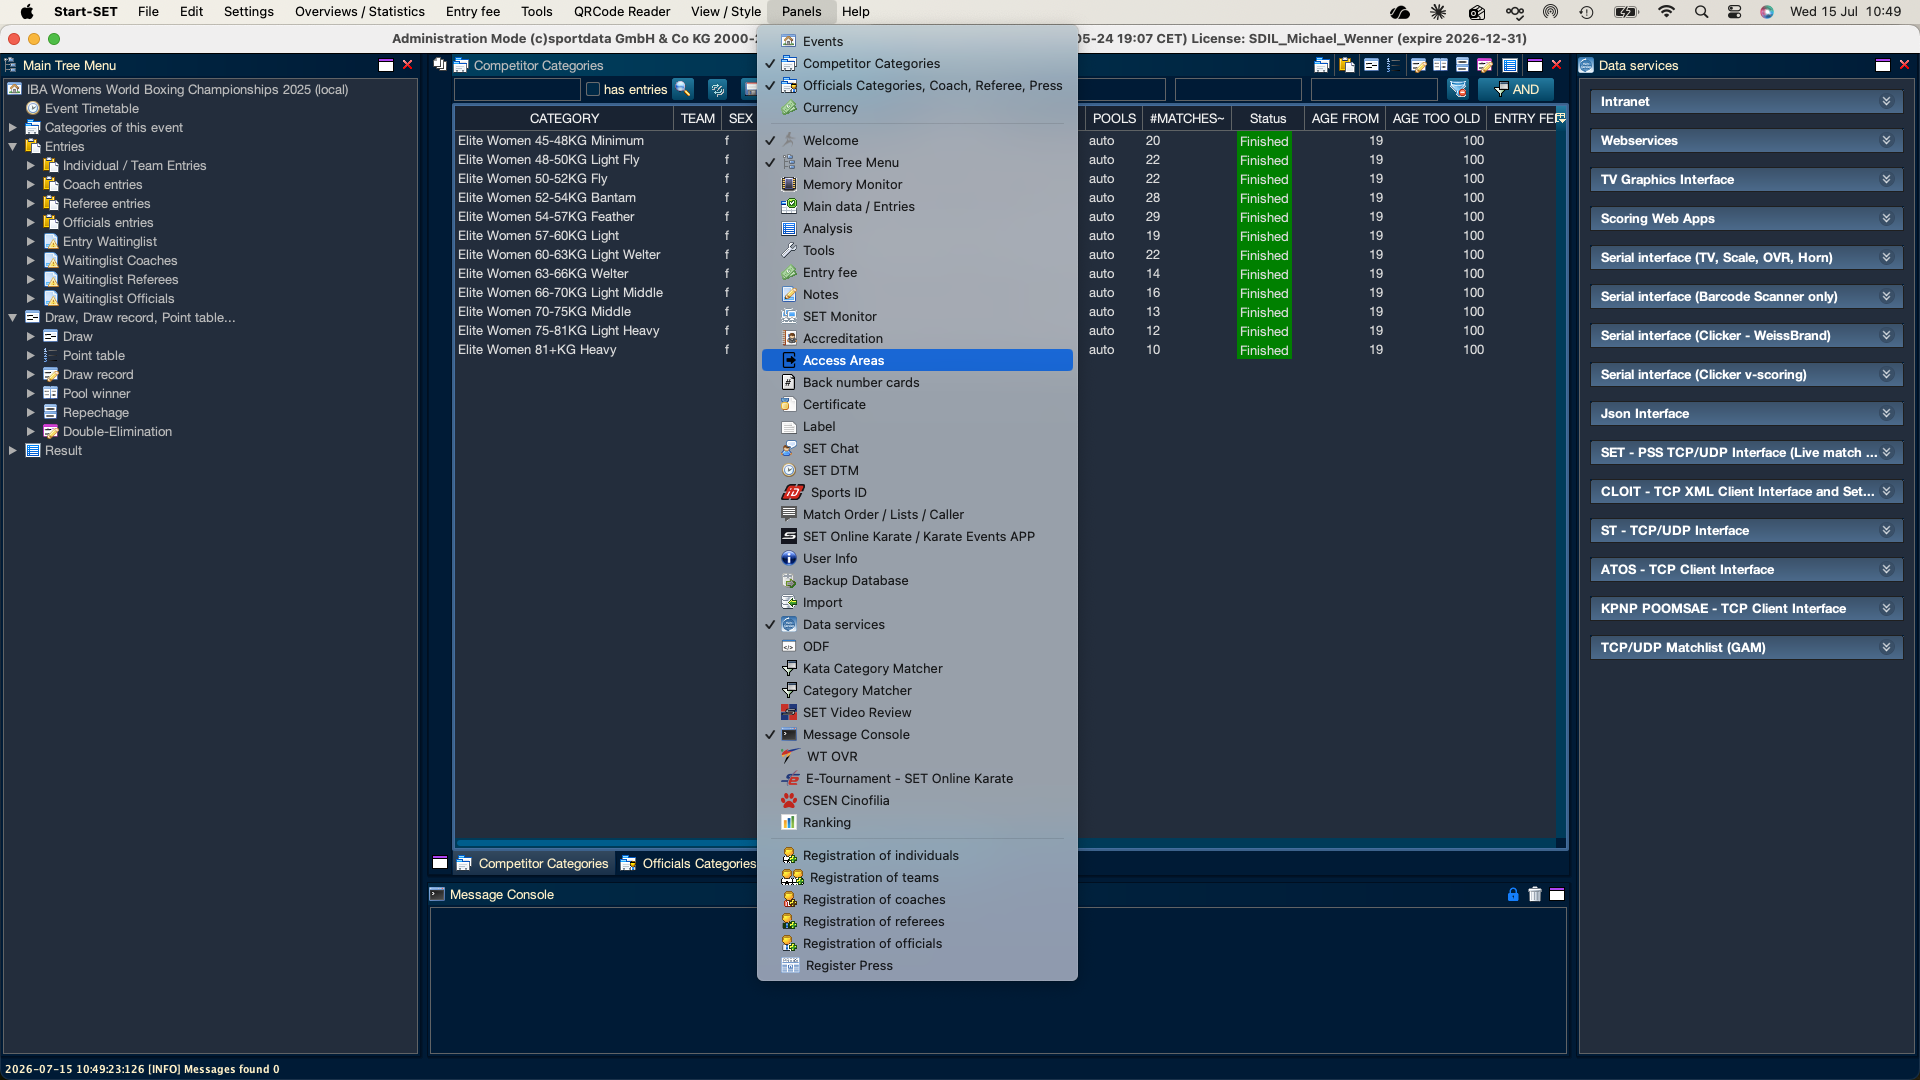
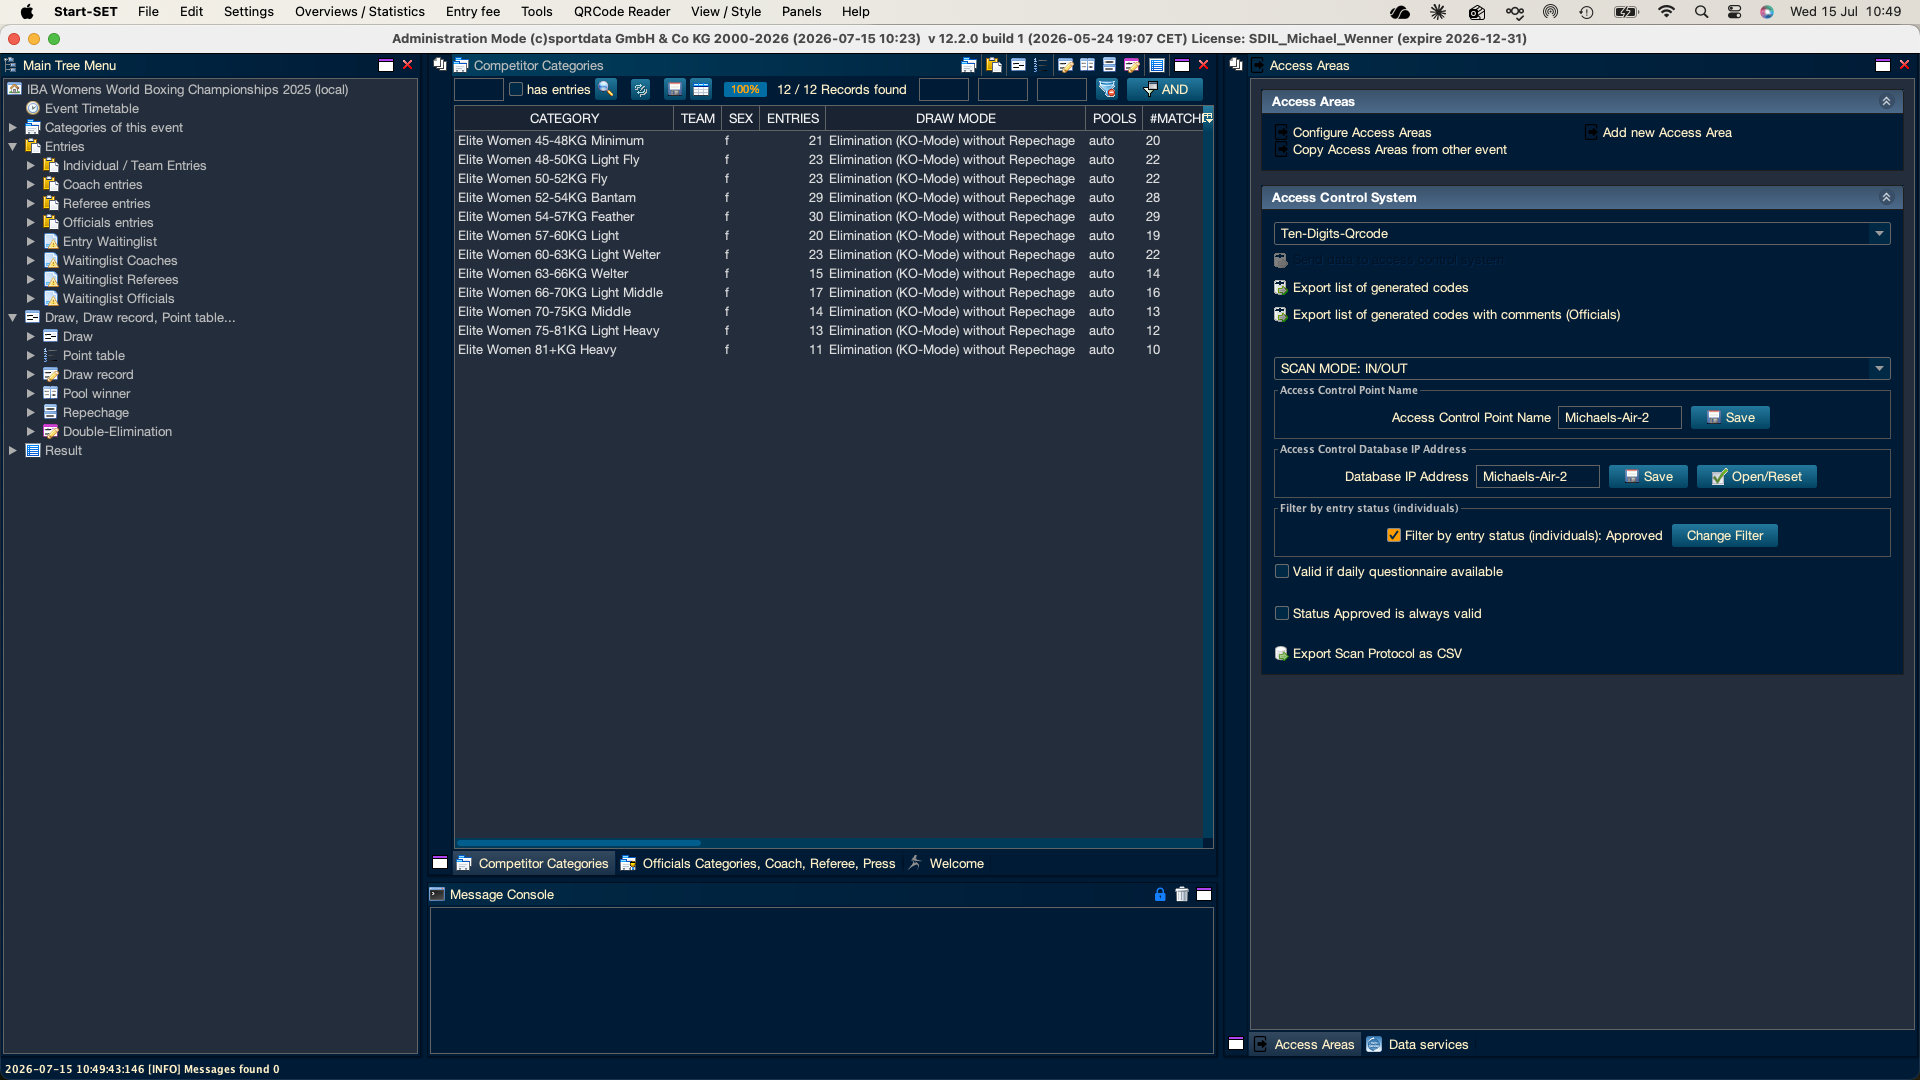
Go to Panels and open the Access Areas panel.

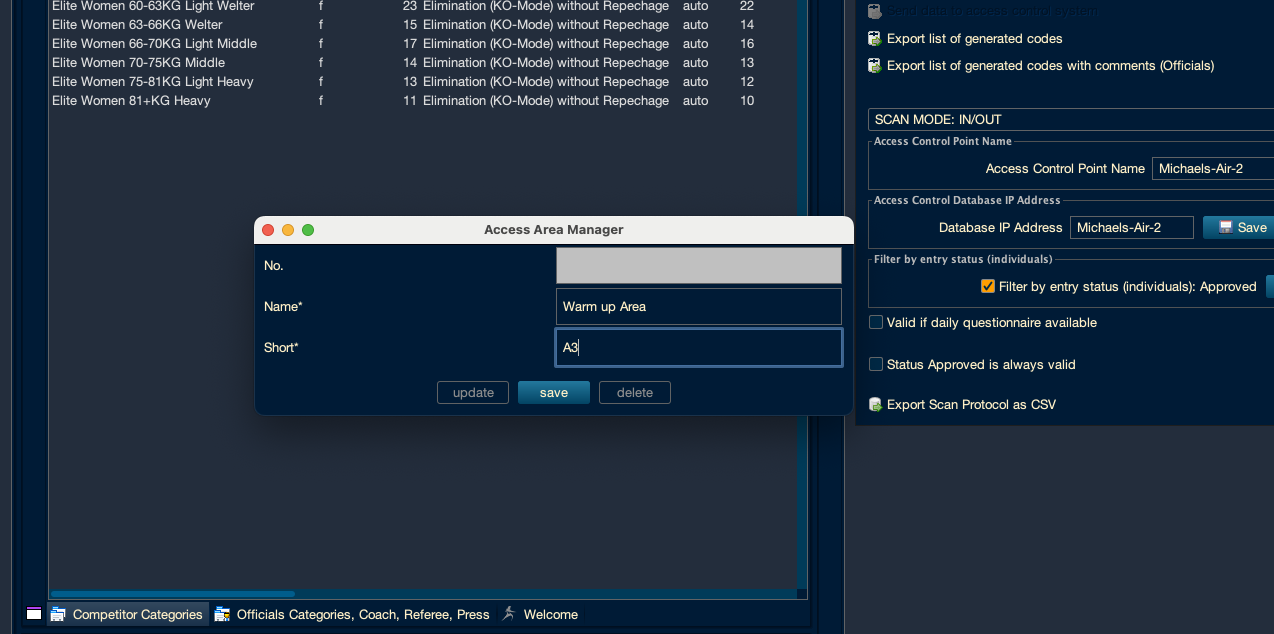
Click on Add New Access Area

Give a name that describes that area and a unique short name that can represent that area, for example 1, A, 1A,1B. They can be used on accreditations and shouldn´t take too much space.

Assign Access Areas

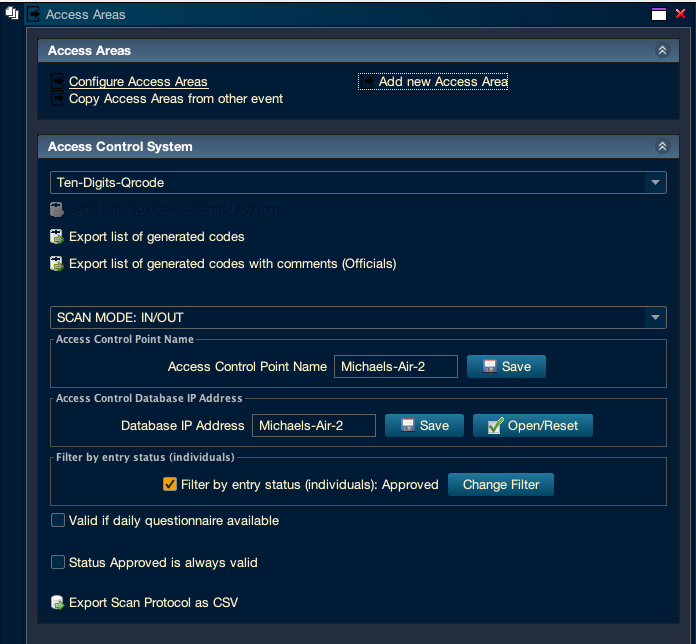
To assign areas to different roles click on configure access areas.

Tick the box under the role to grant access to those roles to the different areas respectively.

Settings

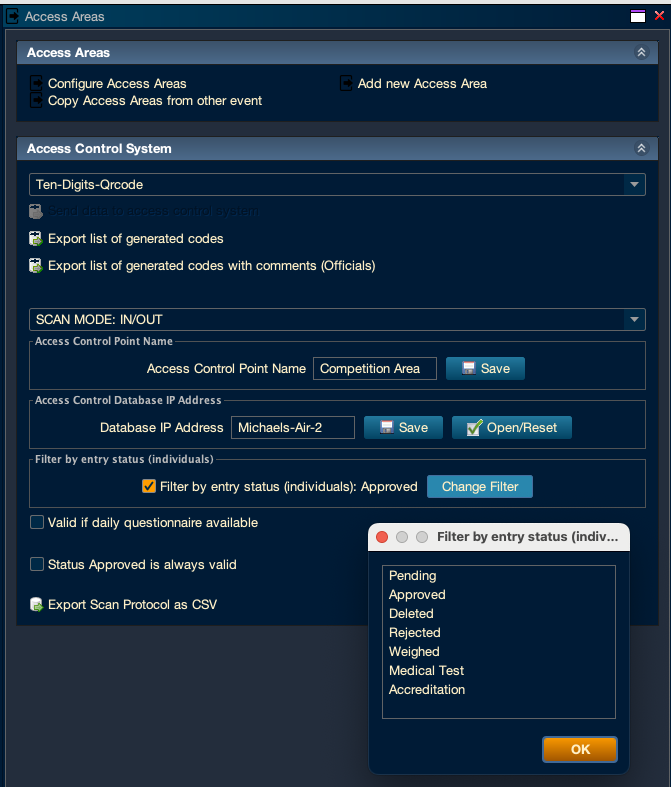
  • Select the type of code you will be using Ten-Digits-QRcode or Ten-Digits 1D-Code.the Scan Mode
  • Scan Mode: There are 3 options, IN, OUT and IN/OUT. With dedicated laptops in and out you will be able to easily determine when someone entered and exited when exporting the Scan Protocol CSV. With IN/OUT this requires less equipment but you will have all ins/outs on the same Scan Protocol.
  • Give each access point the area name to which the laptop has been allocated
  • If the laptop is only a client and another laptop has the database, then type in the Database IP Address.

QR/Barcode Scanner

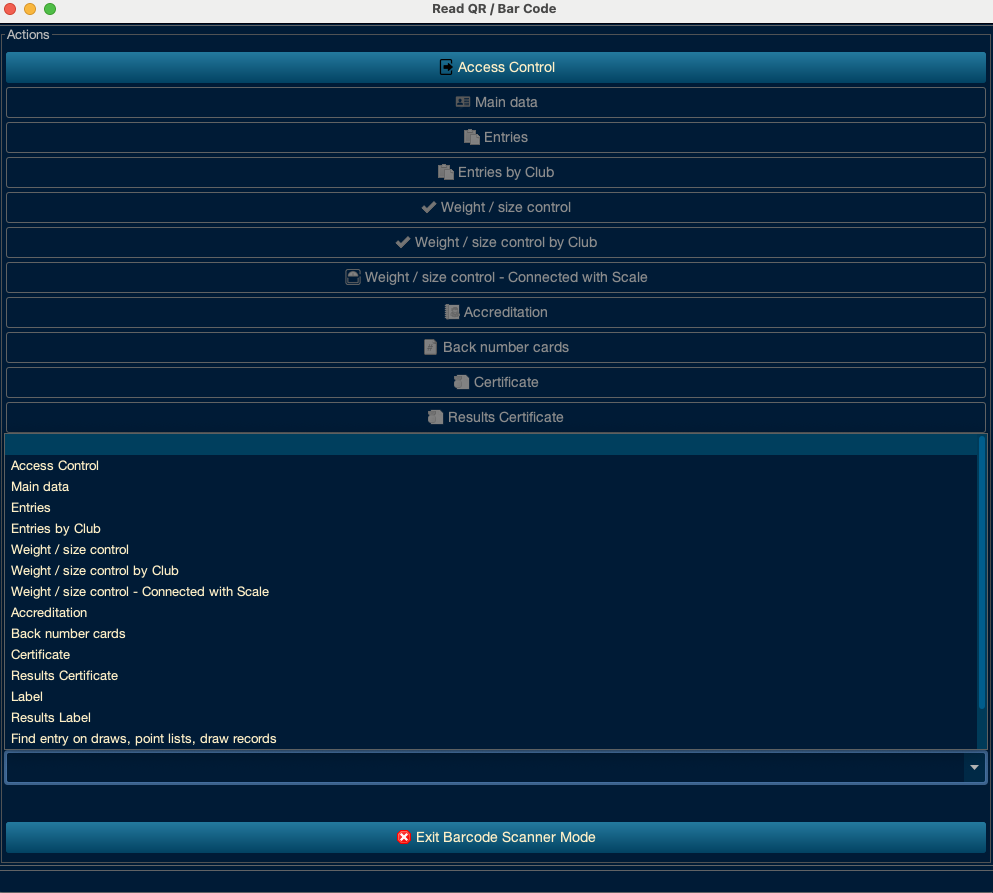
Read our Use a Barcode Scanner with SET Article to set up your scanner. In the QRcode Reader Panel select Access Control in the drop down list at the bottom of the page and minimize the window without closing it.

Scan QR Code

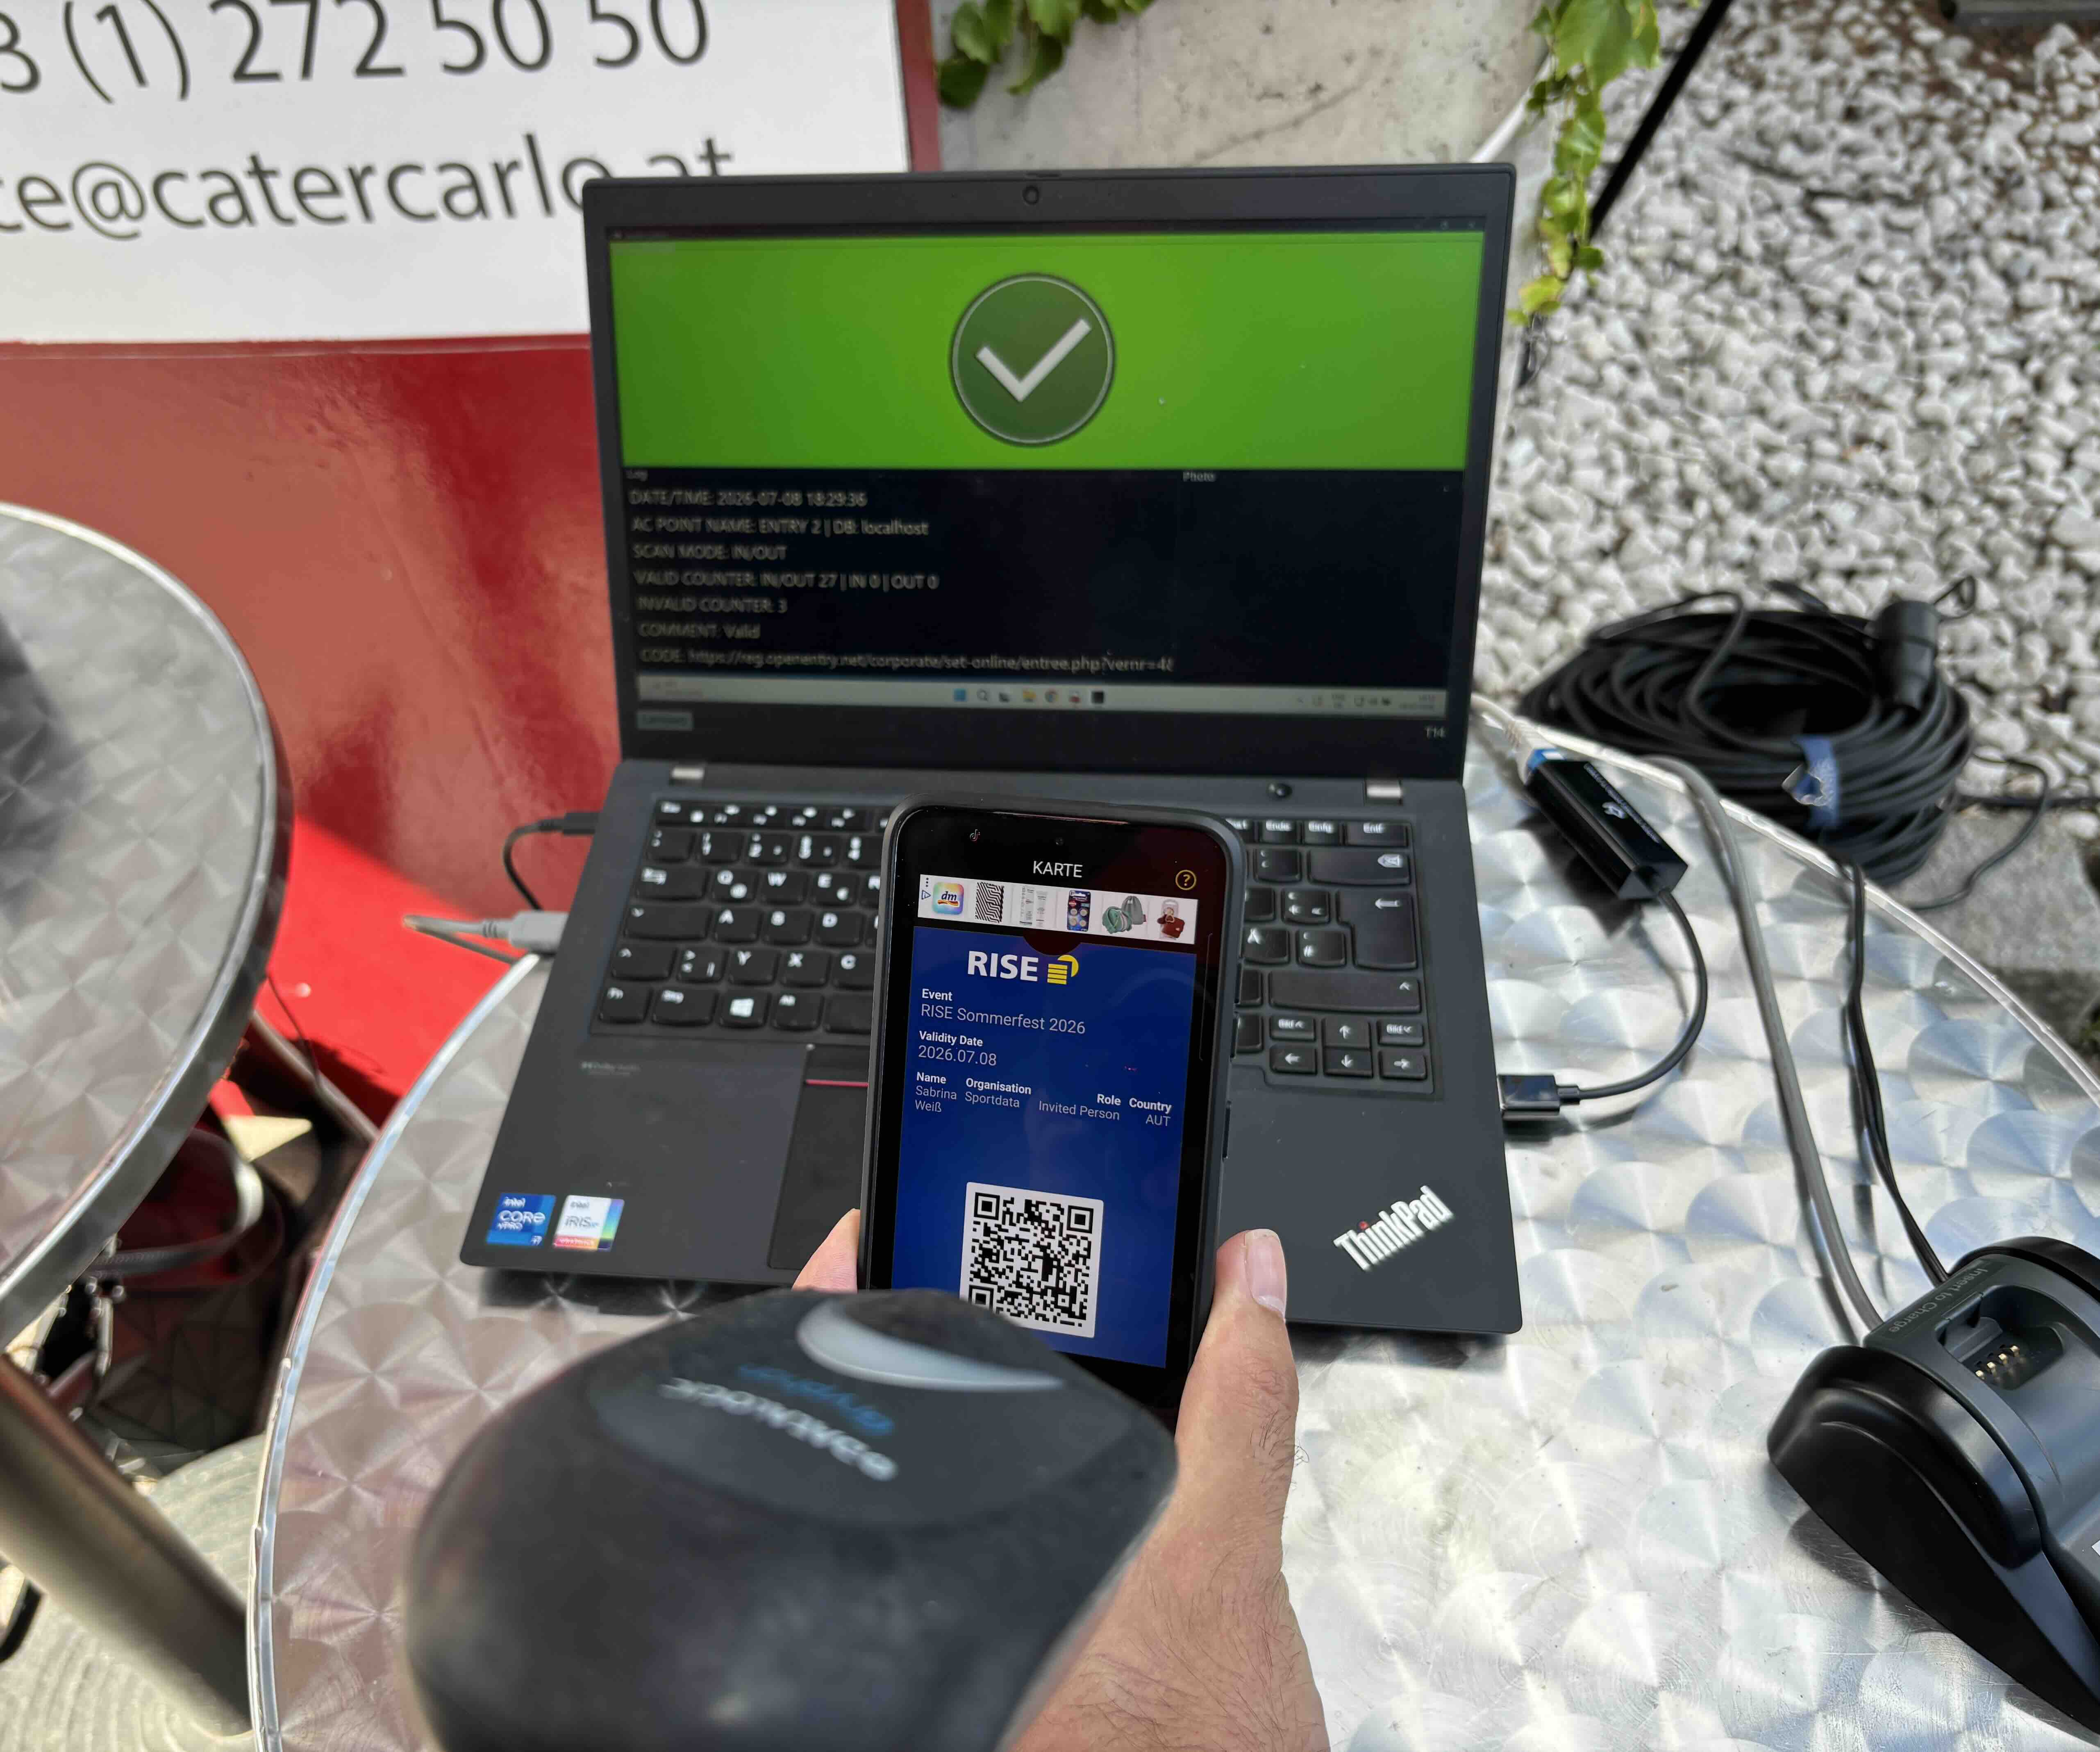
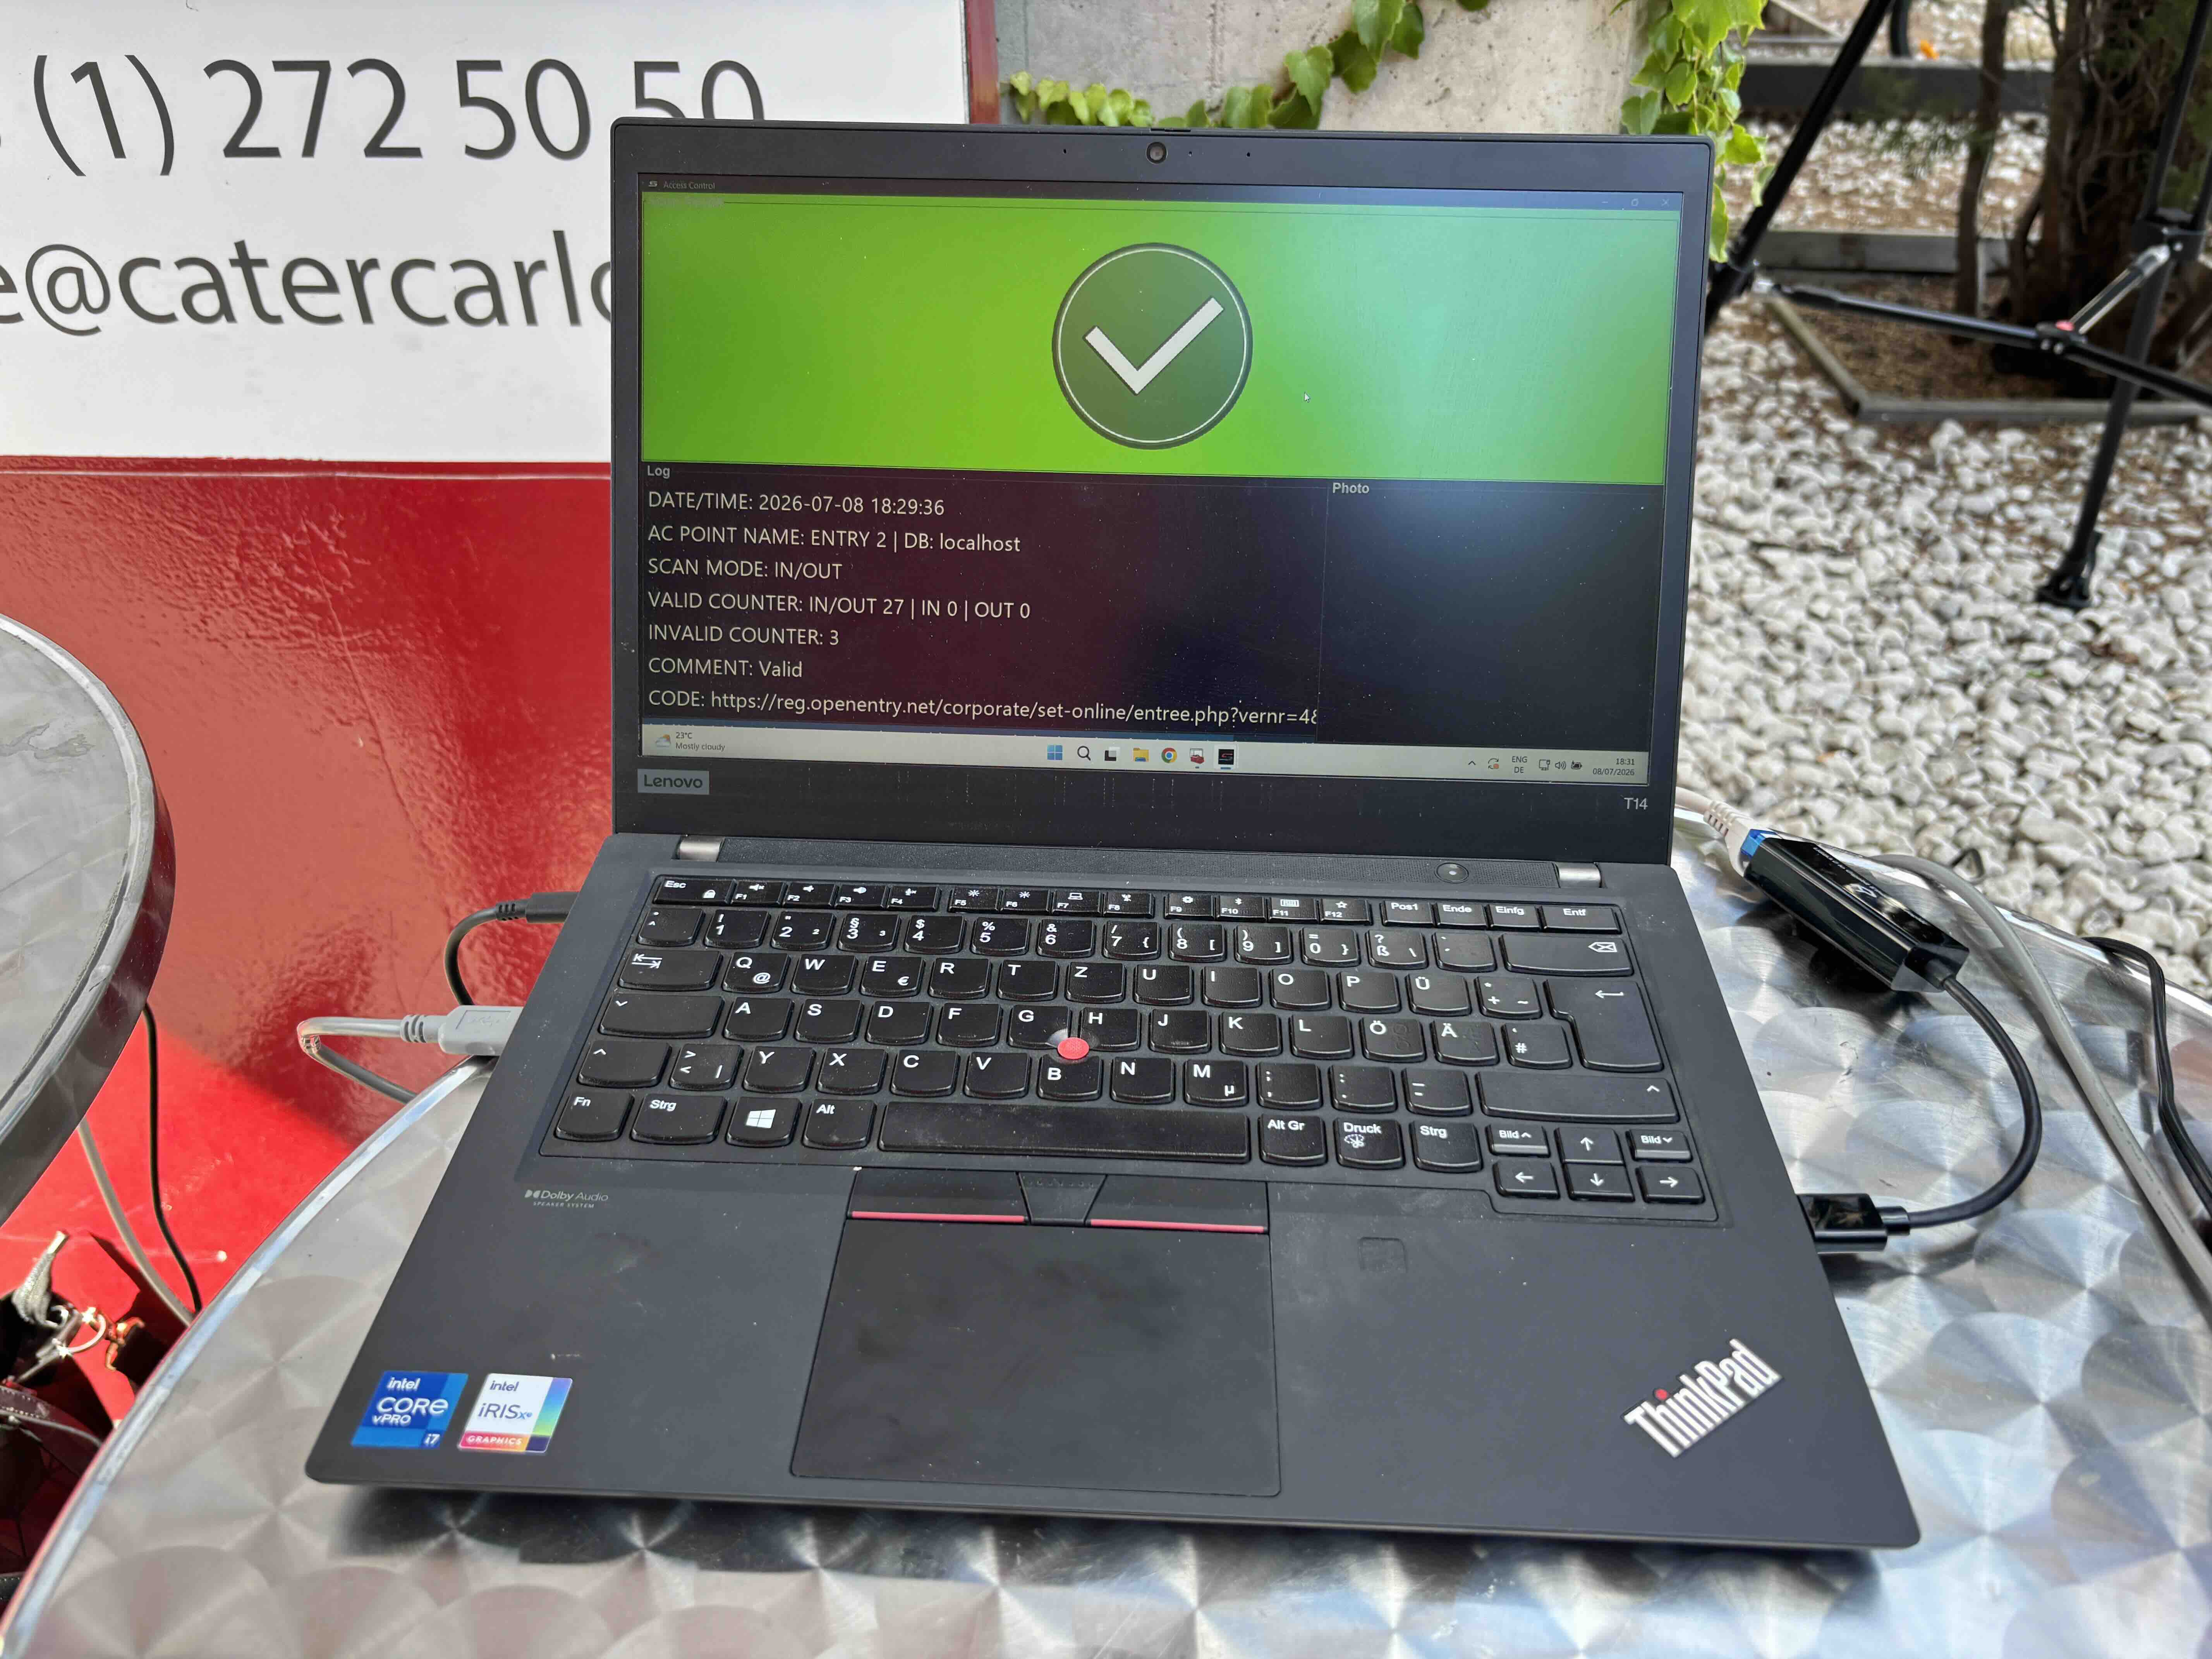
Once you scan an accreditation a large green checkmark or red cross will appear along with additional information.

IWUF Wushu Taolu System & Scoreboard

Resources

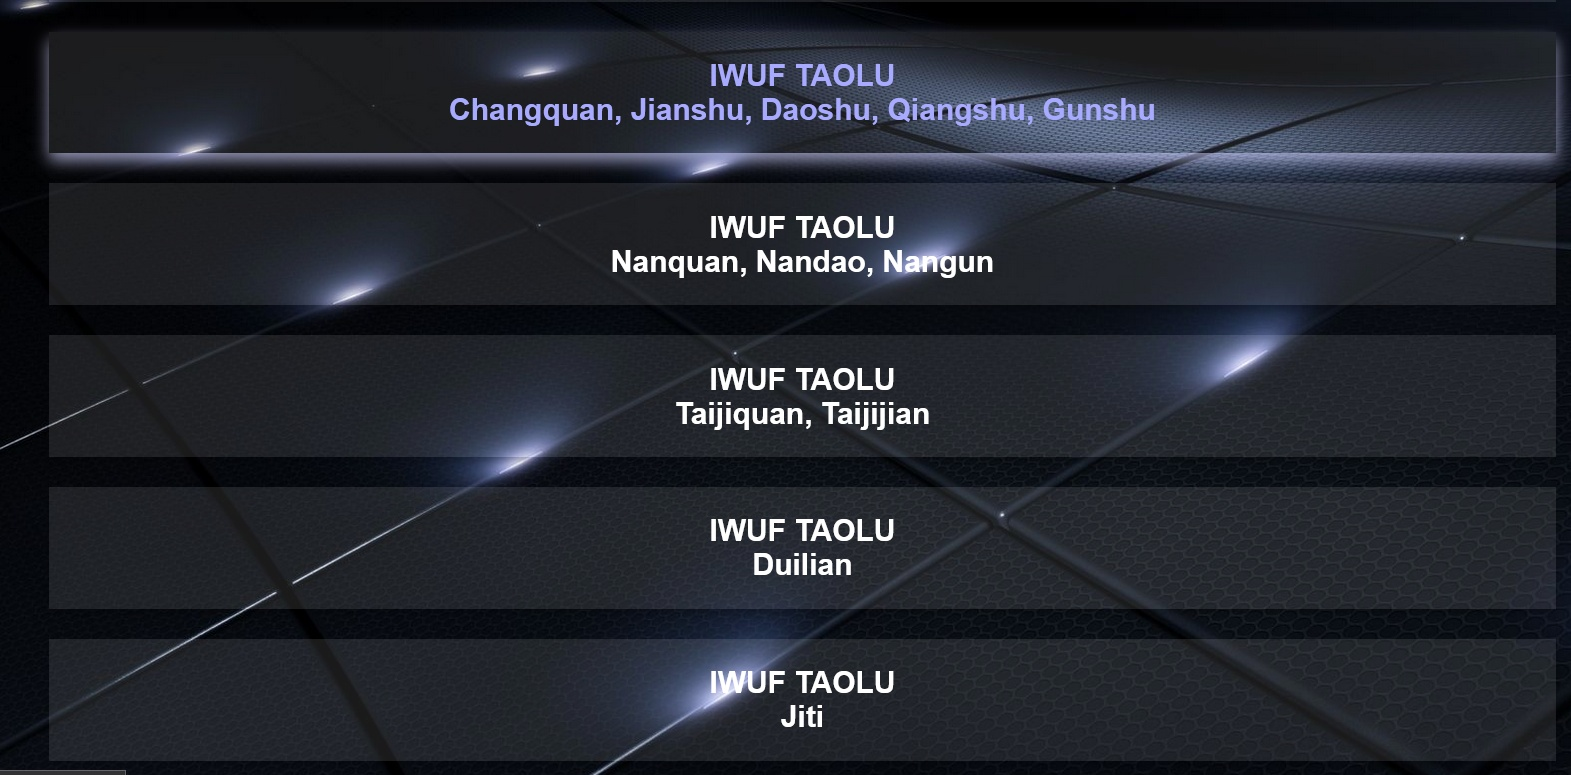
Supported Styles (with and without Difficulty)

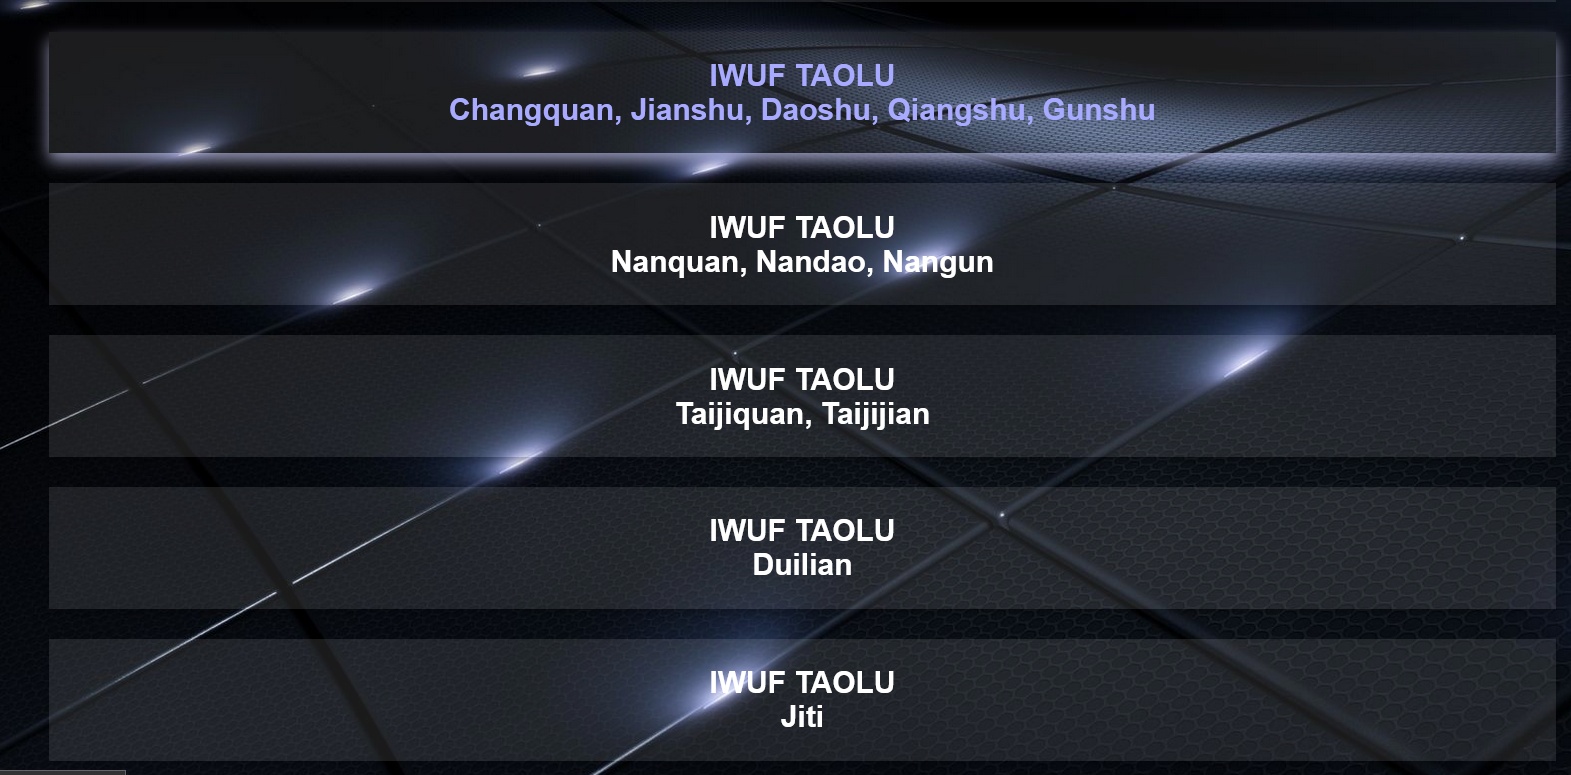
  • Changquan, Jianshu, Daoshu, Qiangshu & Gunshu
  • Nanquan, Nandao & Nangun
  • Taijiquan & Taijijian
  • Duilian
  • Jiti

SET: set Draw Mode and Draw Mode Option

Make sure the Draw Mode of the Categories are set to “Point table” and the Draw Mode Option is set to “Points->IWUF TAOLU”.

Related Video tutorials

SET: Generate Draws / Start Lists

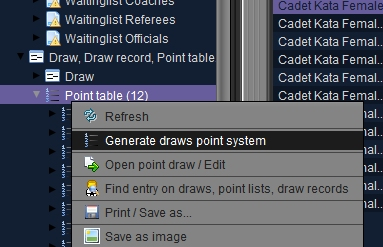
Right click on the Point table node in the Main Tree Menu and select “Generate draws point system”. Select the categories you want to generate the draws for from the list.

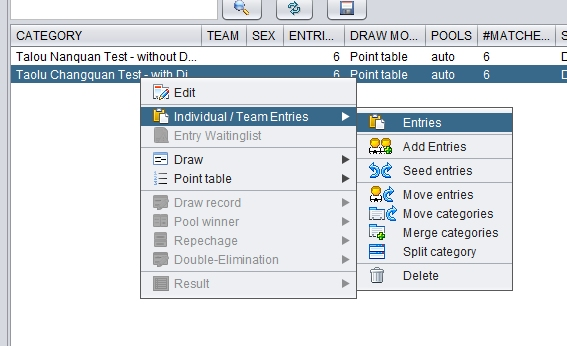
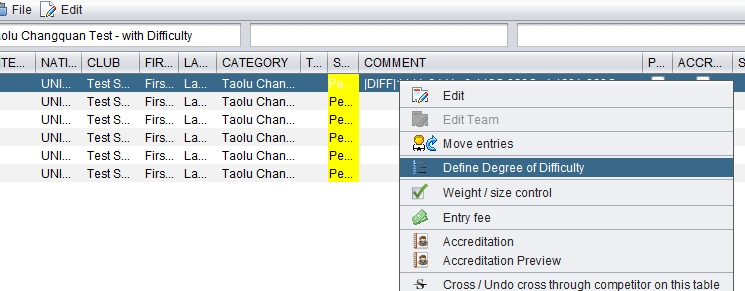
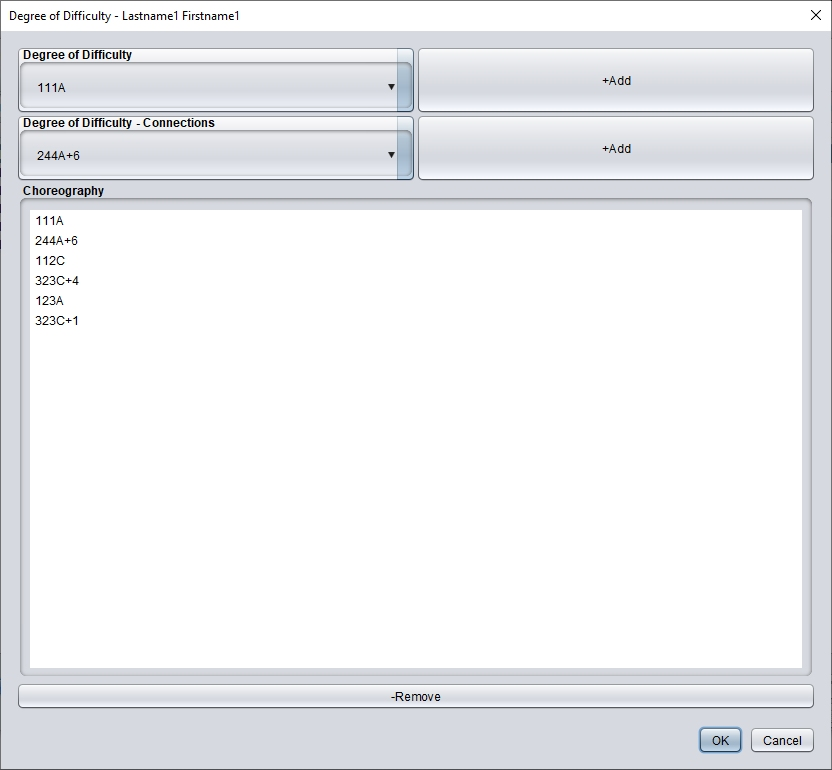
SET: set Diffuculty and Connections for registered Athletes

Open the list of Entries and right click on the Athlete you want to set the Difficulty and Connections information. Select the Diff. and Connection codes and save them.

SET: TAOLU Point Draw/List

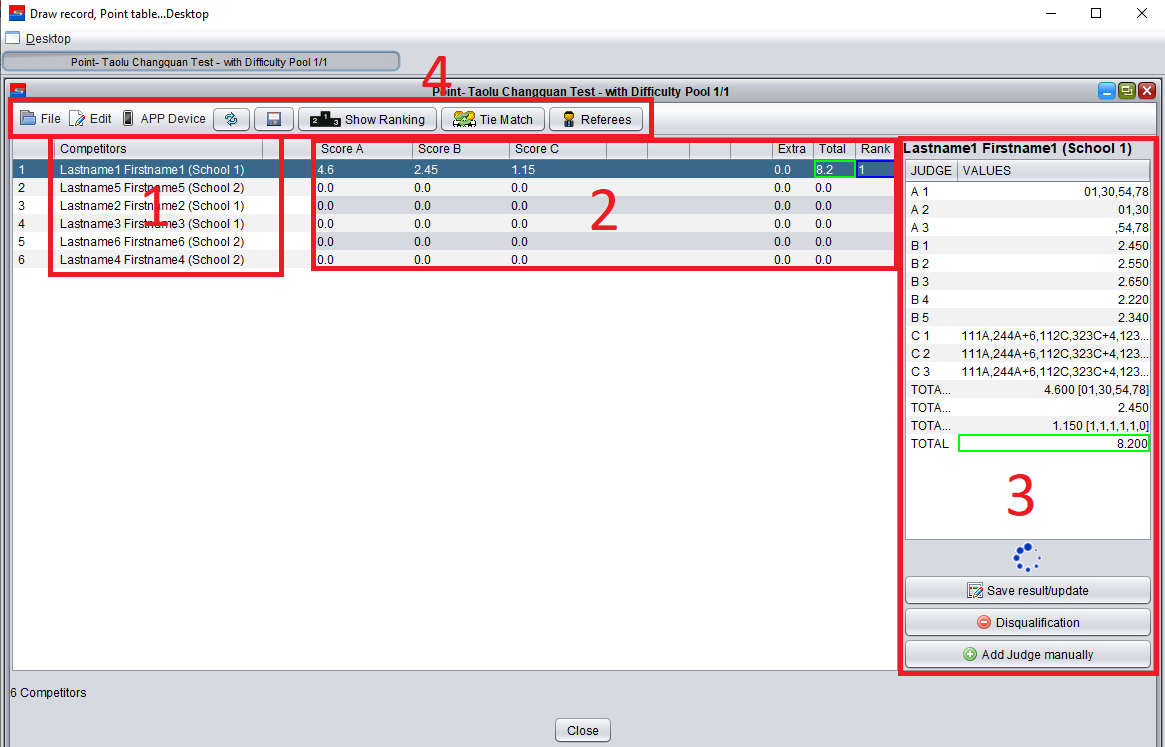
Open one generated and saved Pool/Group

  1. List of entries
    • Double click on one name in order to Show the Match on the screen
    • Right click for the context menu which allows same actions, as well as to add and remove entries manually
    • Results are generally saved automatically. This can be manually triggered as well by selecting the Save ALL Results link. If results are available, according to the IWUF rules, they will be shown on the screen
  2. Table of scores
    • All scores from all Group A, B and C Judges are saved in this rows
    • Right click inside the scores row and select “Restore Saved Scores” in order to load the saved scores into the Judge Scores list. This allows to modify already saved scores manually
    • Right click inside the scores row and select “Show points” in order to display the scores for this athlete in the Show Match windows
  3. Manual and Electronic Score Calculation Panel: See image below
    • Any score entered for a competitor or team, Manual Score or Electronic Scores, are collected ,show and computed here
    • Scores can be entered manually here
      • Press “Add Judge manually” in order to manually add a Referee to the score list
      • Double click a list cell in order to enter an new score manually
    • In order to save the final scores, click on Save result/update. If the Show Match window is open, all scores, the total score and rank are shown on the screen
    • Total scores and ranks are also shown on the SET Activity Monitor.
    • If an athlete gets disqualified, just click the Disqualification button, this will set all scores of the athlete to 0
  4. Additional Buttons
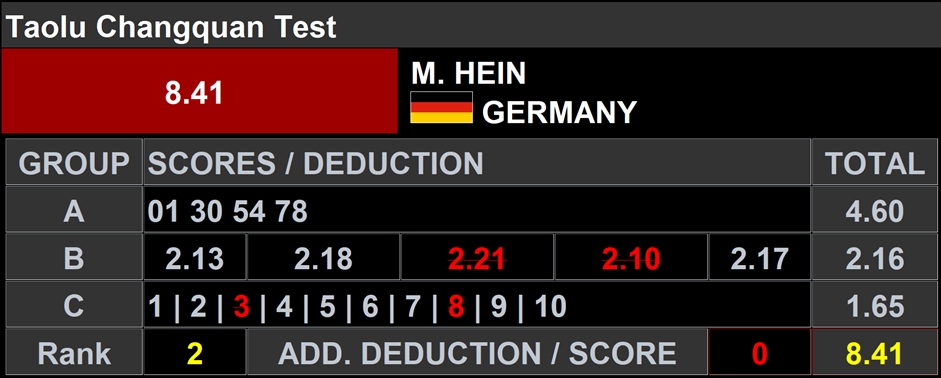
    • Show Ranking: Show the Top 4 ranked during the competition and the first 8 athletes/teams before the competition. You should show the ranking after each athlete, in order to allow the Audience to follow the competition.
    • Tie Match: in case of a tie (Athletes have the same score and rank), this button copies the athletes with the same rank to a new list, in order to perform a new Tie Match. Ties are only resolved when it is required to determine which Competitor will go on to the next round – or to determine the result of a medal contest. After the additional match, the Extra Score field in the main table can be used to mark the winner of the tie match. A score of 0.001 should be entered for the athlete who won the Tie Match.
    • Next Round: The operator/admin should be responsible to check if all results and scores are complete and he should also merge the Top athletes to the next round groups, by using the “Next Round” button. The final order of the athletes in the new groups are automatically managed by the software, according to the WT rules.

Manual and Electronic Score Calculation Panel

Scoreboard

Show results

Groups, Rounds and Medal Matches

  • After finishing a Qualification Round, the Operator/Admin can generate the next final round (if needed) groups by using the “Next round” button
  • The system automatically know how to create and name new categories for the next rounds and merged groups
  • Saving of results can be manually triggered as well by selecting the Save ALL Results link from the popup menu (right click a row). If results are available they will be shown on the screen
Using the SET Scoring App (for Browsers) for Electronic Scoring

Pre-Conditions

  • All SET client laptops and the scoring devices have to be in the same network
  • All SET clients laptops and scoring devices must have a static IP address
  • Make sure to enable Javascript and Cookie support on the scoring device browser
  • Make sure to use only one Browser for scoring (don’t mix different browsers). Pairing information are stored as Cookies on the scoring device Browser. Only the Browser on the scoring device used for pairing stores the paring information!

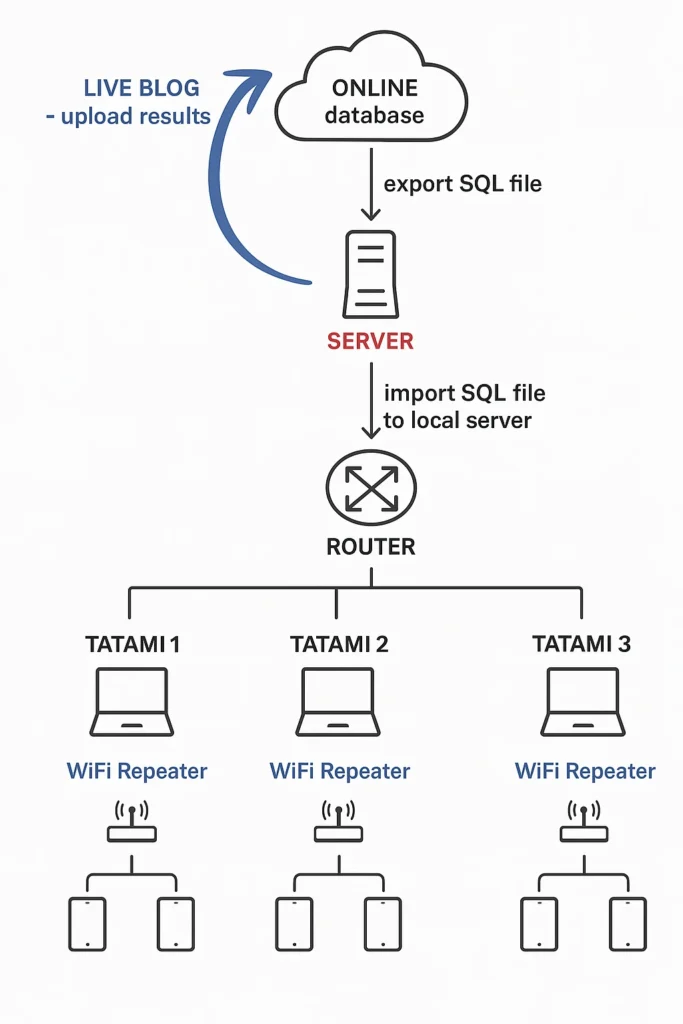
  • Its recommended to use a wired local network.  Alternatively (if stable and performance allows) you can use additional Wireless Repeaters on all Mats, in order to have better Wireless connection for the scoring devices.
  • All SET client laptops must have disabled their firewall and any anti virus software
  • Port 8080 needs to be use to communicate with the scoring devices, so make sure no other software or firewall is blocking this Port

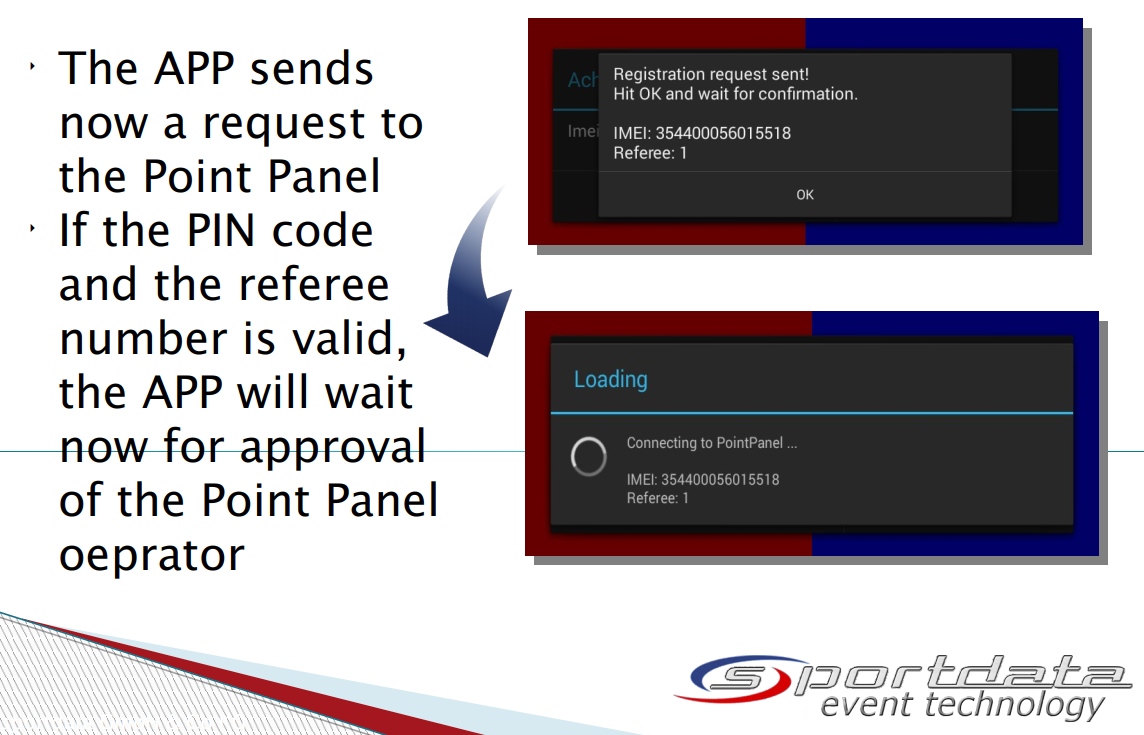
Pair the scoring devices with the client computer

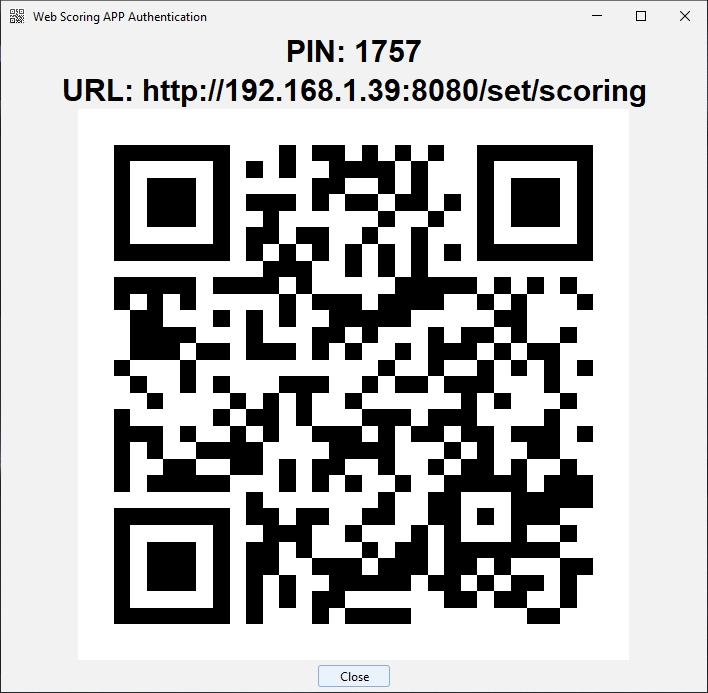
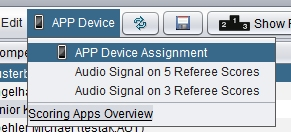
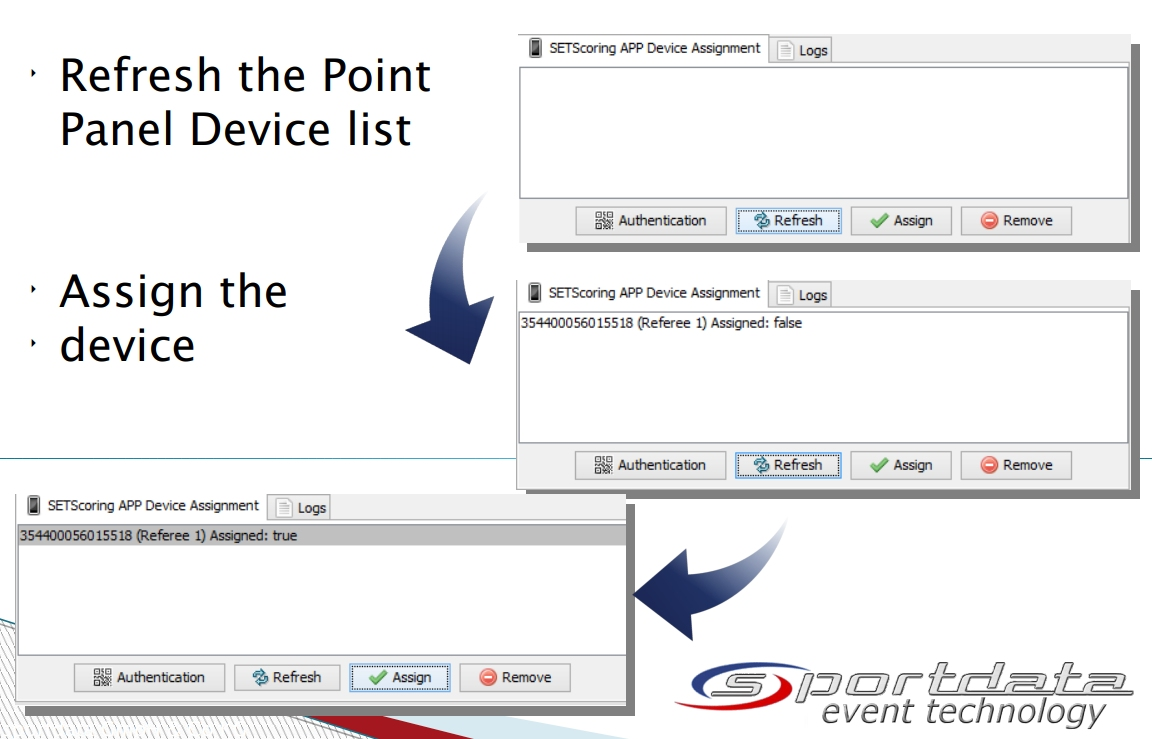
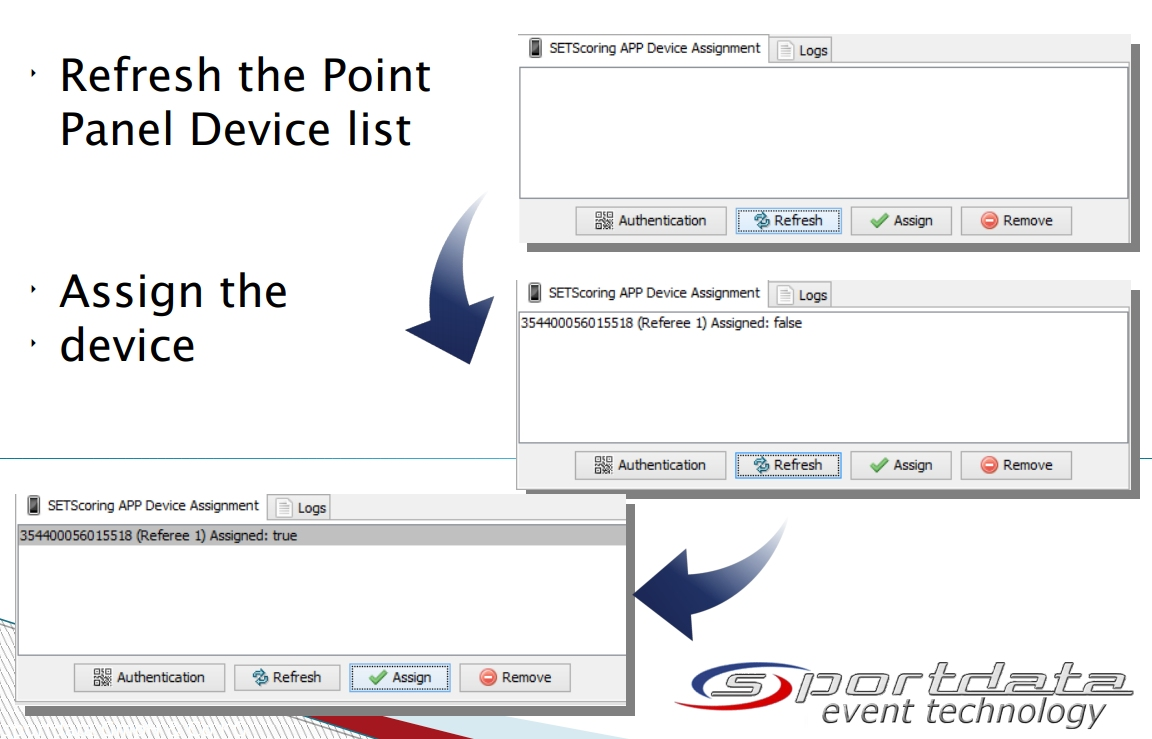
  • Open the “APP Device Assignment”
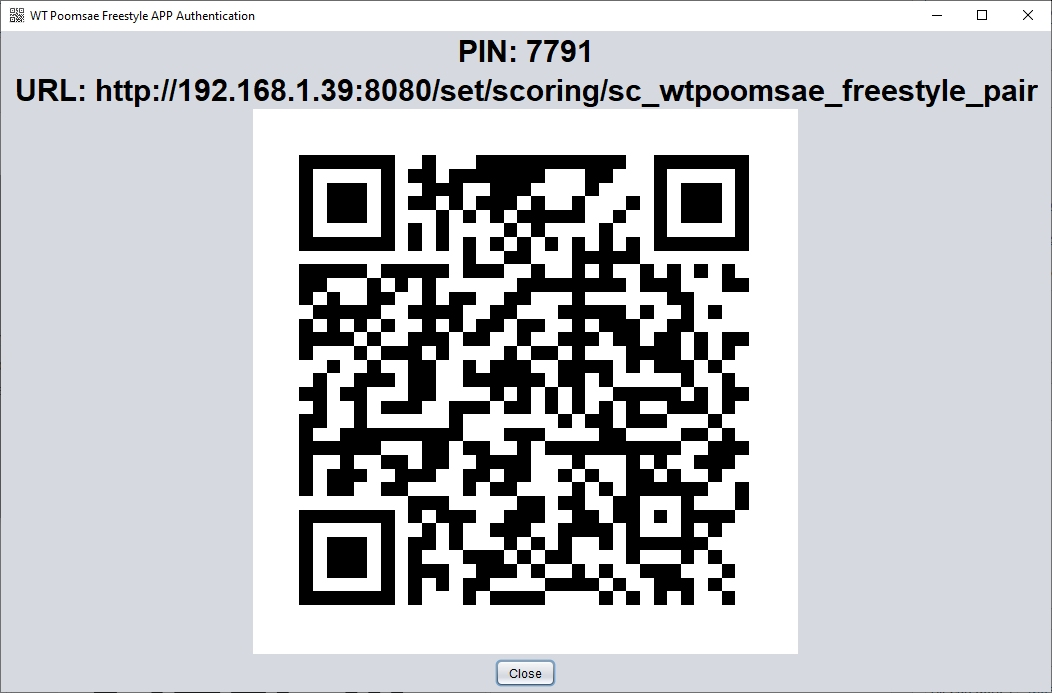
  • Press the Authentication button
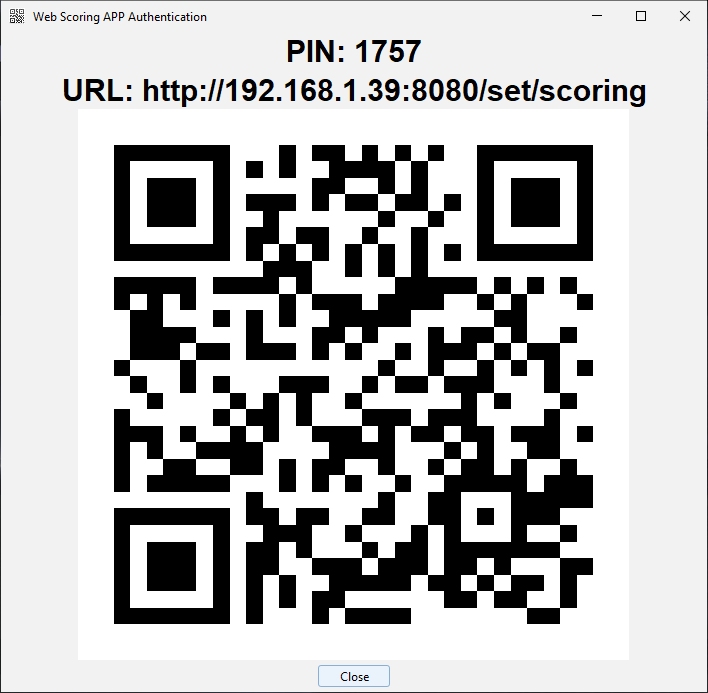
  • This will create a new PIN code and QR Code for the authentication URL
    Note: each time you open the Authentication window a new PIN code will be generated for security reasons
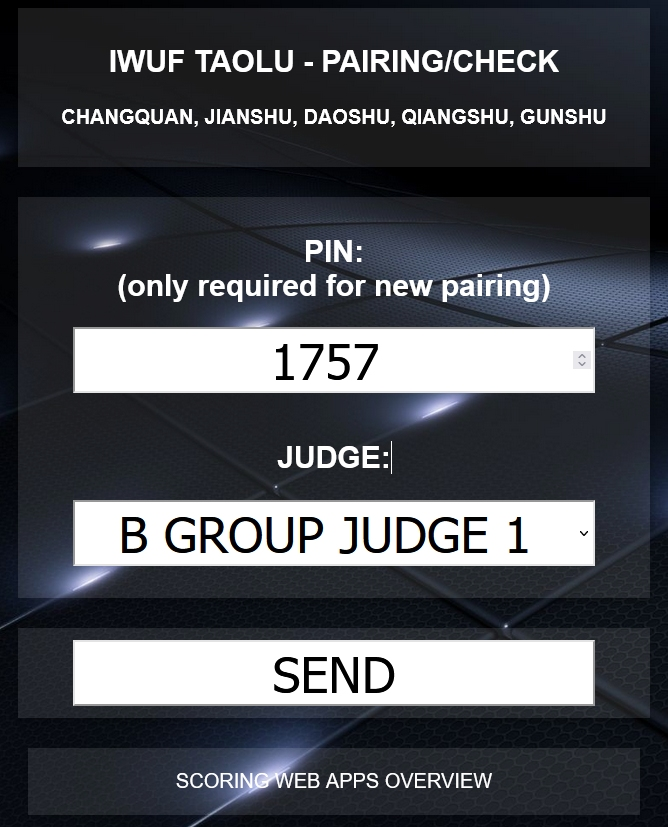
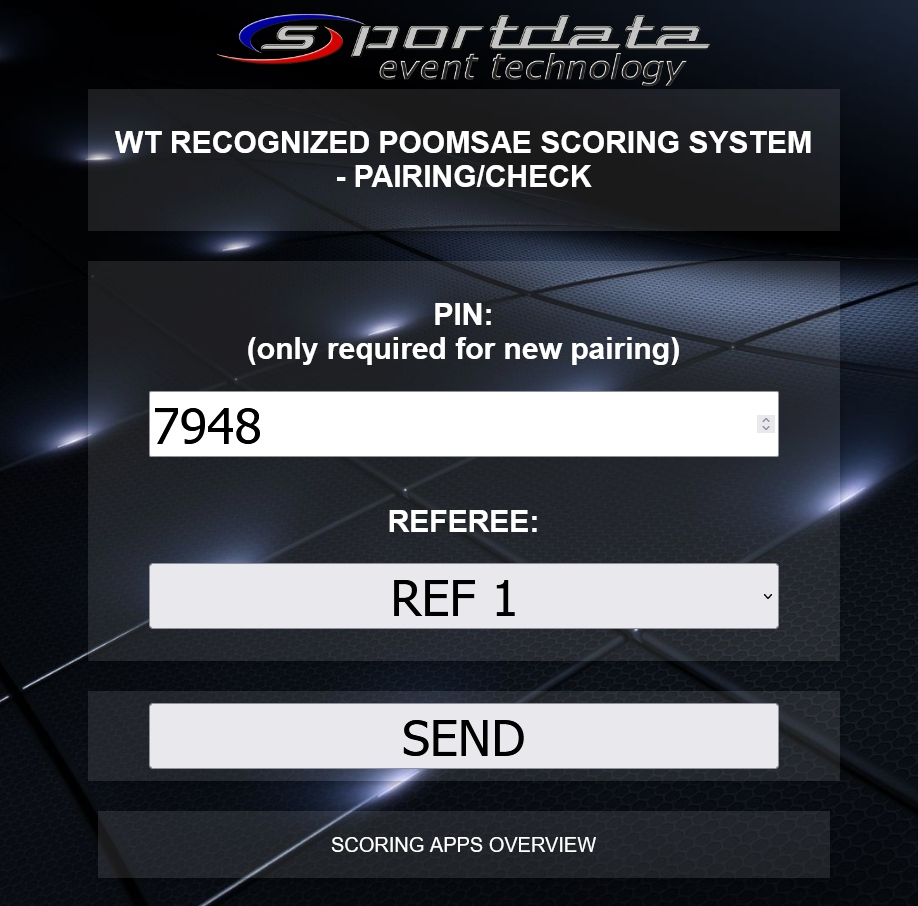
  • Scan the QR Code with a QR Code reader application on your scoring device. Alternatively open your scoring device browser and manually enter the URL.
  • Select the Style and Scoring System
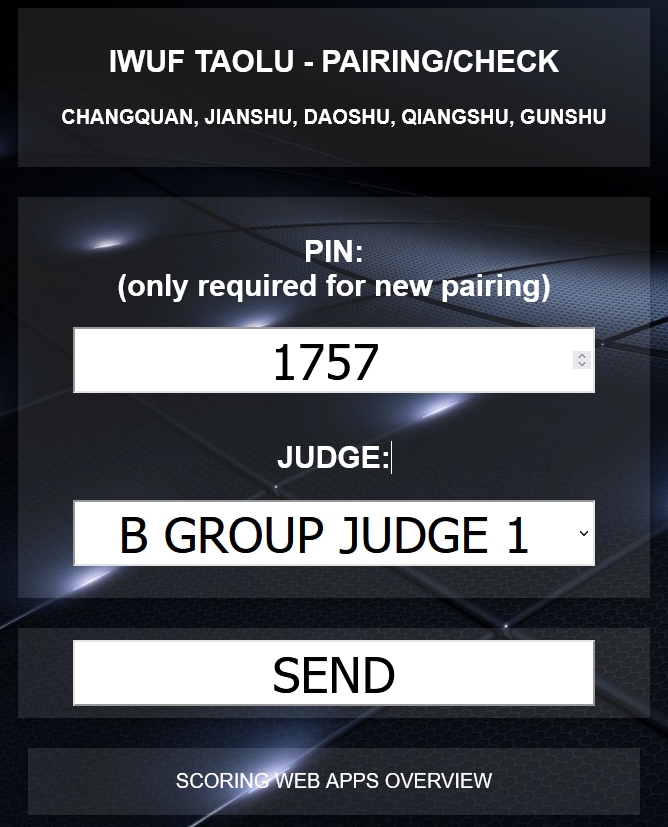
  • Send the Pin and select the Judge
  • Click on Refresh to see the Status of your Request Approval
  • Press the RELOAD Button in the Browser of the scoring device. You are now ready to score!
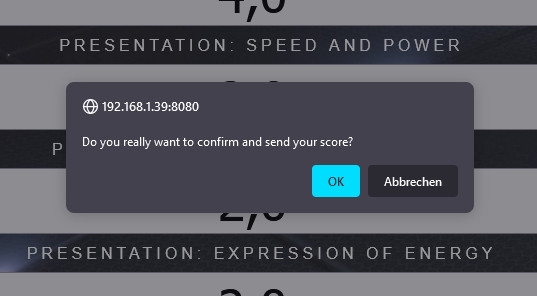
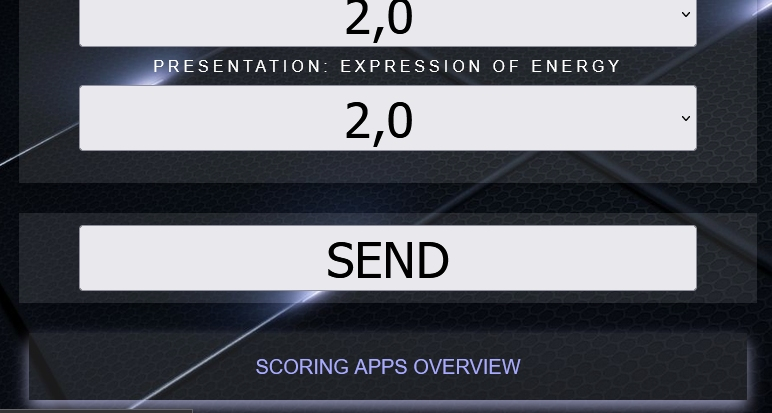
  • SEND: shows first a confirmation popup -> if confirmed sends all scores to the client computer
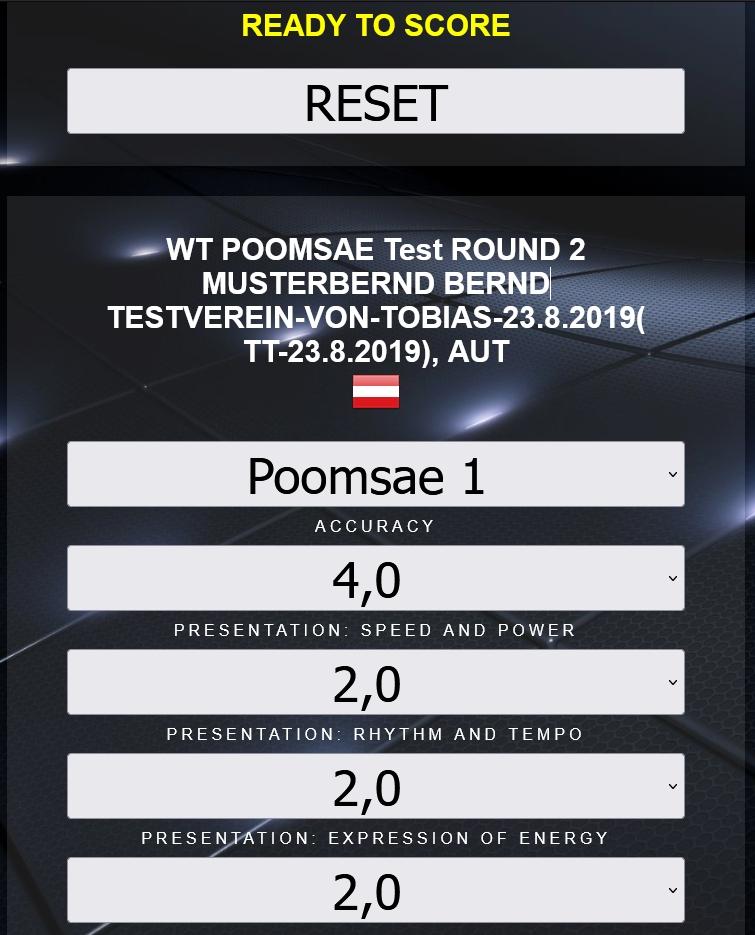
  • RESET: sets all scores and fields back to the default values.
  • RESET also get Athlete and Competition data, so make sure to see the correct Athlete data!

Recommended Hardware

Tablets

Huawei MediaPad T3 Wifi Tablet-PC

Samsung Galaxy Tab A 

Lenovo Tab E7

OTG Lan Adapter to connect to wired network

Plugable USB 2.0 OTG

Ring/Match Area Router

Netgear R6120-100UKS AC1200 Gigabit Dual Band WLAN Router 

NETGEAR WNDR3400 – wireless router

World Taekwondo (WT) Compliant OVR Integration – Kyorugi Competition


Prerequisites:

  • All connected computers and devices are in the same network
  • Any firewall and anti virus software is disabled
  • Port 8080 is not blocked by any other software

SET: Category Configuration

In order to sync match and category information with the DAEDO-tkStrike and KPNP-TKDScoring PSS system, make sure to provide the following additional Category Configuration:

  • Body Level
  • Head Level
  • Rounds
  • Round Time
  • Kyeshi Time
  • Rest Time
  • Golden Point enabled
  • Golden Point Time

Related Video tutorials (see SET-Other category settings)

SET: Generate Draws and Draw Records

The next step is to generate the Draws and Draw Records in the system in order to continue with the Match planning and scheduling. See article here

SET: Generate Matches and add to Timetable (Match Caller)

Next step is to generate the Matches and Match numbering and connect them with the Schedule. see article here.

SET: WT OVR Integration

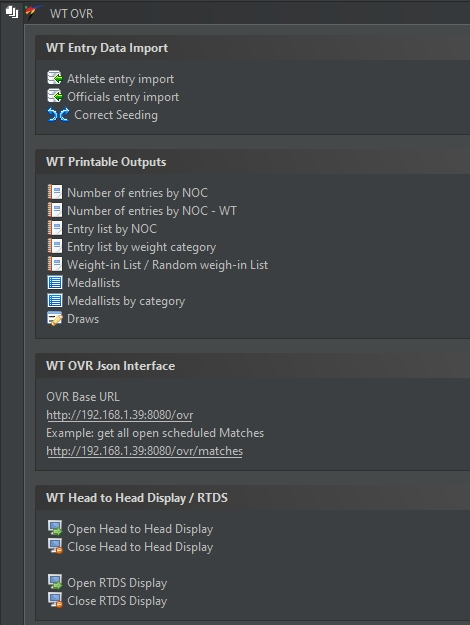
All WT OVR functions can be found in the SET WT OVR Panel.

The SET clients starts an internal Webserver. The WT OVR Json Interface address can be found in the WT OVR Panel. E.g. in this example the OVR address is:

http://192.168.1.39:8080/ovr

In order to validate if the OVR Interface is enabled, just click on the link in the panel. The browser should open and show a “WT OVR Request GET 200” message.

Best of 3

In order to activate the Best of 3 mode, just make sure to check the checkbox “Best of 3 mode”.

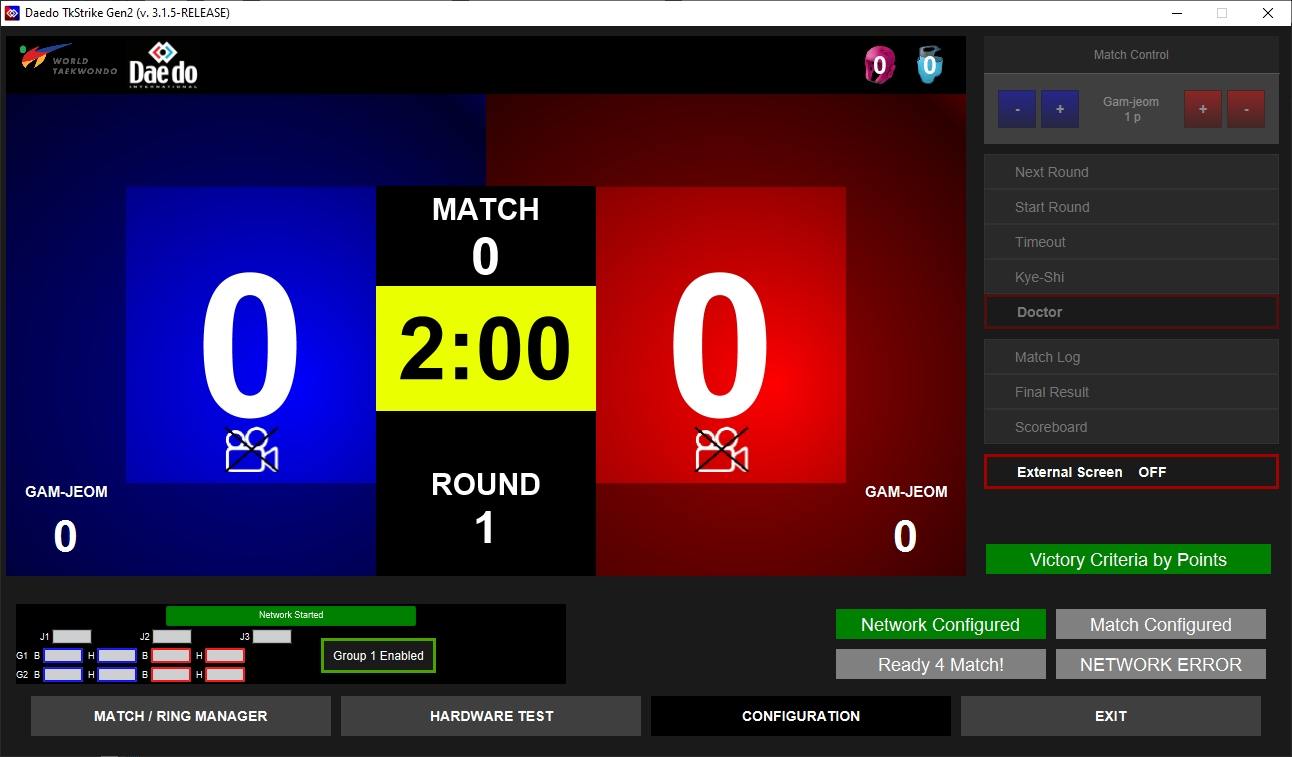
Daedo PSS tkStrike: get Match Information from SET

Once the Matches are numbered and scheduled, you can import all Matches from SET into tkStrike using the WT OVR Interface.

  1. Click on Configuration
  2. Go to the “External” Tab
  3. There you find a section “WT OVR Configuration”. Set the Mat number and the OVR URL from SET (e.g. http://192.168.1.39:8080/ovr,  like in the example above)
  4. Test the connection. You should see a message popup showing “The OVR connection is OK!”
  5. Save the configuration
  6. Now go to “Match/Ring Manager”
  7. Click on “Next Match”, this will import non finsihed and scheduled Matches from SET to tkStrike
  8. You can load the imported Matches with “Existing Match”
  • All scoring information will be sent in real time automatically to SET via the OVR Interface and processed in SET. This allows SET to show updates of Timetables, Activities, etc.. as well as to process automatically results.
  • New matches or changes of Matches can be updated the same way by loading the matches new into tkStrike.

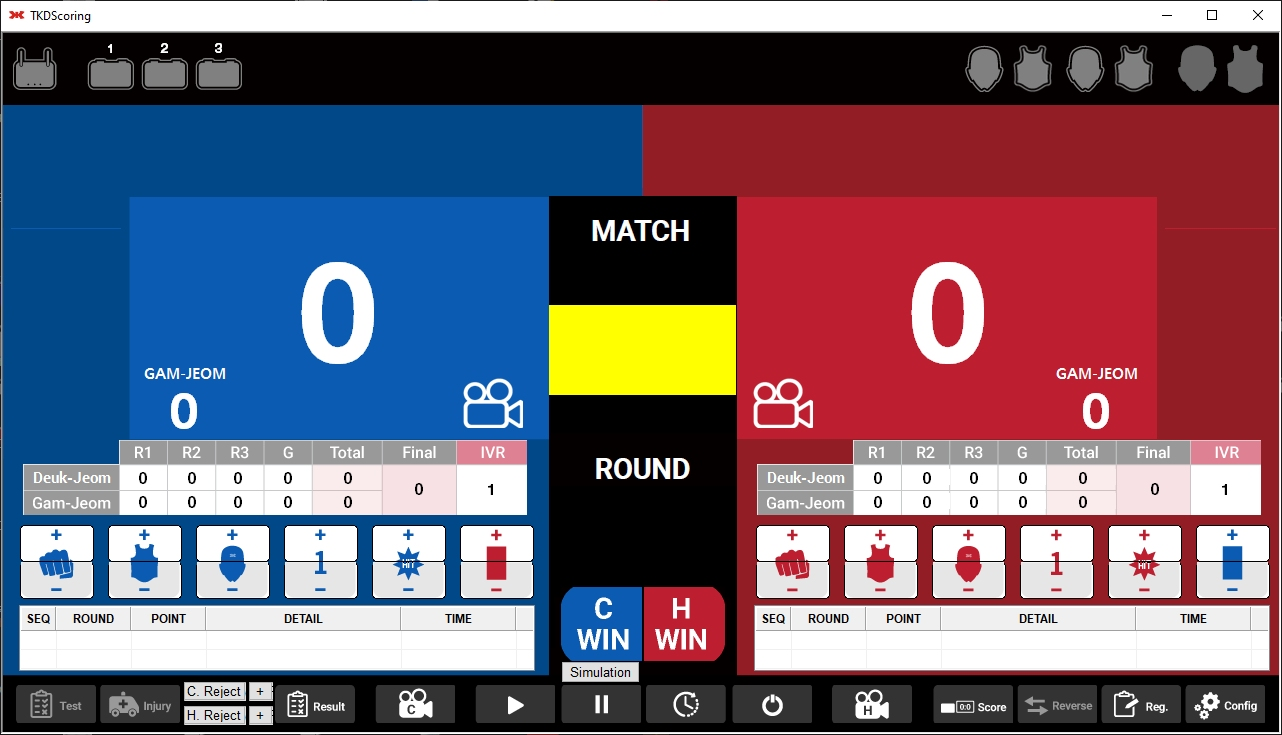
KPNP TKDScoring: get Match Information from SET

Once the Matches are numbered and scheduled, you can import all Matches from SET into KPNP TKDScoring using the WT OVR Interface.

  1. Click the Config button and set the Court in the Rule Tab.
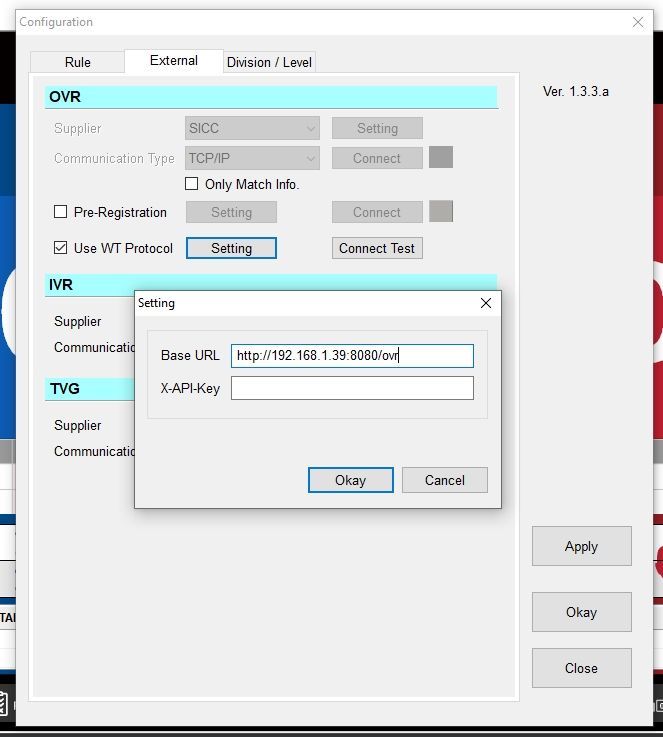
  2. Go to the “External” Tab
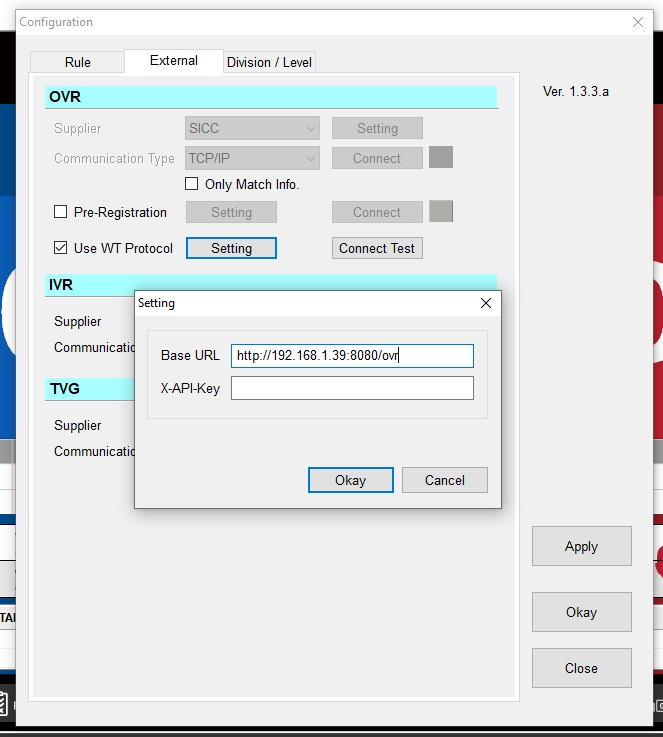
  3. There you find a section “OVR”. Click the Checkbox “Use WT Protocol” and open the Settings. Enter the Base URL, the OVR URL  from SET (e.g. http://192.168.1.39:8080/ovr,  like in the example above) and click on “Okay”. See image below
  4. Test the connection. You should see a message popup showing “HTTP Response 204”
  5. Apply the configuration
  6. Now click on  the “Reg.” button
  7. Click on “Load OVR Match”, this will import the next non finsihed and scheduled Match from SET.
  • All scoring information will be sent in real time automatically to SET via the OVR Interface and processed in SET. This allows SET to show updates of Timetables, Activities, etc.. as well as to process automatically results.
  • New matches or changes of Matches can be updated the same way by loading the matches new into tkStrike.

RTDS and Head to Head Display

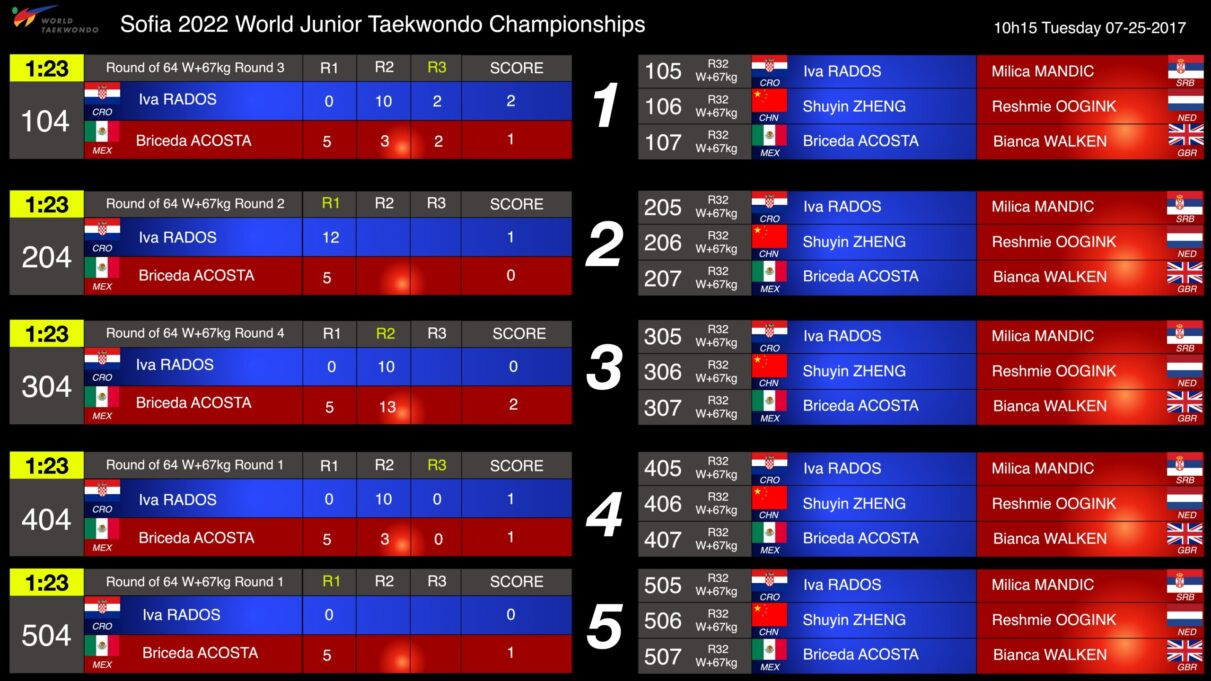
The RTDS and the Head to Head display can be found and opened also from Panels -> WT OVR.

Please note that the displays only show live information if the OVR Information from the Daedo and KPNP PSS is sent directly to the same computer.

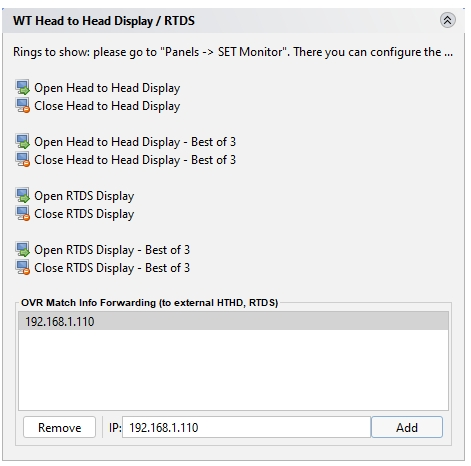
In case you use a different OVR server or multiple of them, you can forward the OVR message to any computers running the RTDS and Head to Head displays.

To do so, please add the IP Address of the RTDS and Head to Head computers into the list “OVR Match Info Forwarding” on the OVR Server (getting the messages from Daedo and KPNP).

WT Poomsae System (Recognized and Freestyle)

World Taekwondo (WT) Poomsae System

Resources

SET: set Draw Mode and Draw Mode Option

Make sure the Draw Mode of the WT Poomsae Categories are set to “Point table” and the Draw Mode Option is set to “Points->WT POOMSAE RECOGNIZED or Points->WT POOMSAE FREESTYLE”.

Related Video tutorials

SET: Generate Draws / Start Lists

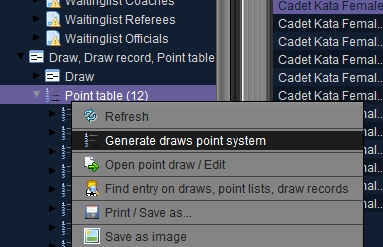
Right click on the Point table node in the Main Tree Menu and select “Generate draws point system”. Select the categories you want to generate the draws for from the list.

SET: WT Poomsae Point Draw/List

Open one generated and saved Pool/Group

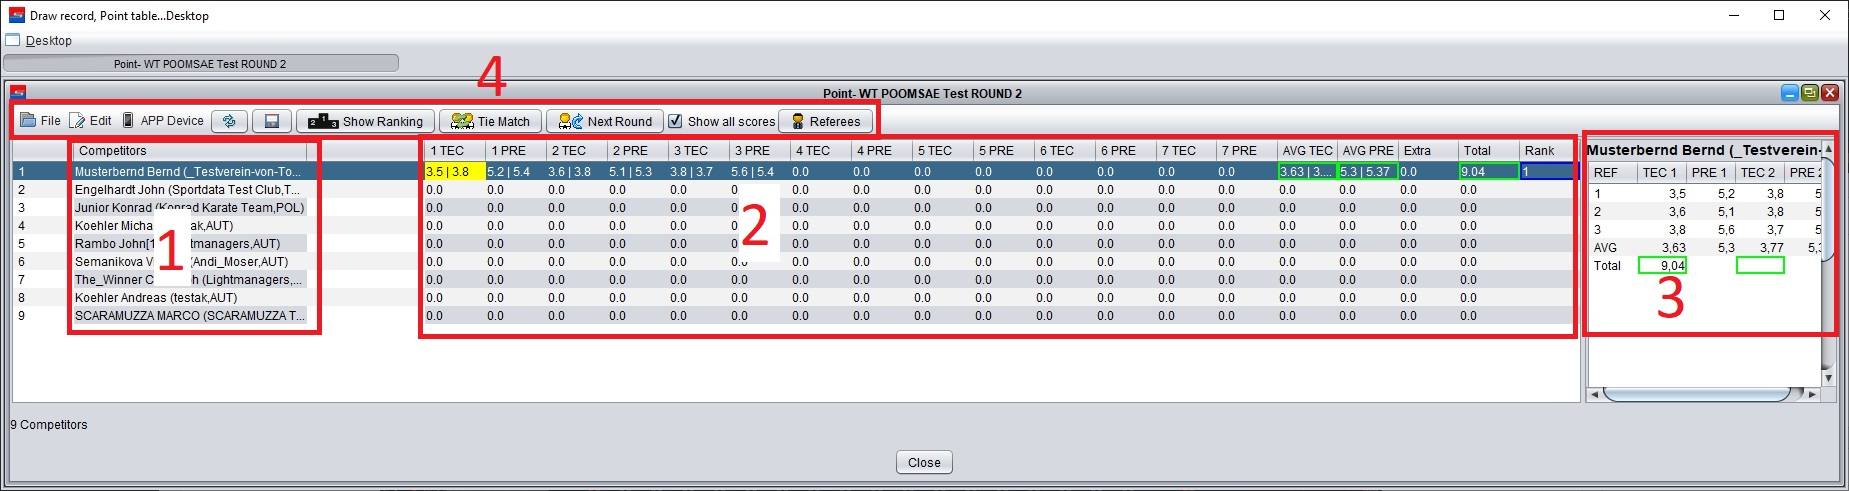
  1. List of entries
    • Double click on one name in order to Show the Match on the screen
    • Right click for the context menu which allows same actions, as well as to add and remove entries manually
    • Results are generally saved automatically. This can be manually triggered as well by selecting the Save ALL Results link. If results are available, according to the WT rules, they will be shown on the screen
  2. Table of scores
    • All scores from 3, 5 or 7 Referees are saved in this rows
    • Double click inside the scores row in order to load the saved scores into the Referee Scores list. This allows to modify already saved scores manually
    • Panels of 3, 5 or  to 7 Referees are supported
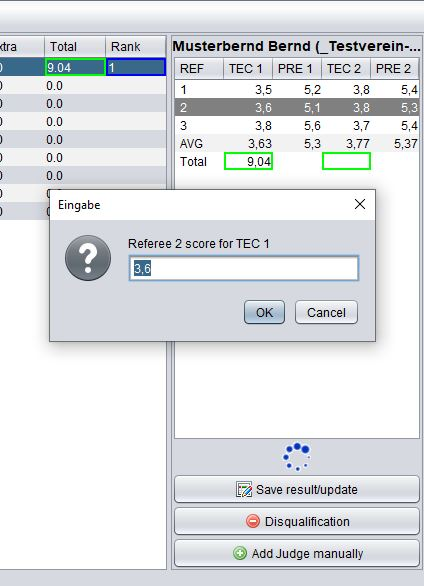
  3. Manual and Electronic Score Calculation Panel:
    • Any score entered for a competitor or team, Manual Score or Electronic Scores, are collected ,show and computed here. (See image below)
    • Scores can be entered manually here
      • Press “Add Judge manually” in order to manually add a Referee to the score list
      • Double click a list cell in order to enter an new score manually
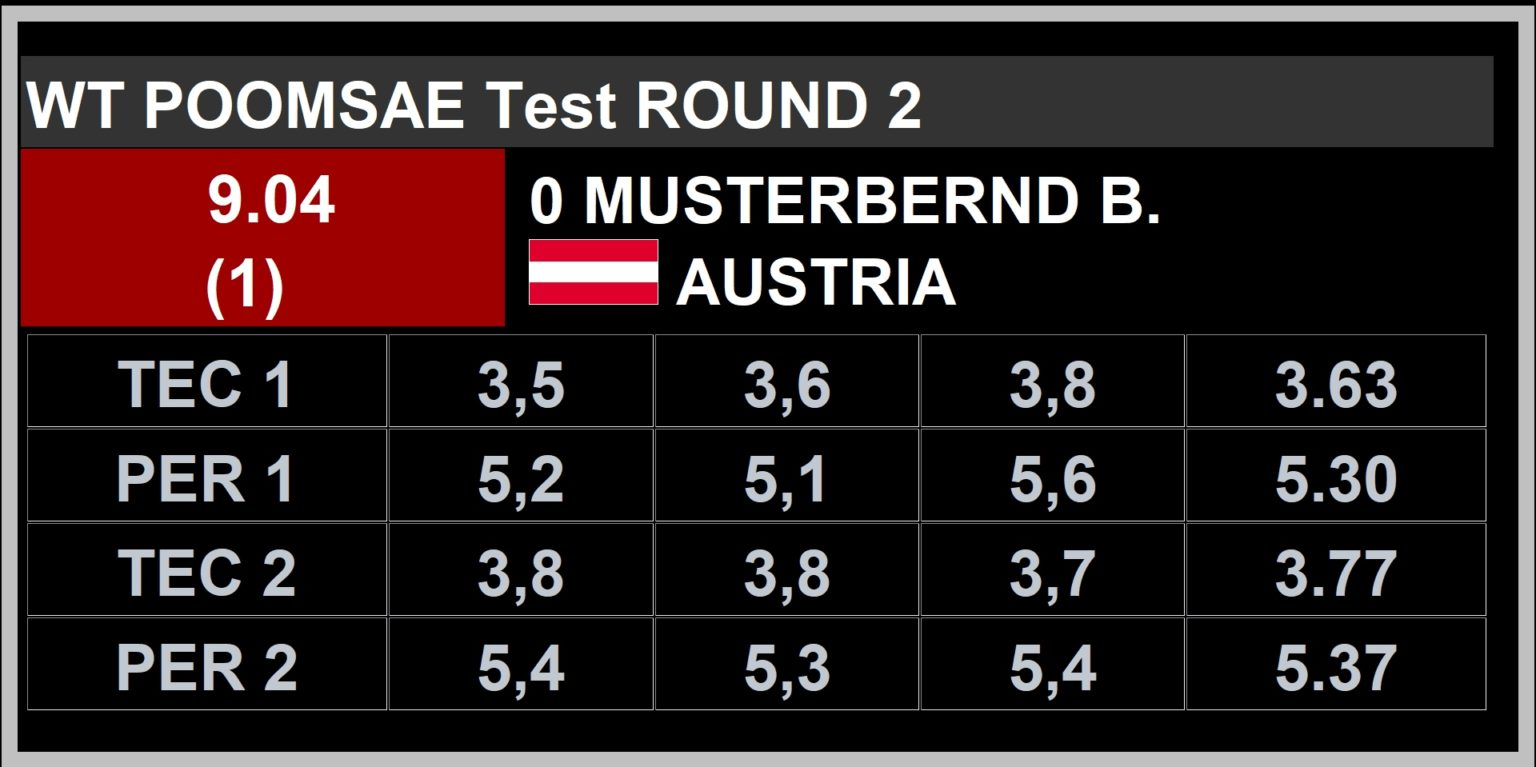
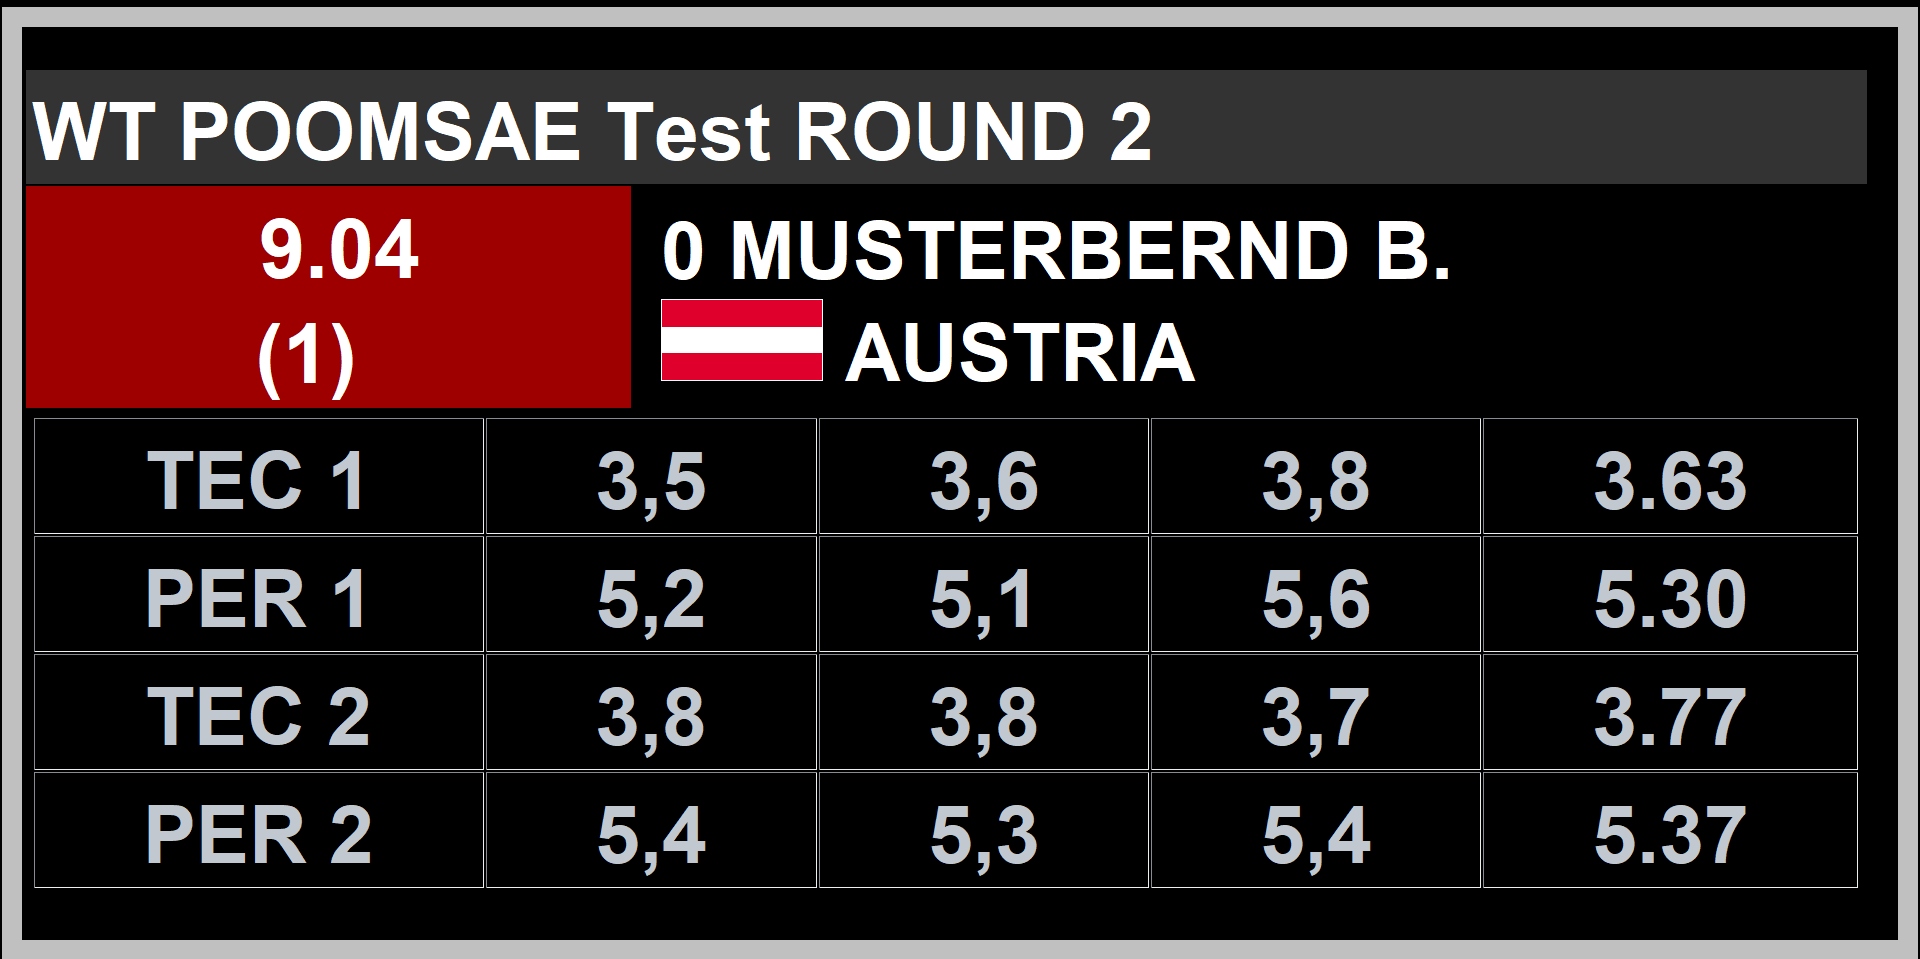
    • In order to save the final scores, click on Save result/update. If the Show Match window is open, all scores, the total score and rank are shown on the screen. See image below.
    • Total scores and ranks are also shown on the SET Activity Monitor. Removed scores are show in red. See image below.
    • If an athlete gets disqualified, just click the Disqualification button, this will set all scores of the athlete to 0
  4. Additional Buttons
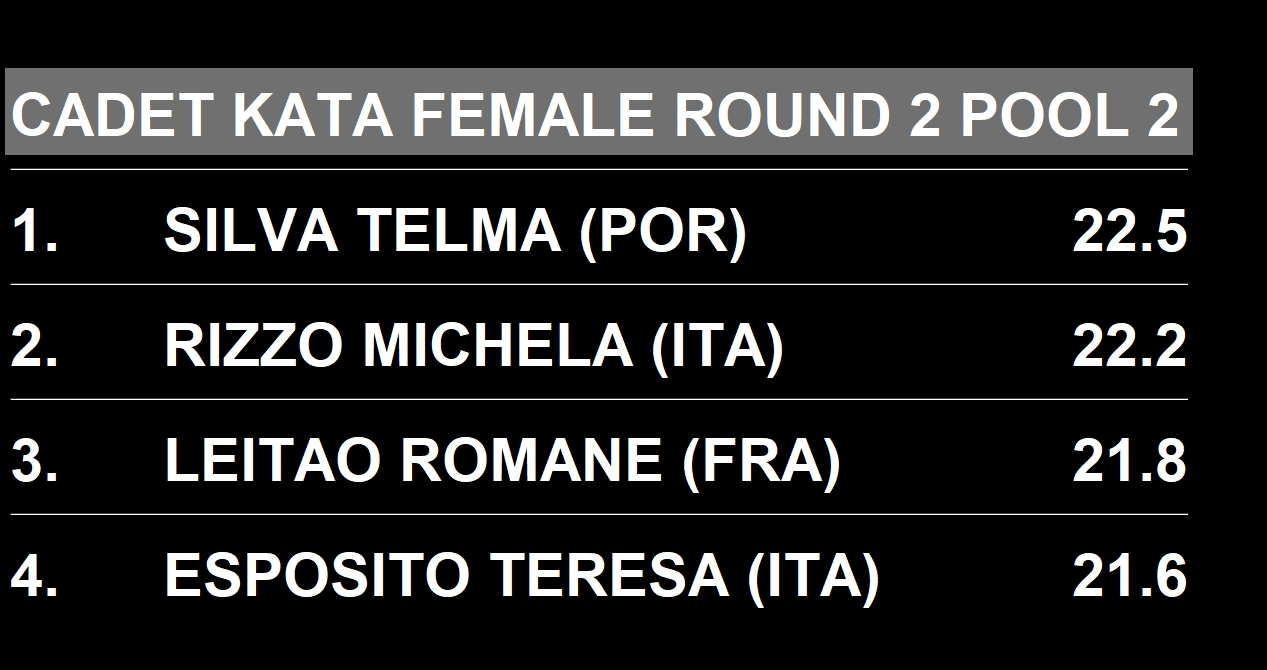
    • Show Ranking: Show the Top 4 ranked during the competition and the first 8 athletes/teams before the competition. You should show the ranking after each athlete, in order to allow the Audience to follow the competition.

  1. Tie Match: in case of a tie (Athletes have the same score and rank), this button copies the athletes with the same rank to a new list, in order to perform a new Tie Match. Ties are only resolved when it is required to determine which Competitor will go on to the next round – or to determine the result of a medal contest. After the additional match, the Extra Score field in the main table can be used to mark the winner of the tie match. A score of 0.001 should be entered for the athlete who won the Tie Match.
  2. Next Round: The operator/admin should be responsible to check if all results and scores are complete and he should also merge the Top athletes to the next round groups, by using the “Next Round” button. The final order of the athletes in the new groups are automatically managed by the software, according to the WT rules.

Manual and Electronic Score Calculation Panel

Total Scores in Red

Show Ranking

Groups, Rounds and Medal Matches

  • After finishing a Round, the Operator/Admin should generate the next round groups by using the “Next round” button
  • The system automatically know how to create and name new categories for the next rounds and merged groups
  • Saving of results can be manually triggered as well by selecting the Save ALL Results link from the popup menu (right click a row). If results are available, according to the WT rules, they will be shown on the screen

Using the SET Scoring App (for Browsers) for Electronic Scoring

Pre-Conditions

  • All SET client laptops and the scoring devices have to be in the same network
  • All SET clients laptops and scoring devices must have a static IP address
  • Make sure to enable Javascript and Cookie support on the scoring device browser
  • Make sure to use only one Browser for scoring (don’t mix different browsers). Pairing information are stored as Cookies on the scoring device Browser. Only the Browser on the scoring device used for pairing stores the paring information!
  • Its recommended to use a wired local network.  Alternatively (if stable and performance allows) you can use additional Wireless Repeaters on all Mats, in order to have better Wireless connection for the scoring devices.
  • All SET client laptops must have disabled their firewall and any anti virus software
  • Port 8080 needs to be use to communicate with the scoring devices, so make sure no other software or firewall is blocking this Port

Pair the scoring devices with the client computer

  • Open the “APP Device Assignment”
  • Press the Authentication button
  • This will create a new PIN code and QR Code for the authentication URL
    Note: each time you open the Authentication window a new PIN code will be generated for security reasons
  • Scan the QR Code with a QR Code reader application on your scoring device. Alternatively open your scoring device browser and manually enter the URL.

Press the RELOAD Button in the Browser of the scoring device. You are now ready to score!

SEND: shows first a confirmation popup -> if confirmed sends all scores to the client computer

RESET: sets all scores and fields back to the default values

How to change between different scoring modes

(e.g. between Recognized and Freestyle)

Click on the SCORING APP OVERVIEW link on the bottom of the scoring view

Select the required scoring app from the list of available scoring apps

Recommended Hardware

Tablets

Huawei MediaPad T3 Wifi Tablet-PC

Samsung Galaxy Tab A 

Lenovo Tab E7

OTG Lan Adapter to connect to wired network

Plugable USB 2.0 OTG

Ring/Match Area Router

Netgear R6120-100UKS

NETGEAR WNDR3400