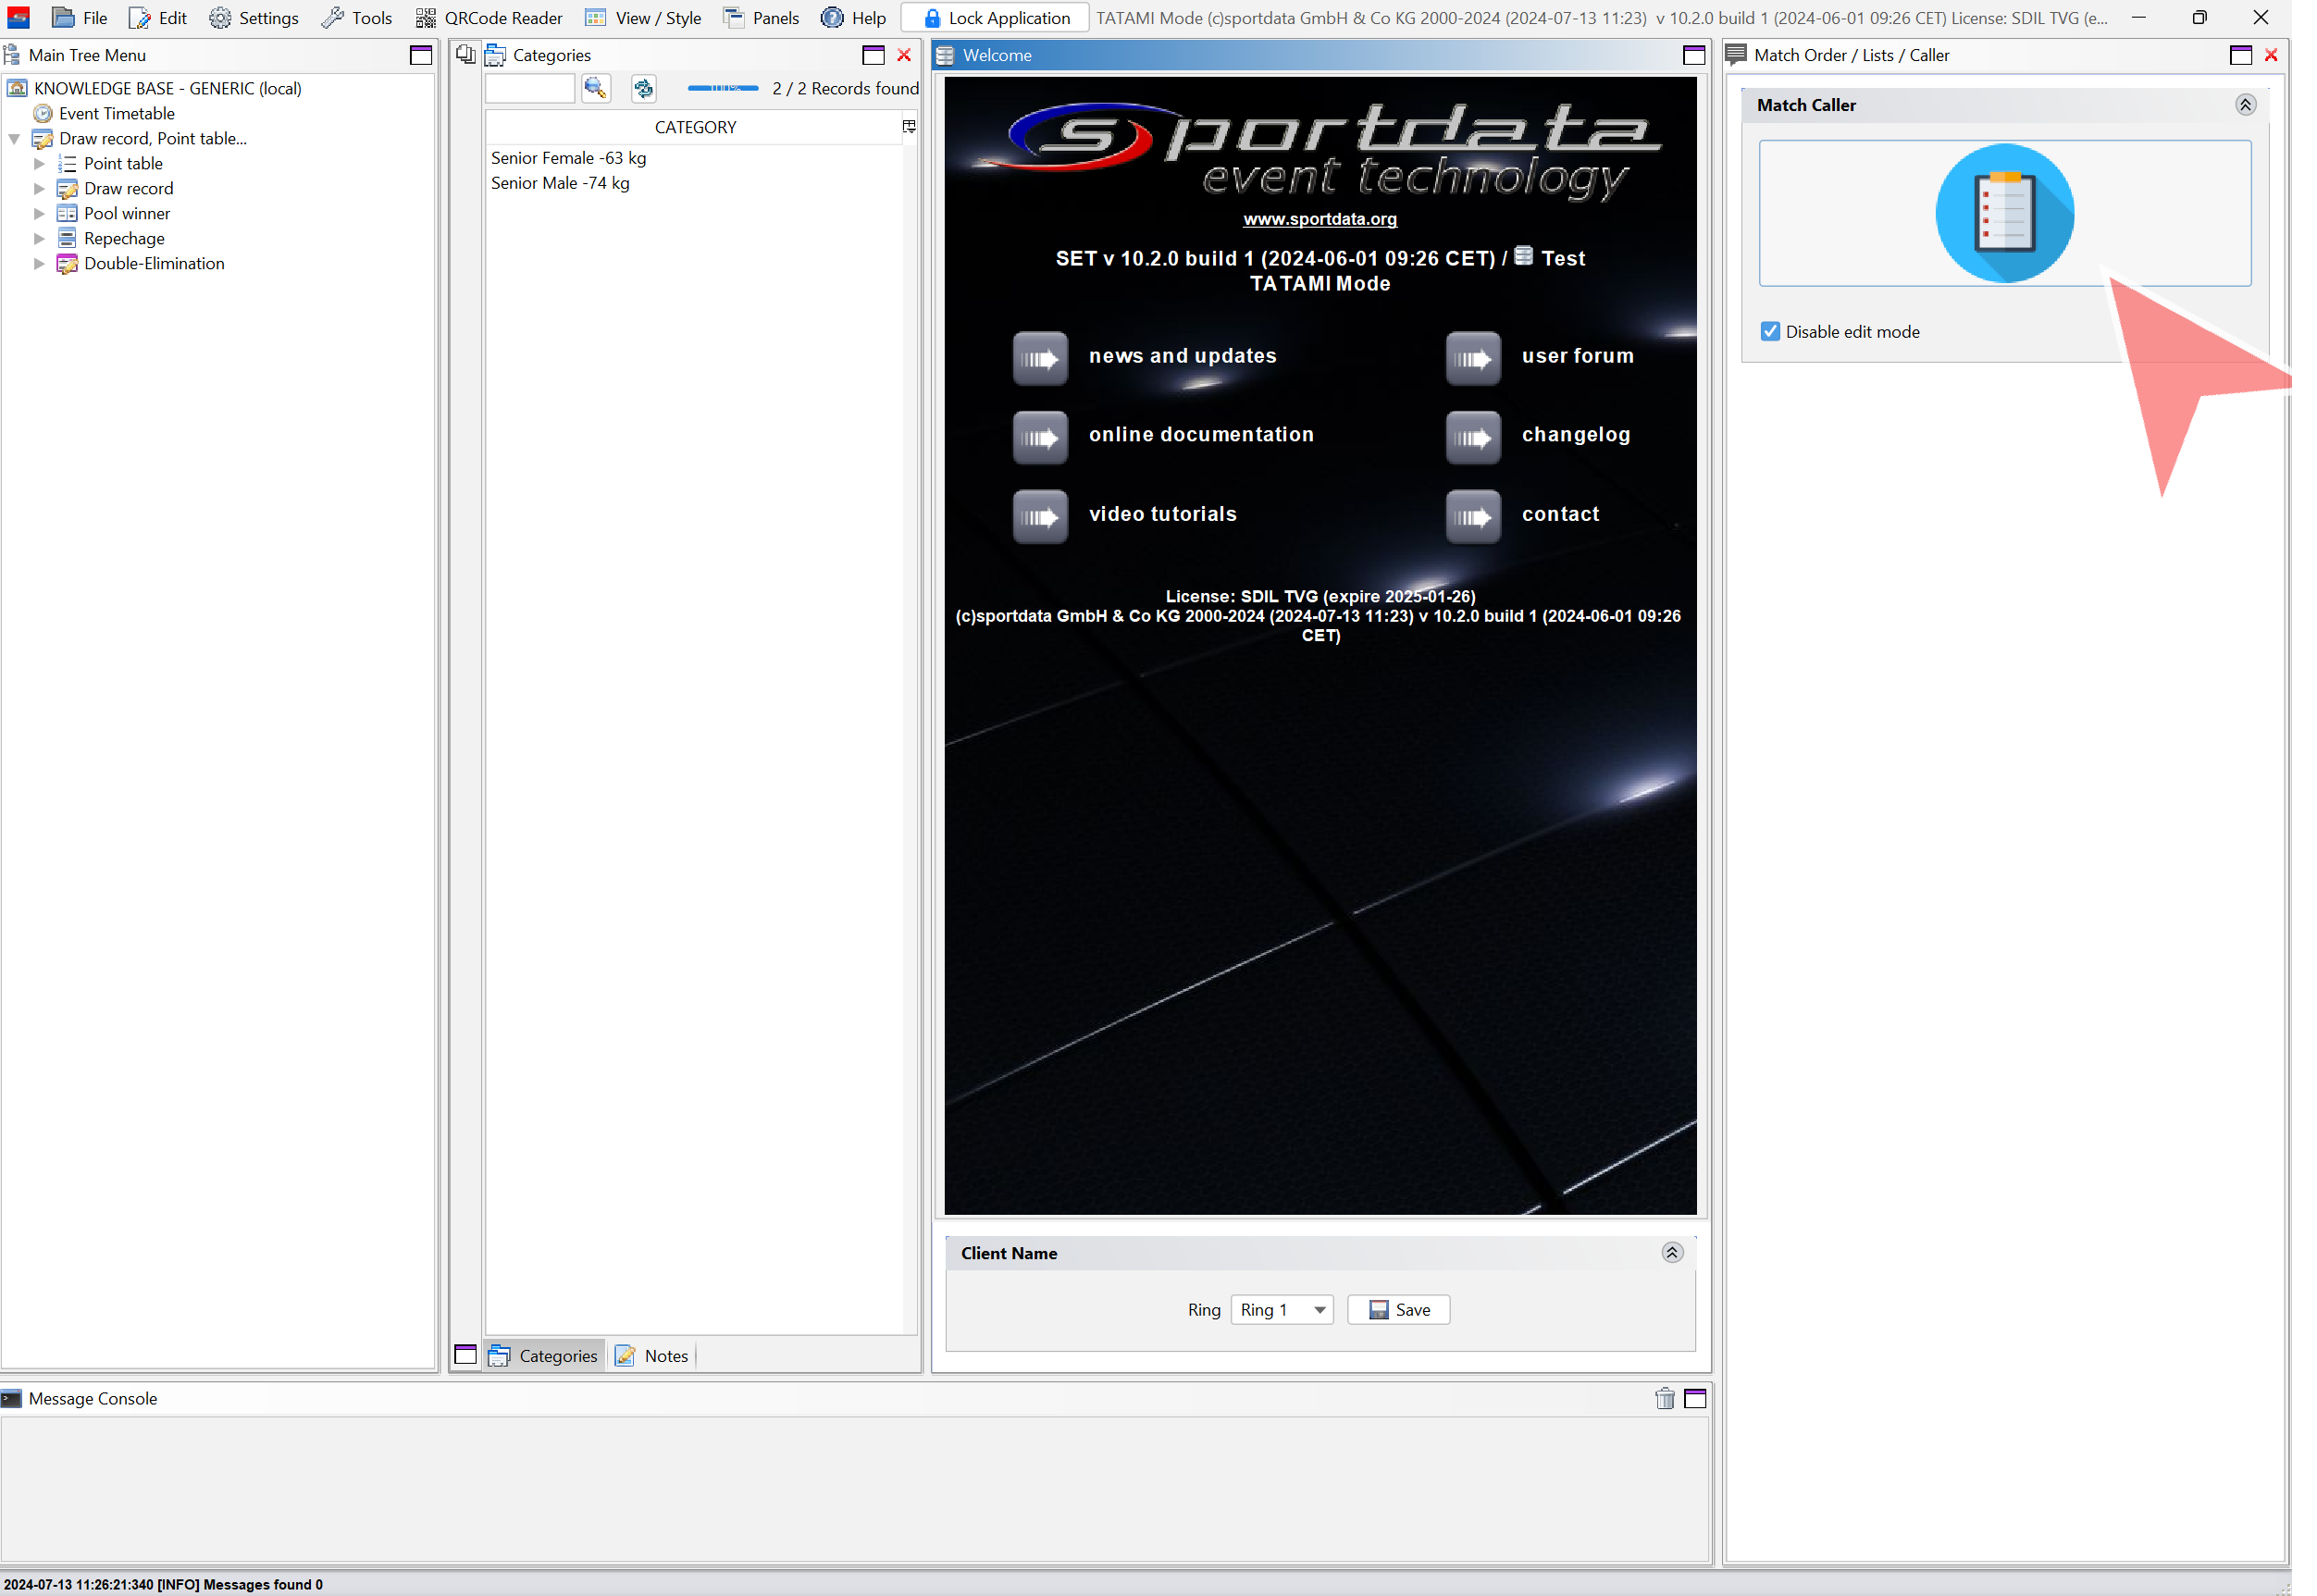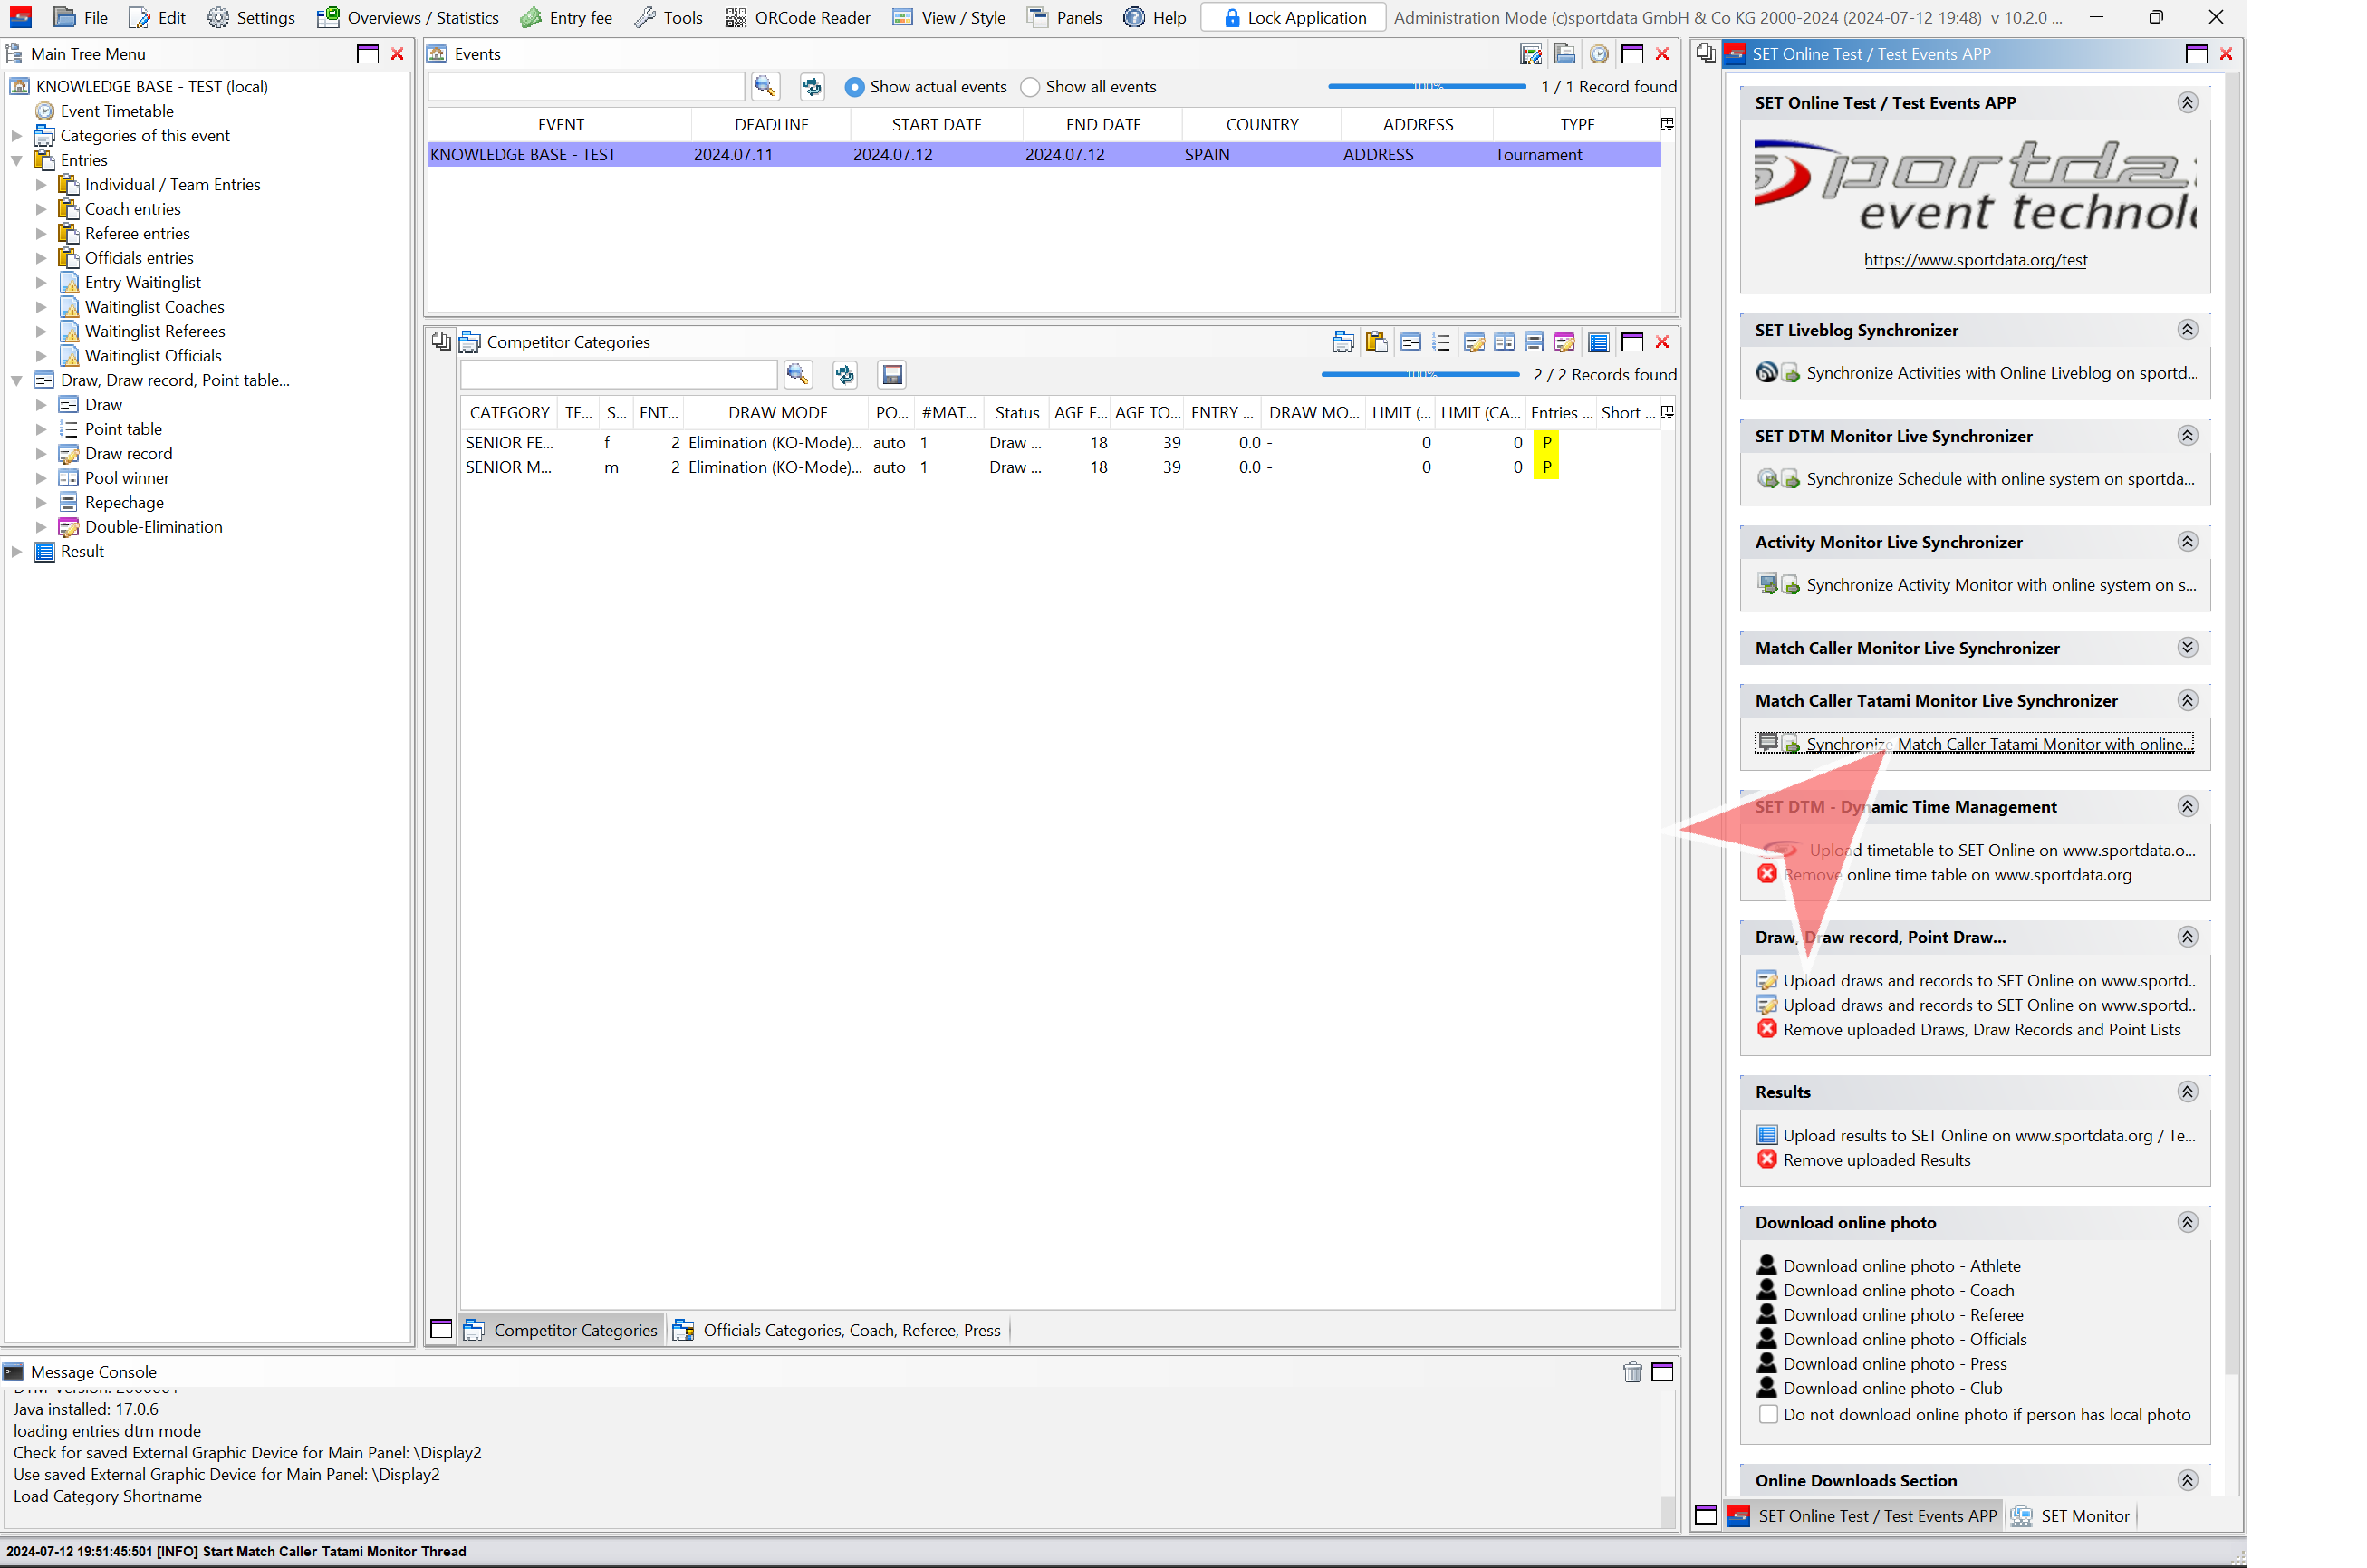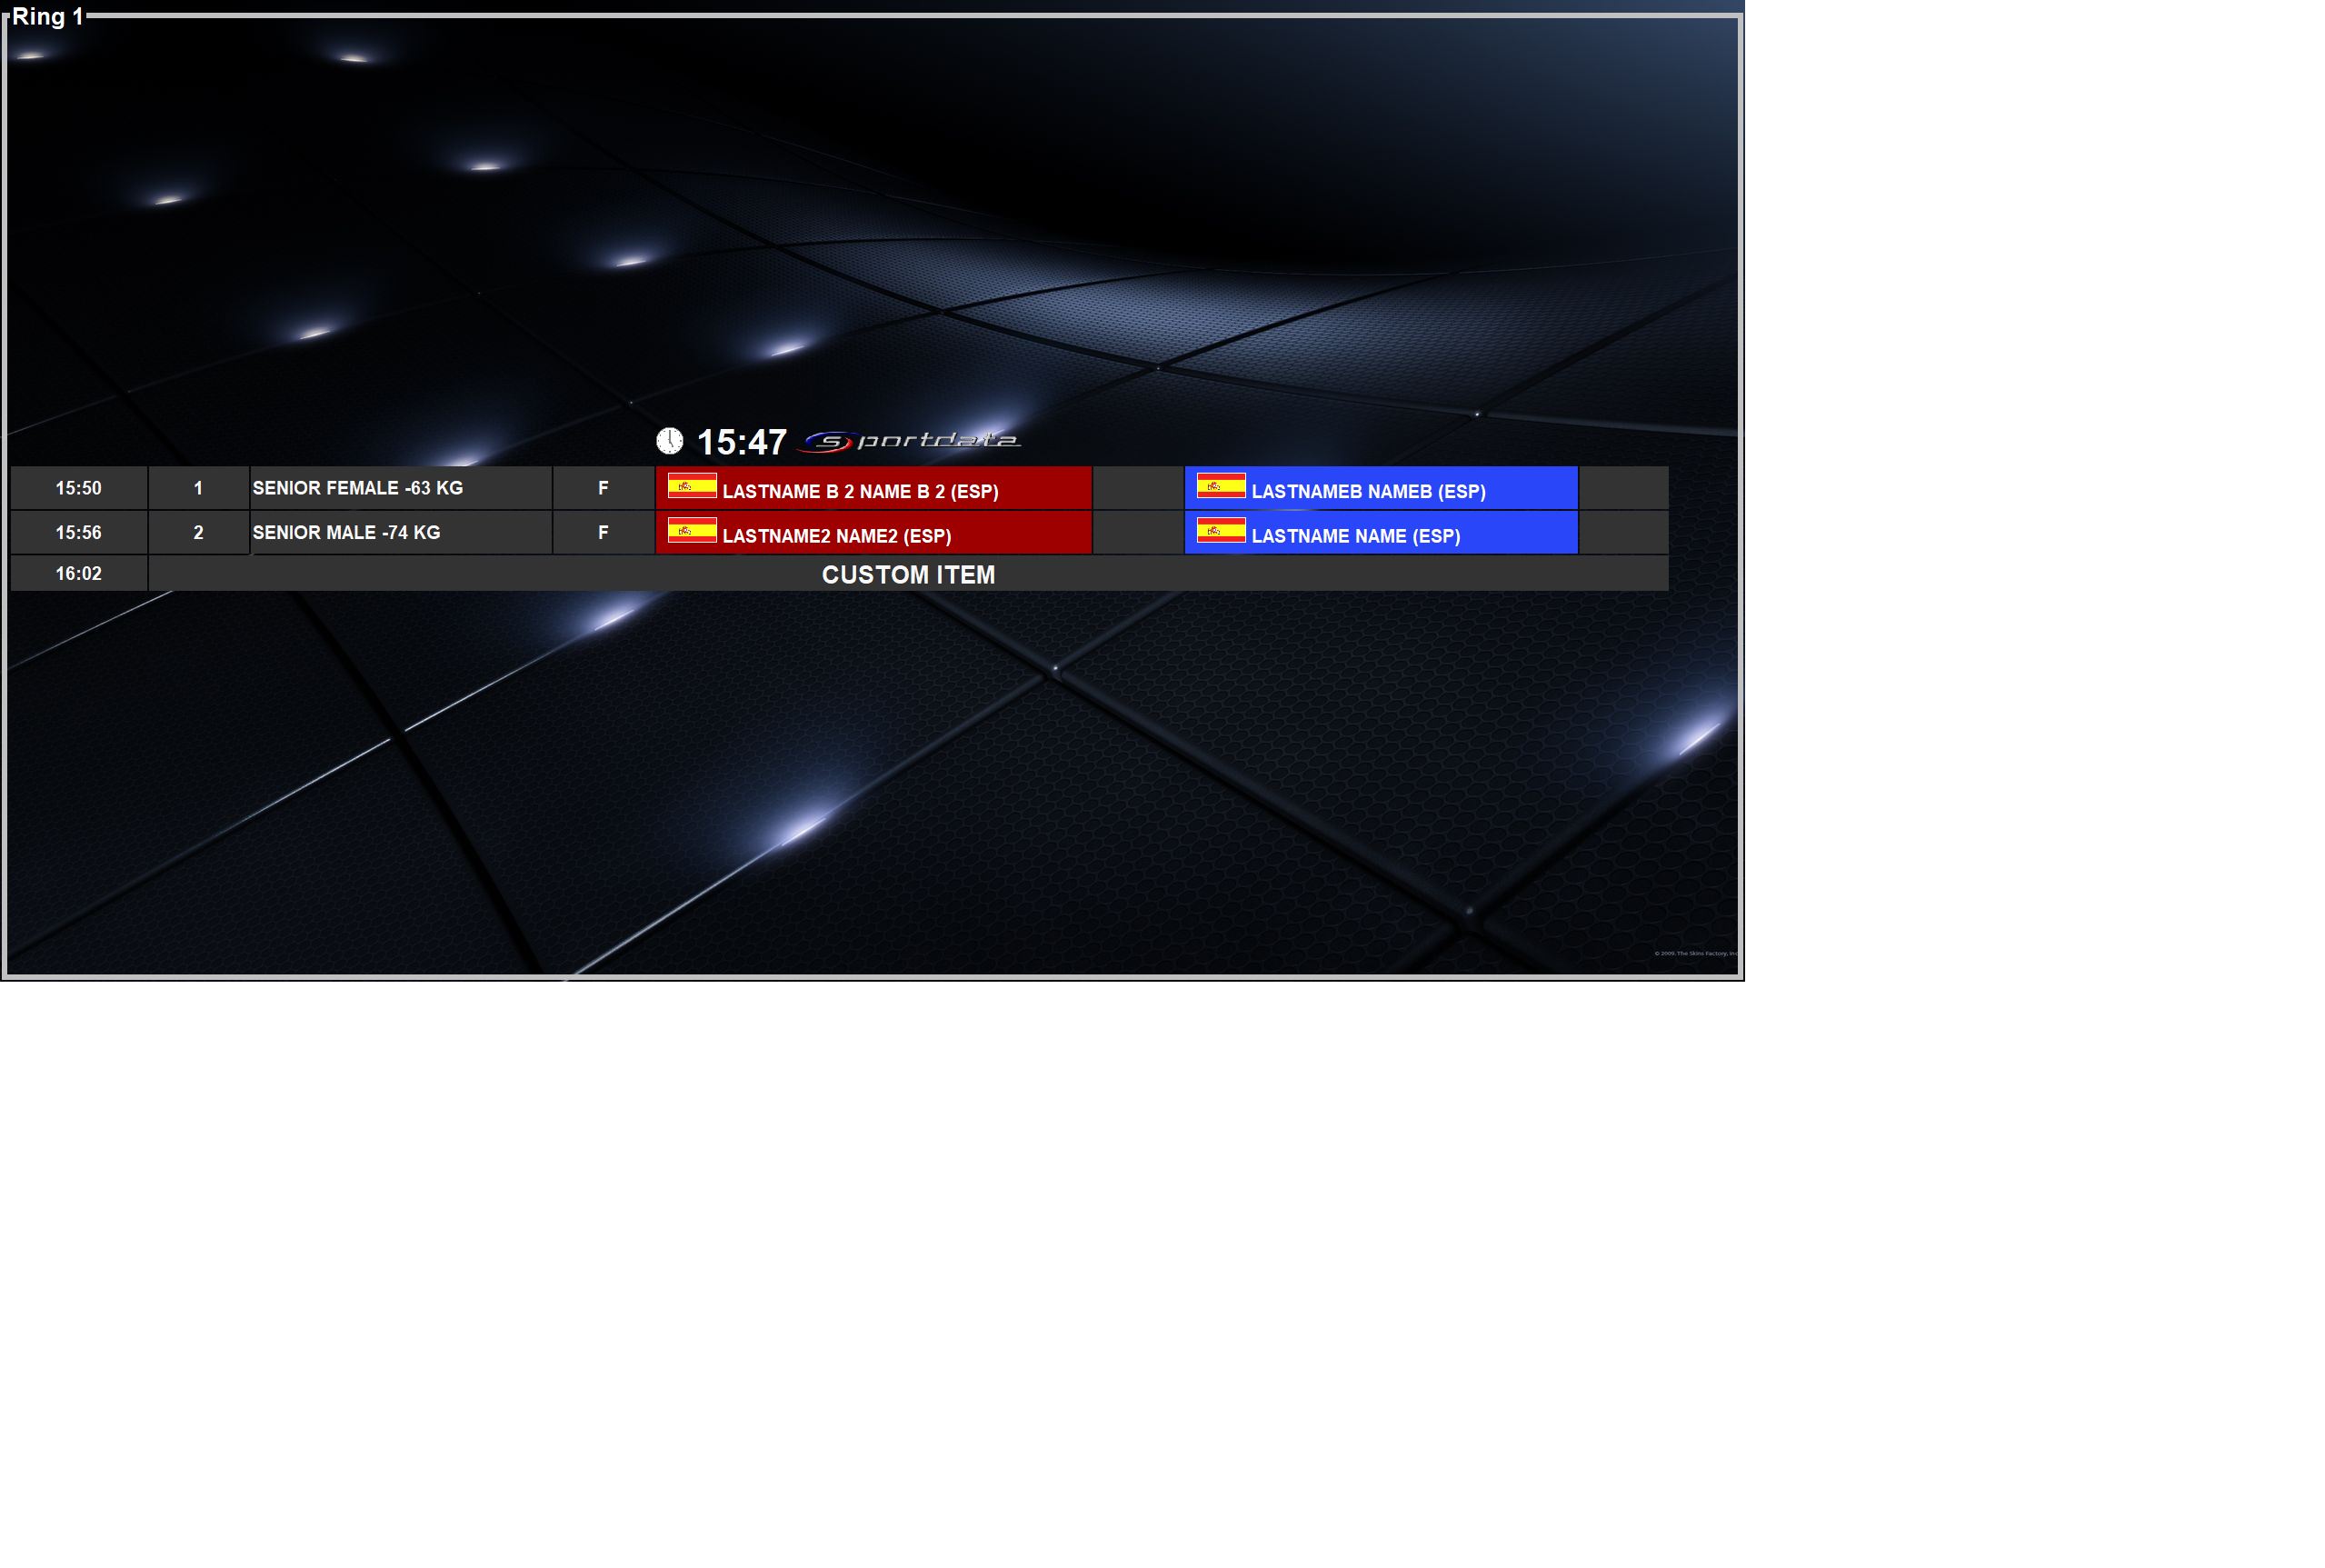
Interactive Demo
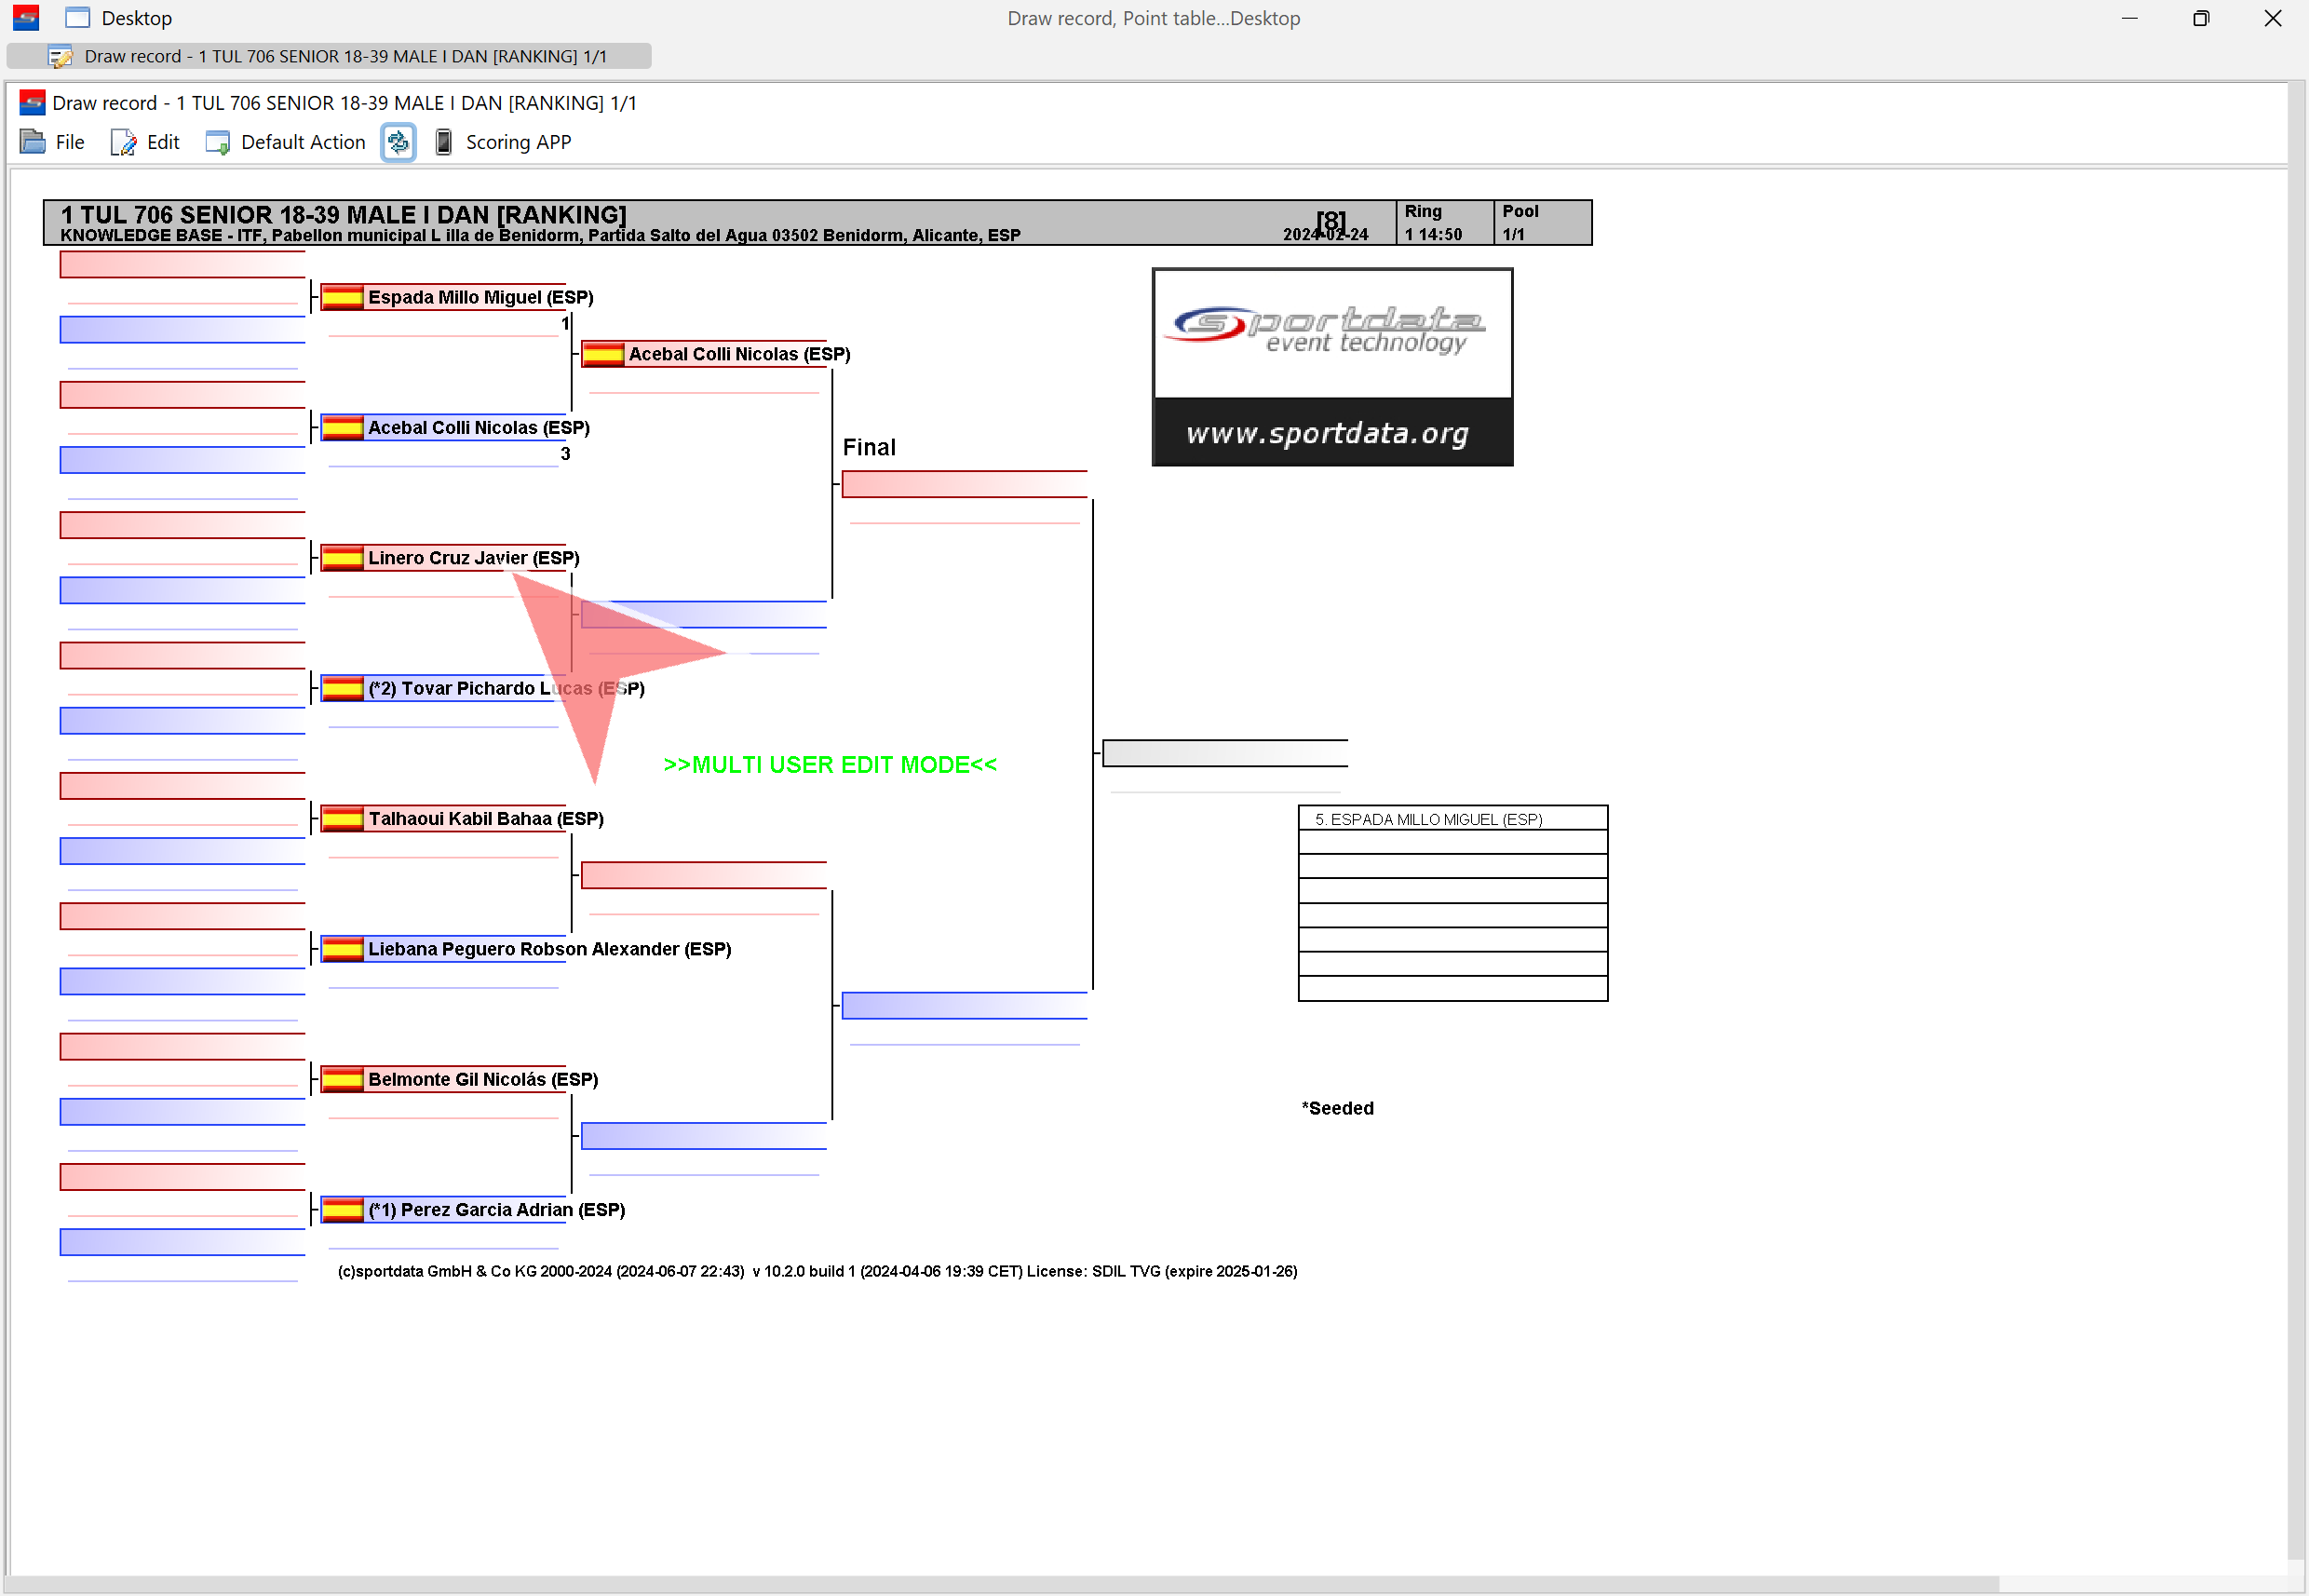
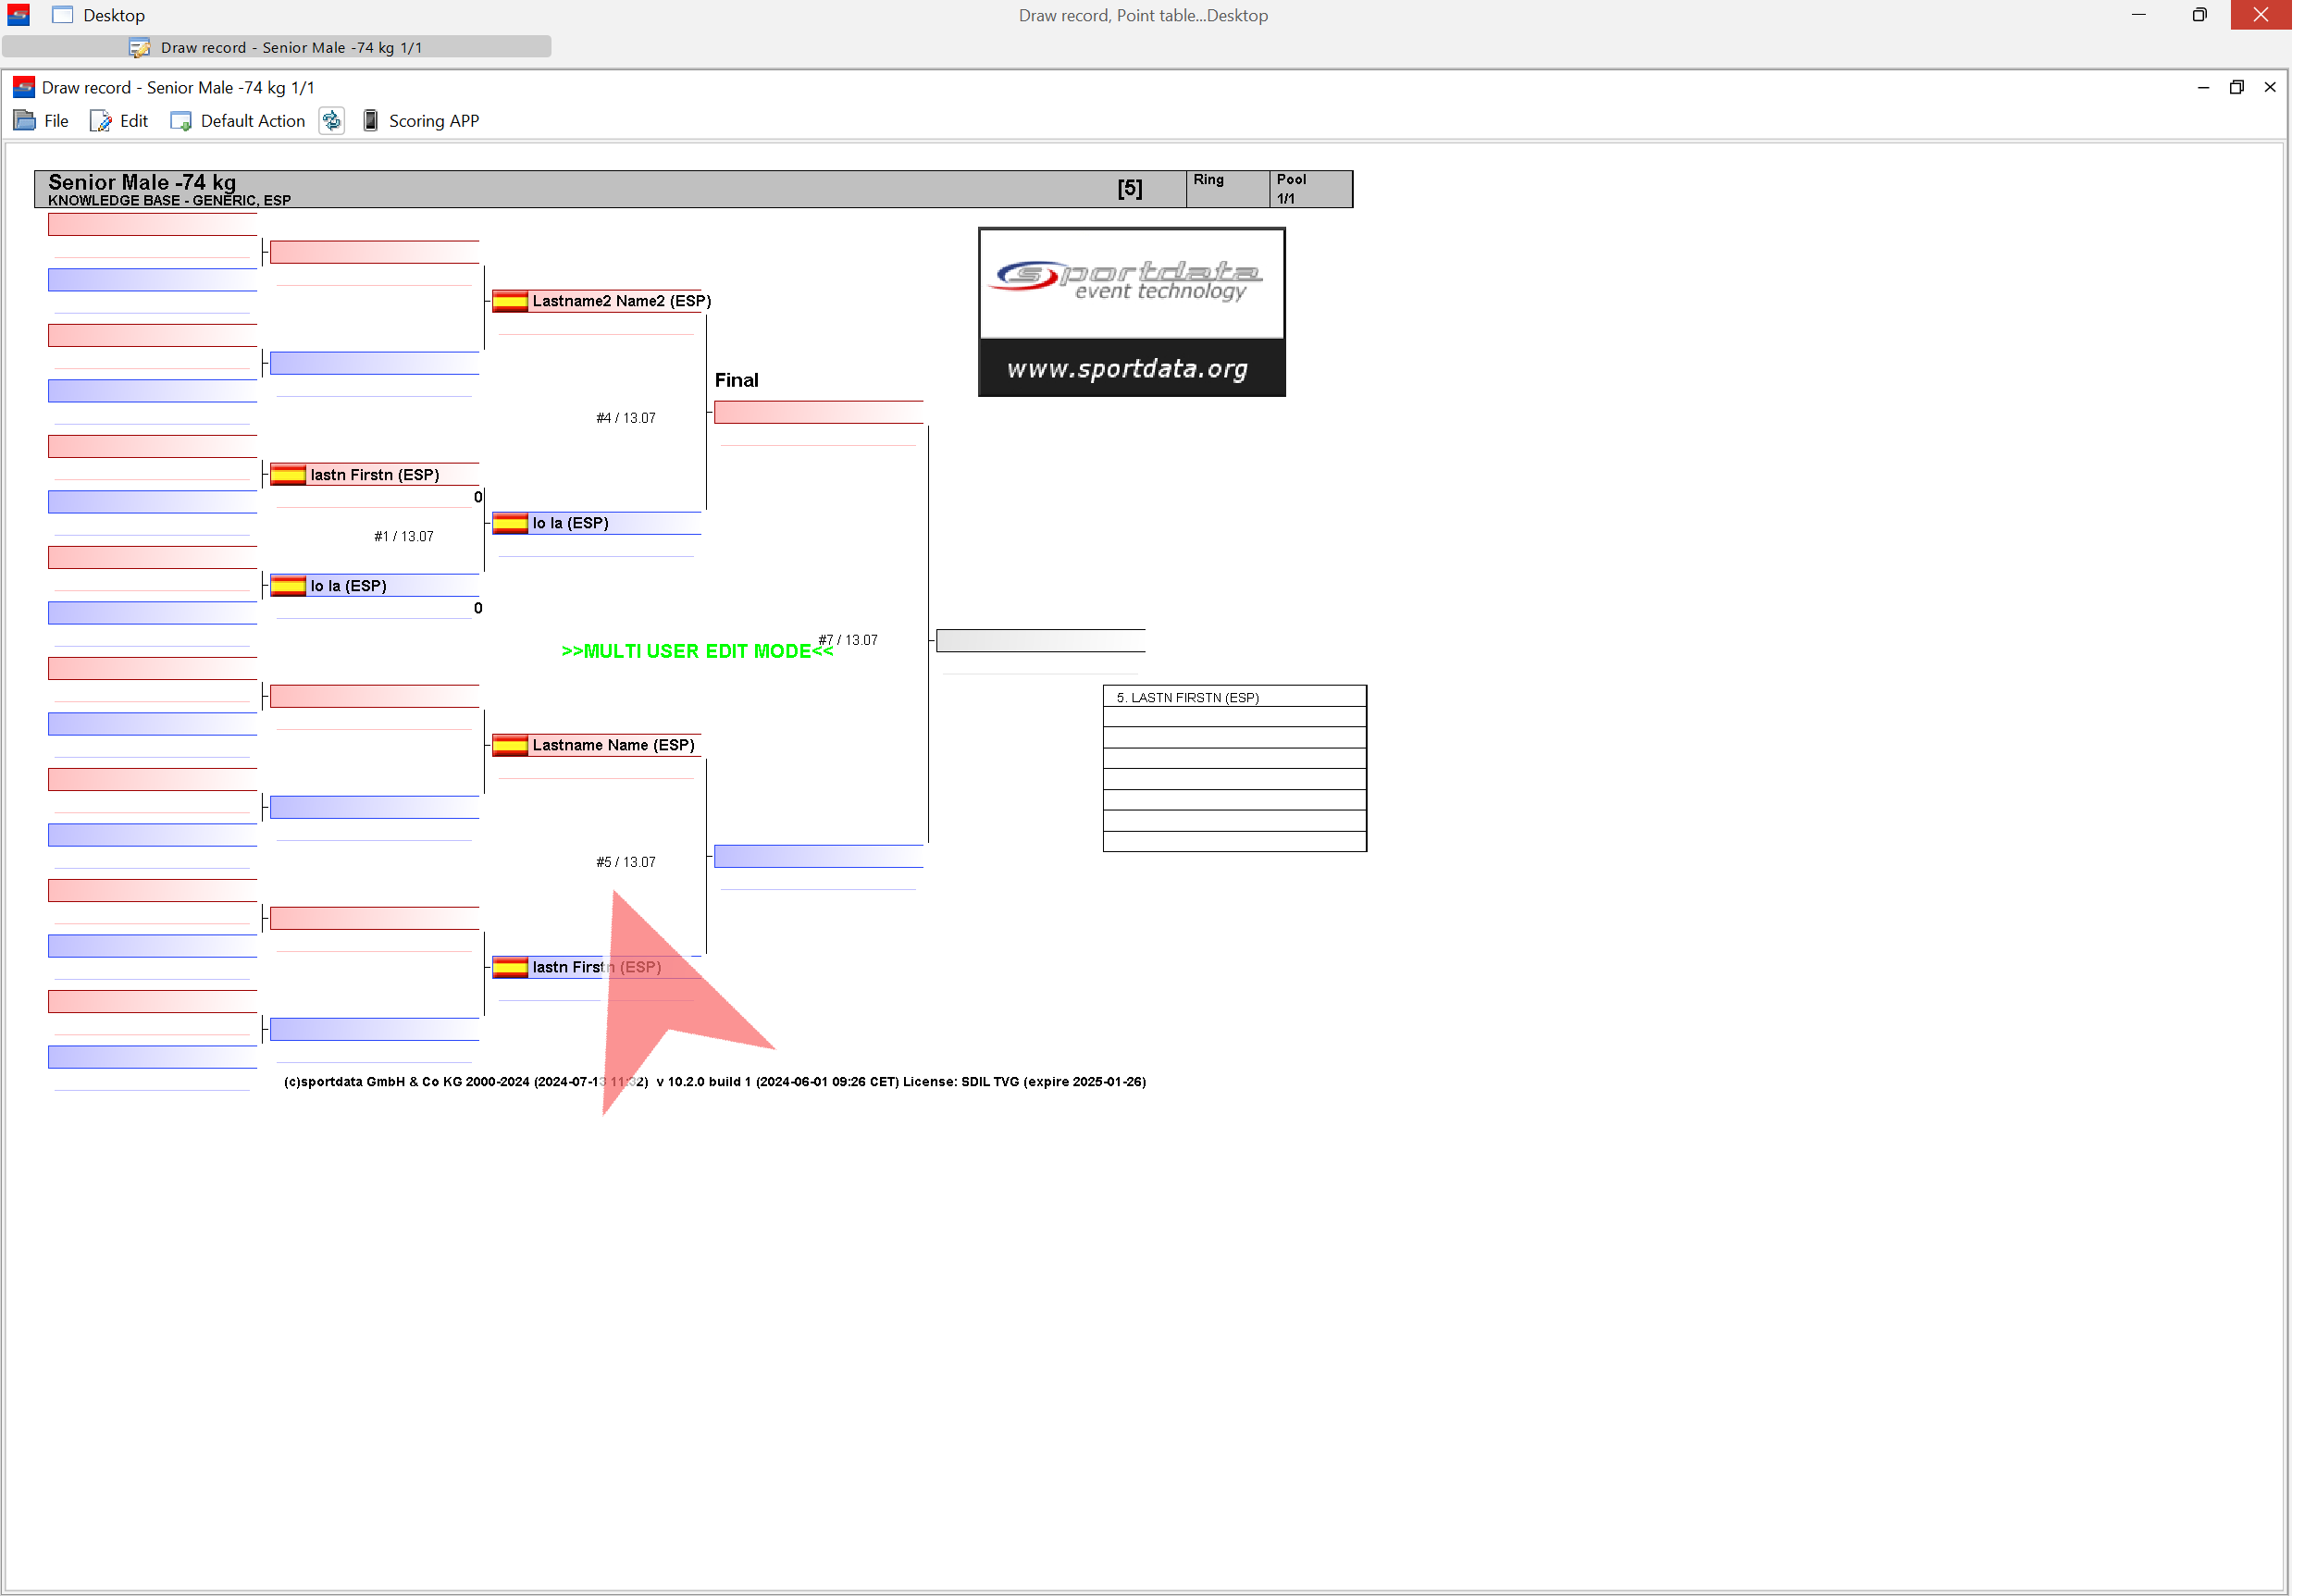
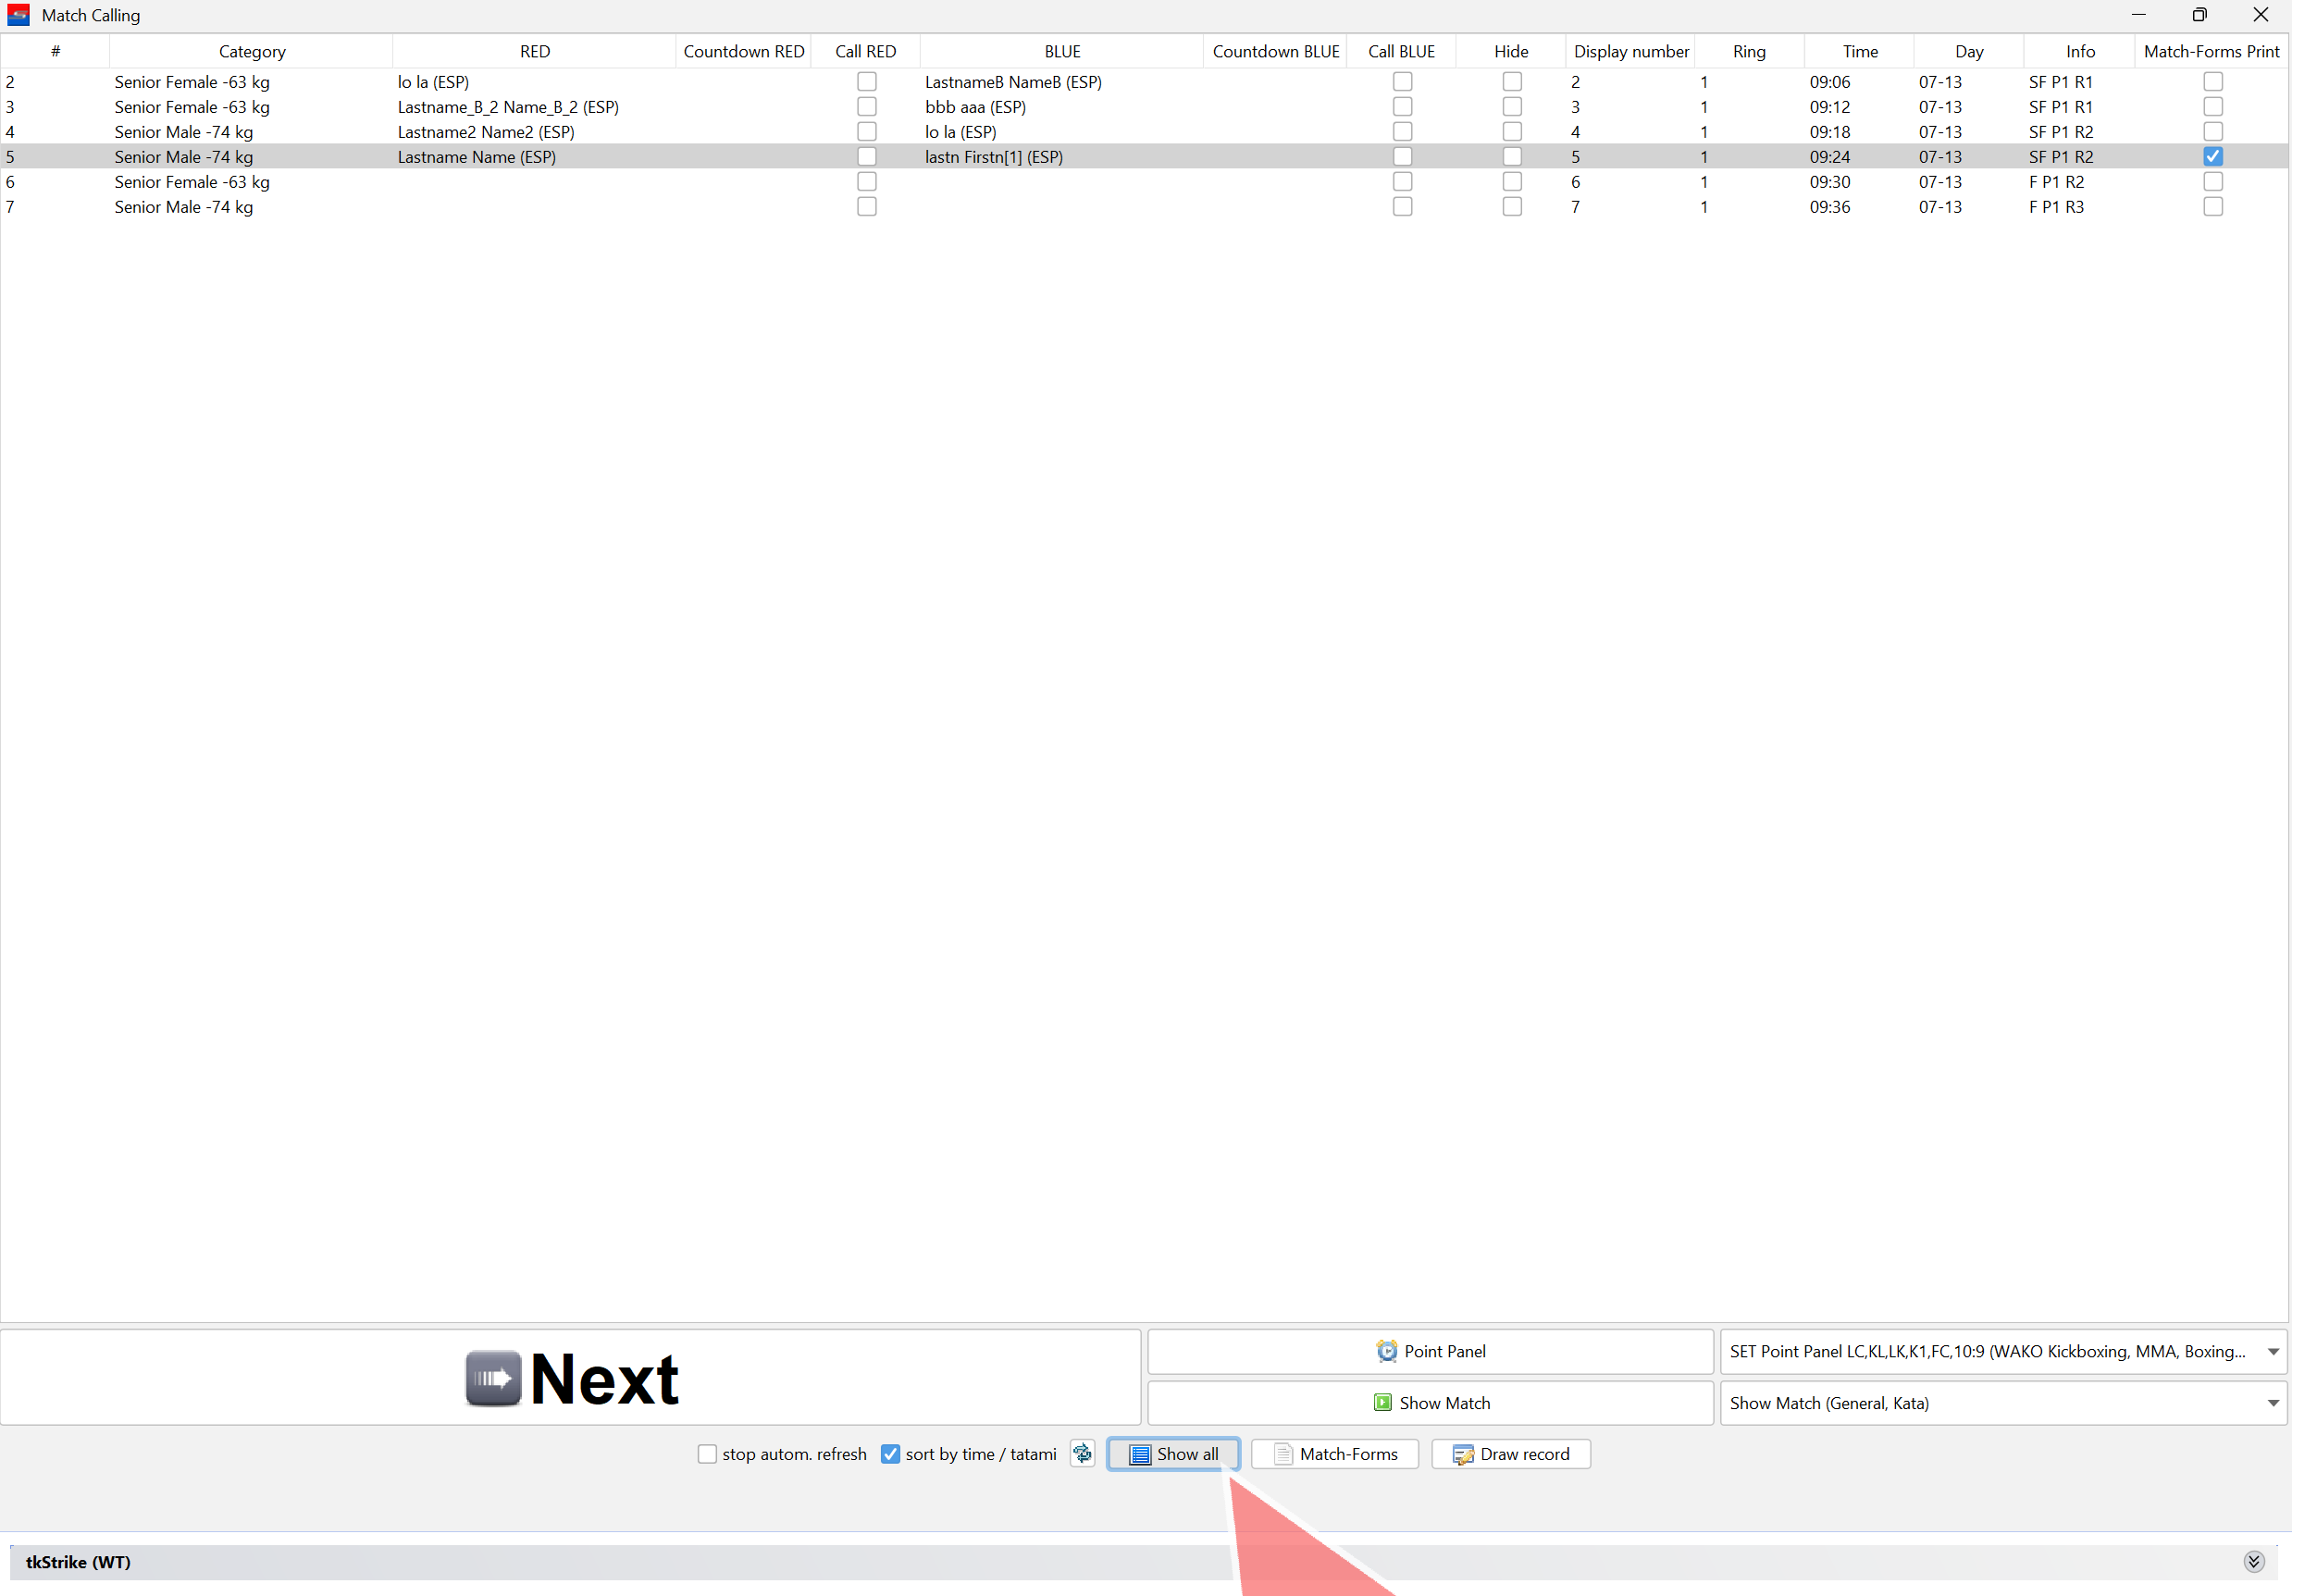
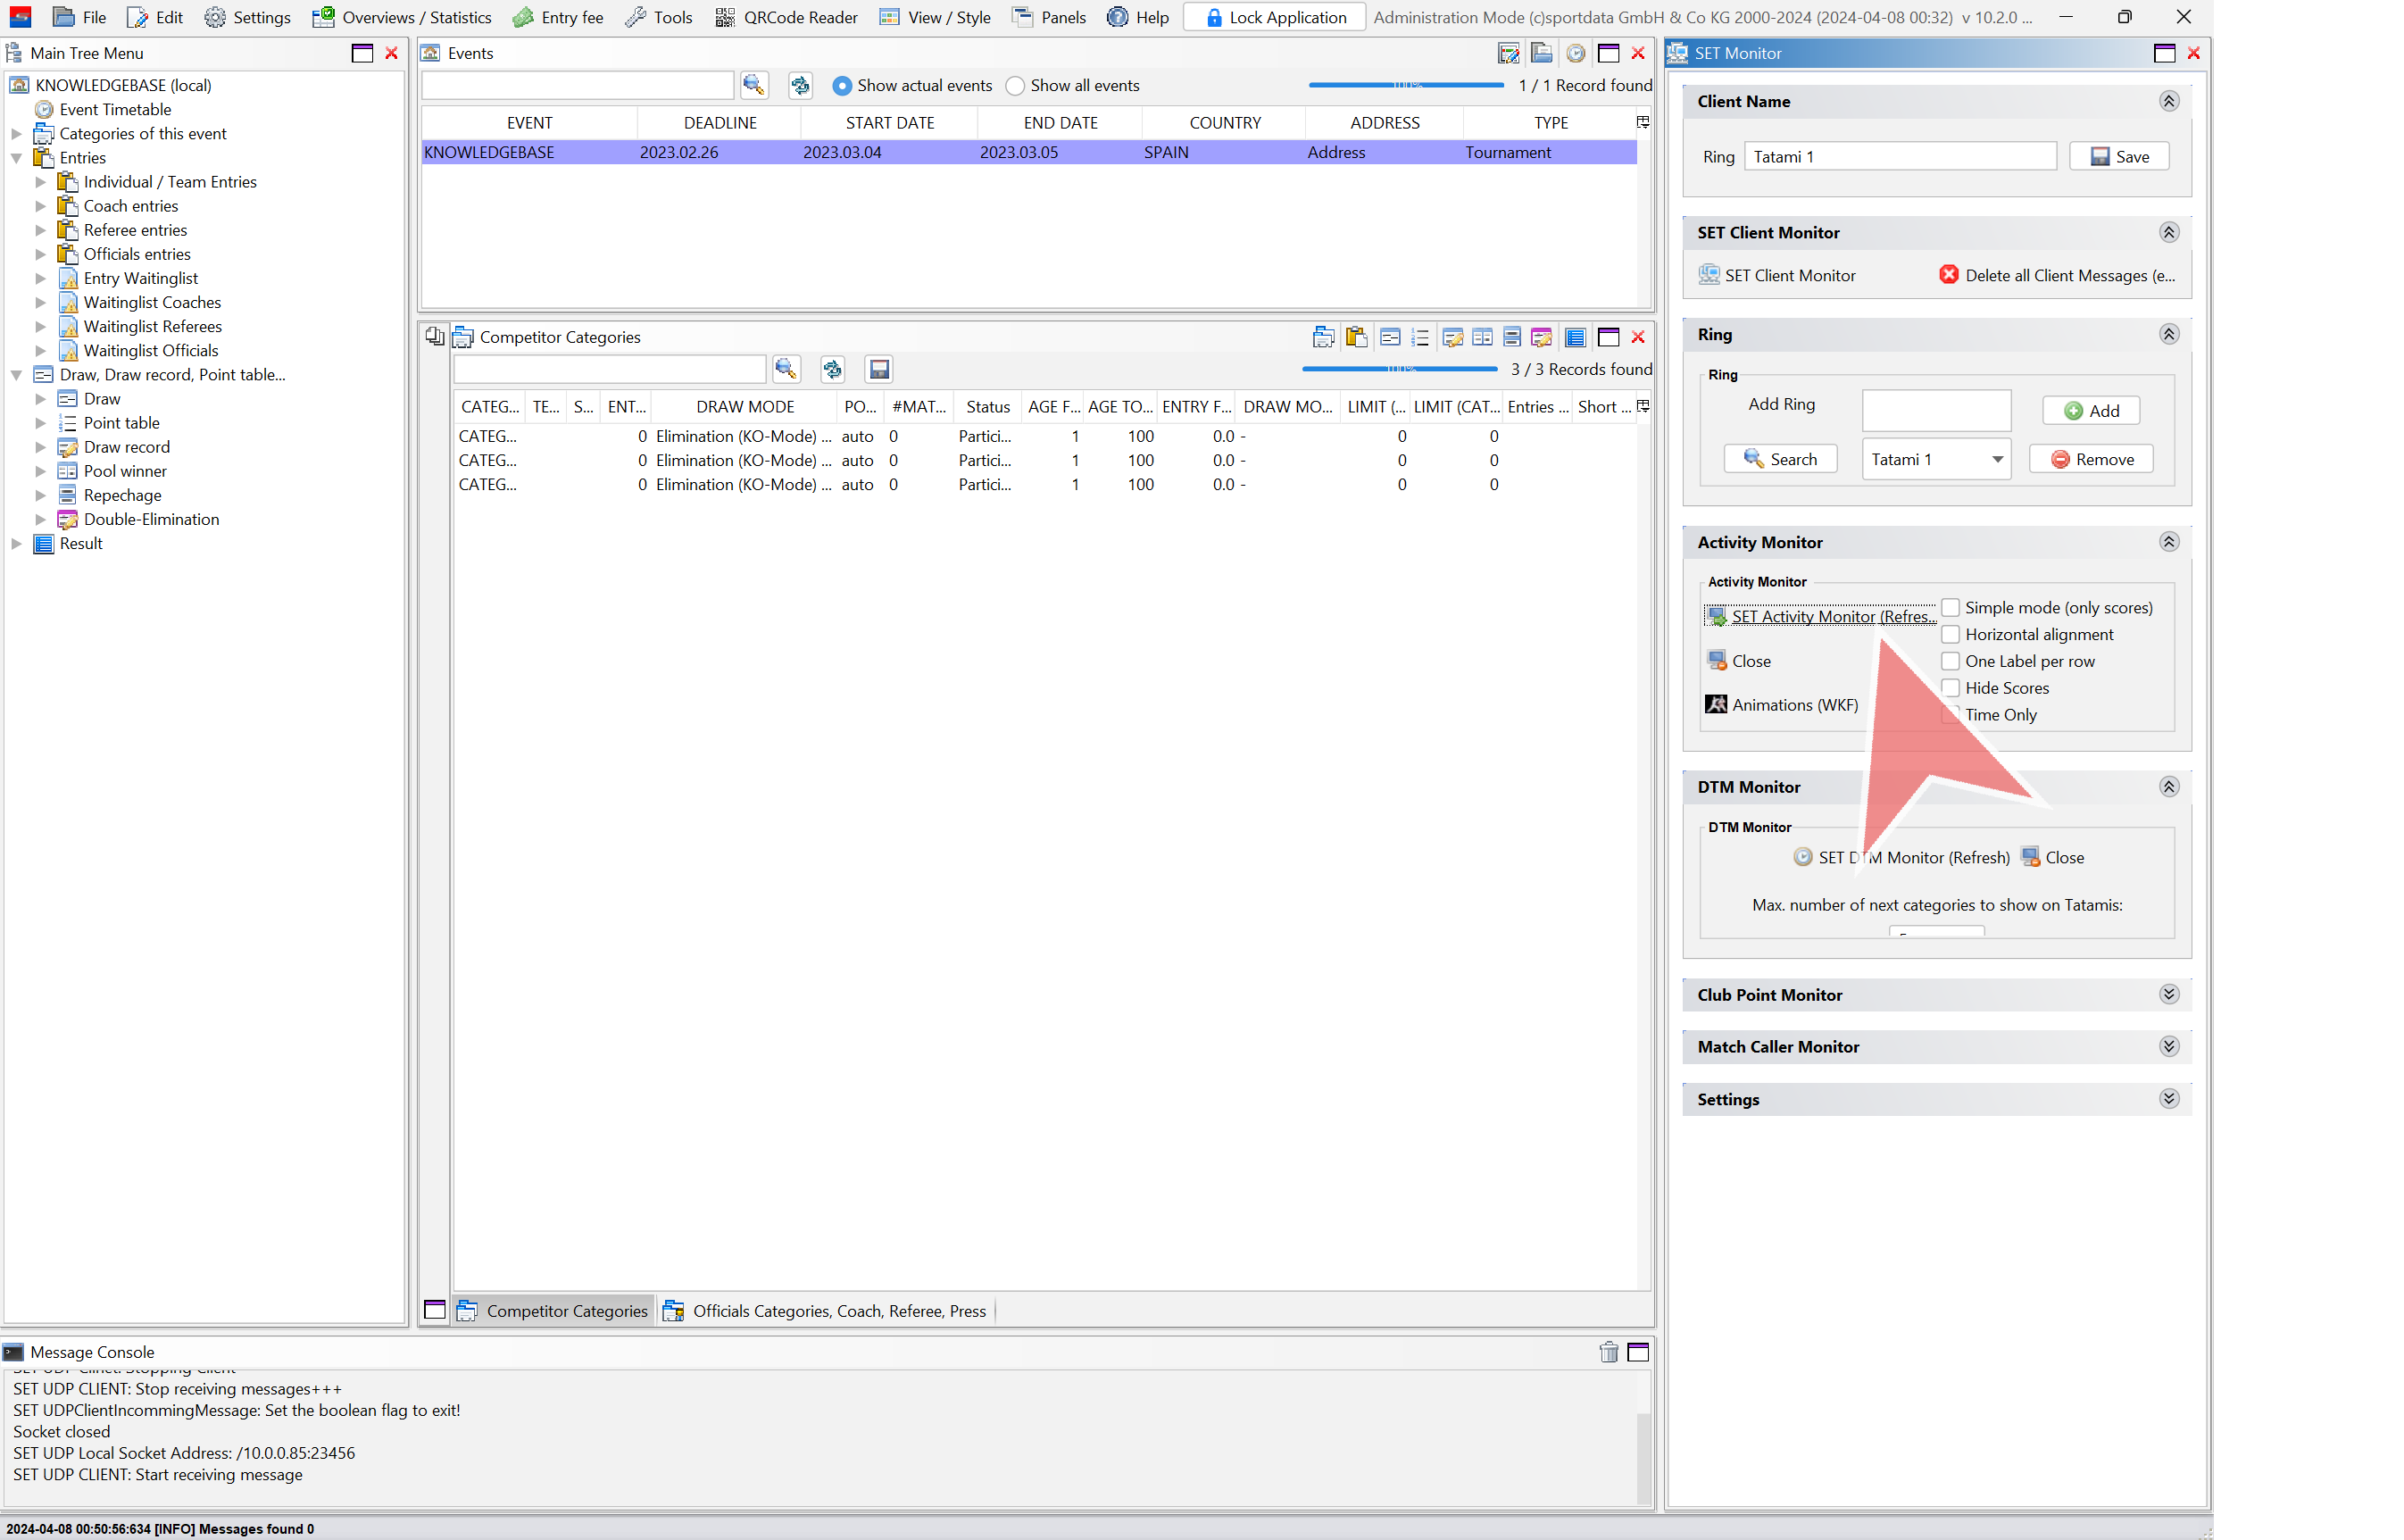
Open a category by double-clicking on it.
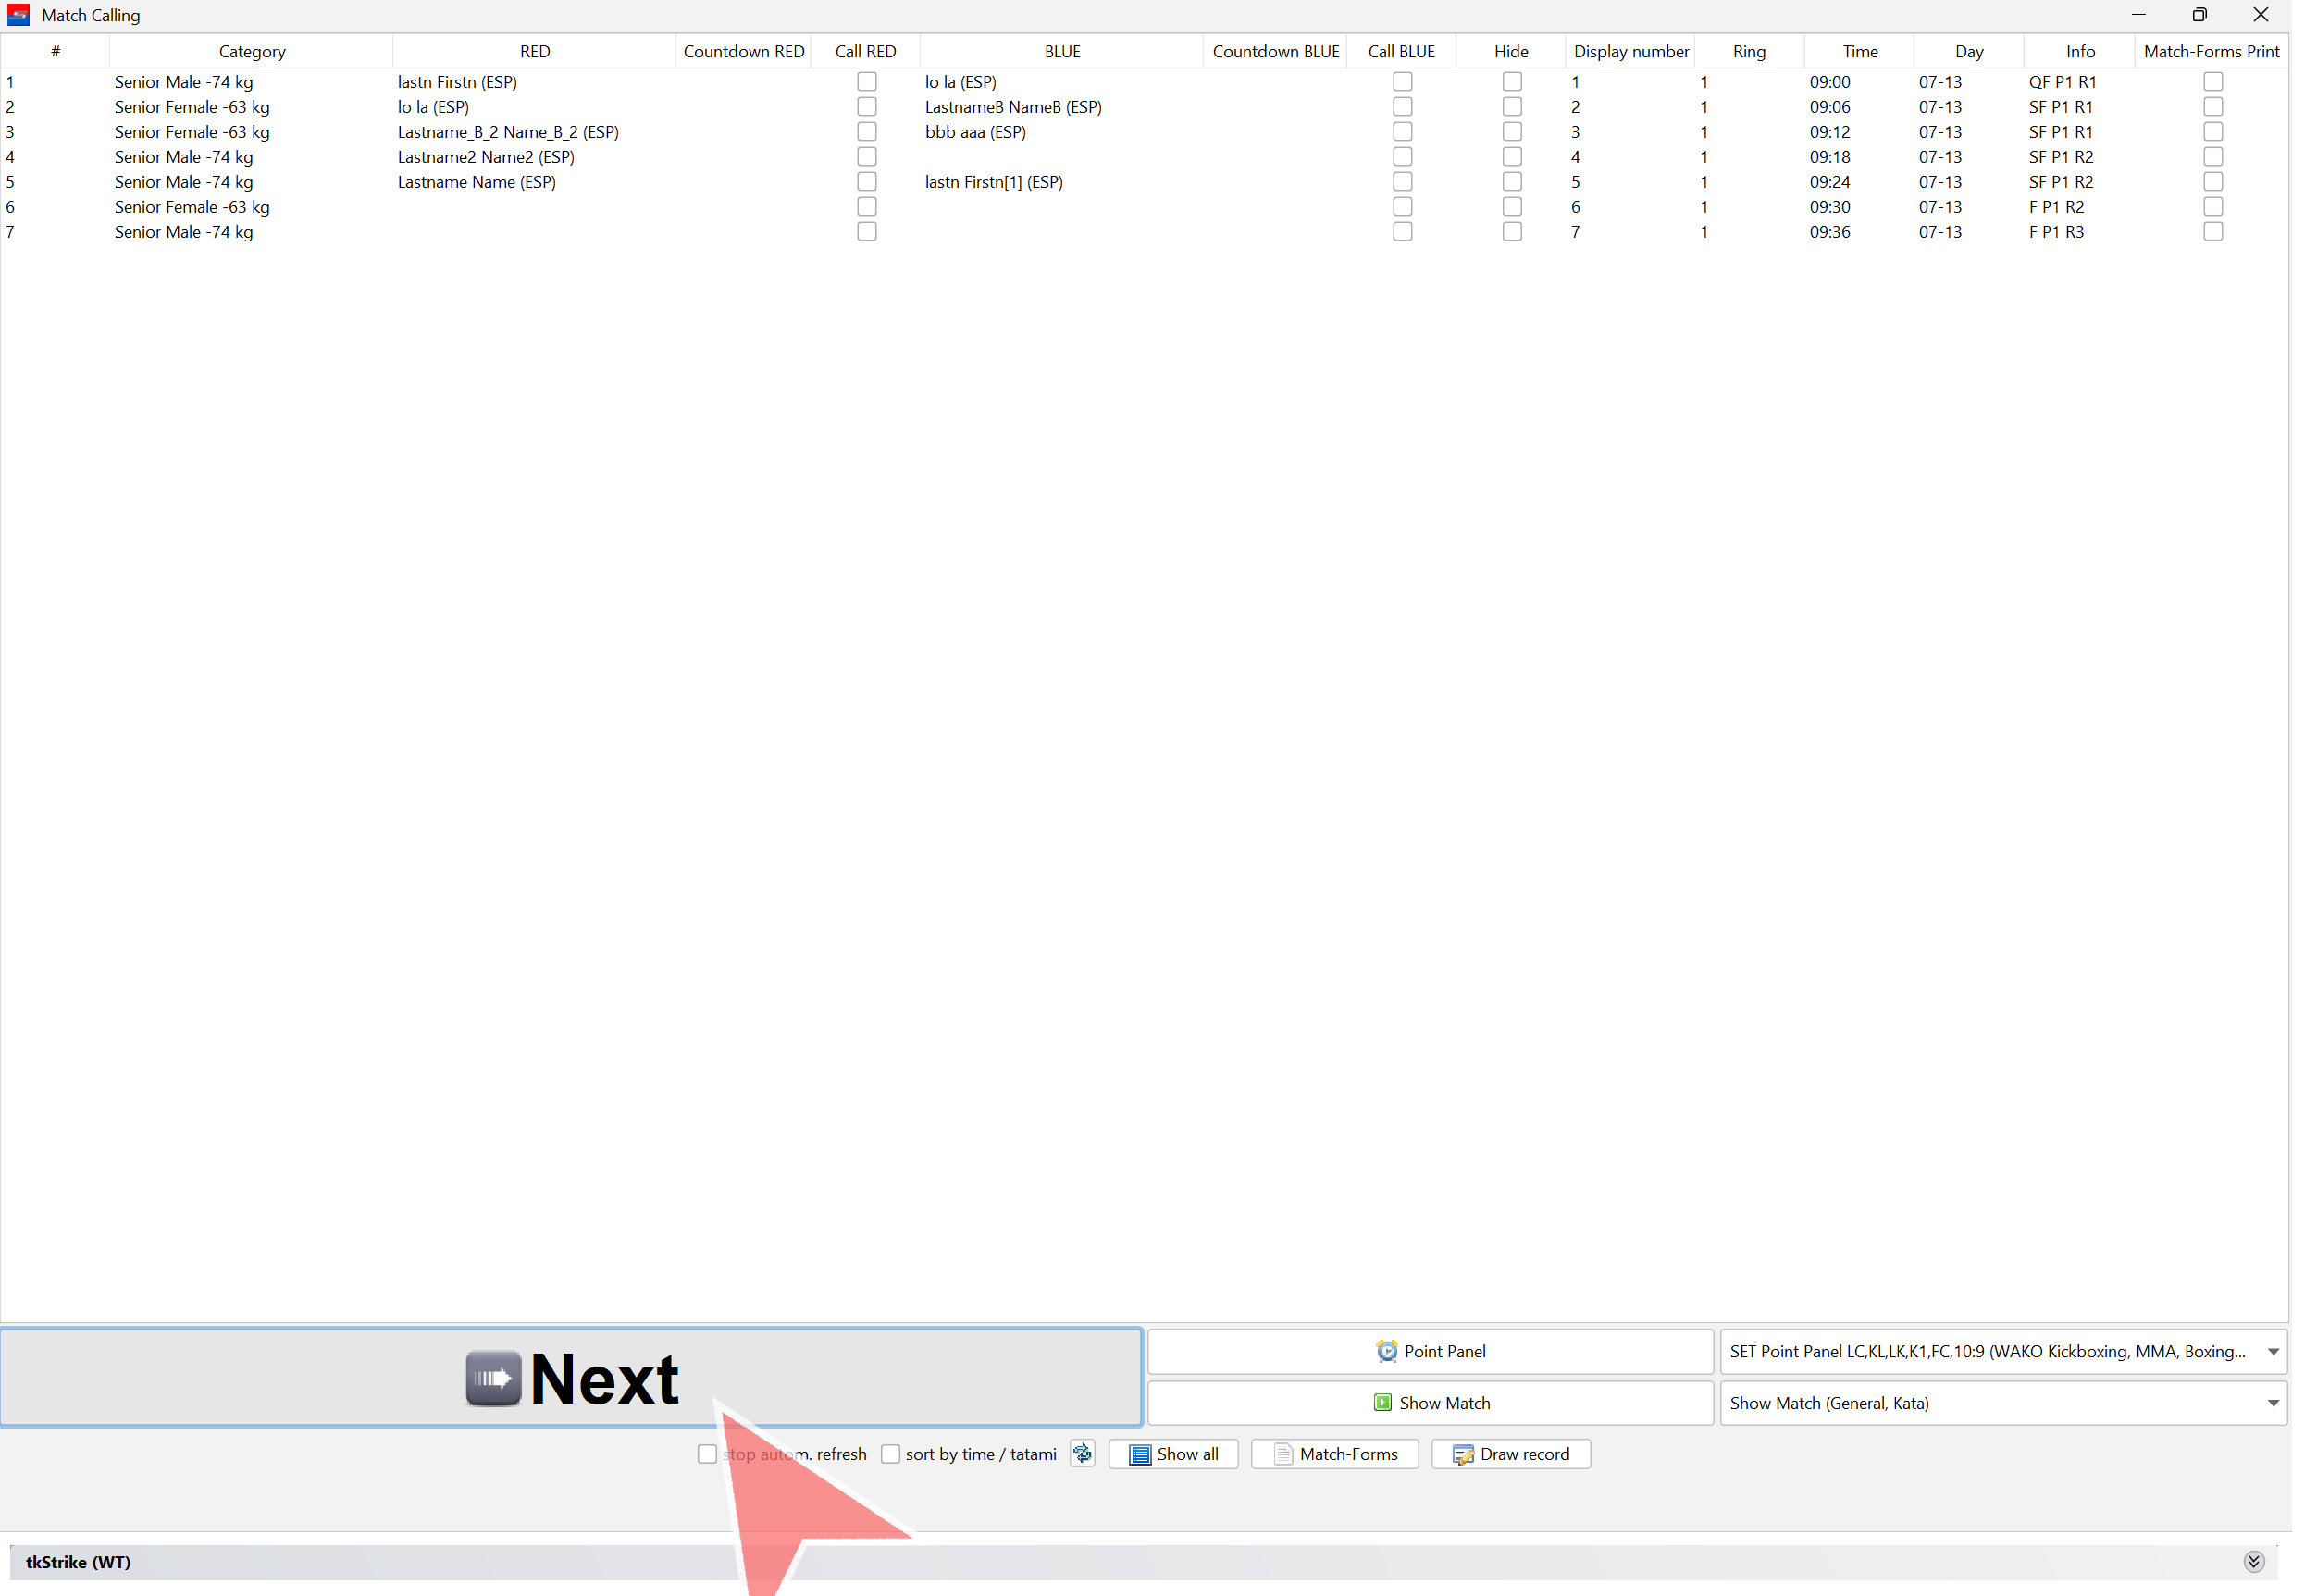
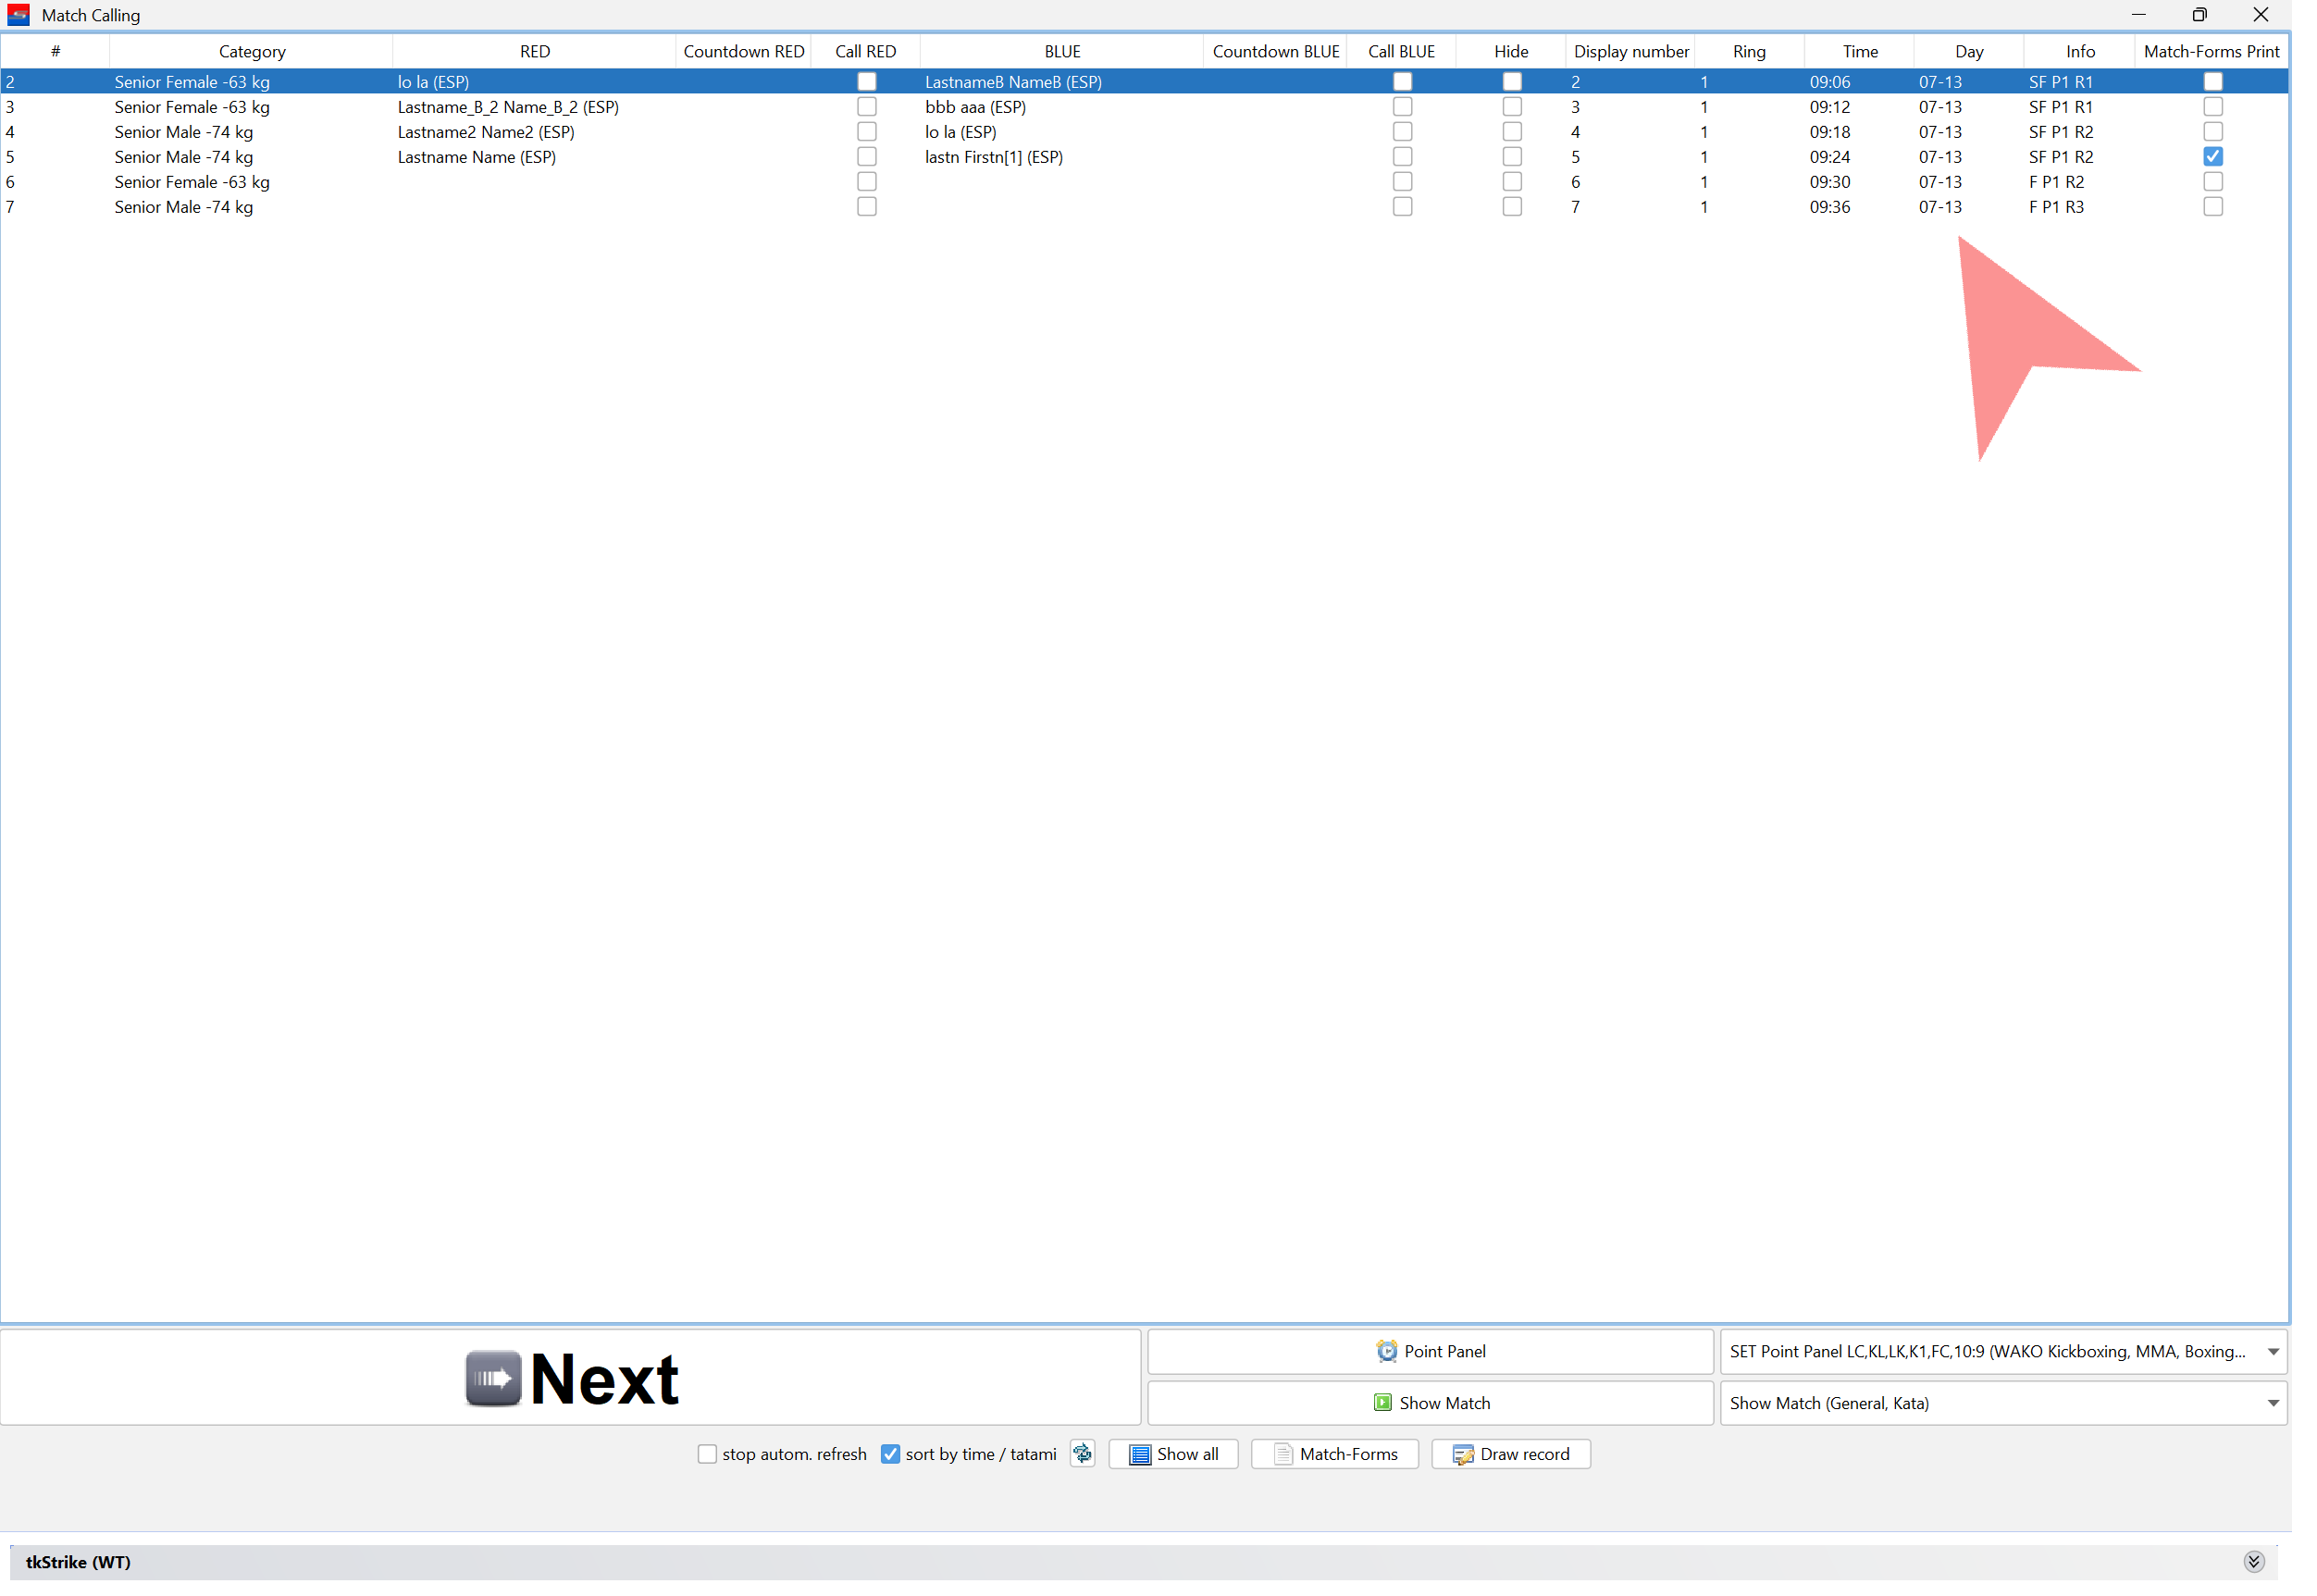
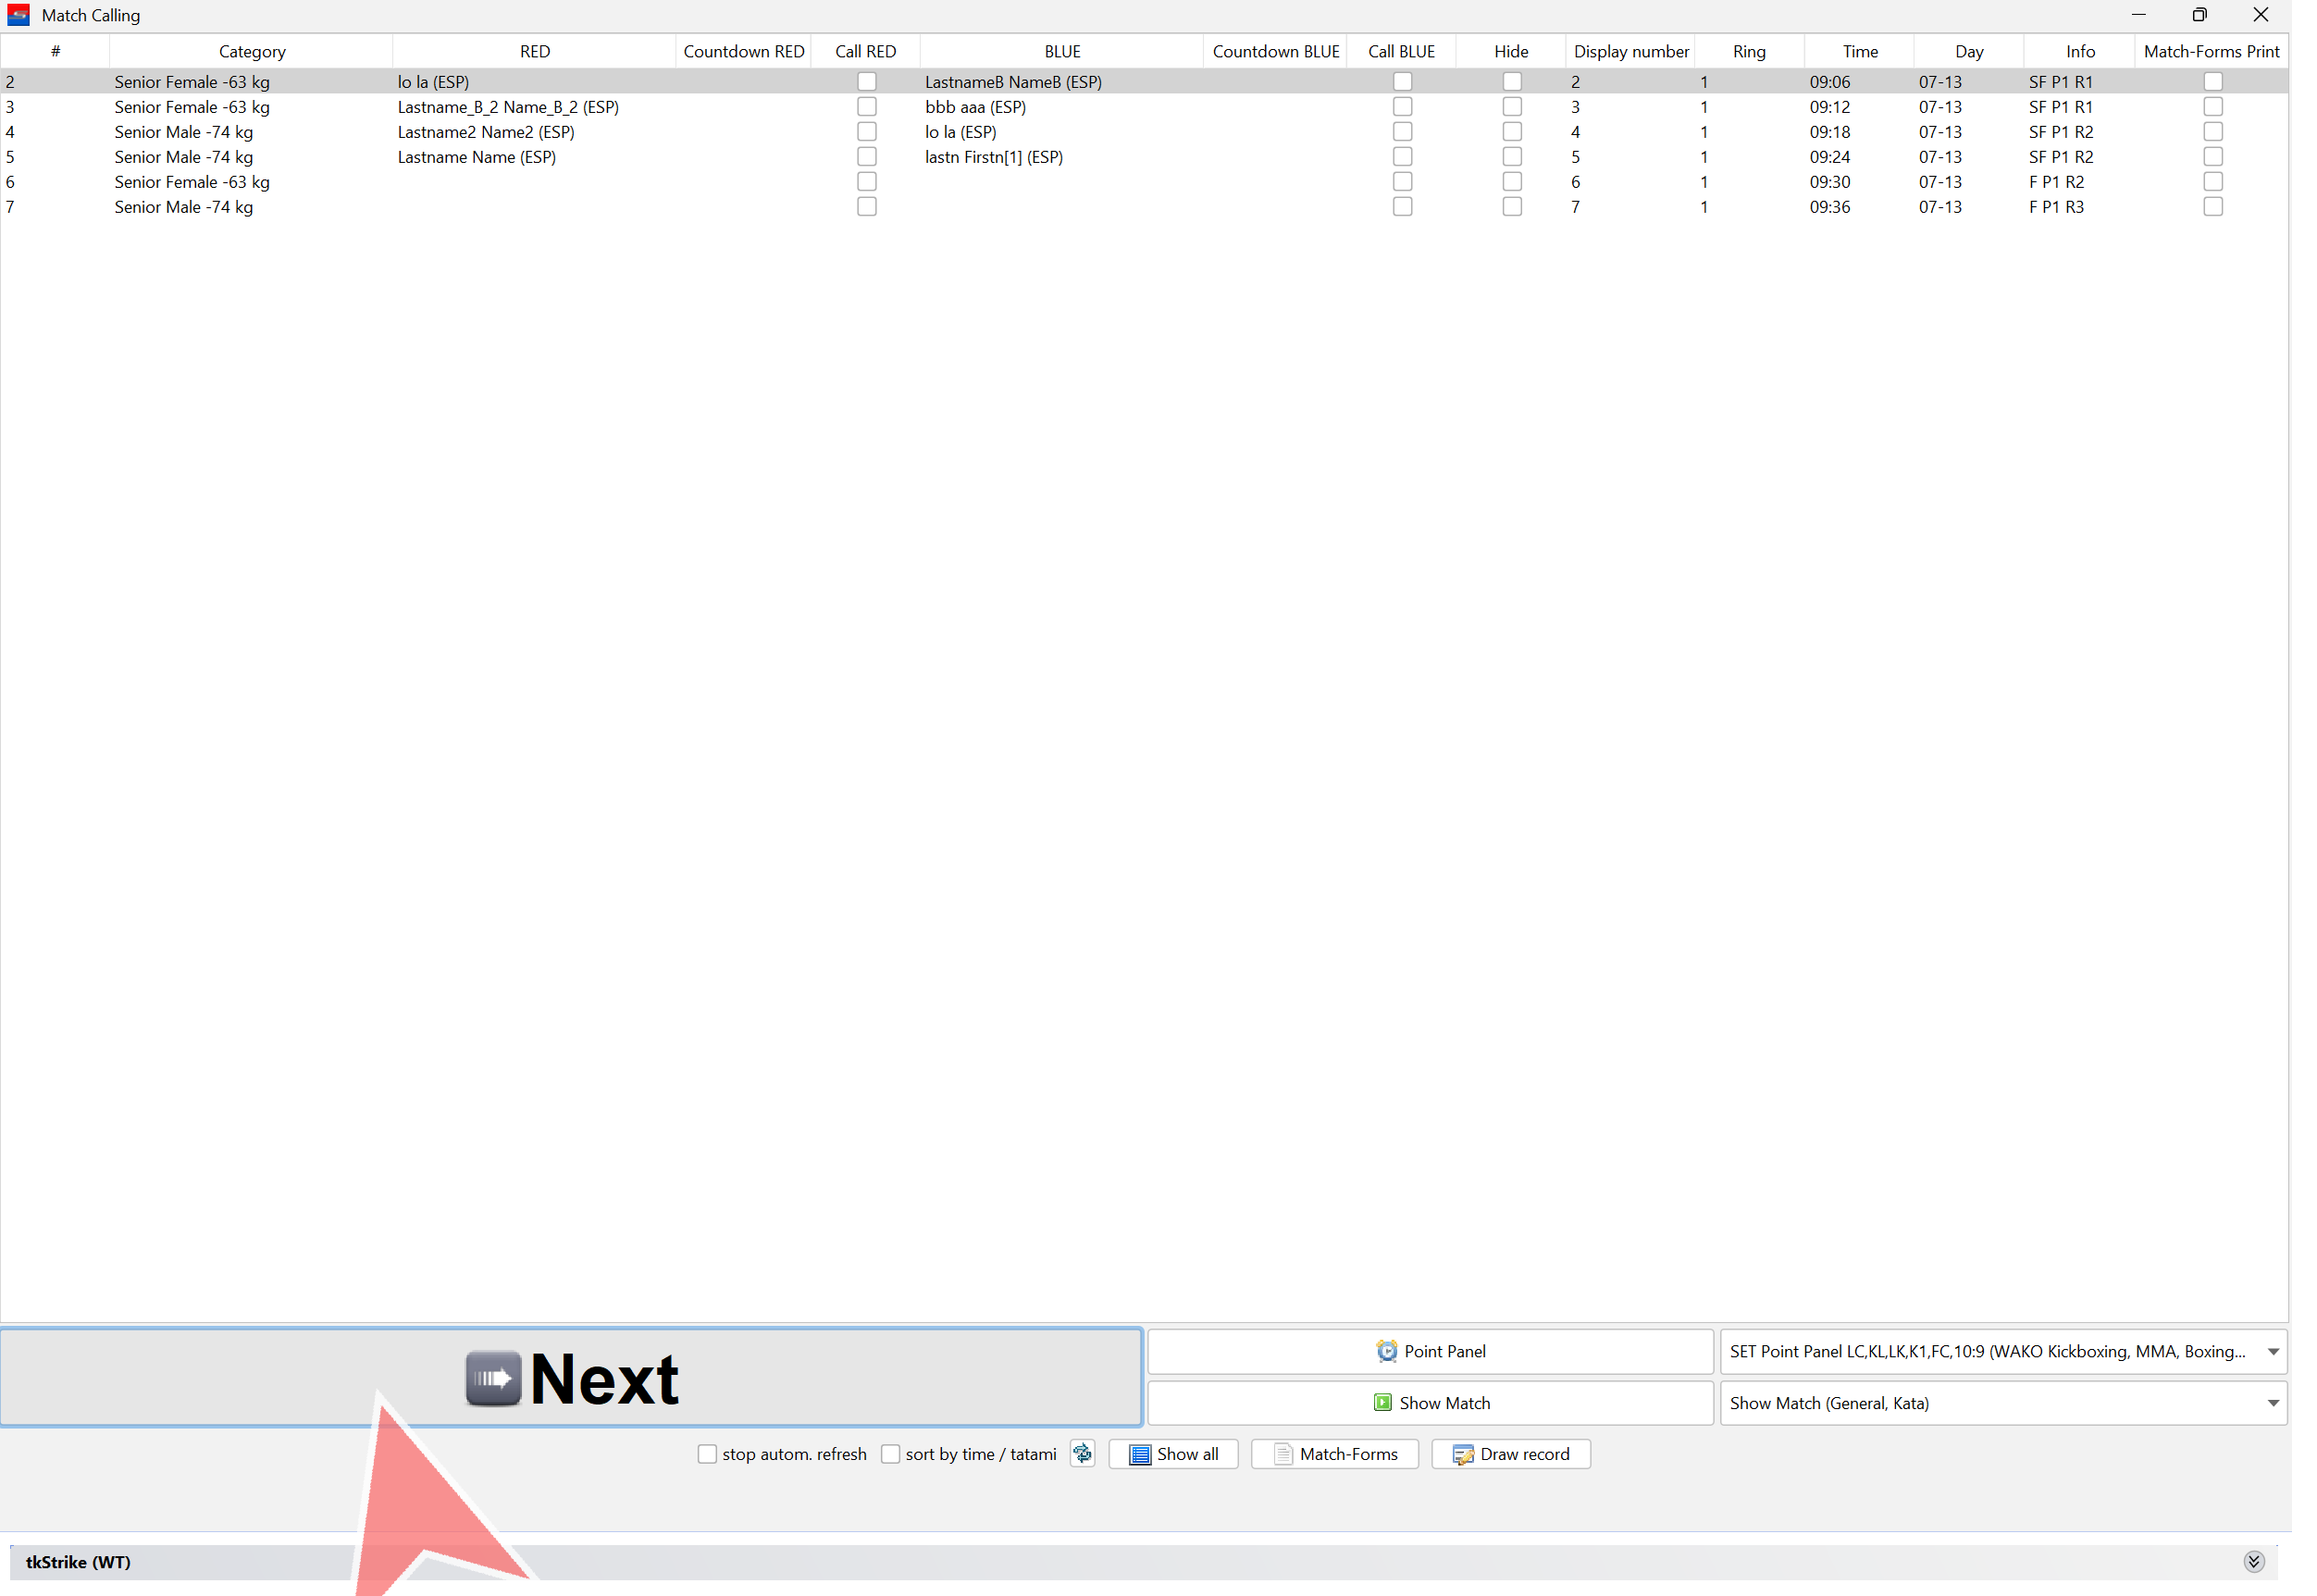
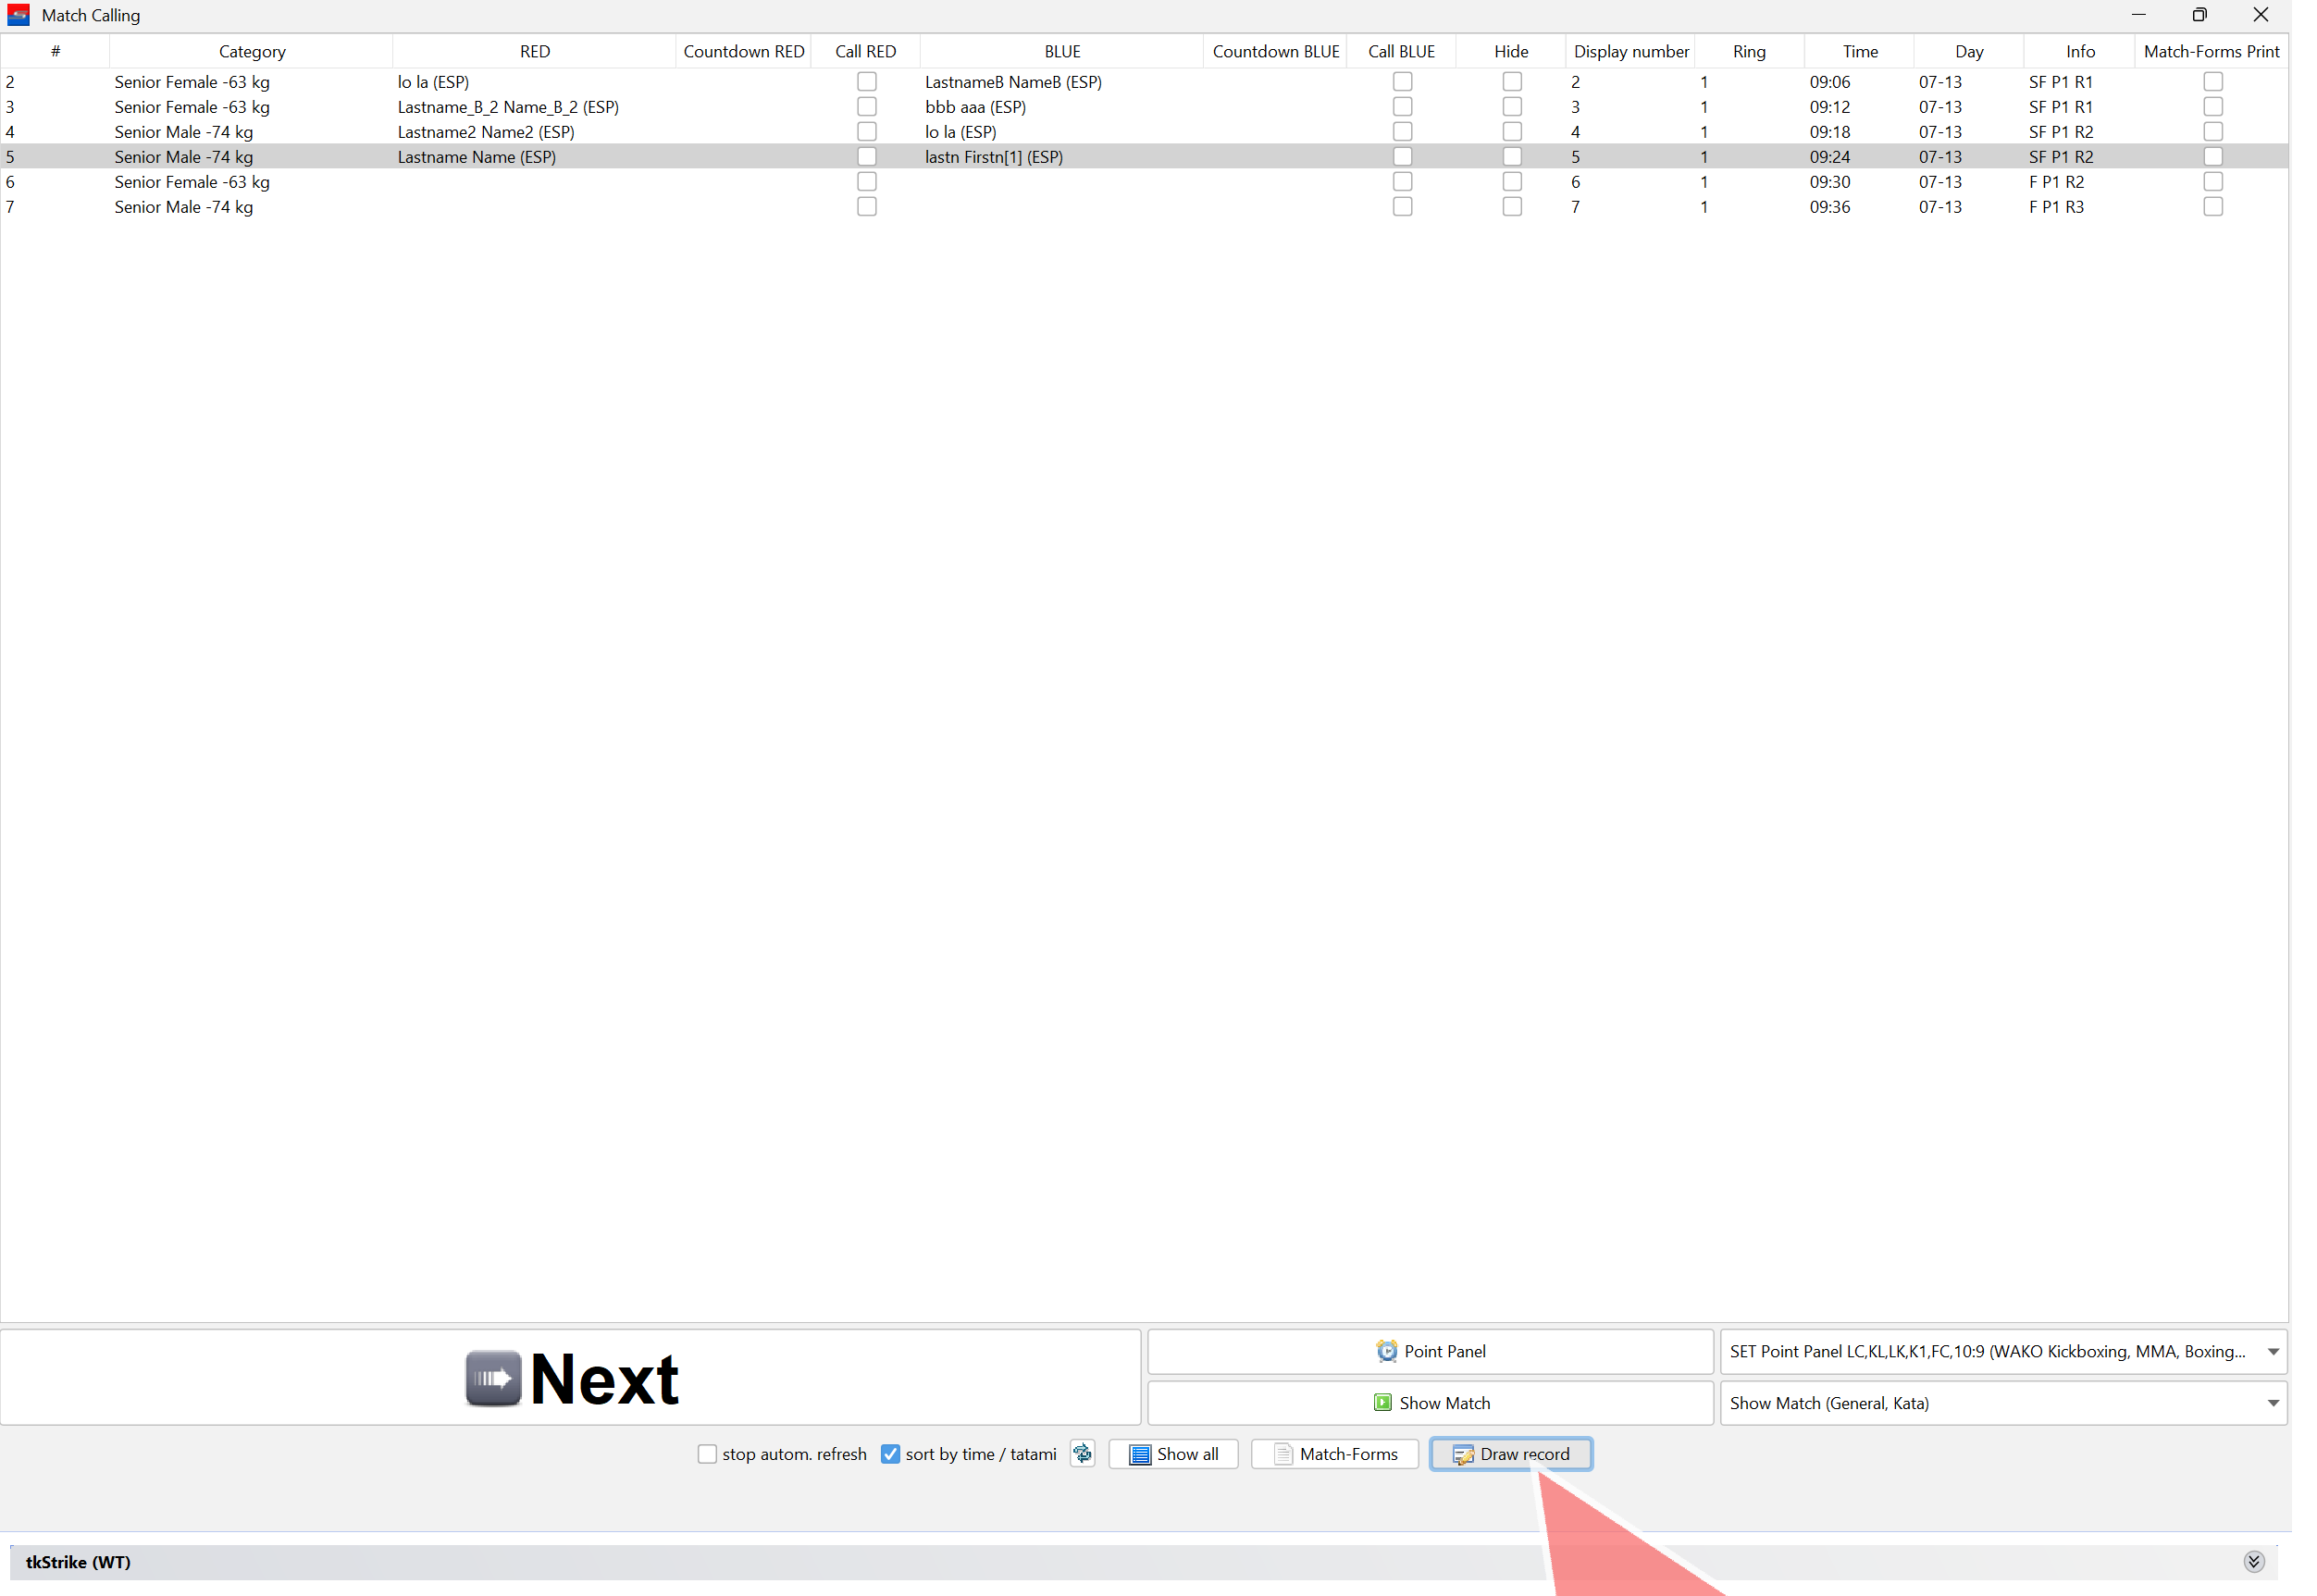
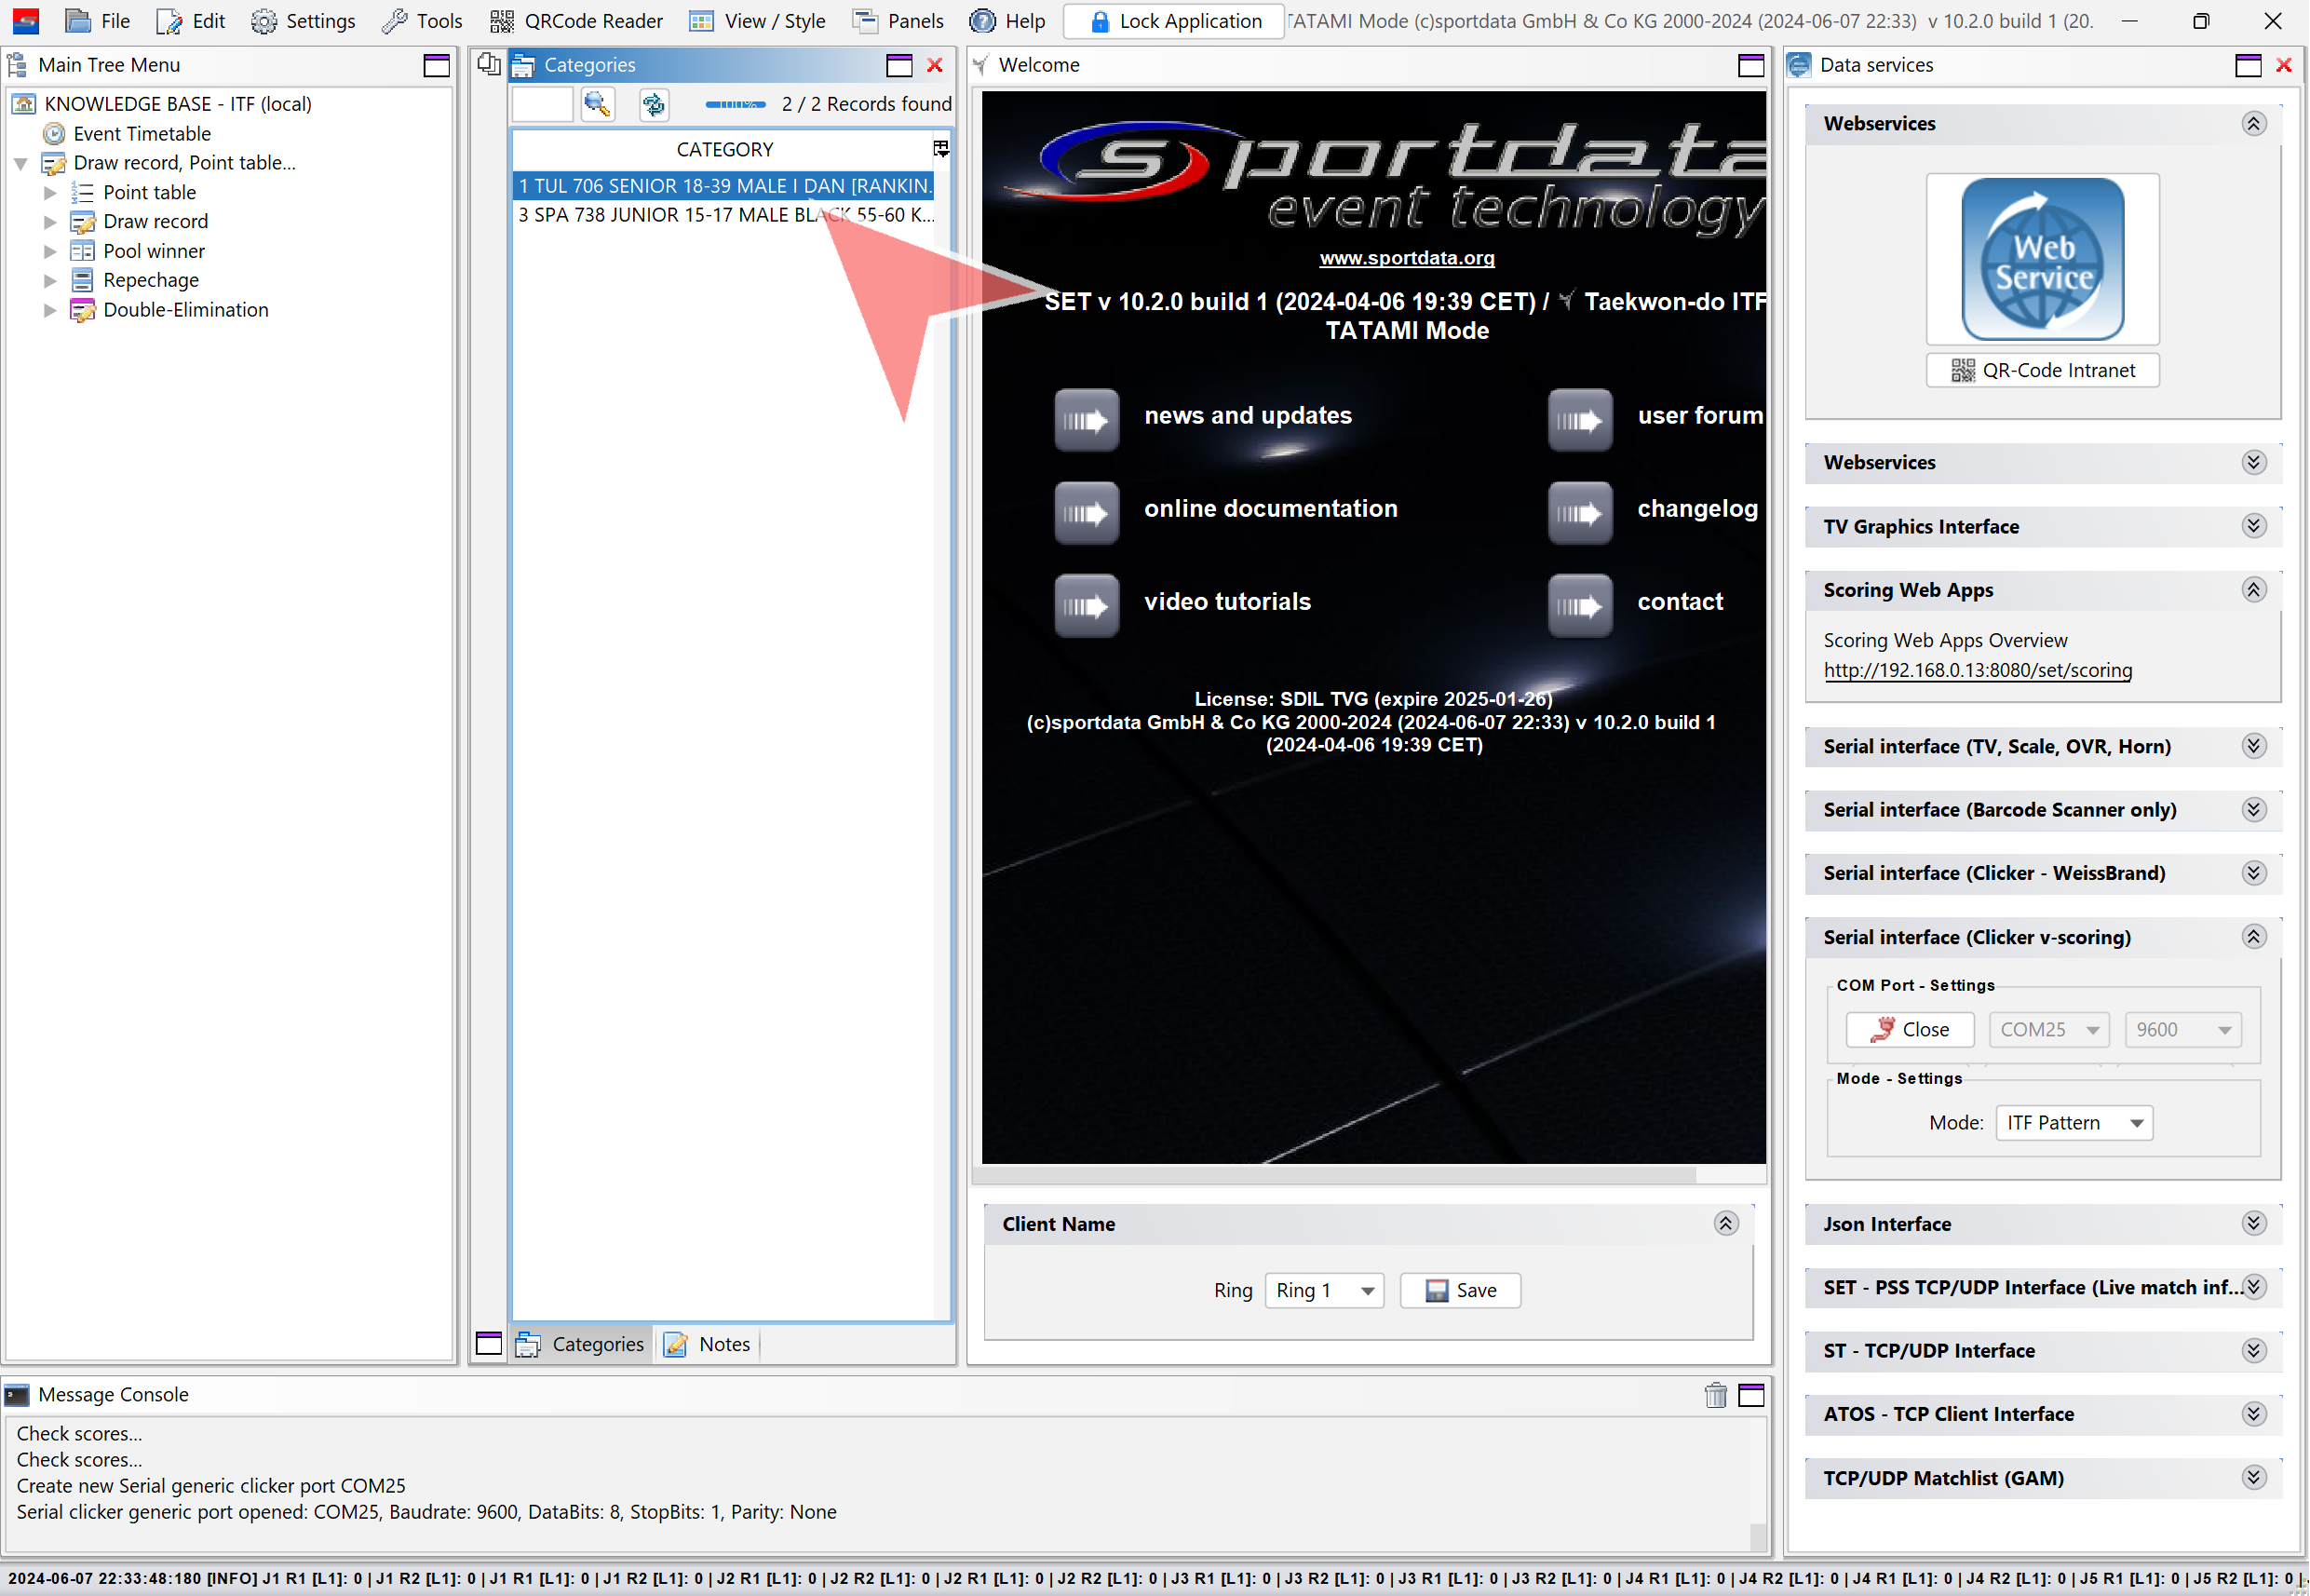
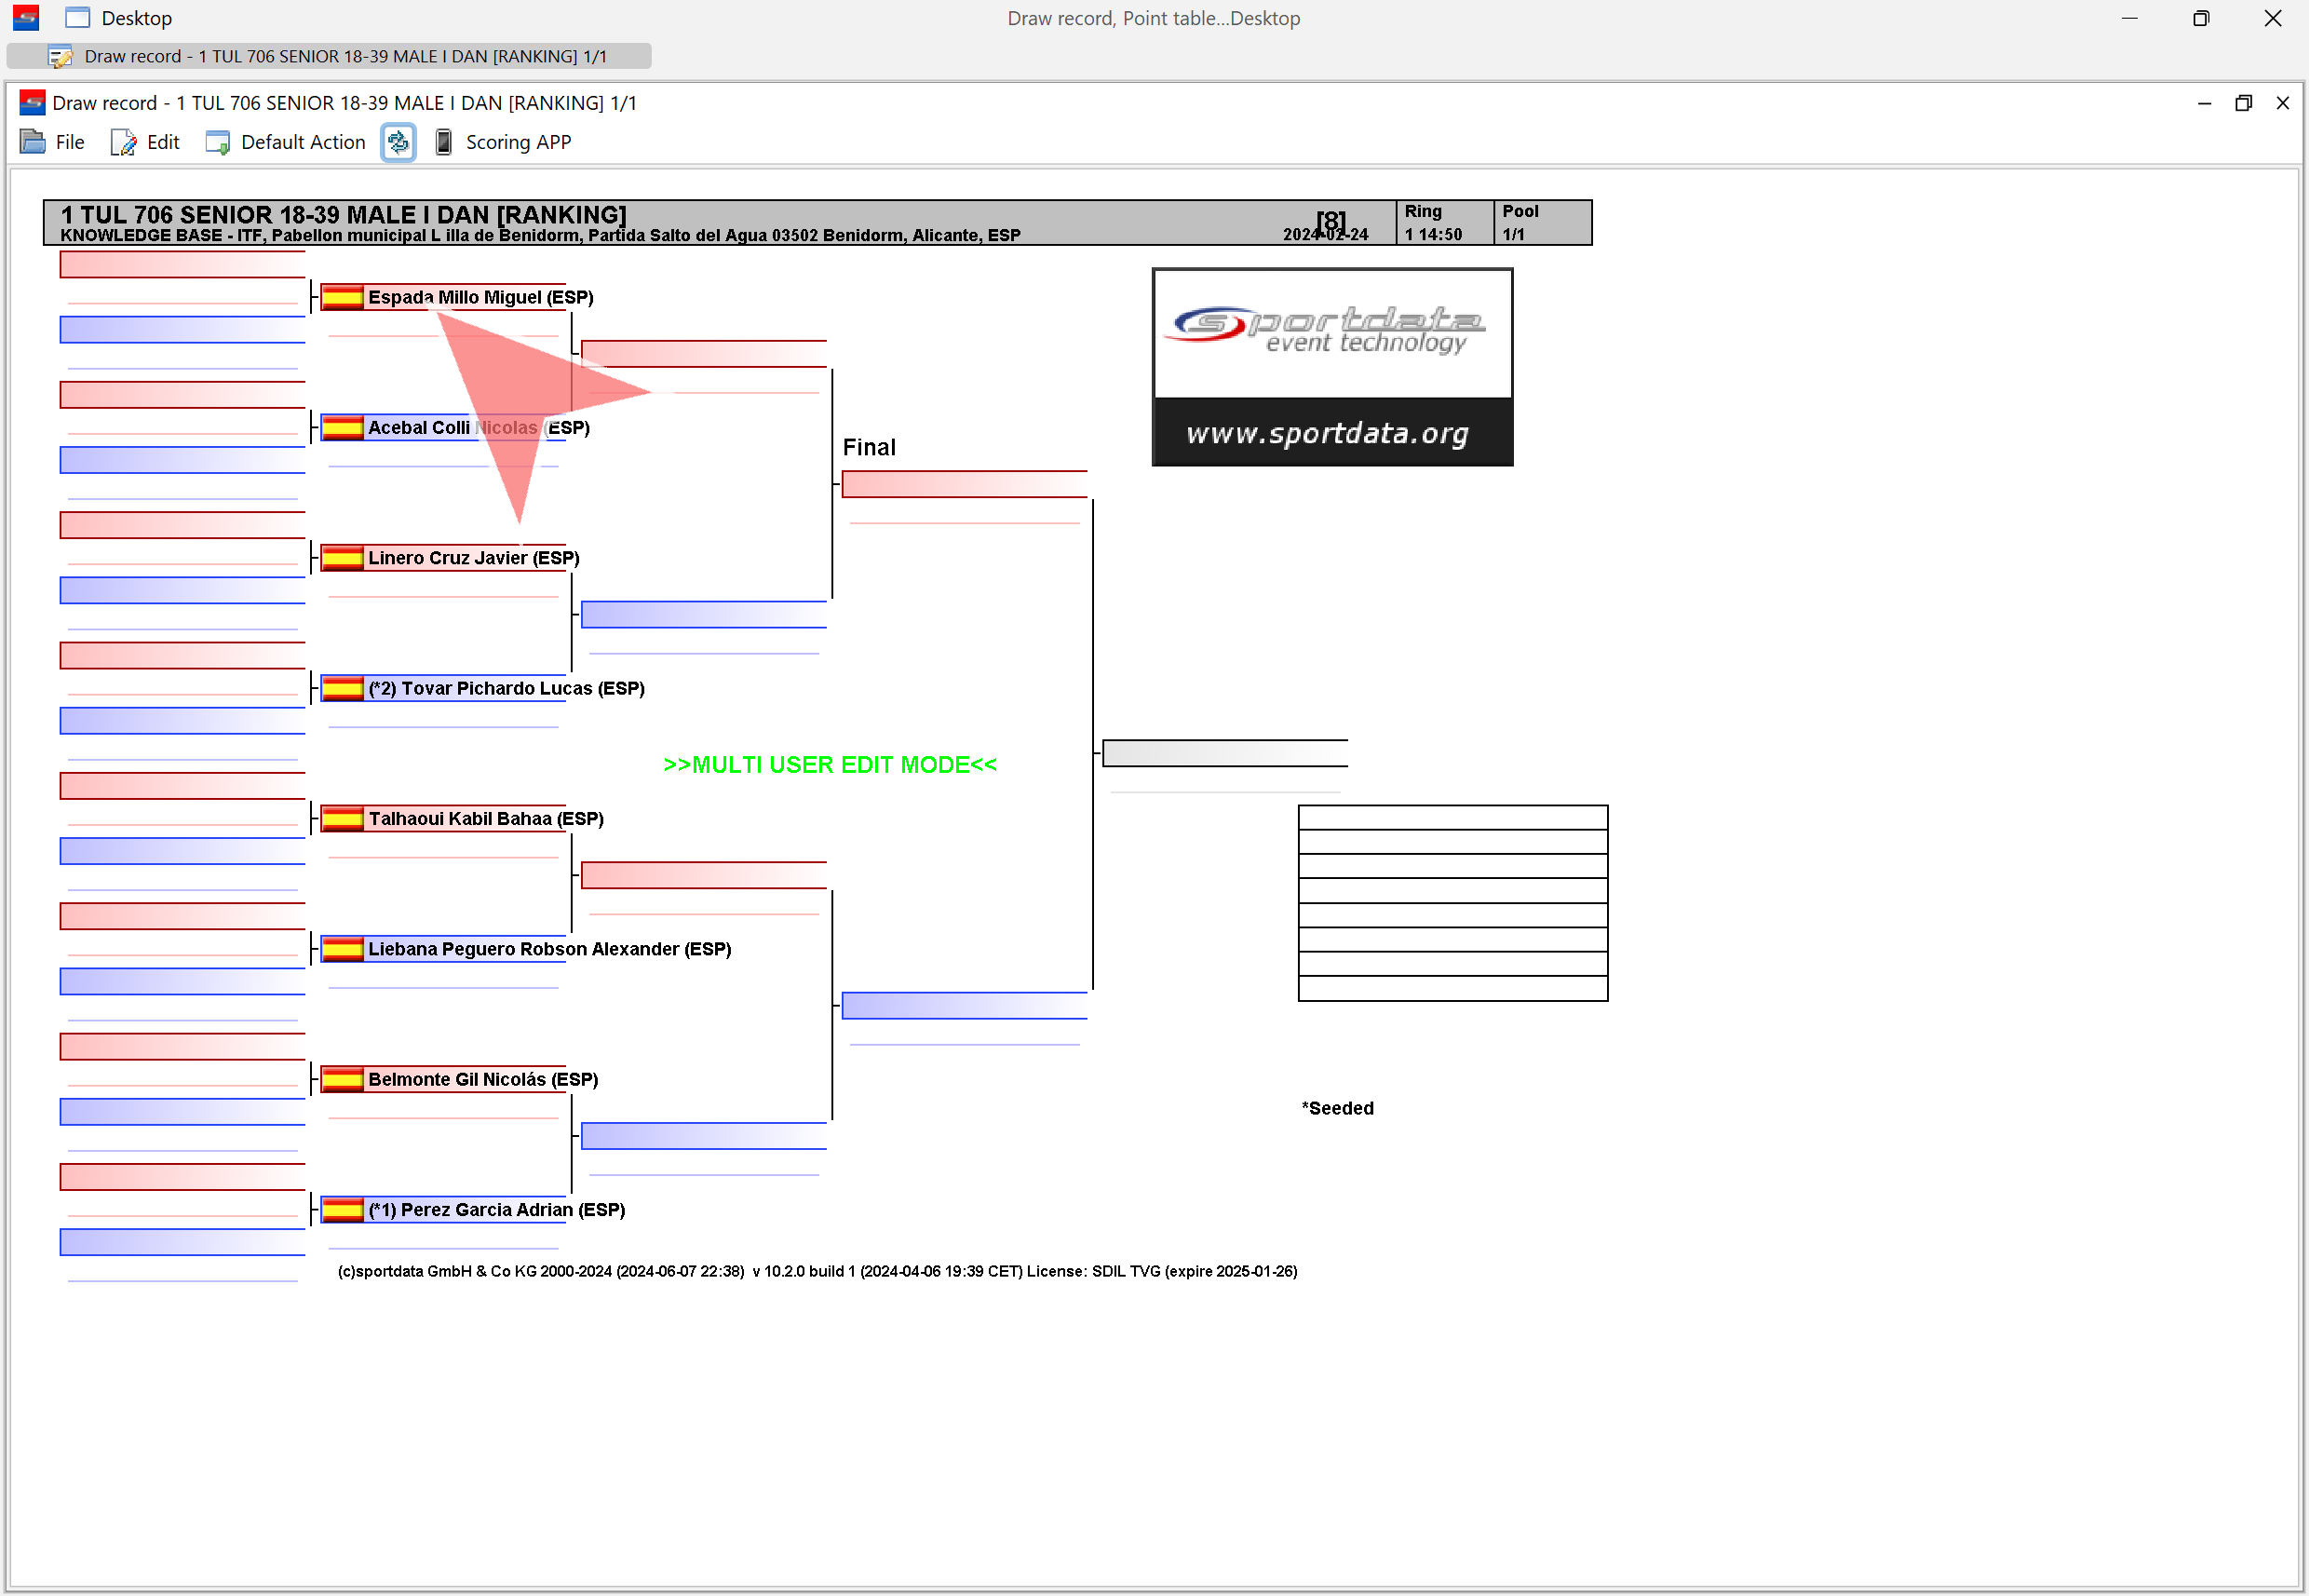
Open a match by clicking on a name.
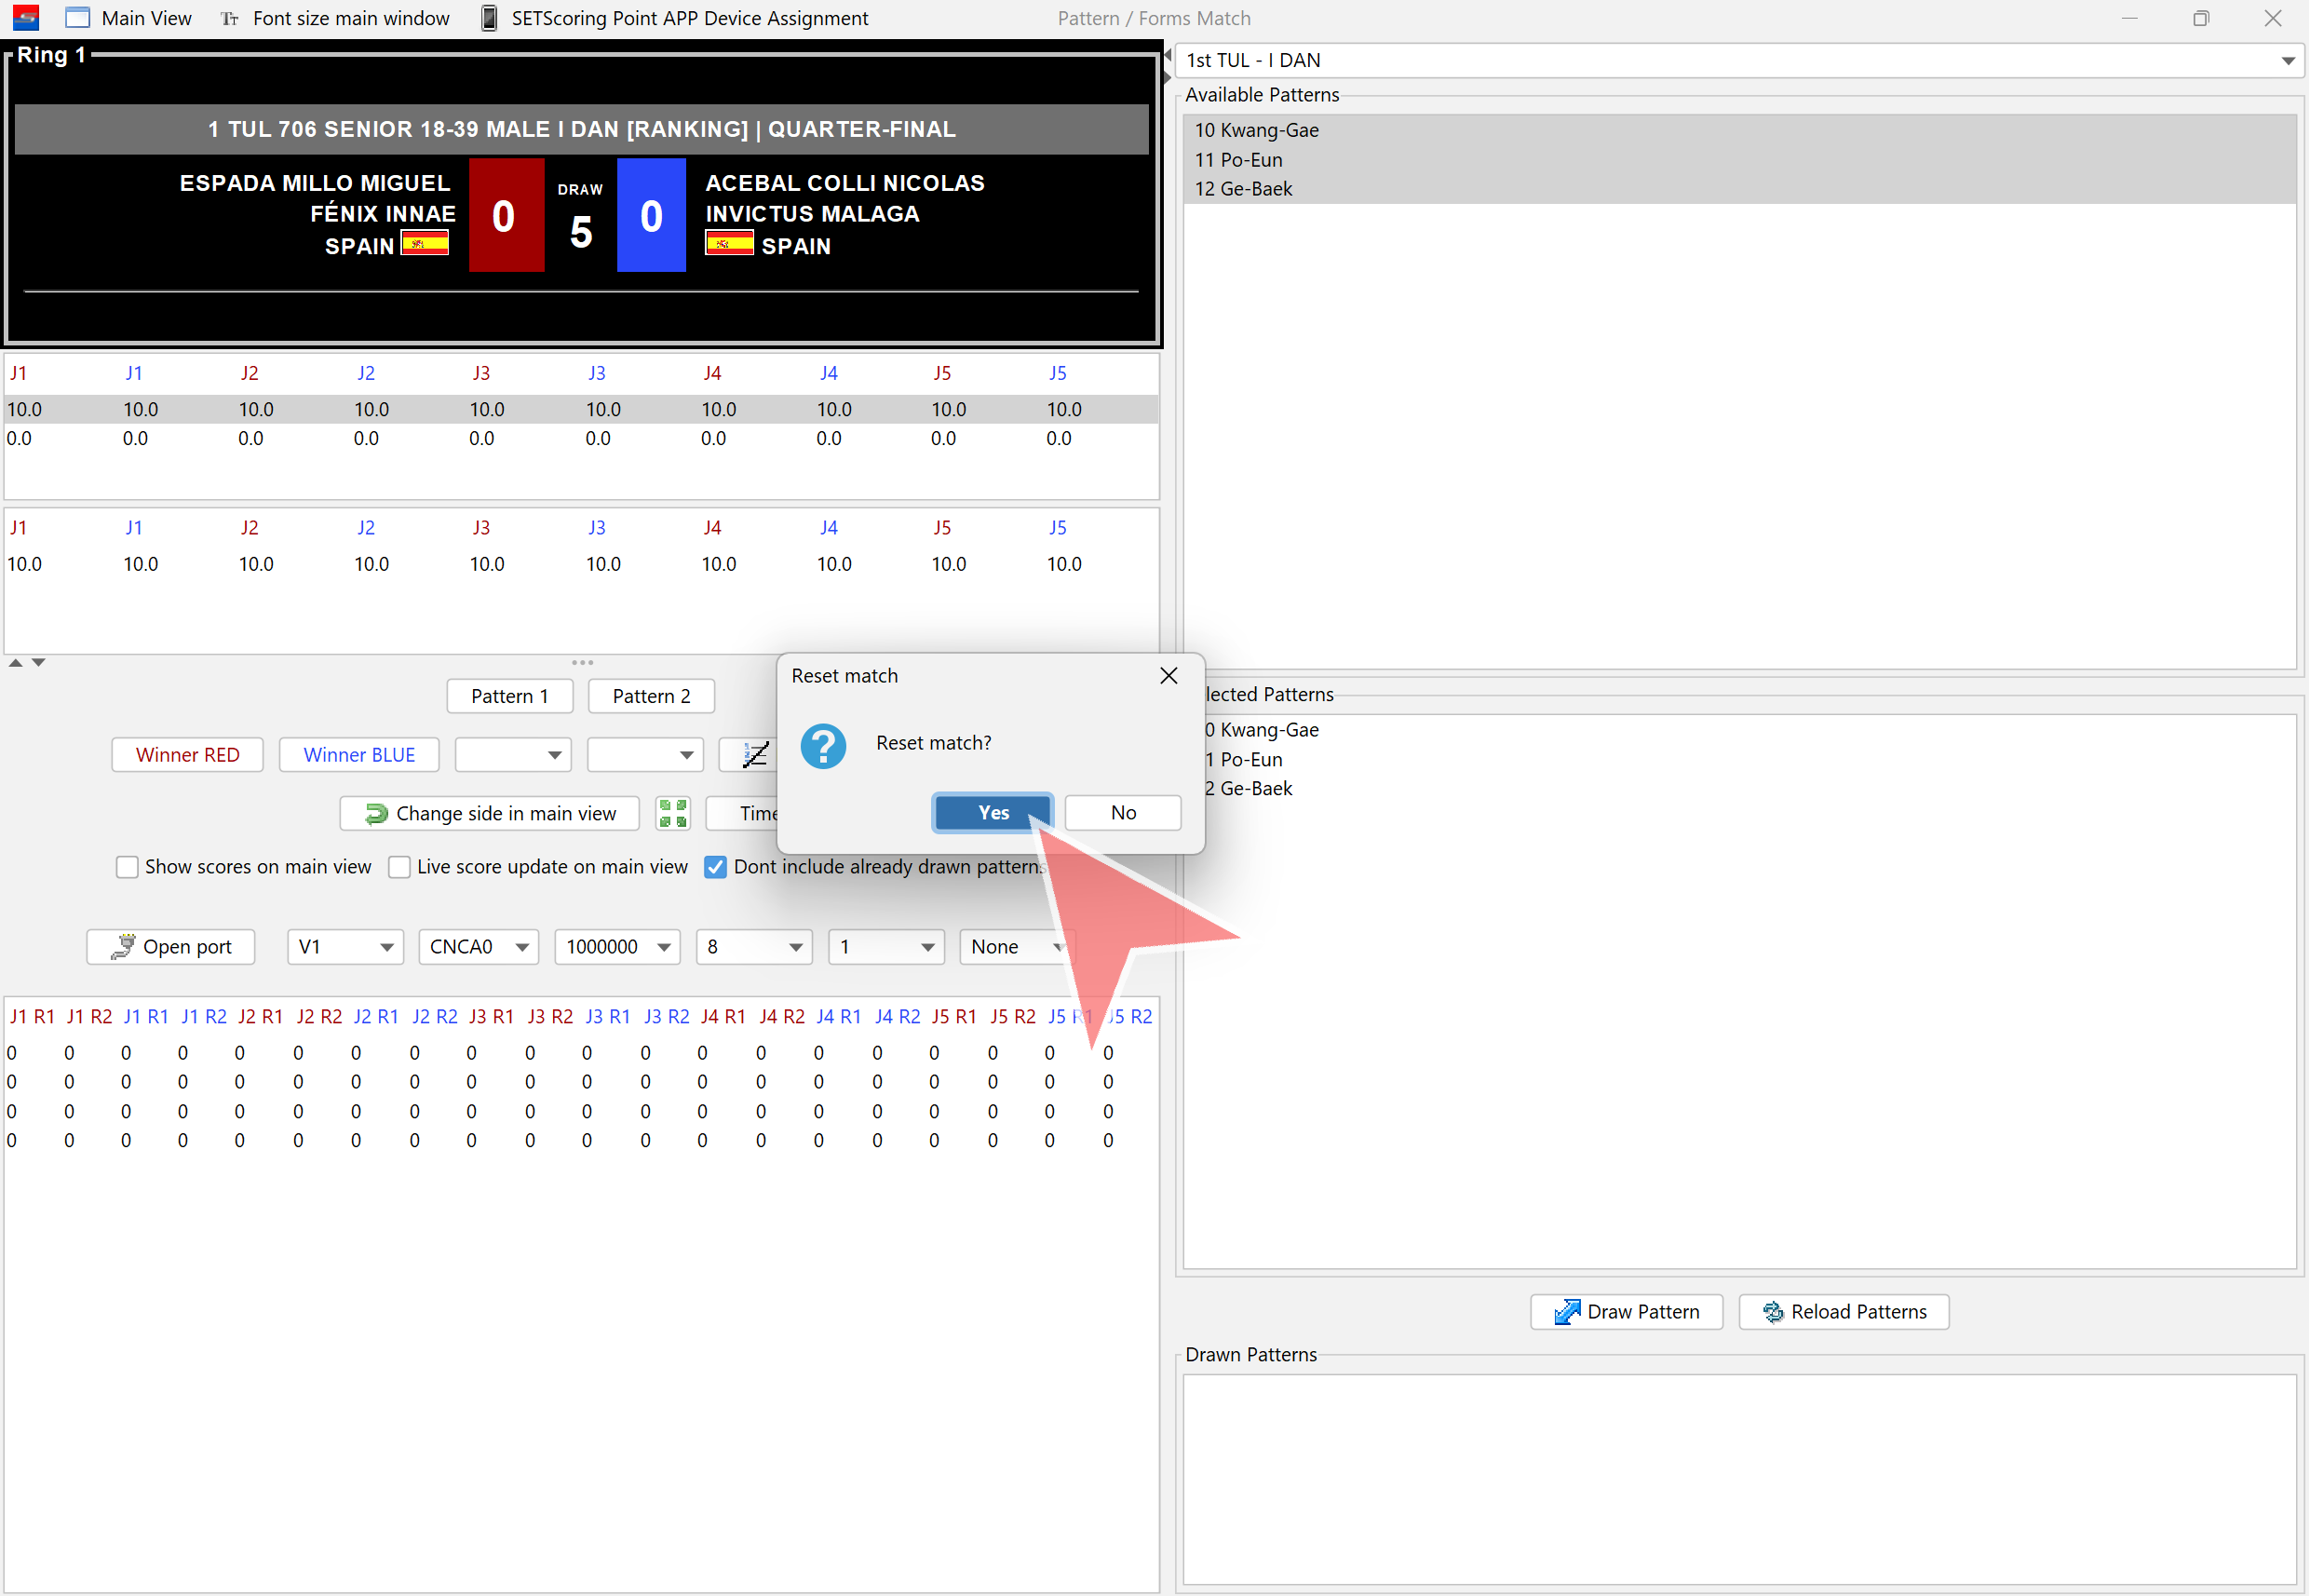
Always reset the match before starting!

Confirm the match reset by clicking on „Yes“.
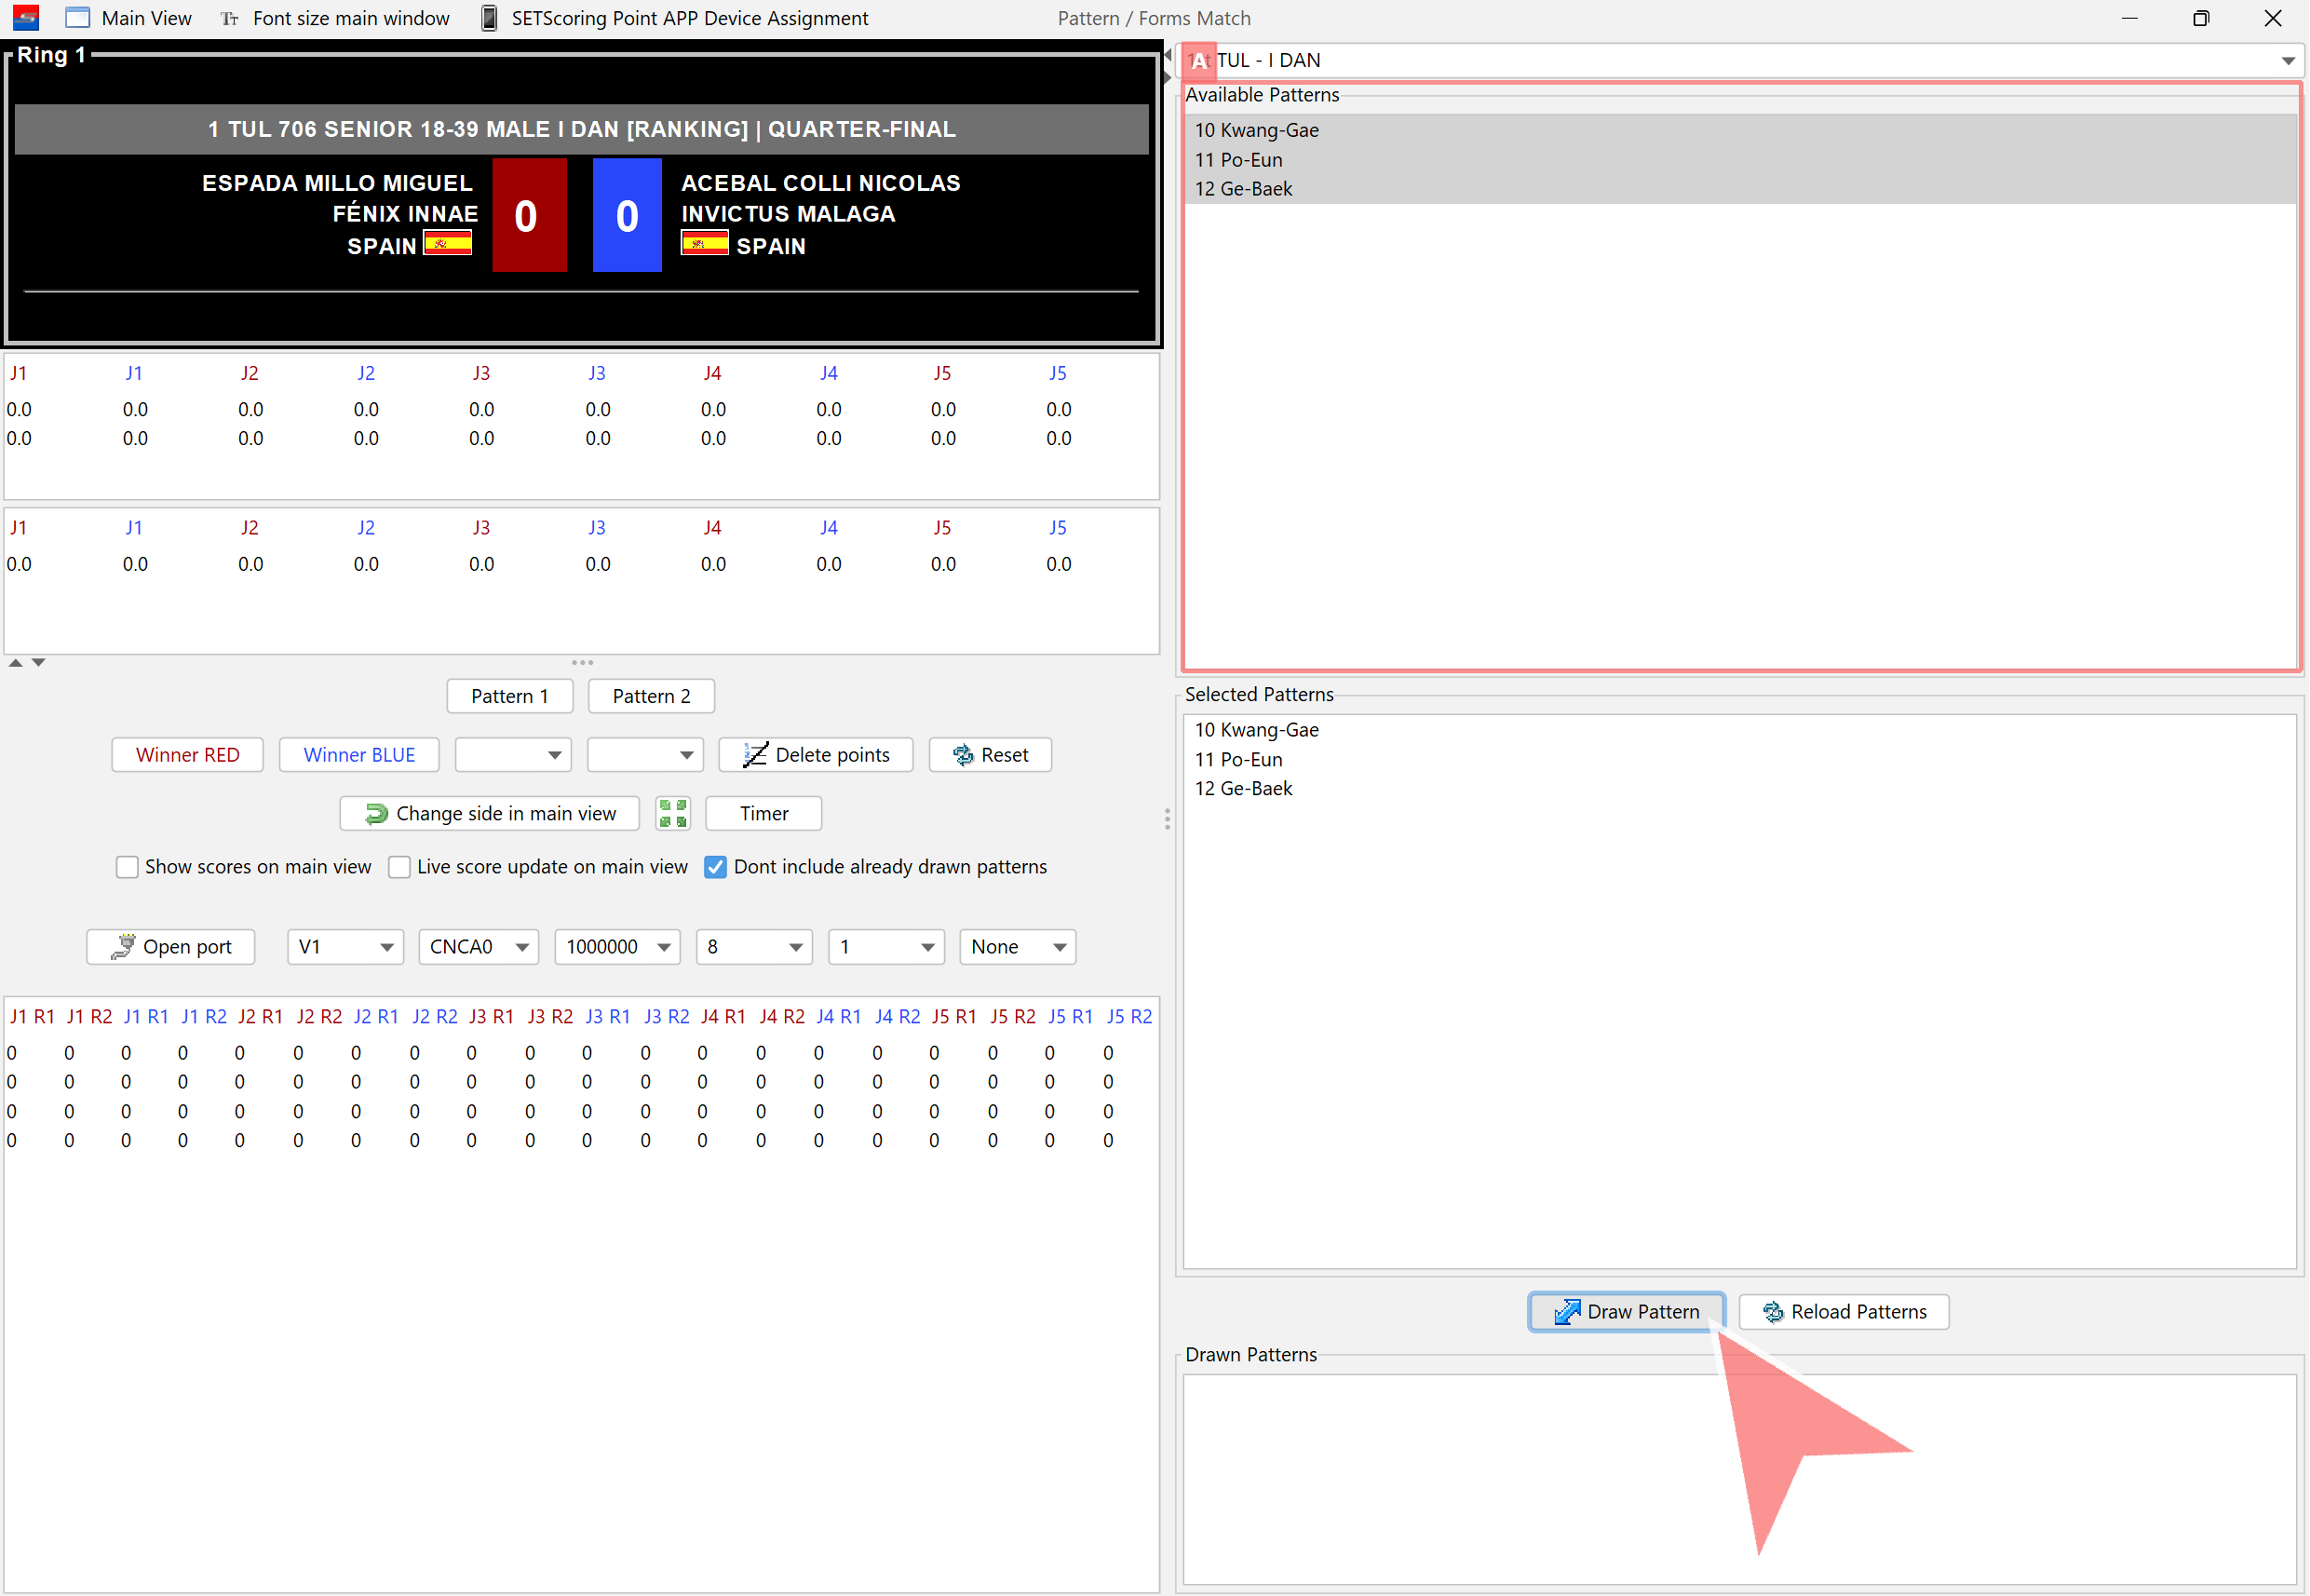
1st Pattern
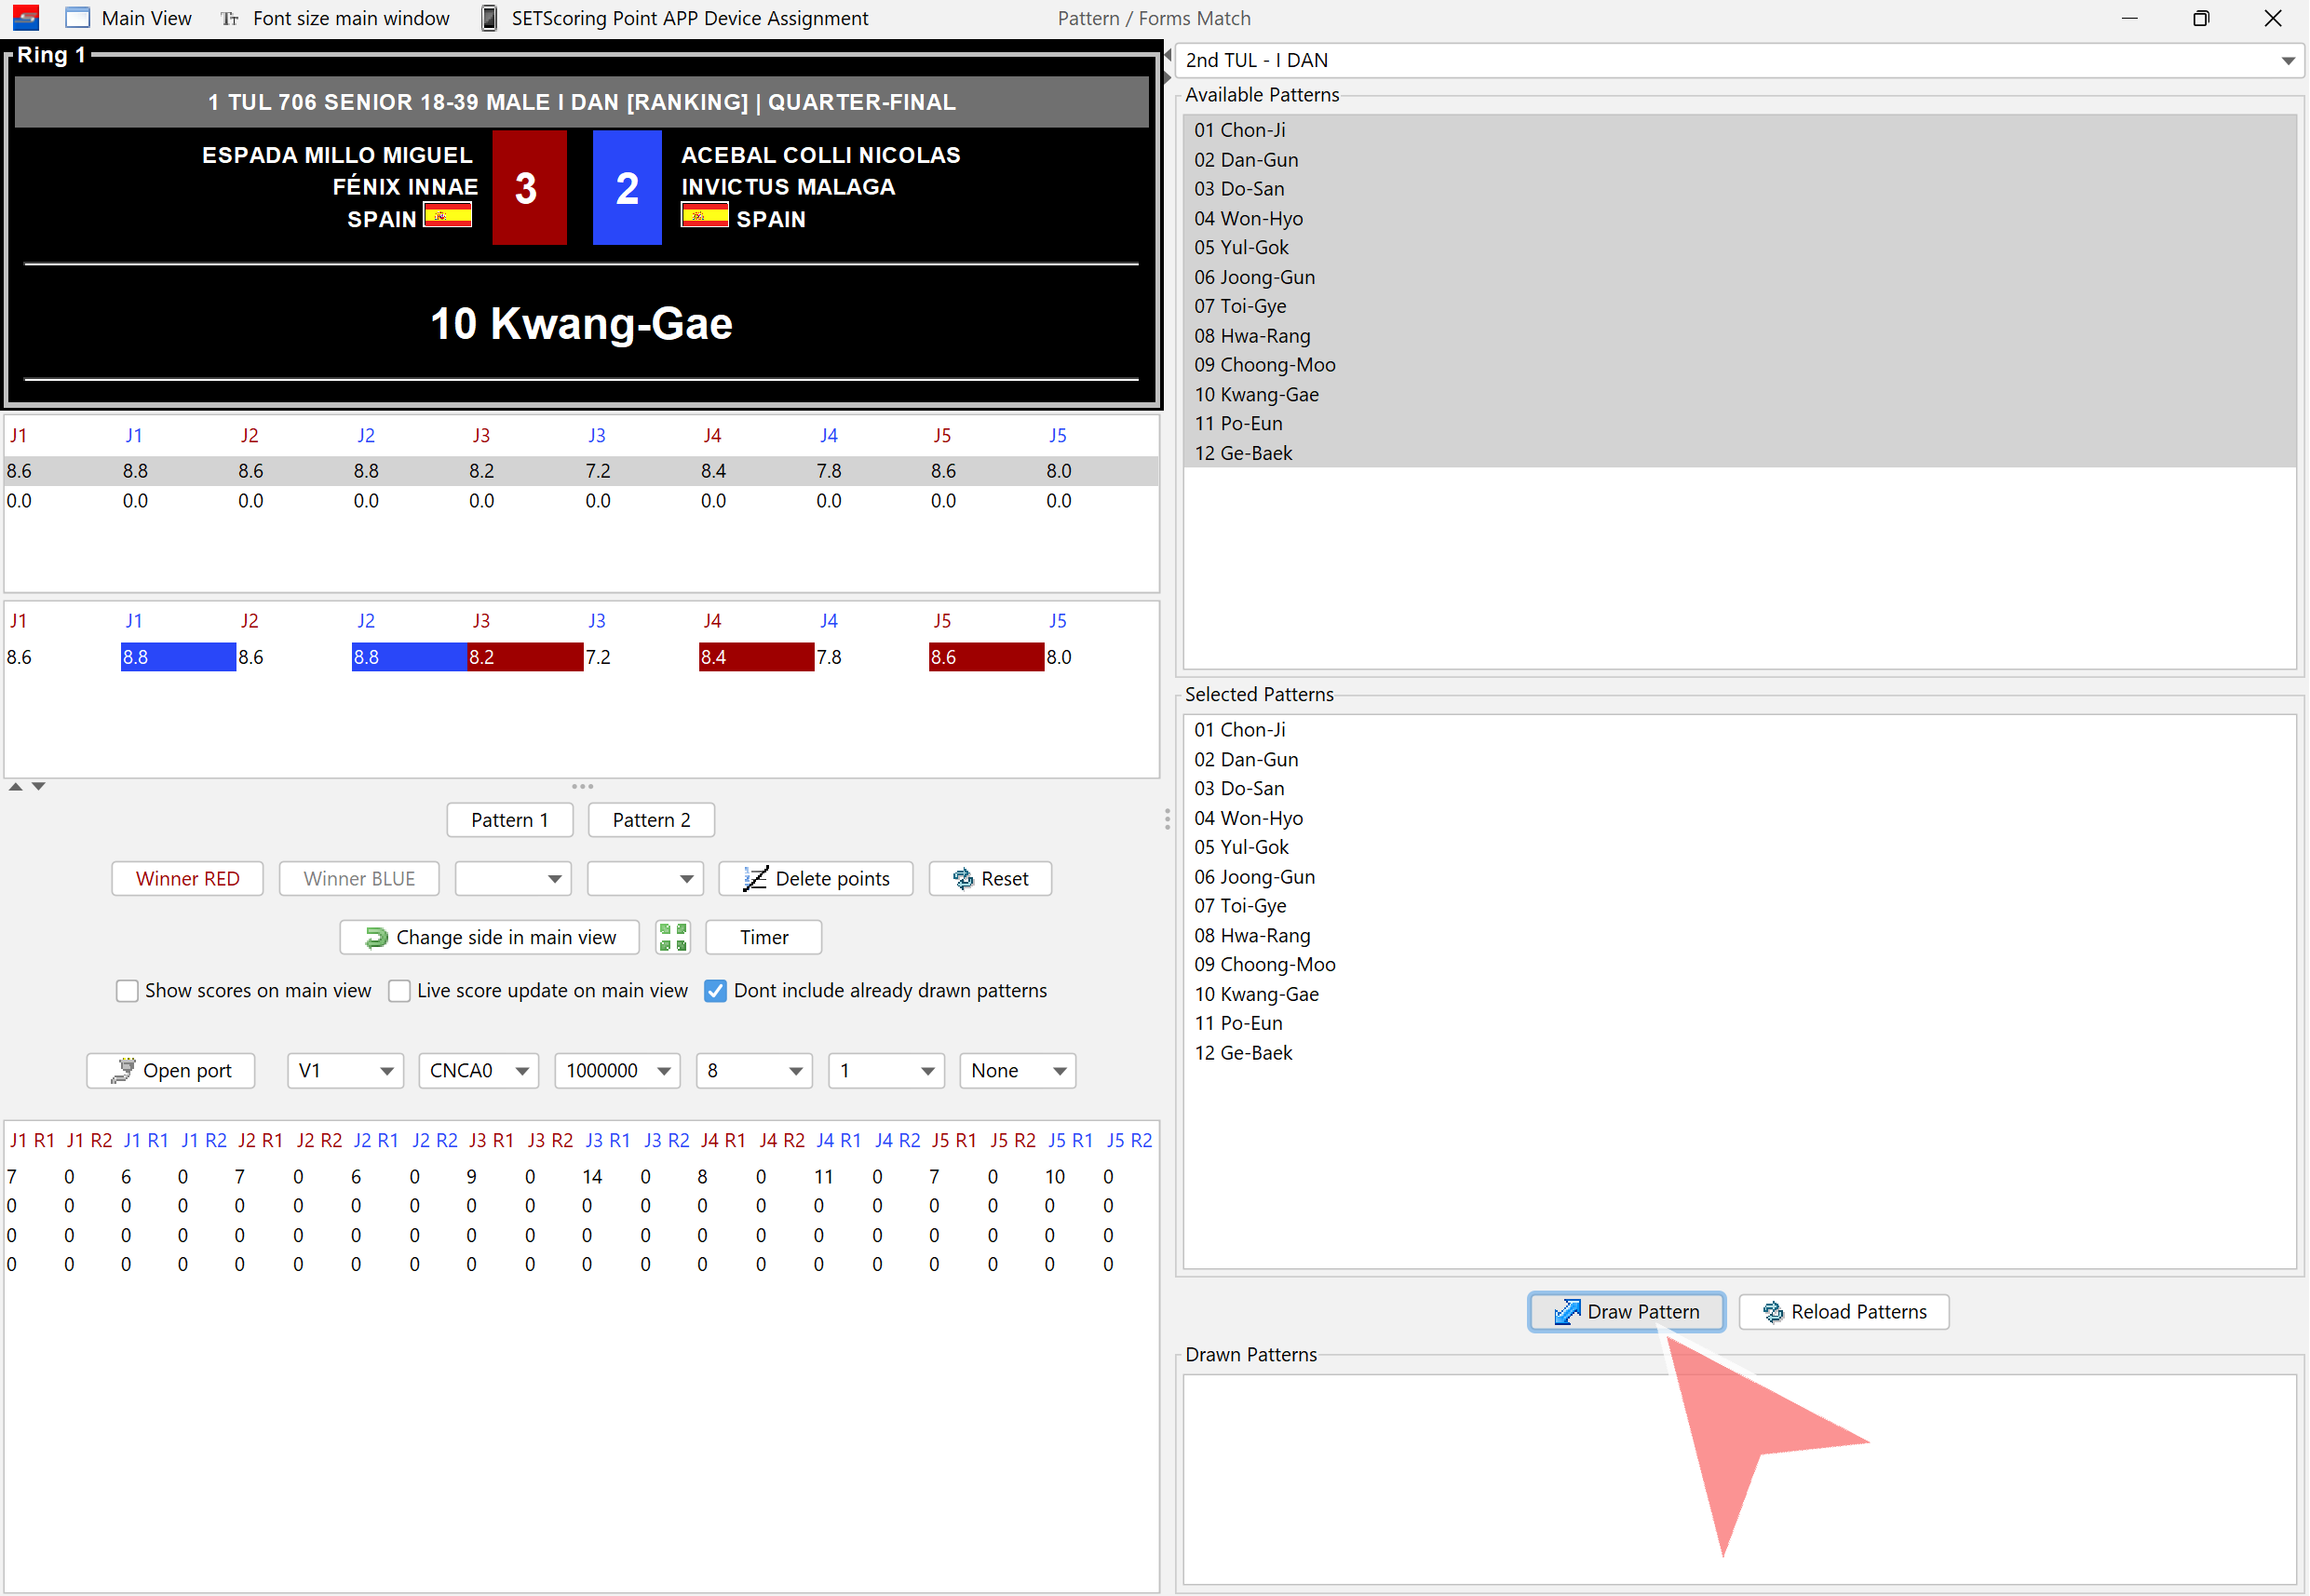
Ensure the correct patterns are selected. Click on „Draw Pattern“.
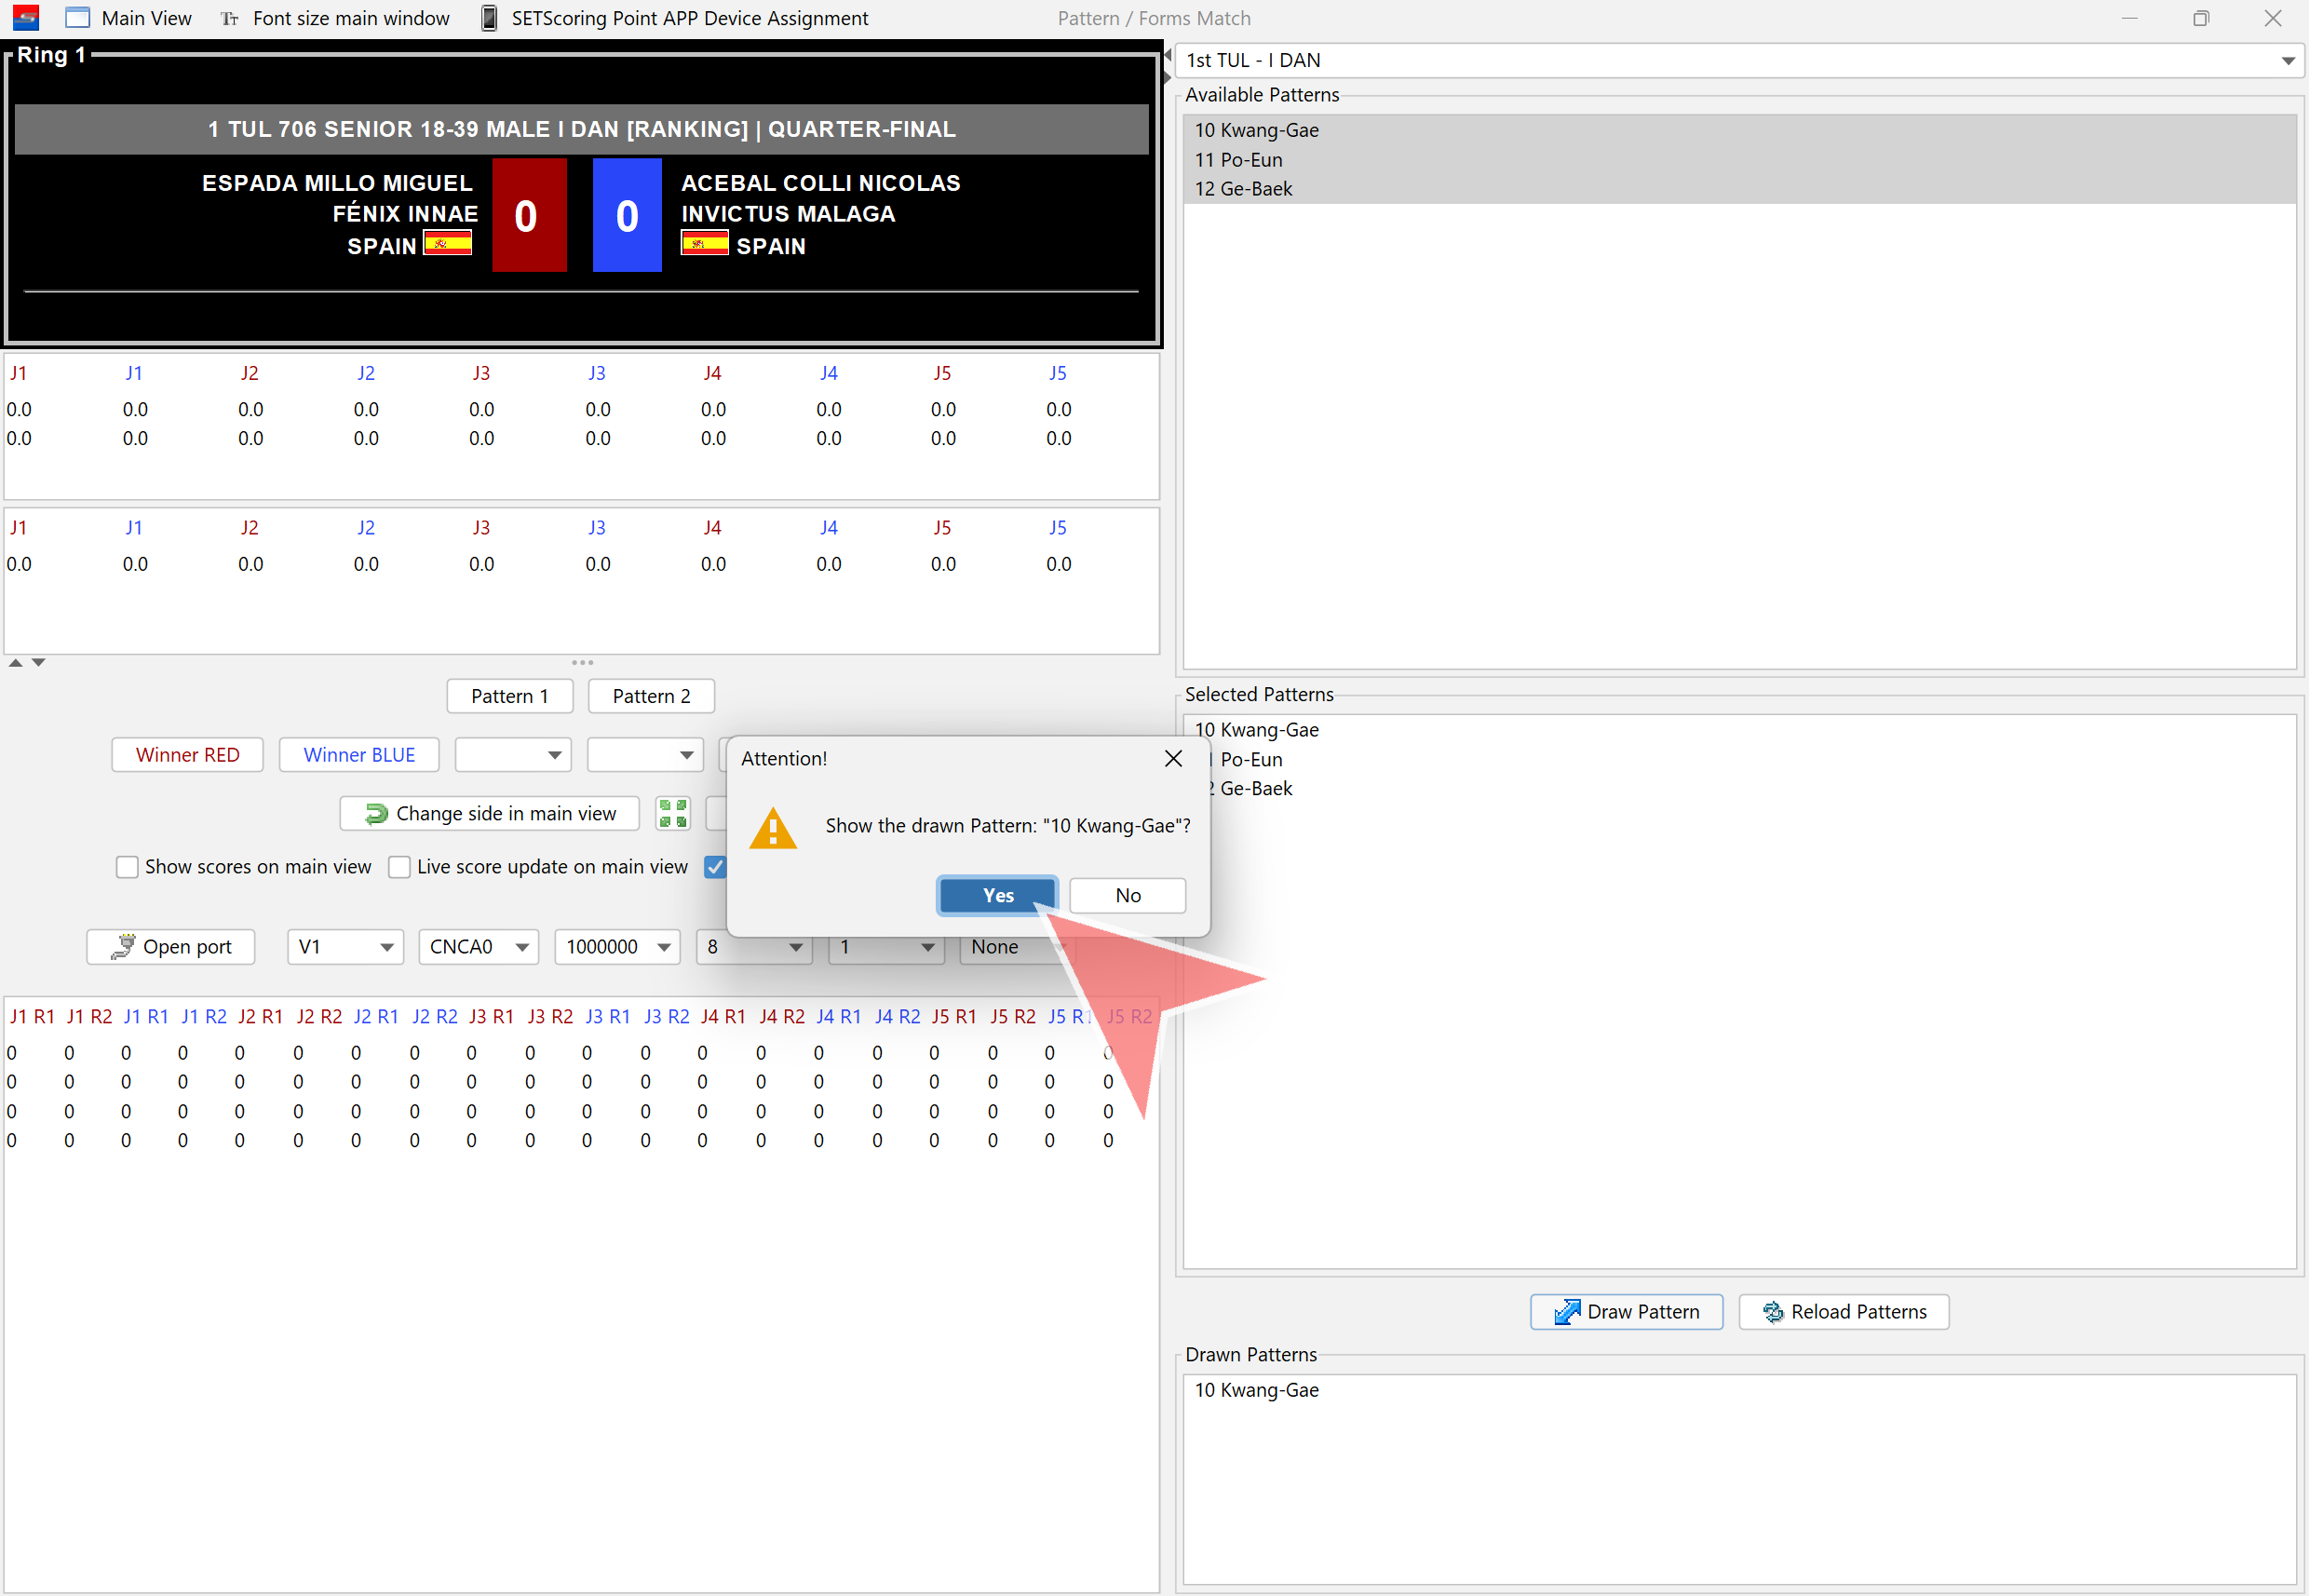
Confirm the drawn pattern. It will be displayed on the screen once „Yes“ is clicked.
Click on „Pattern 1“ to open scores window.
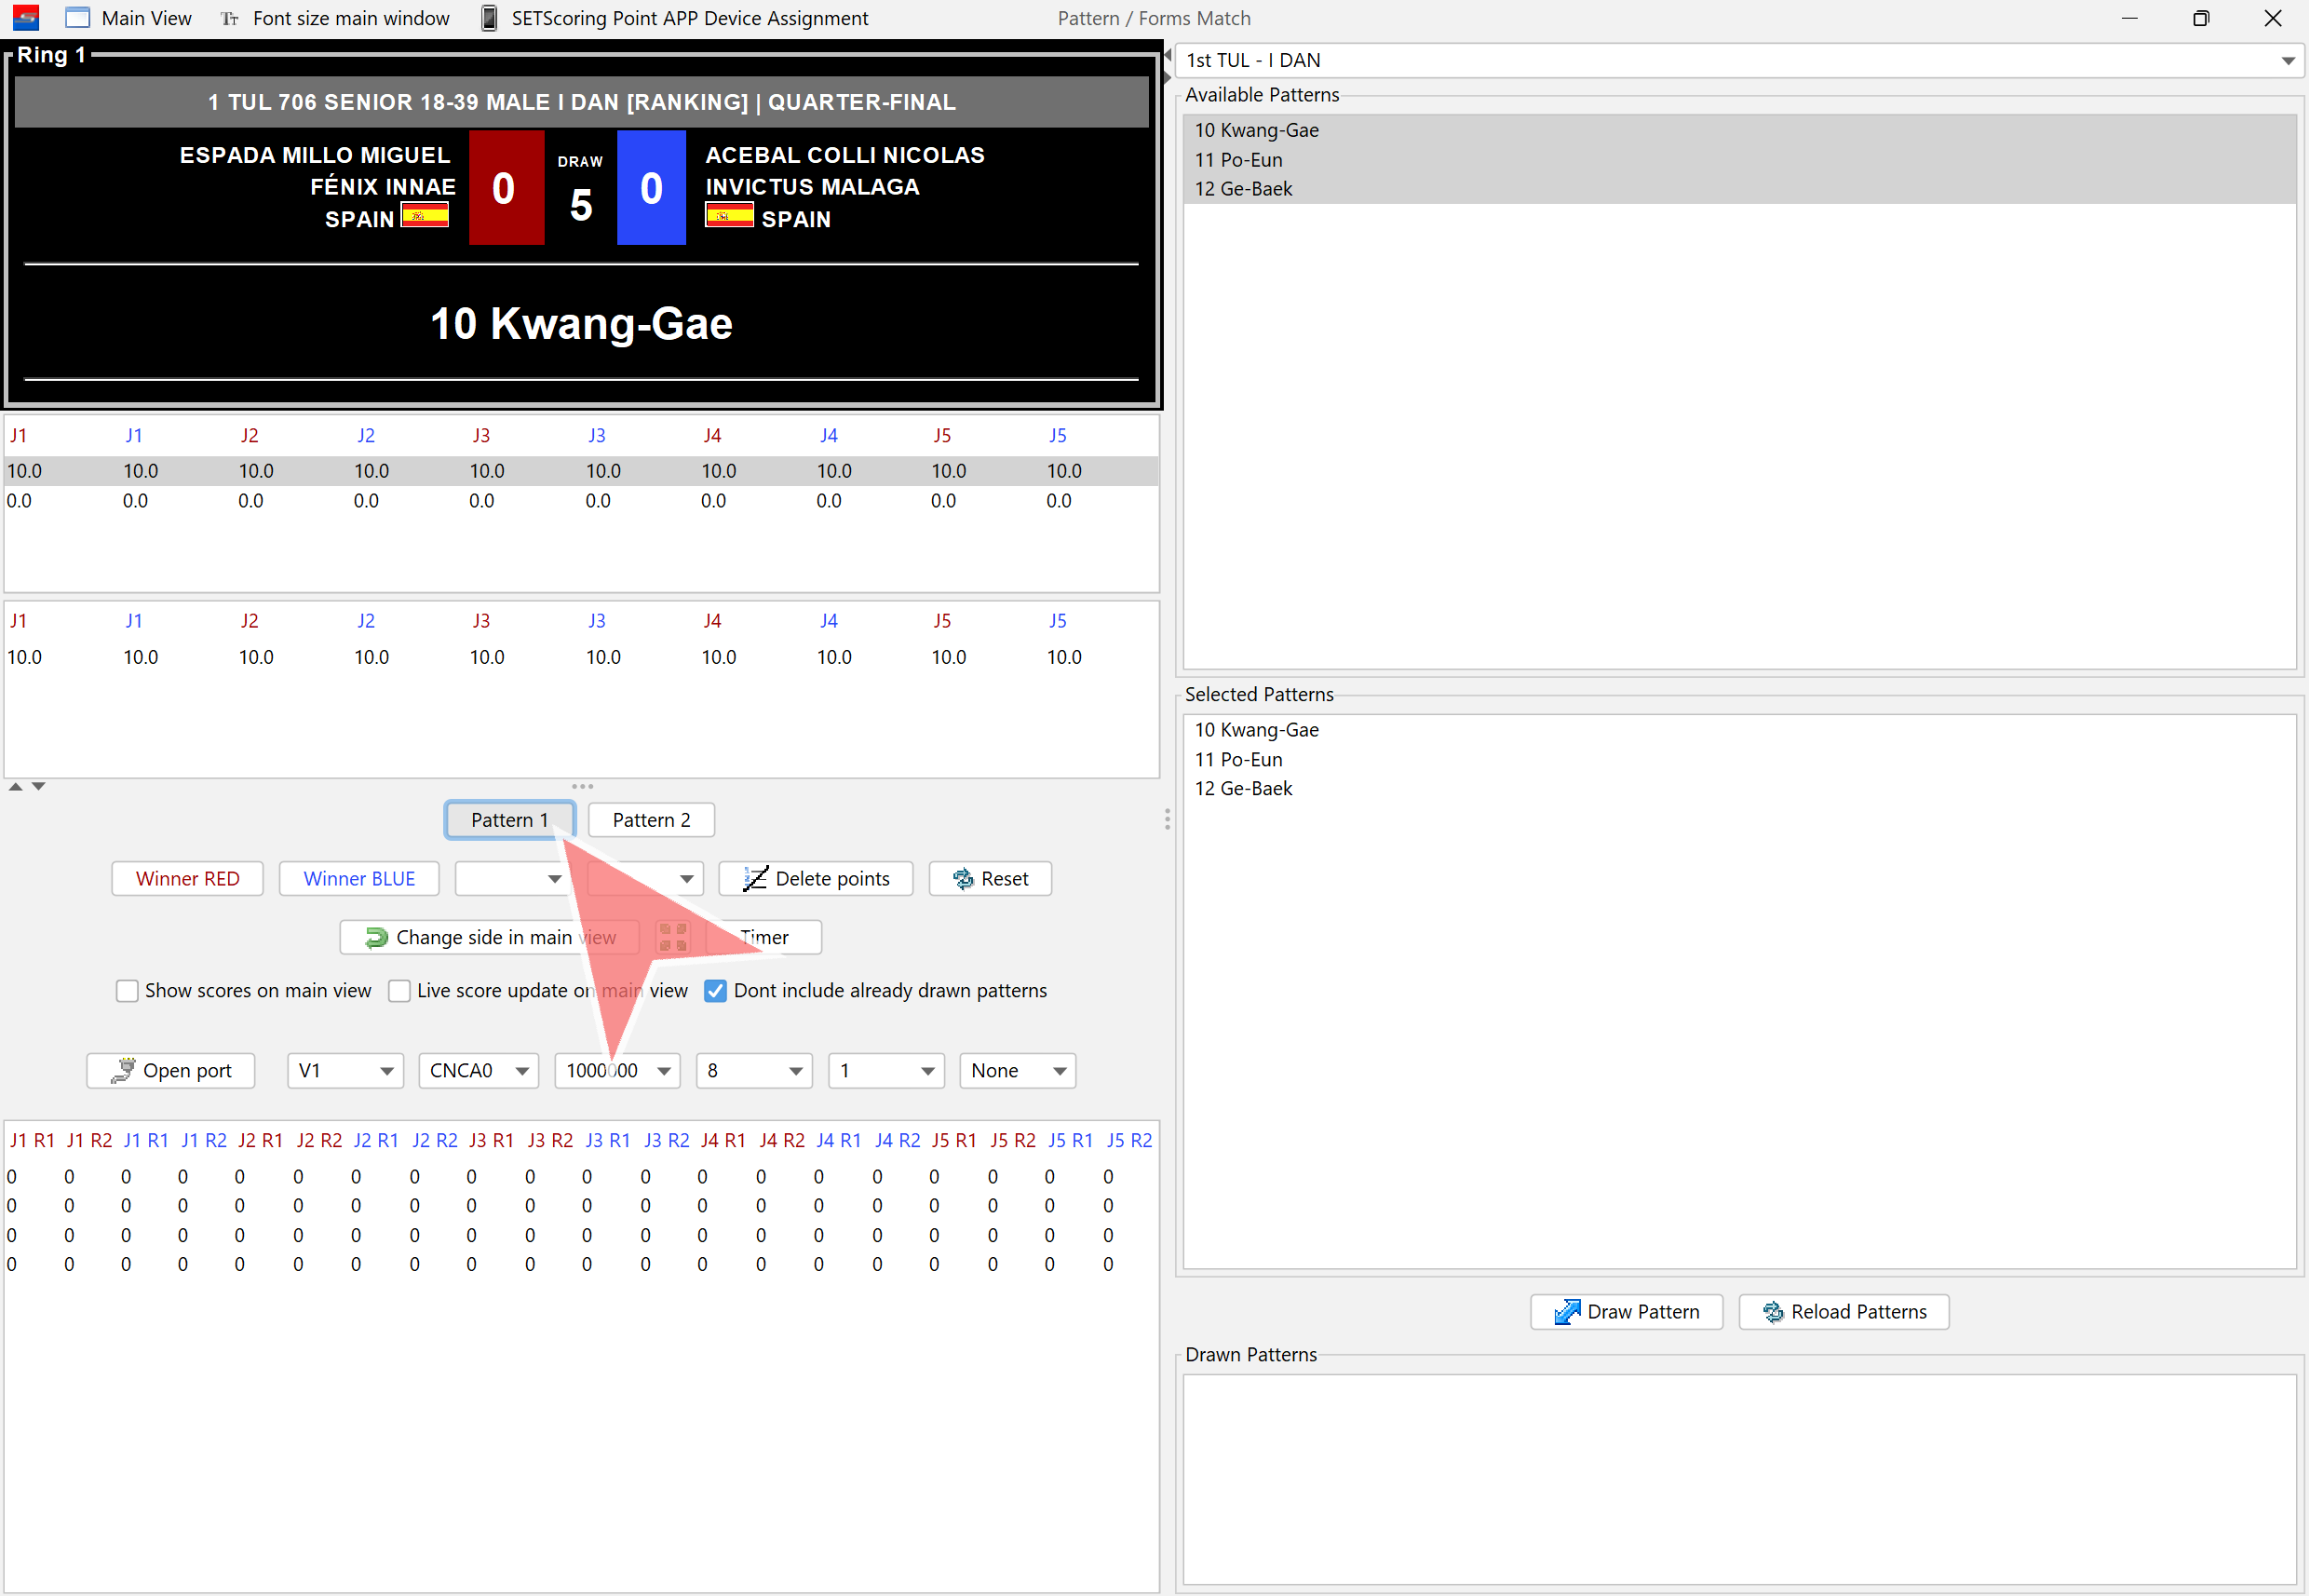
Judges are now able to start scoring.
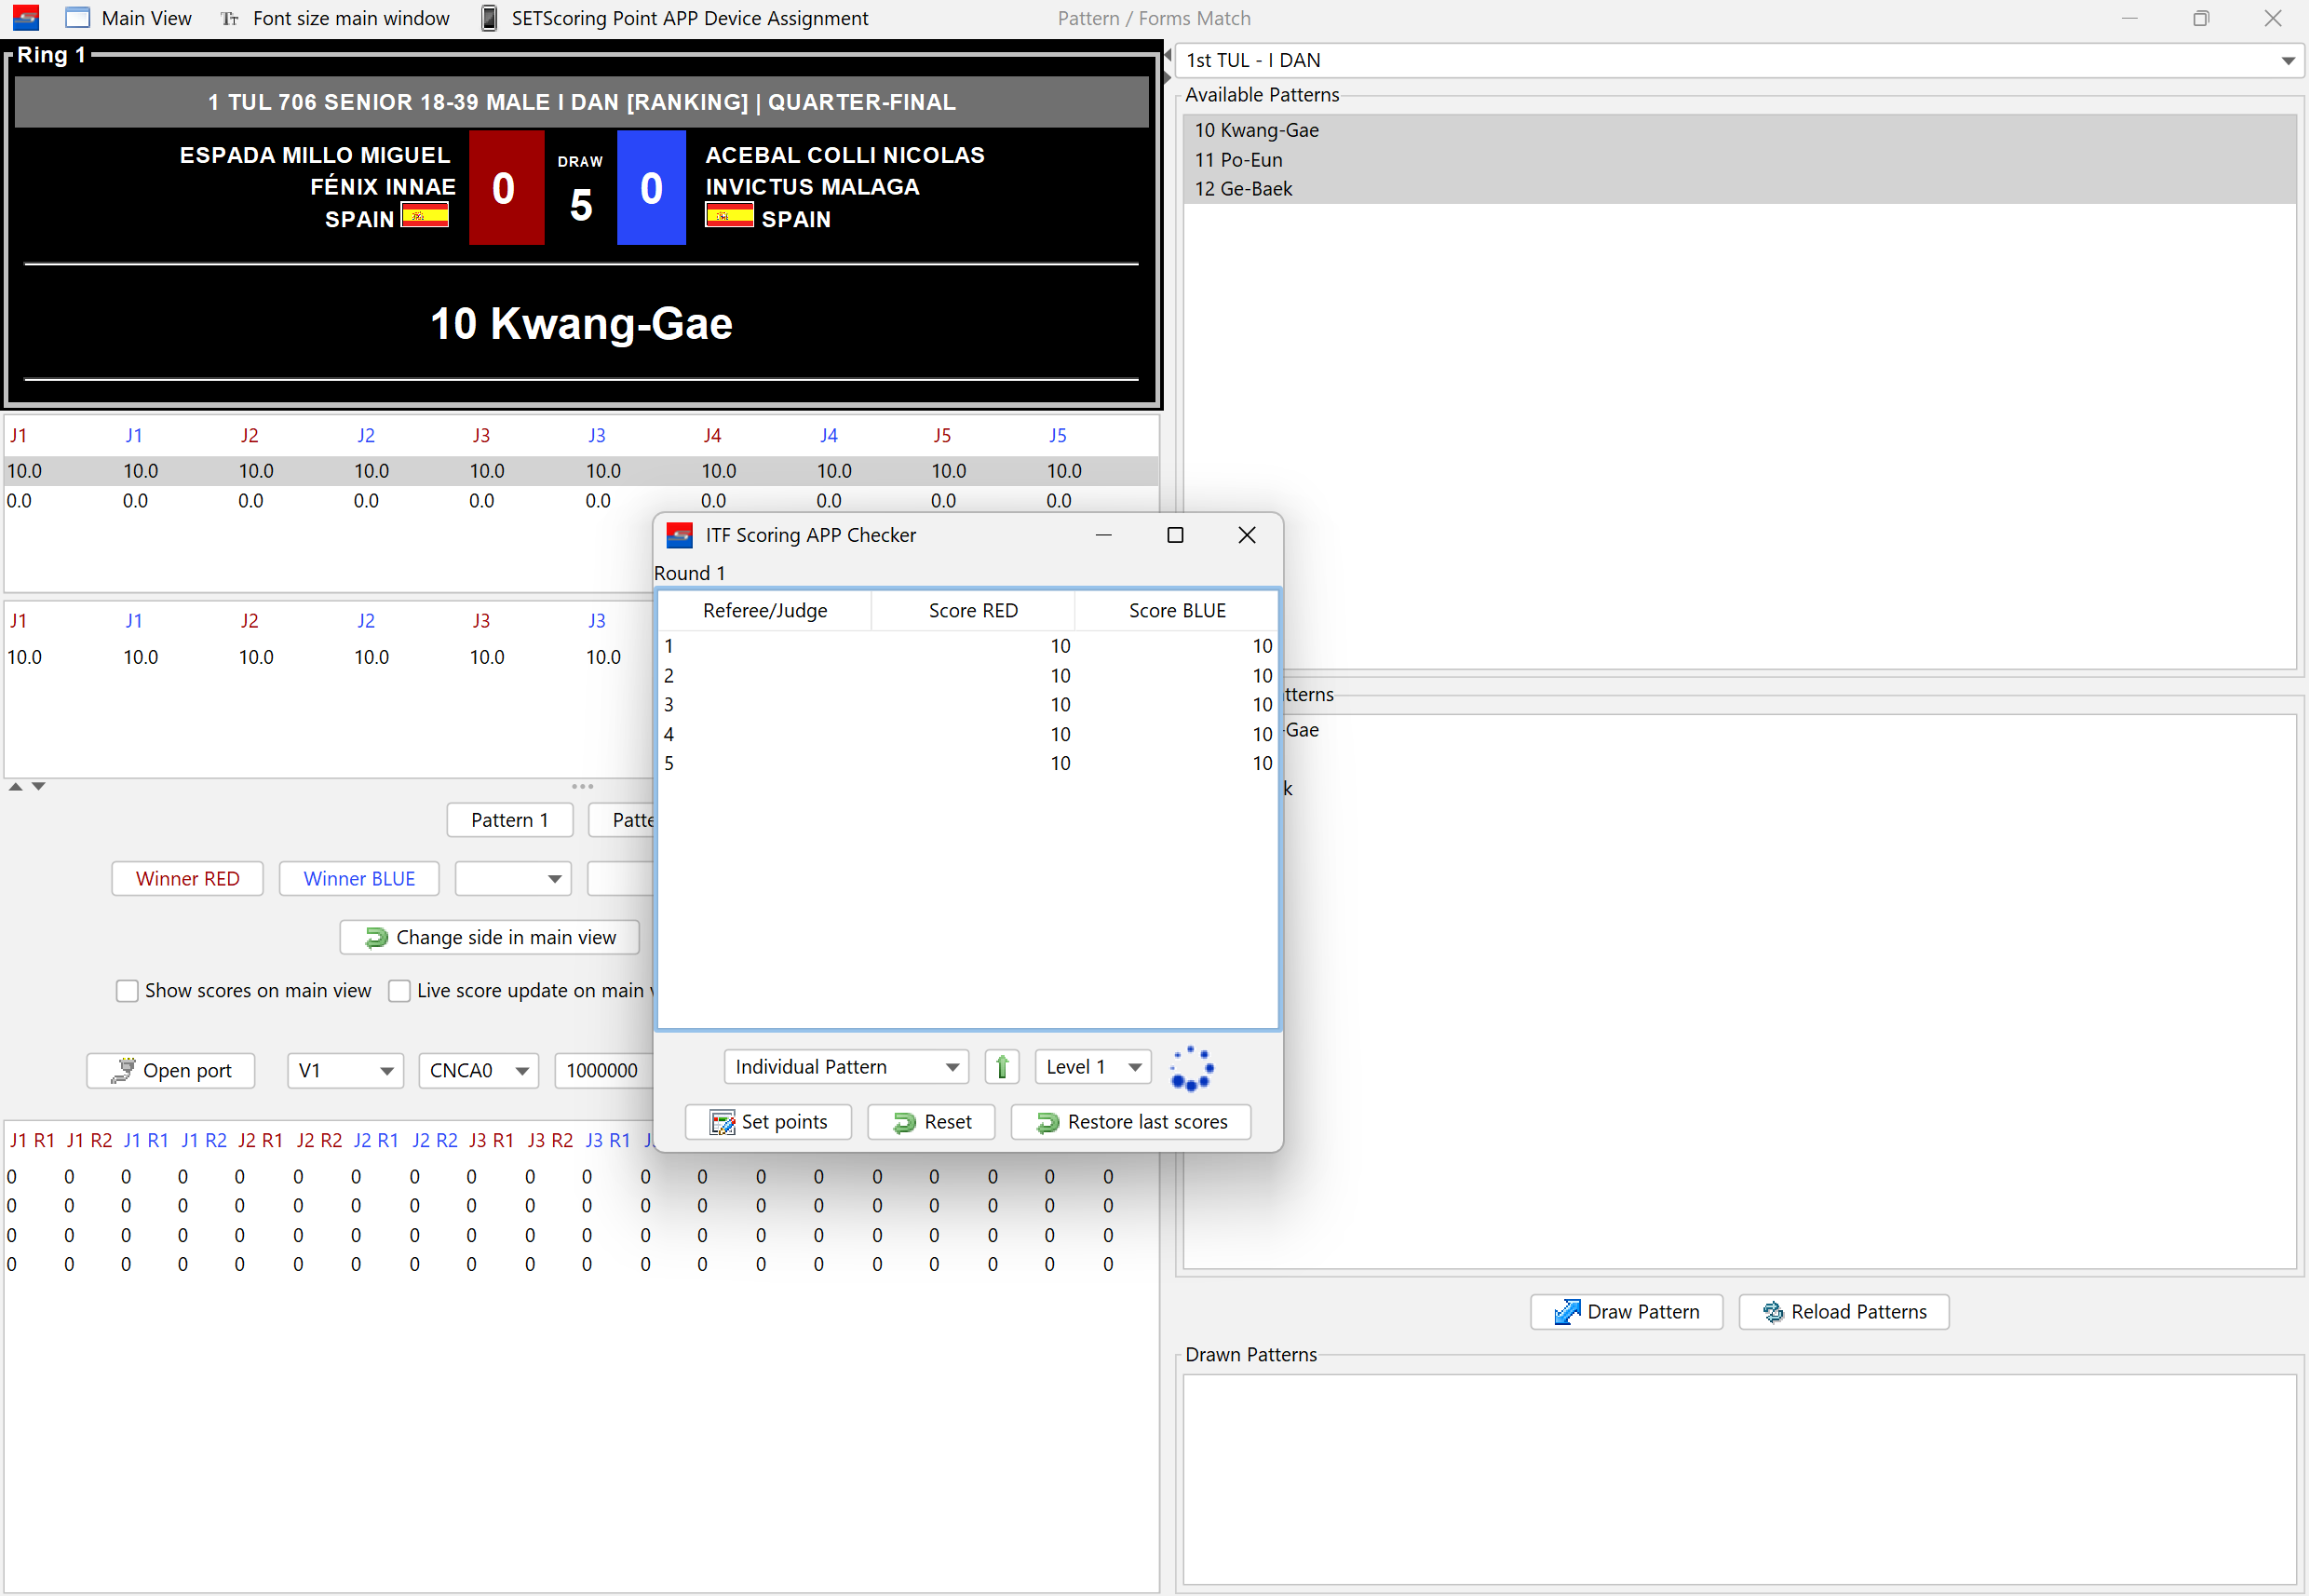
If there is only one level, click on „Set Points“ and close the window.
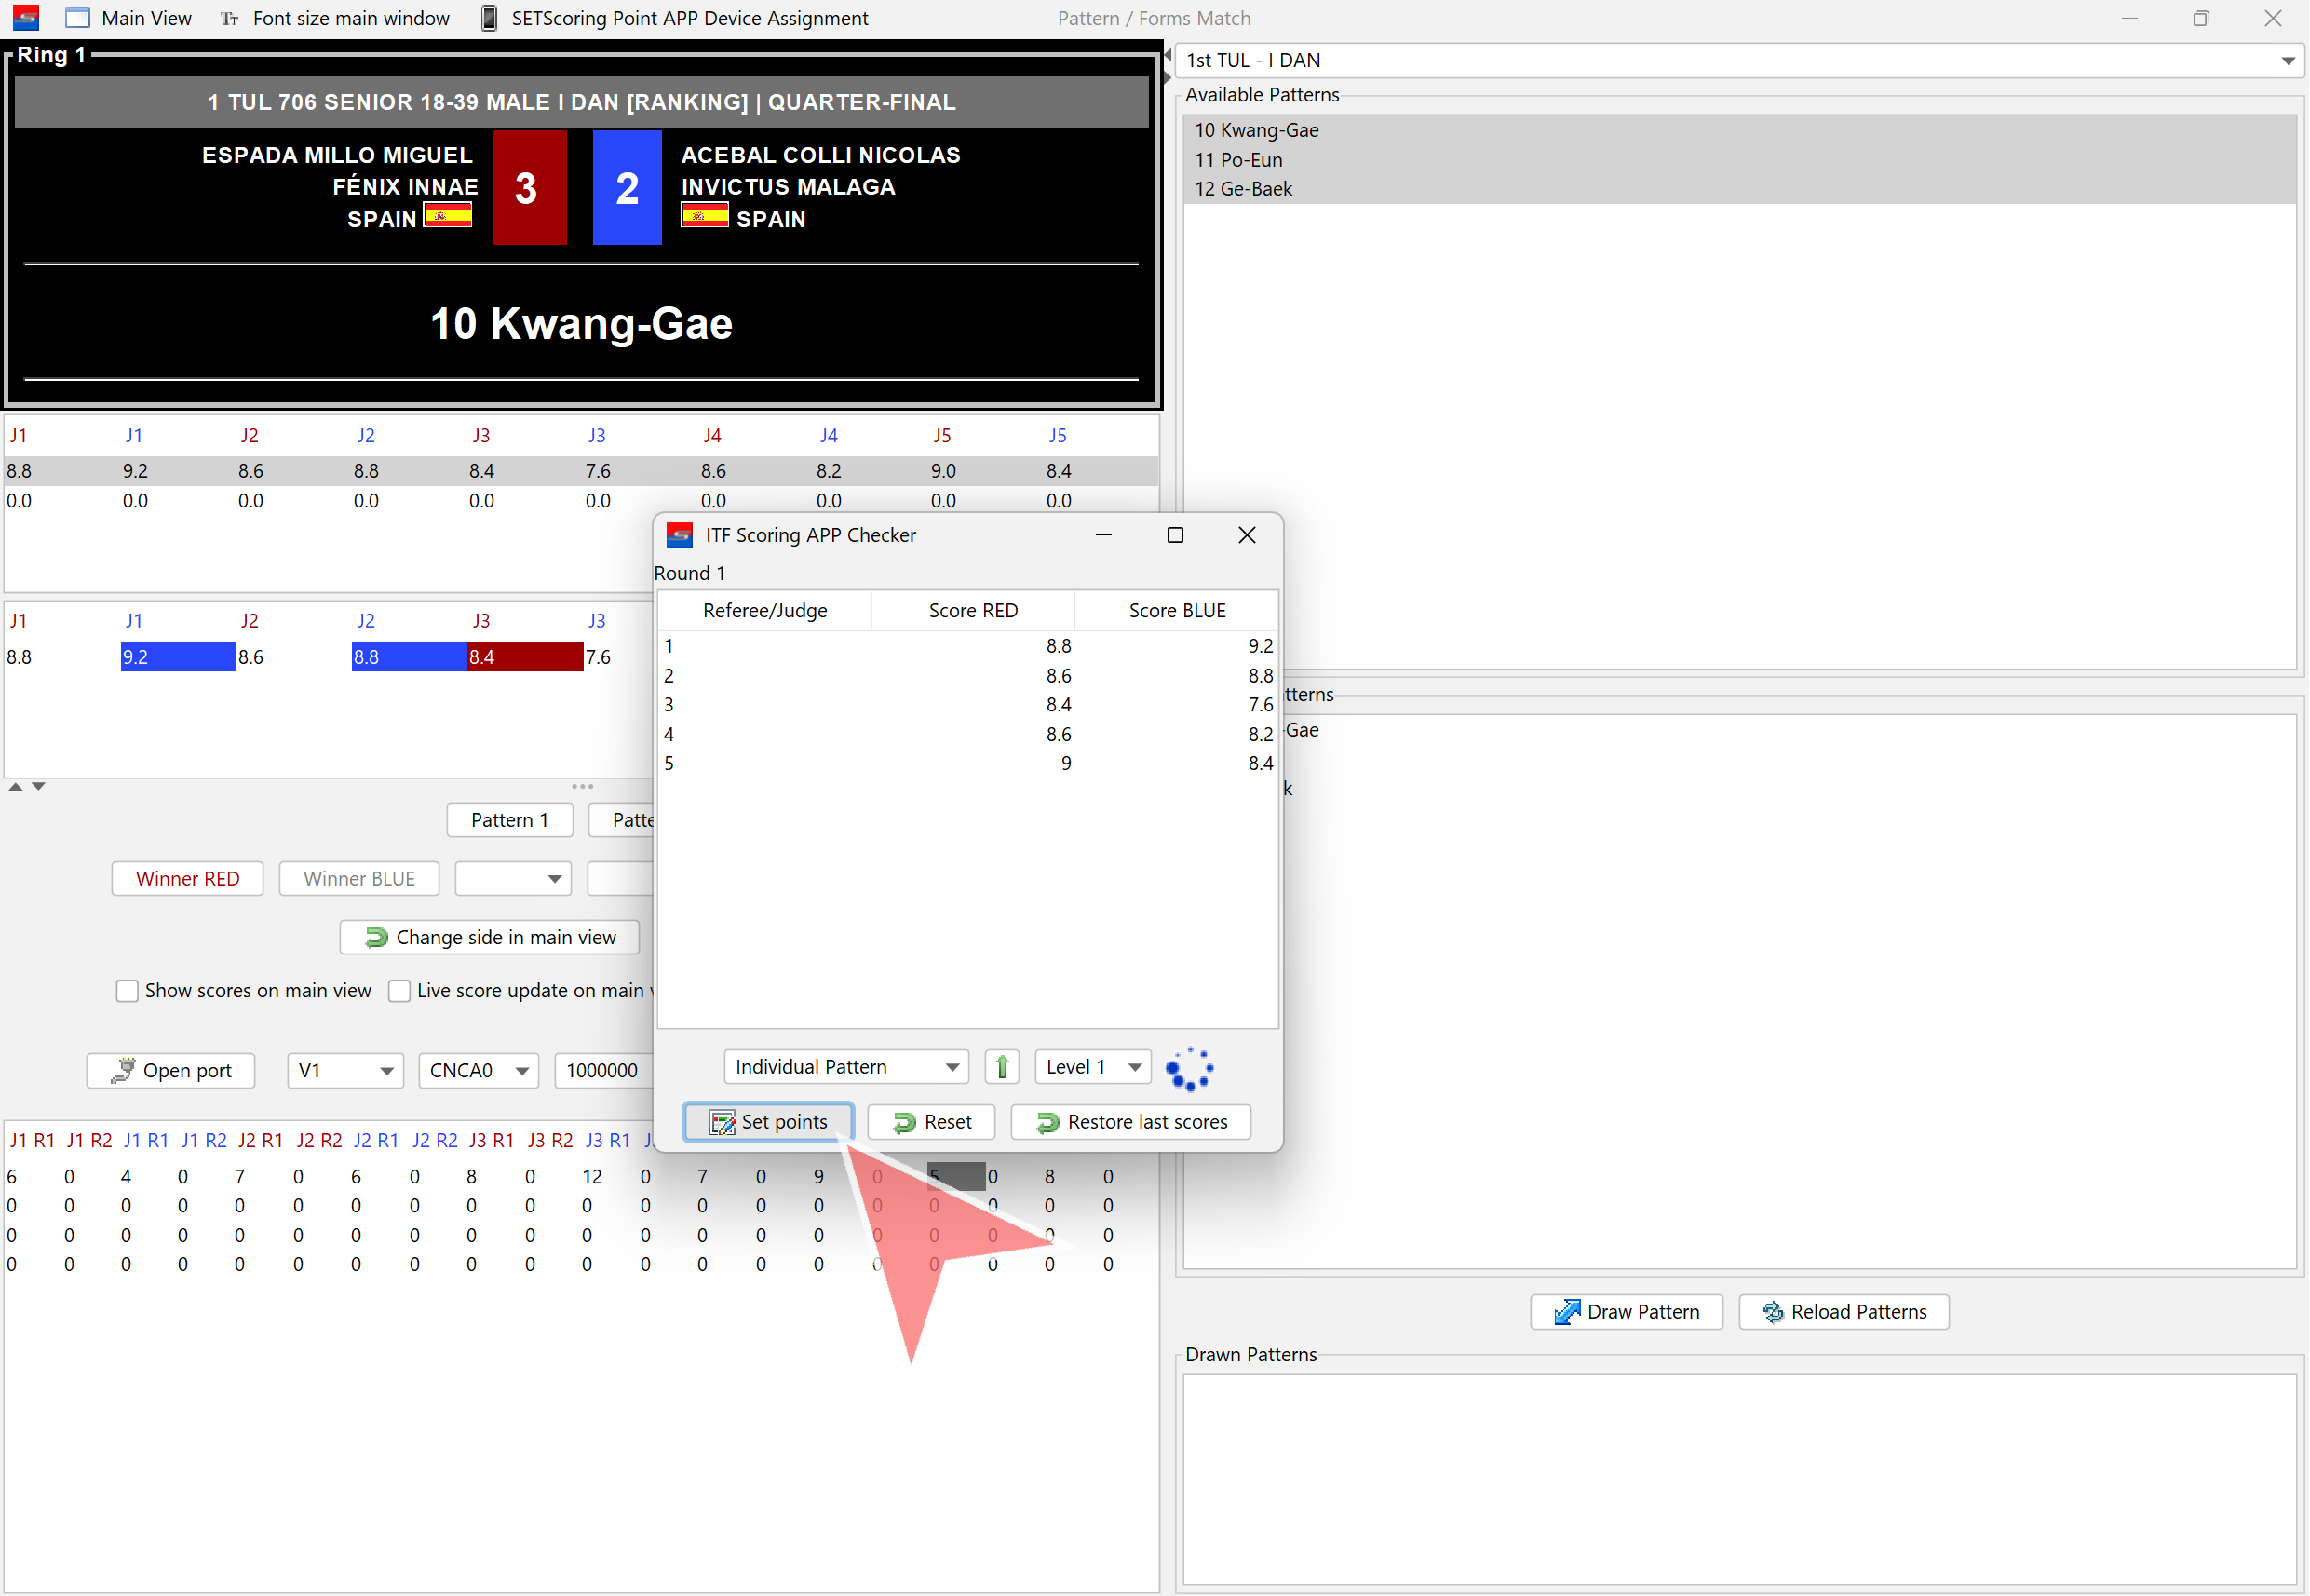
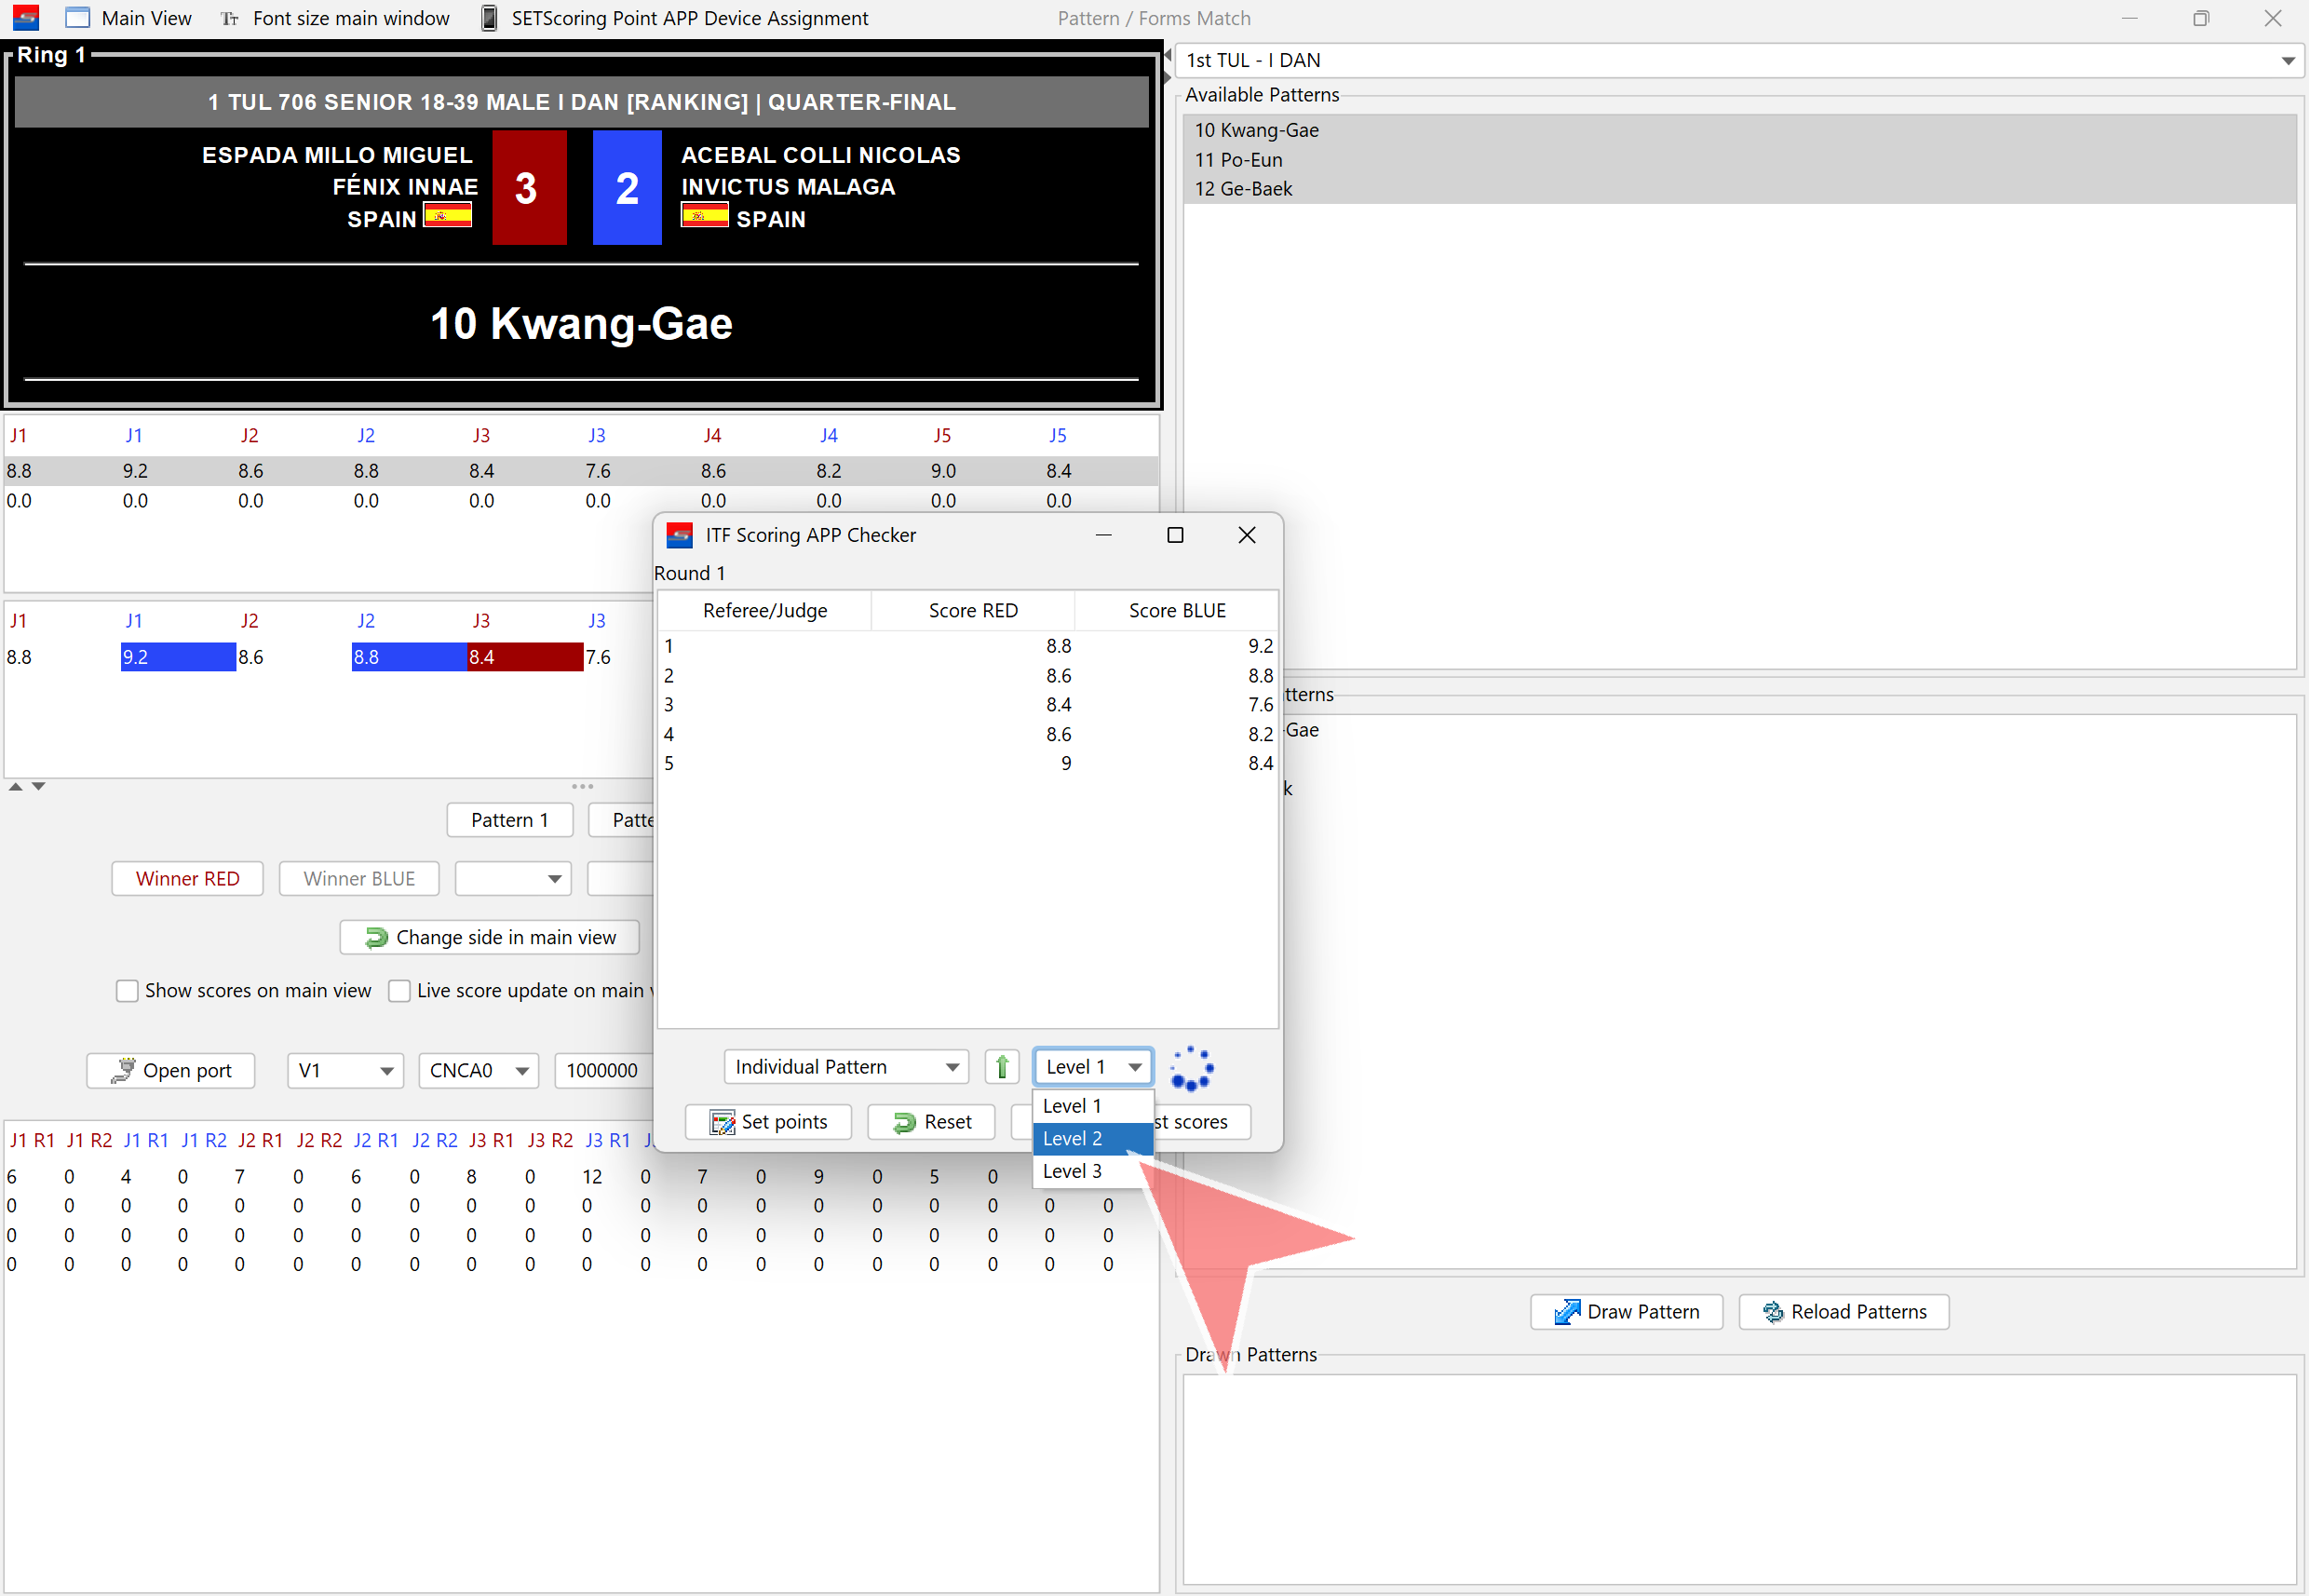
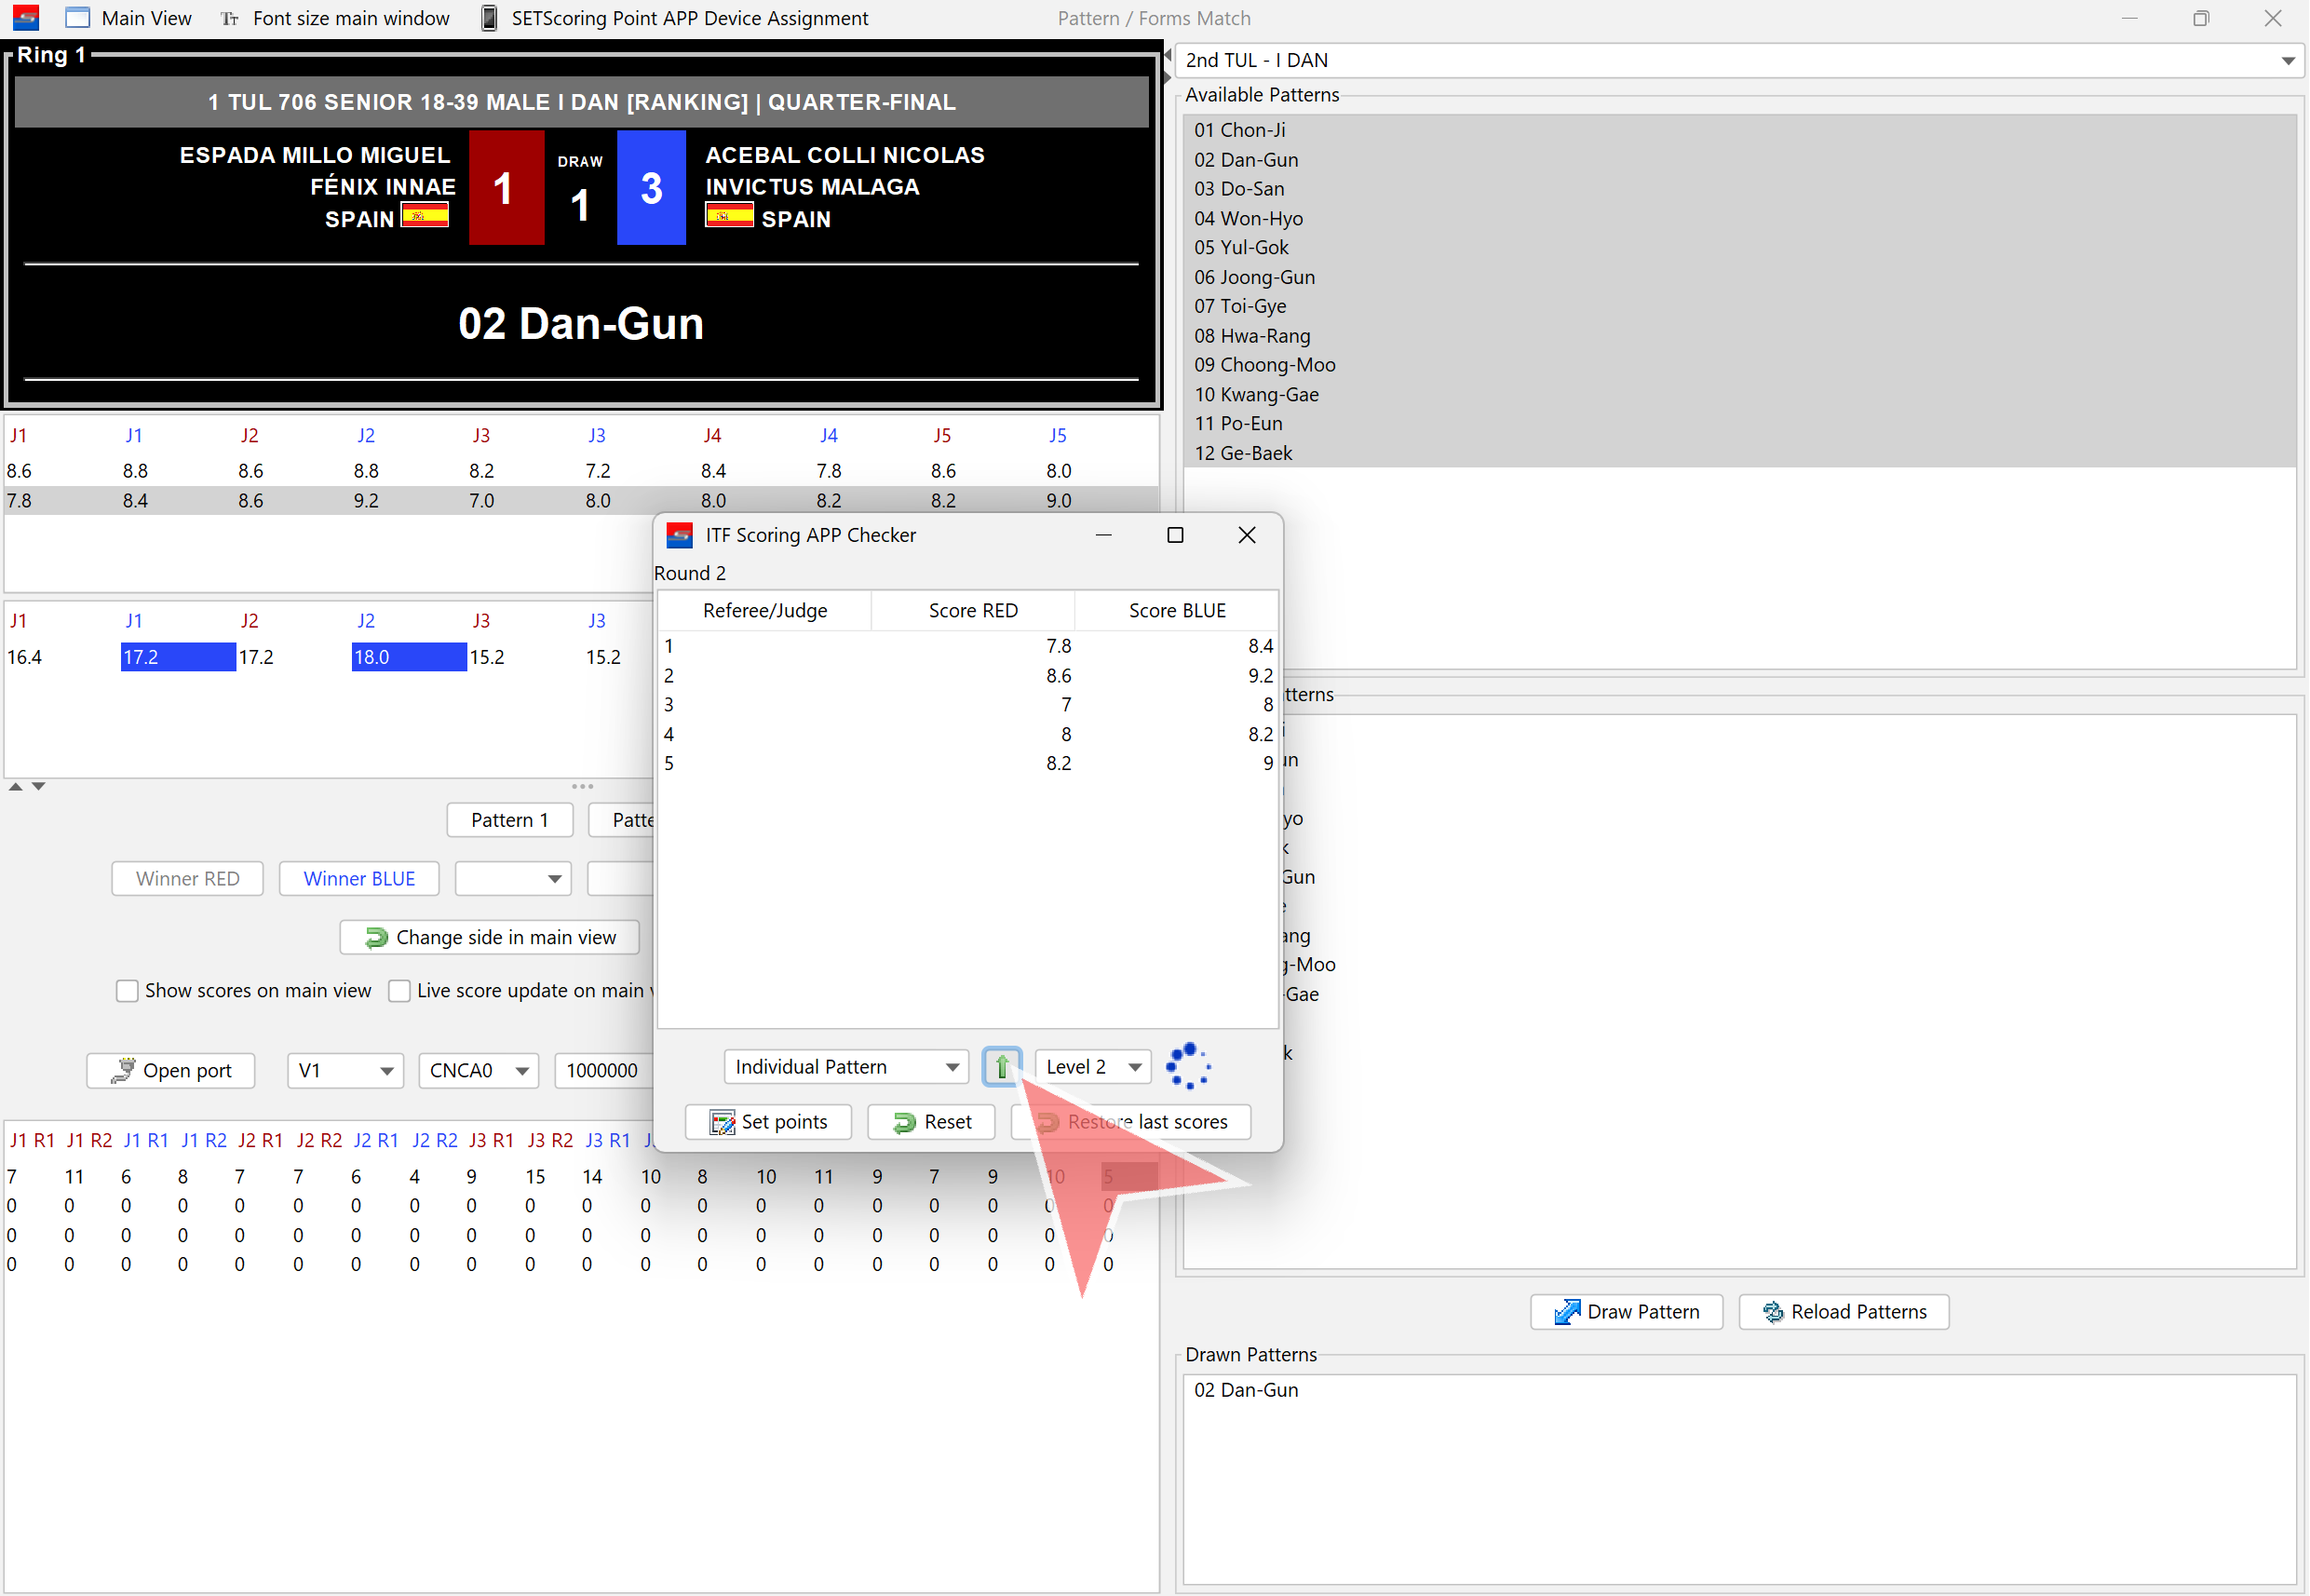
If there is more than one level, click on the dropdown menu and select the next level when the main judge indicates, after the pattern is completed.
Select the next level.
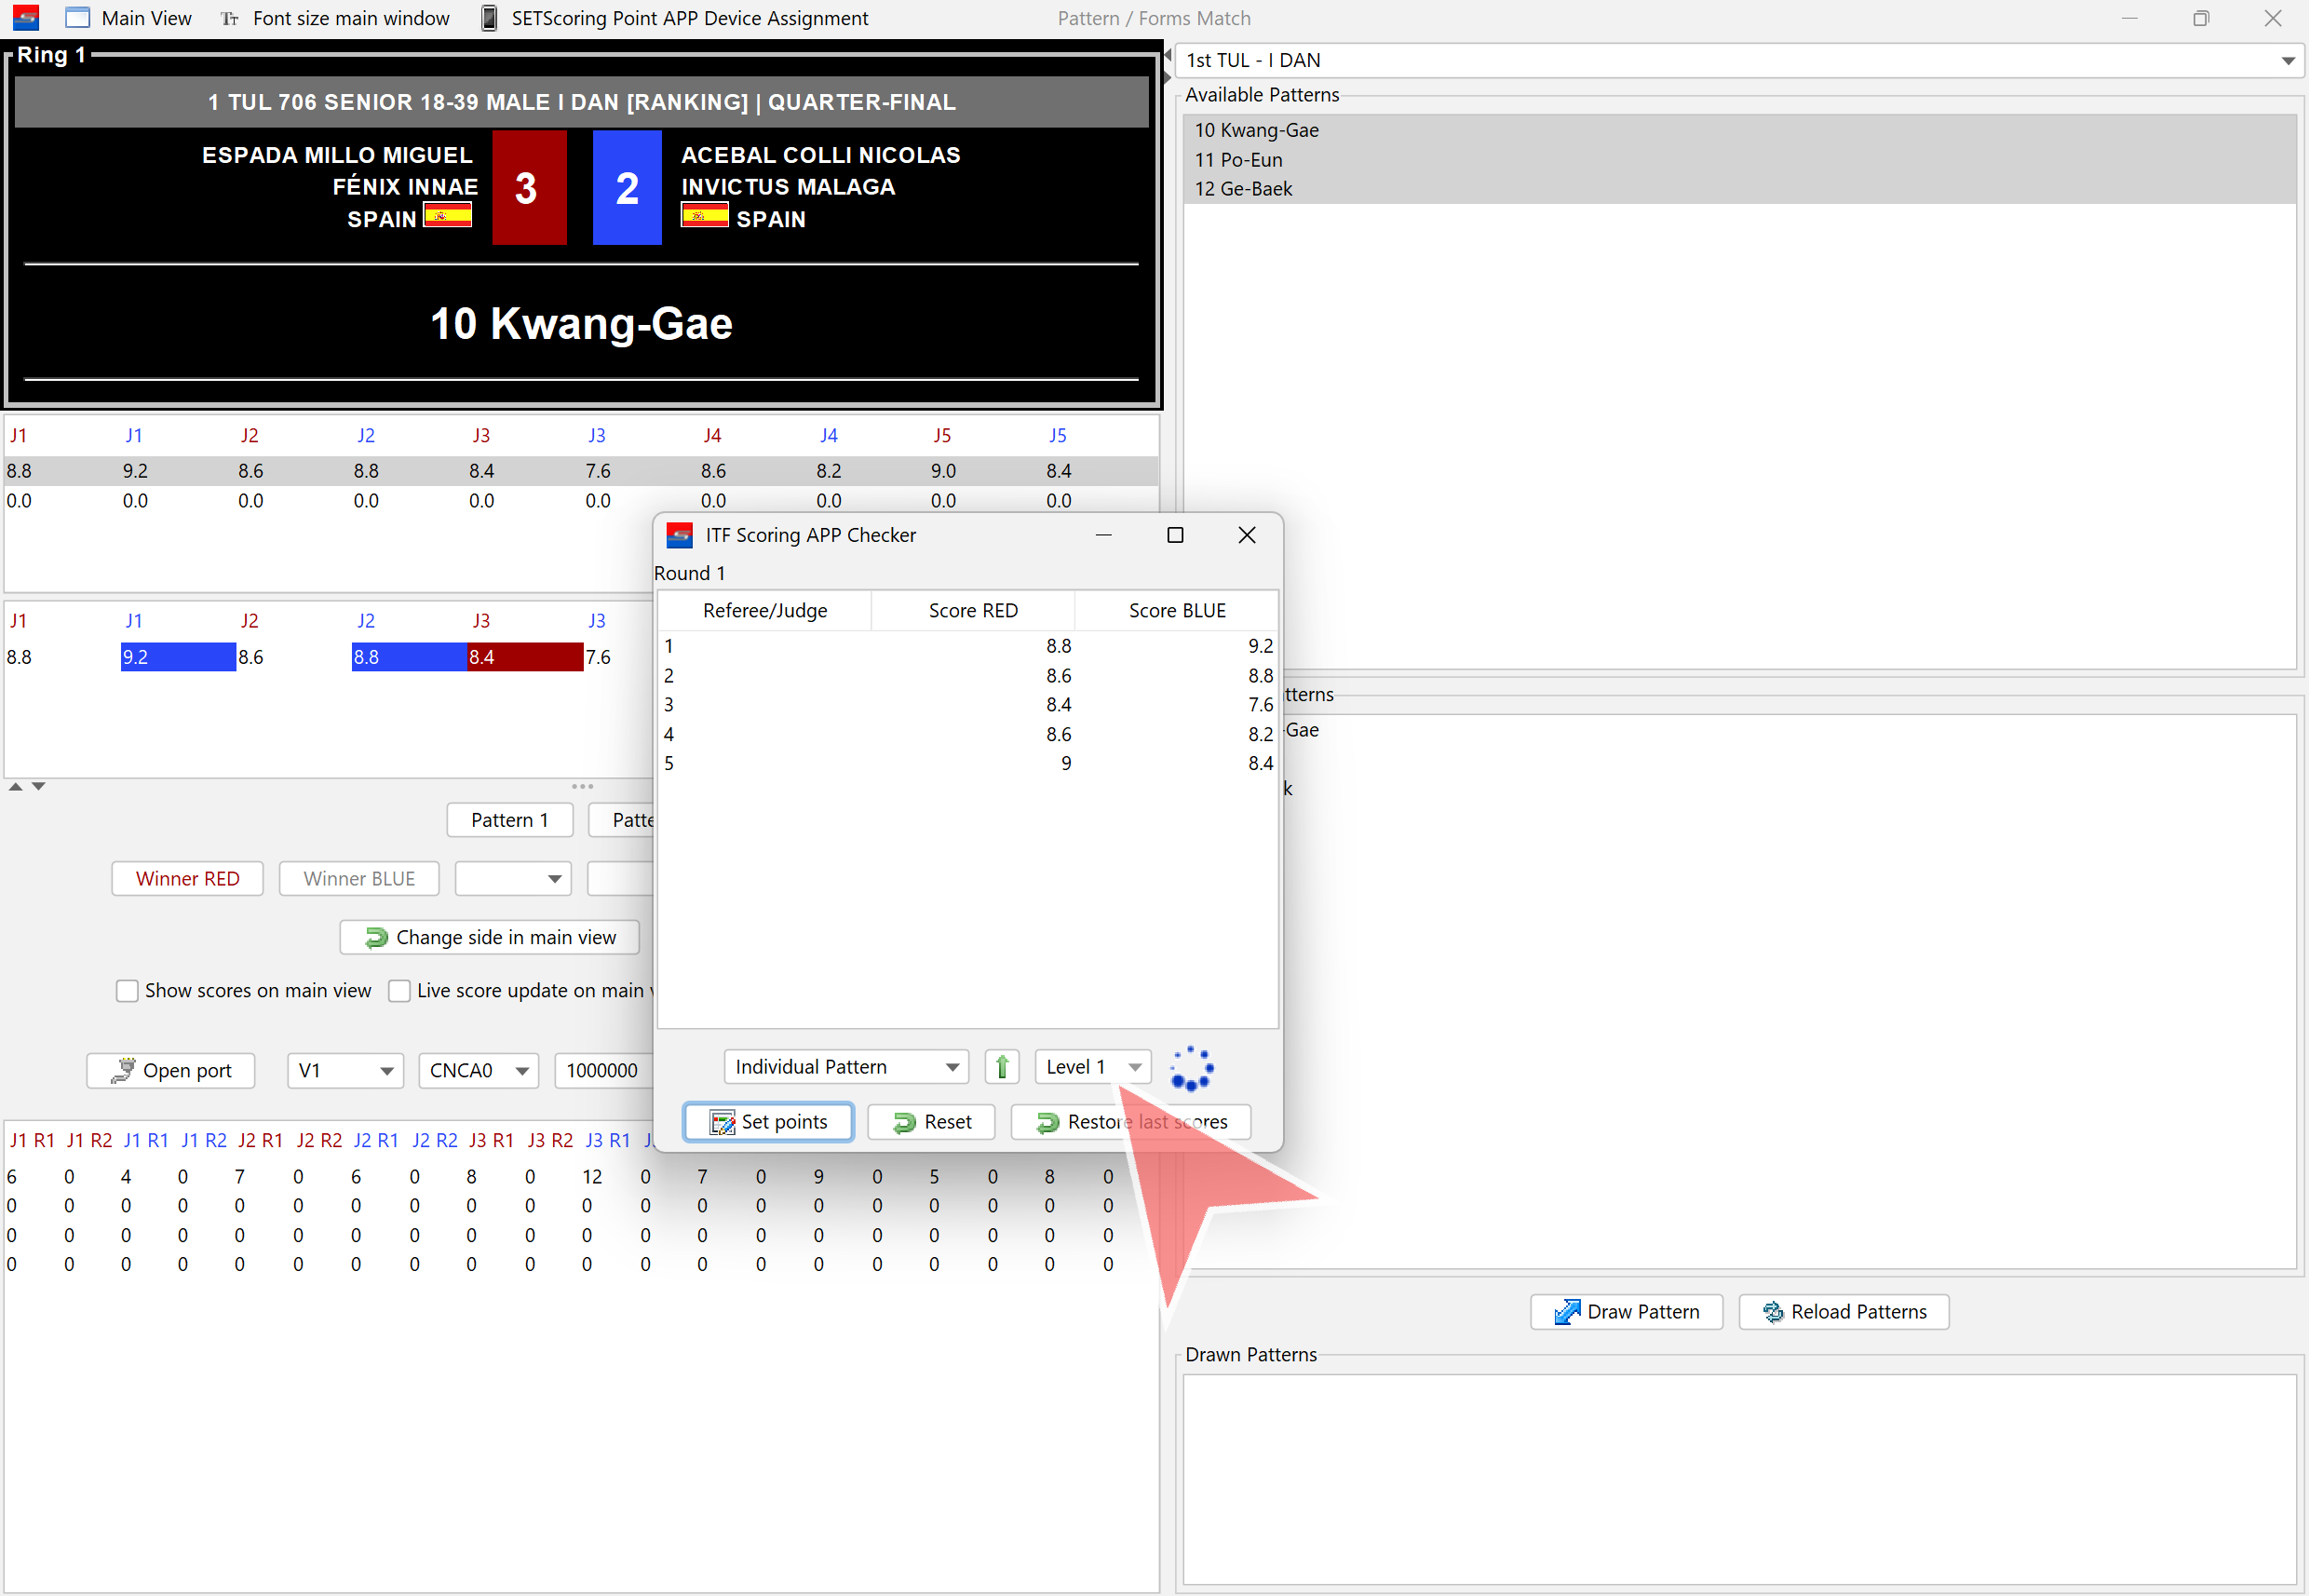
The green arrow can also be clicked to proceed to the next level.
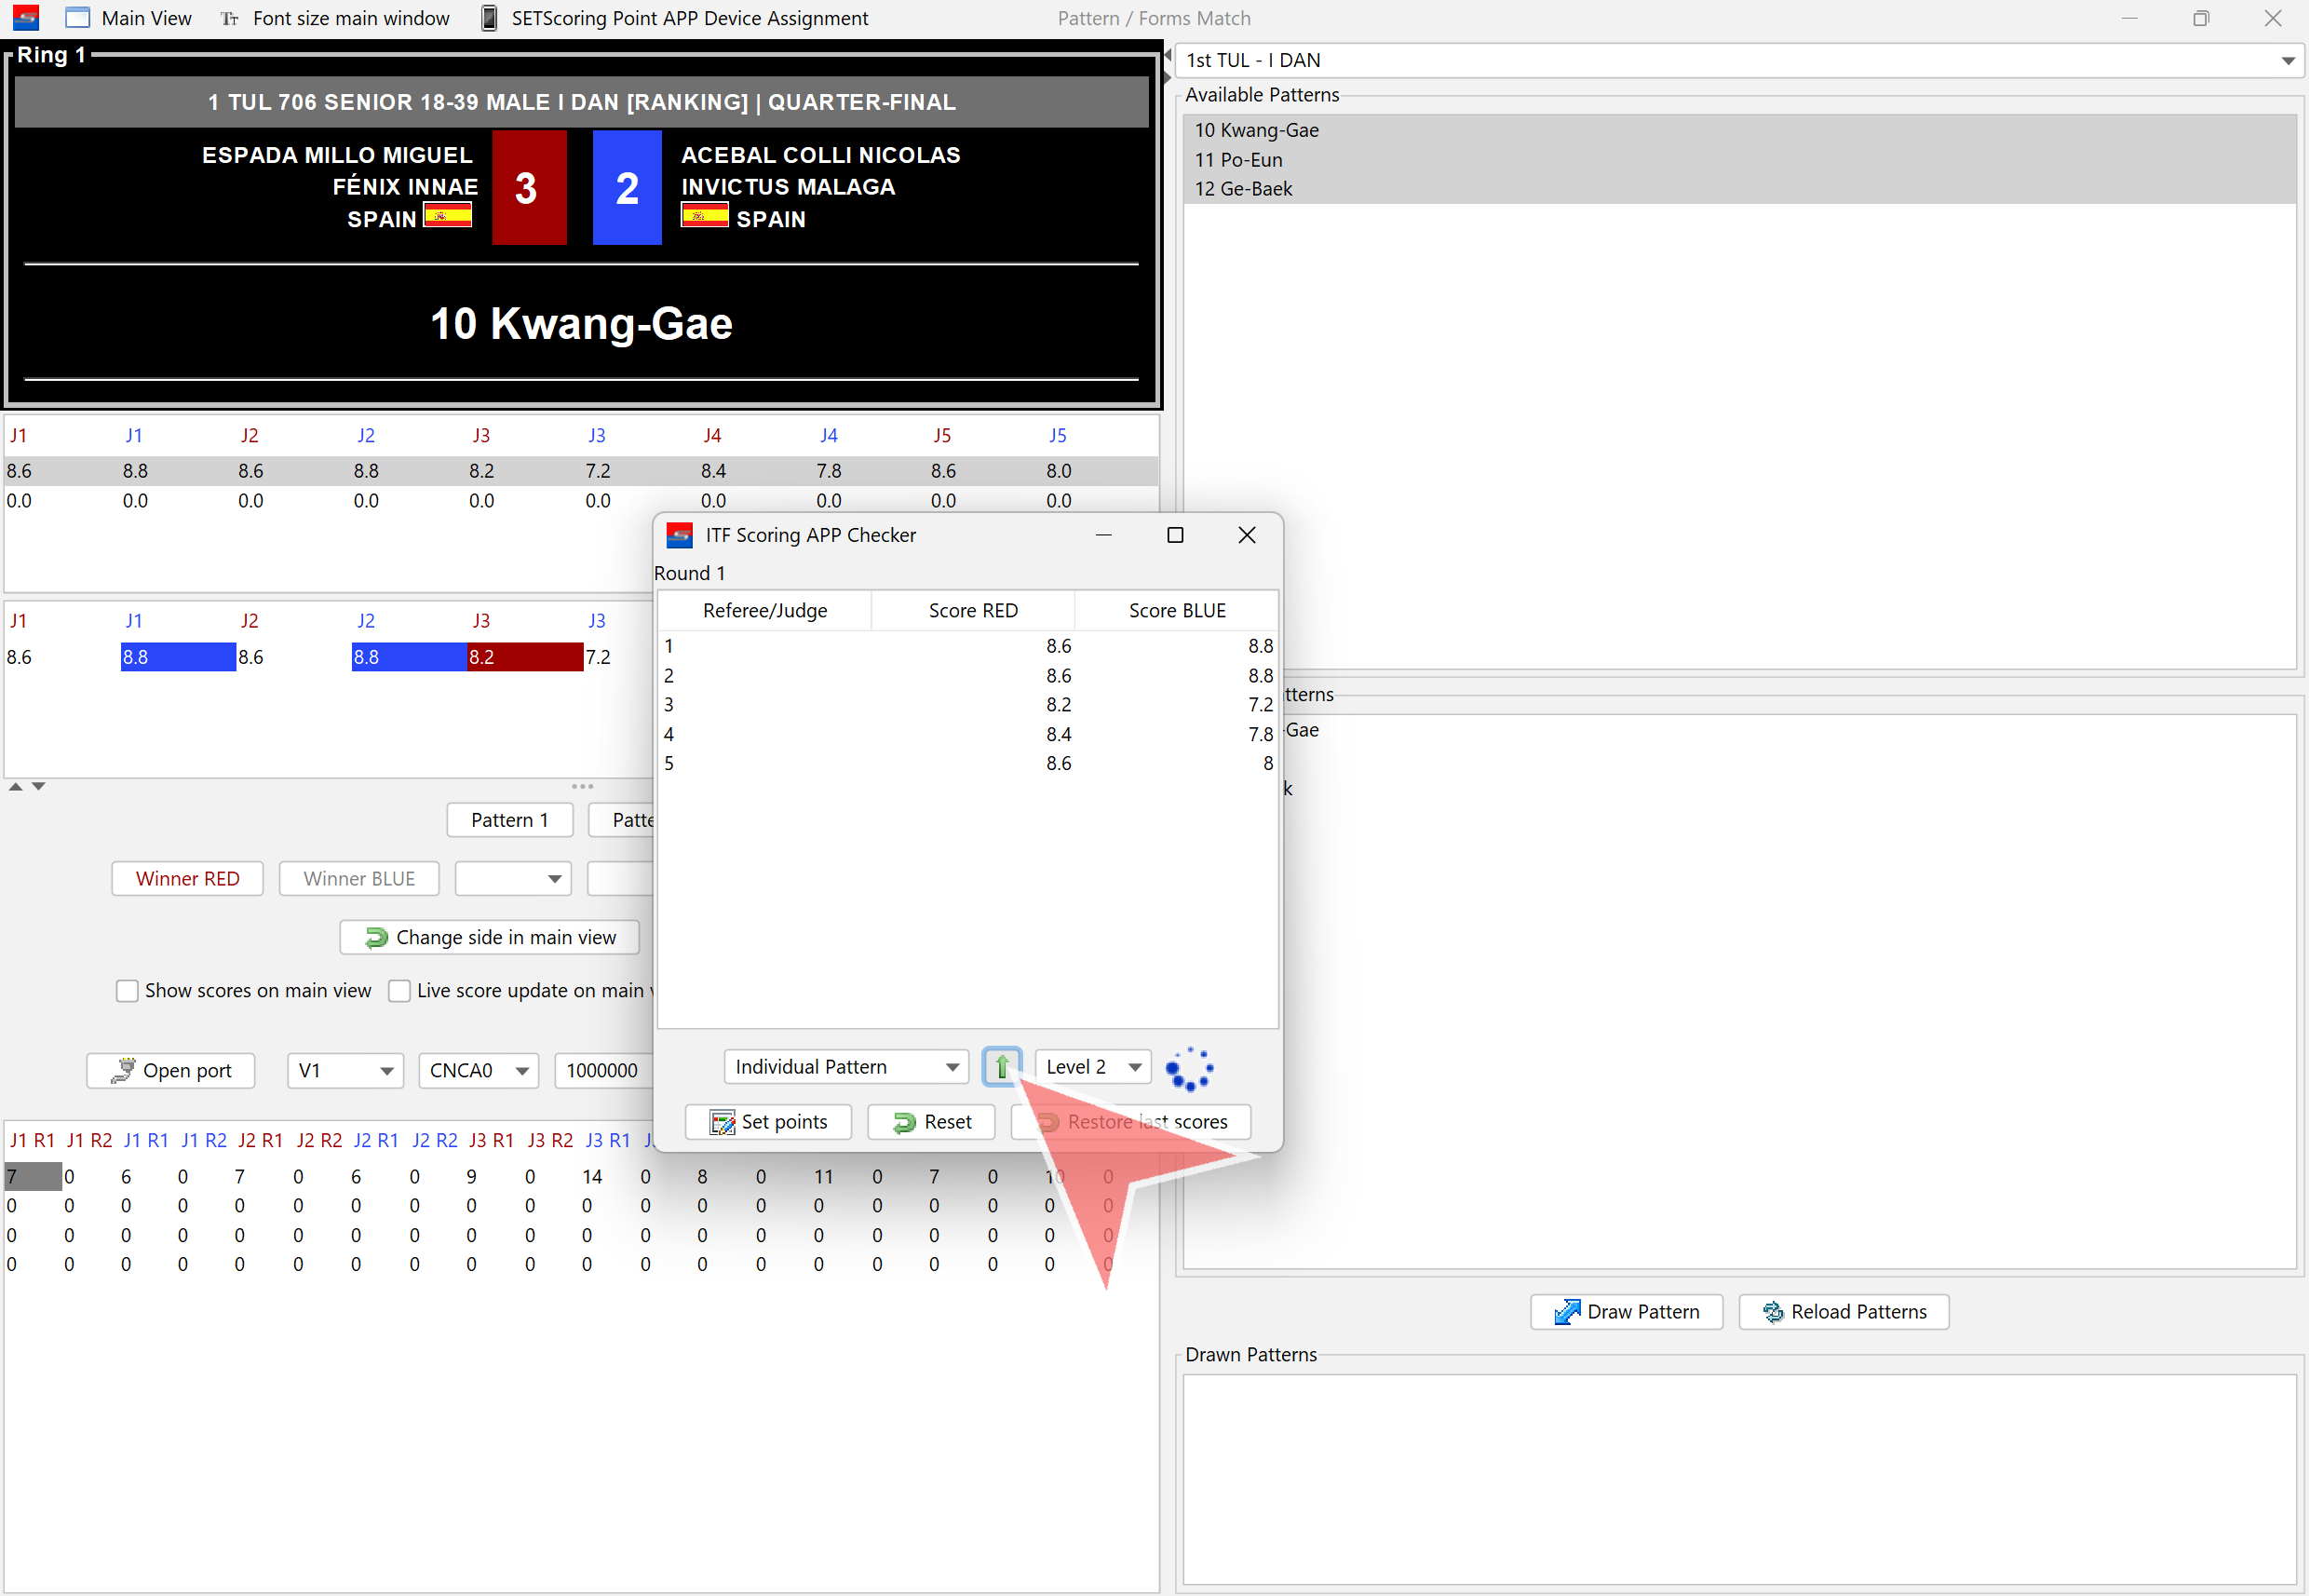
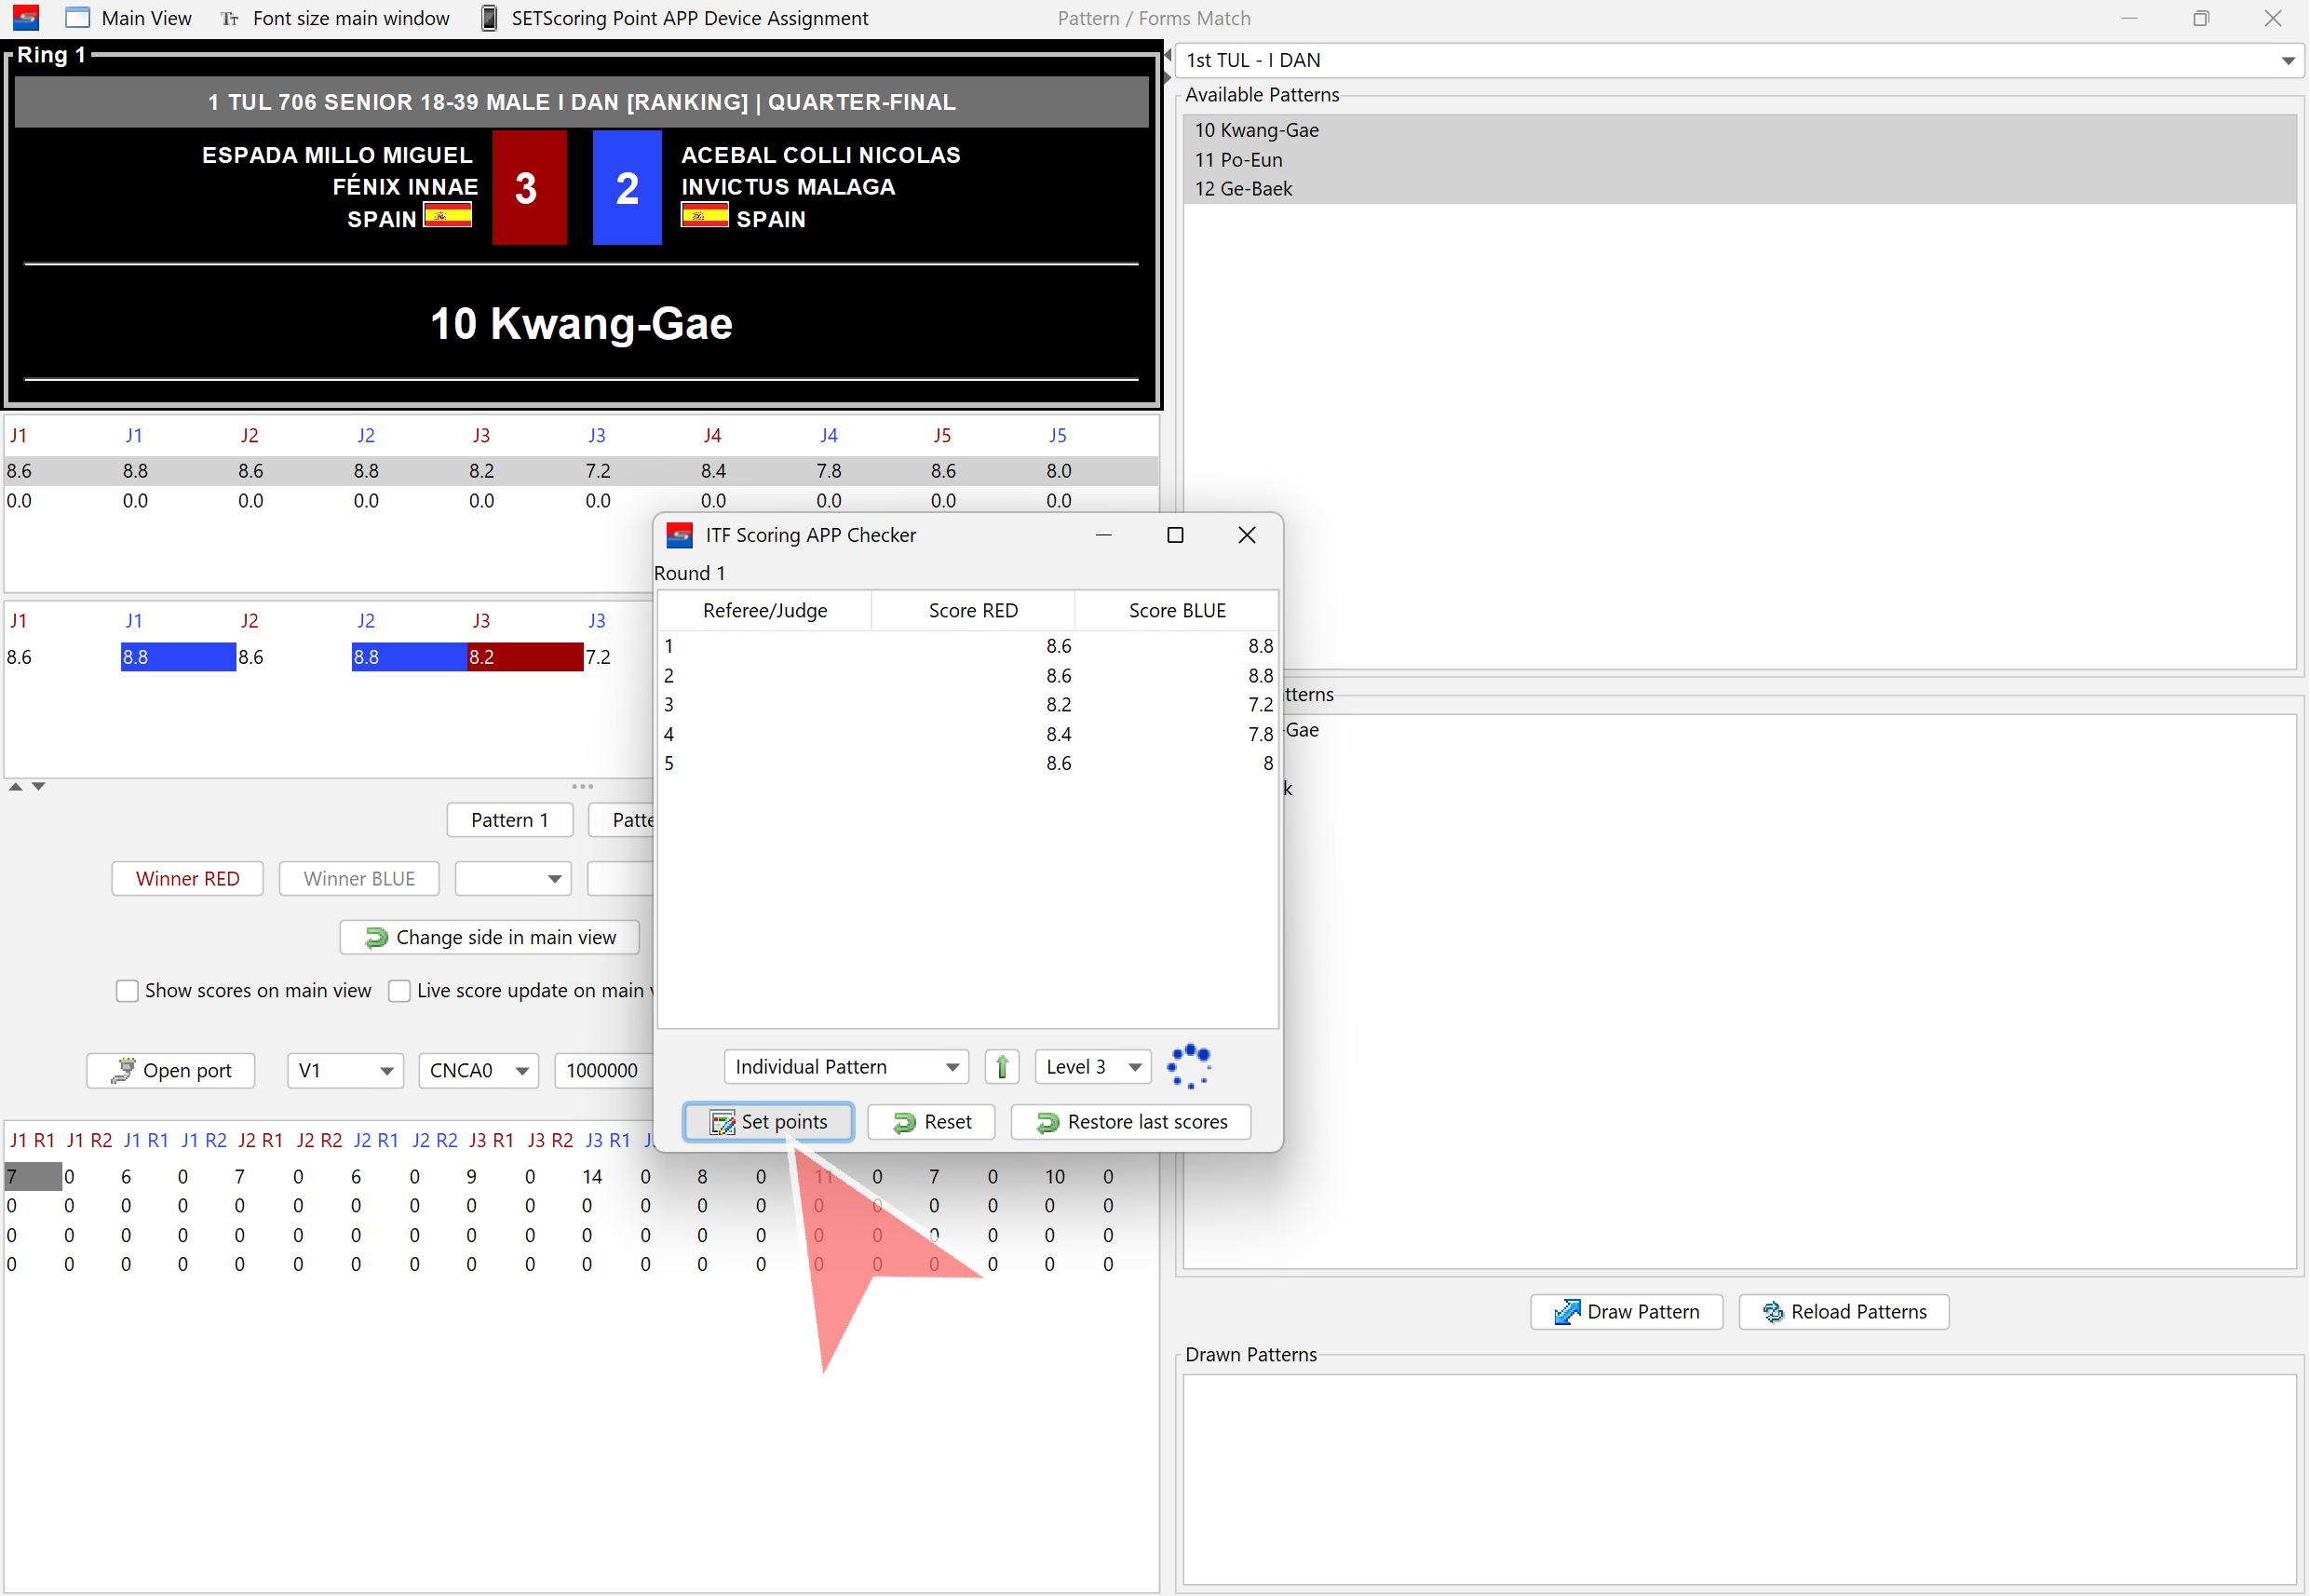
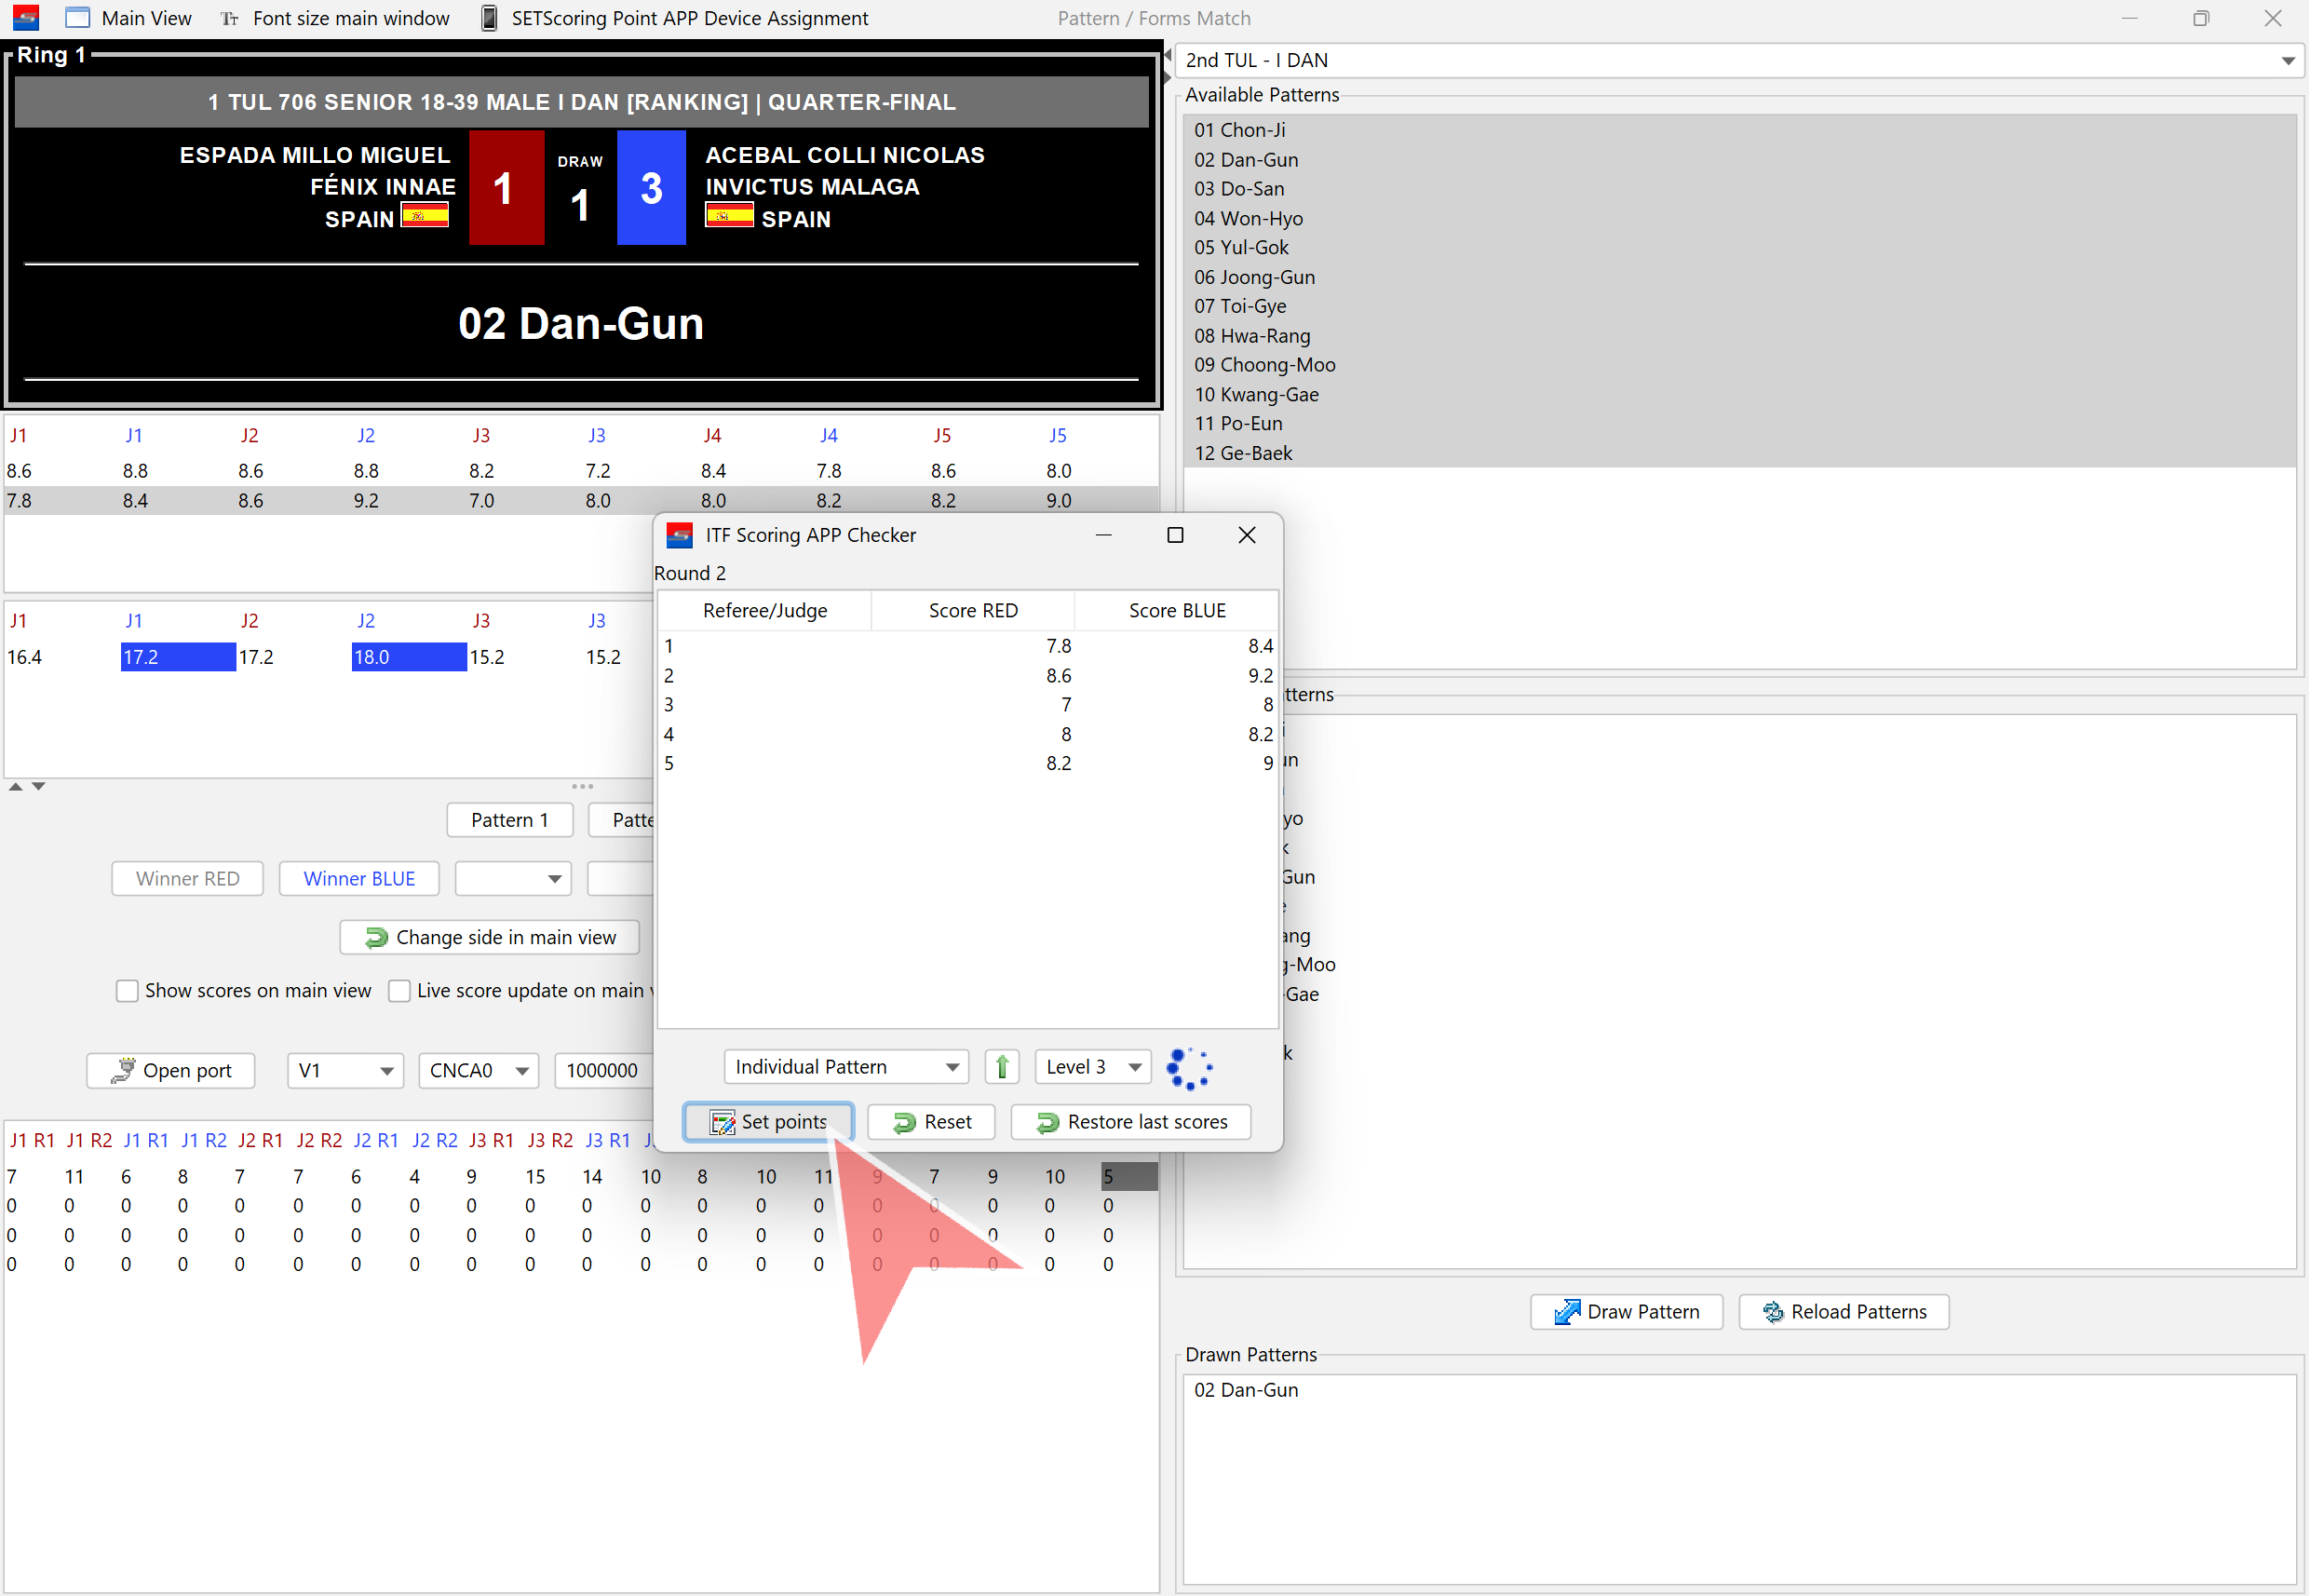
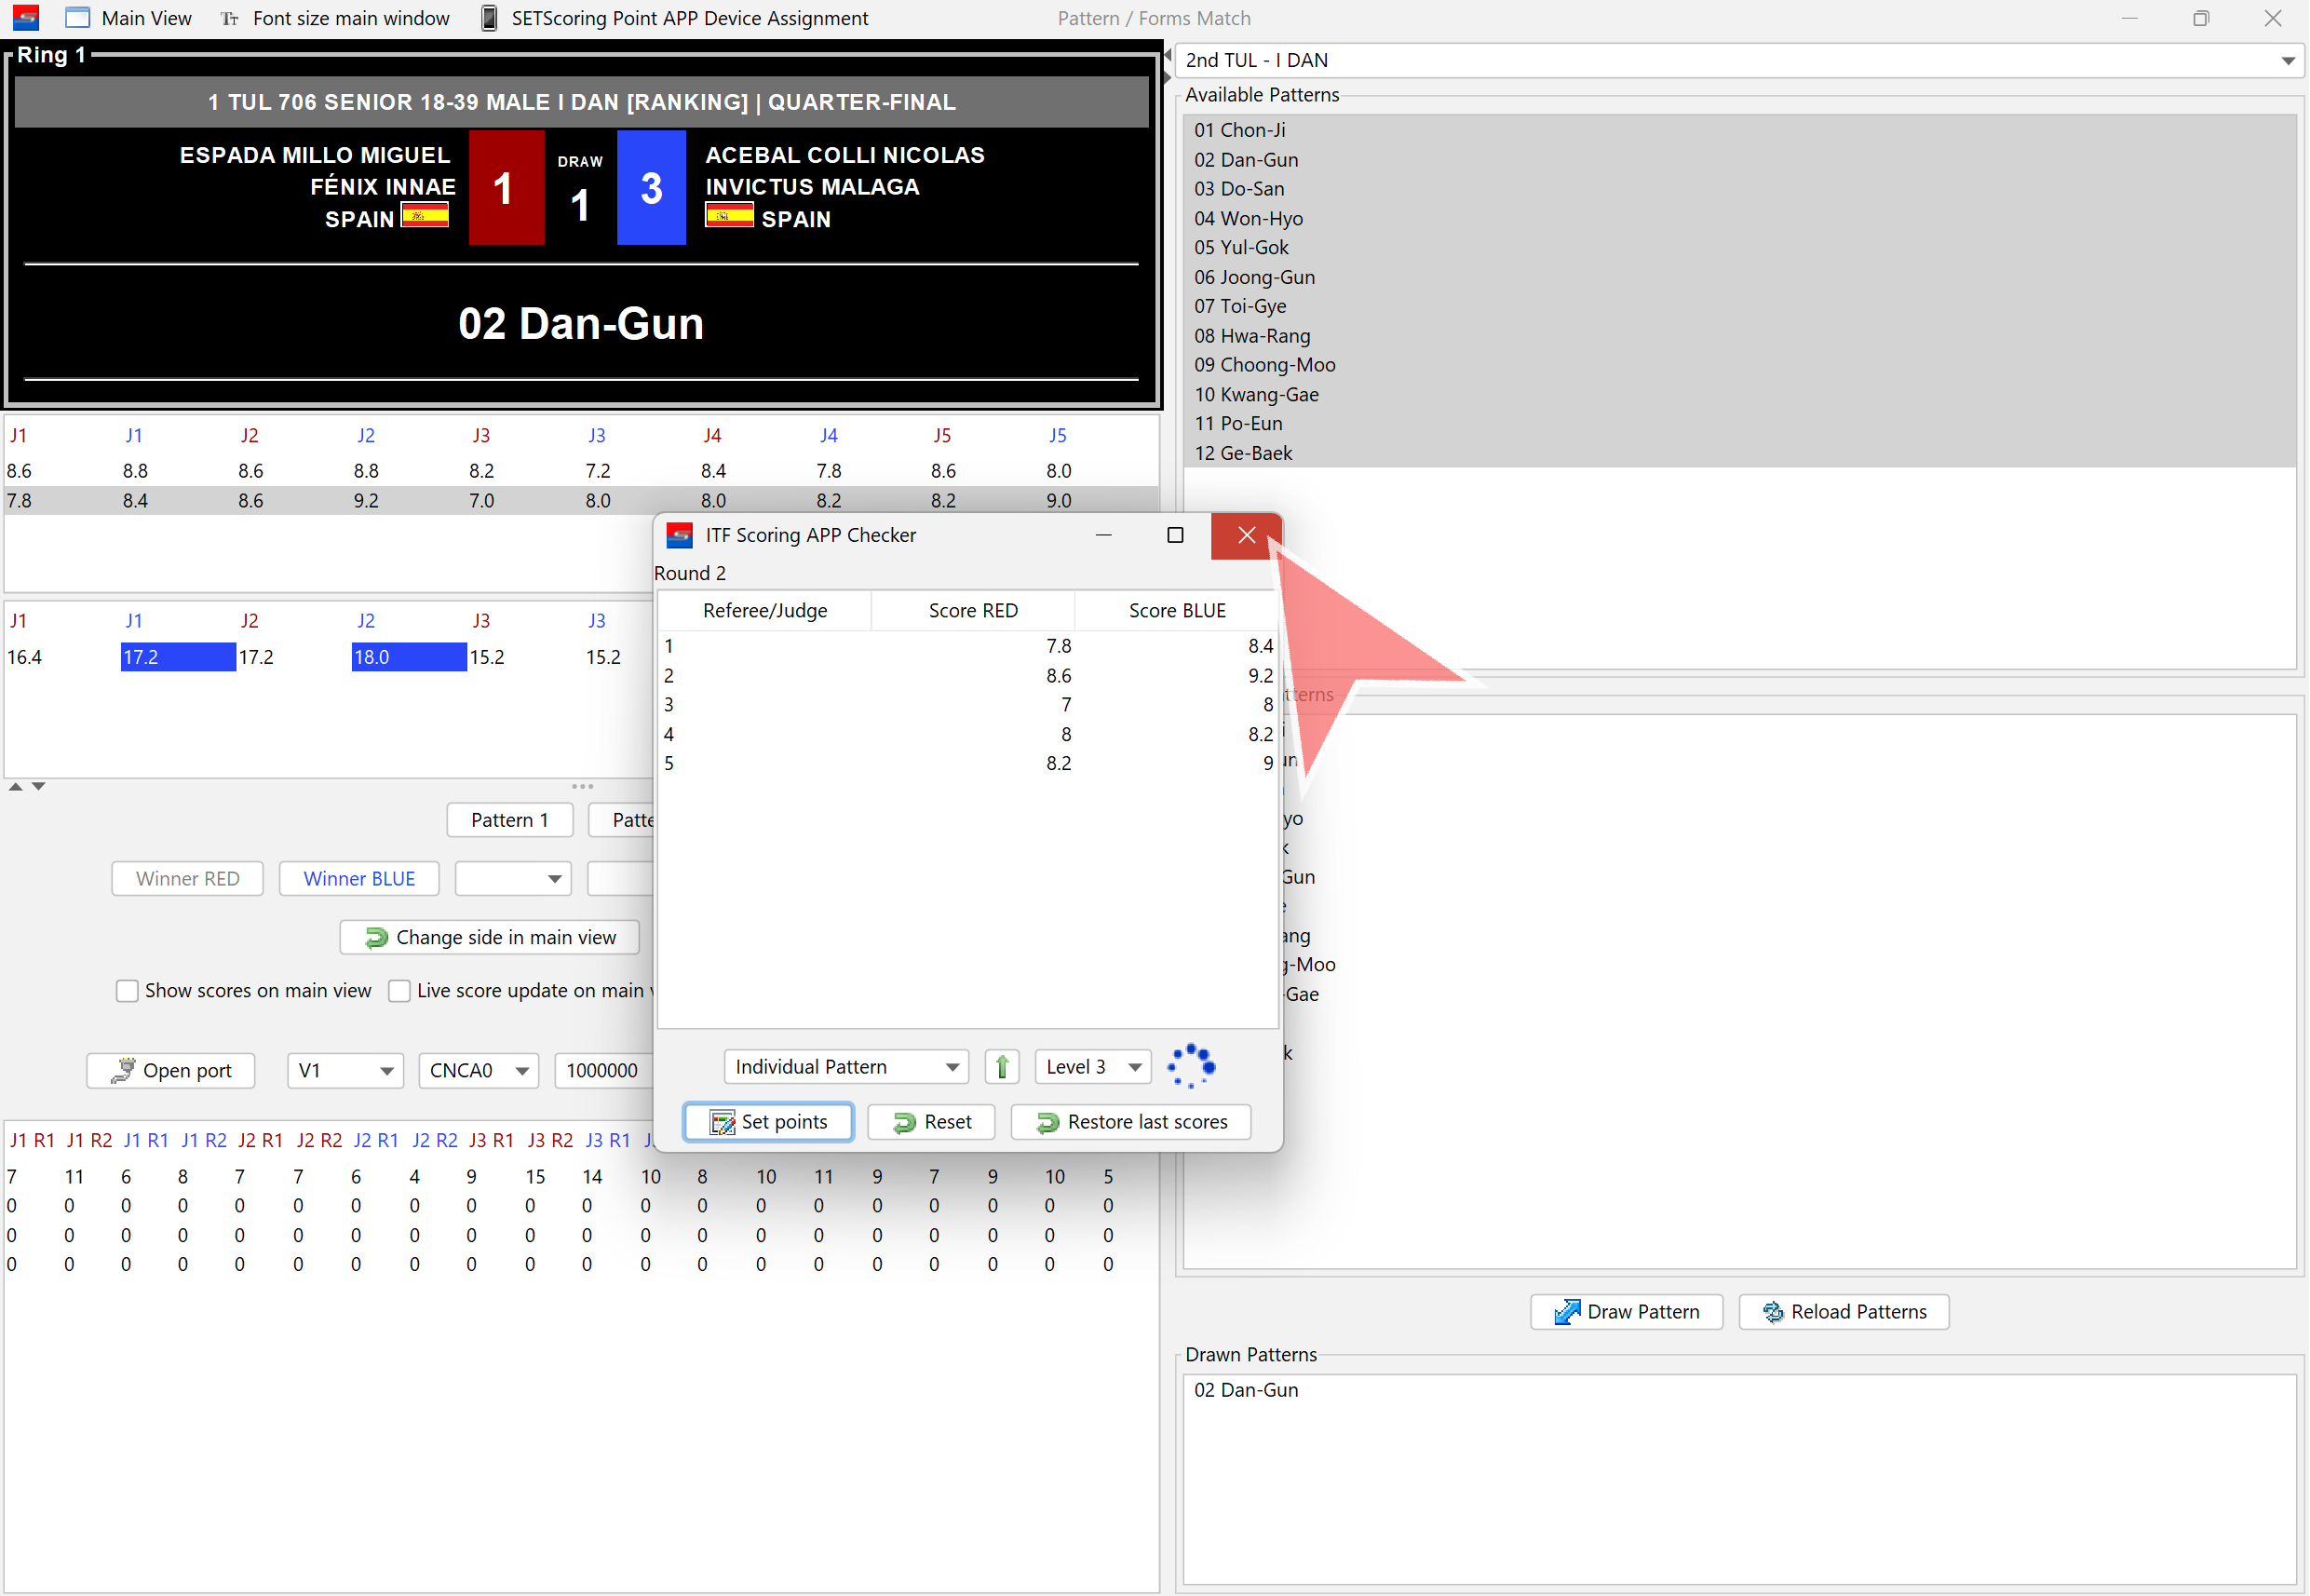
When scoring for Pattern 1 is finished, click on „Set Points“. The scores will then be displayed on the main screen.
Close the window.
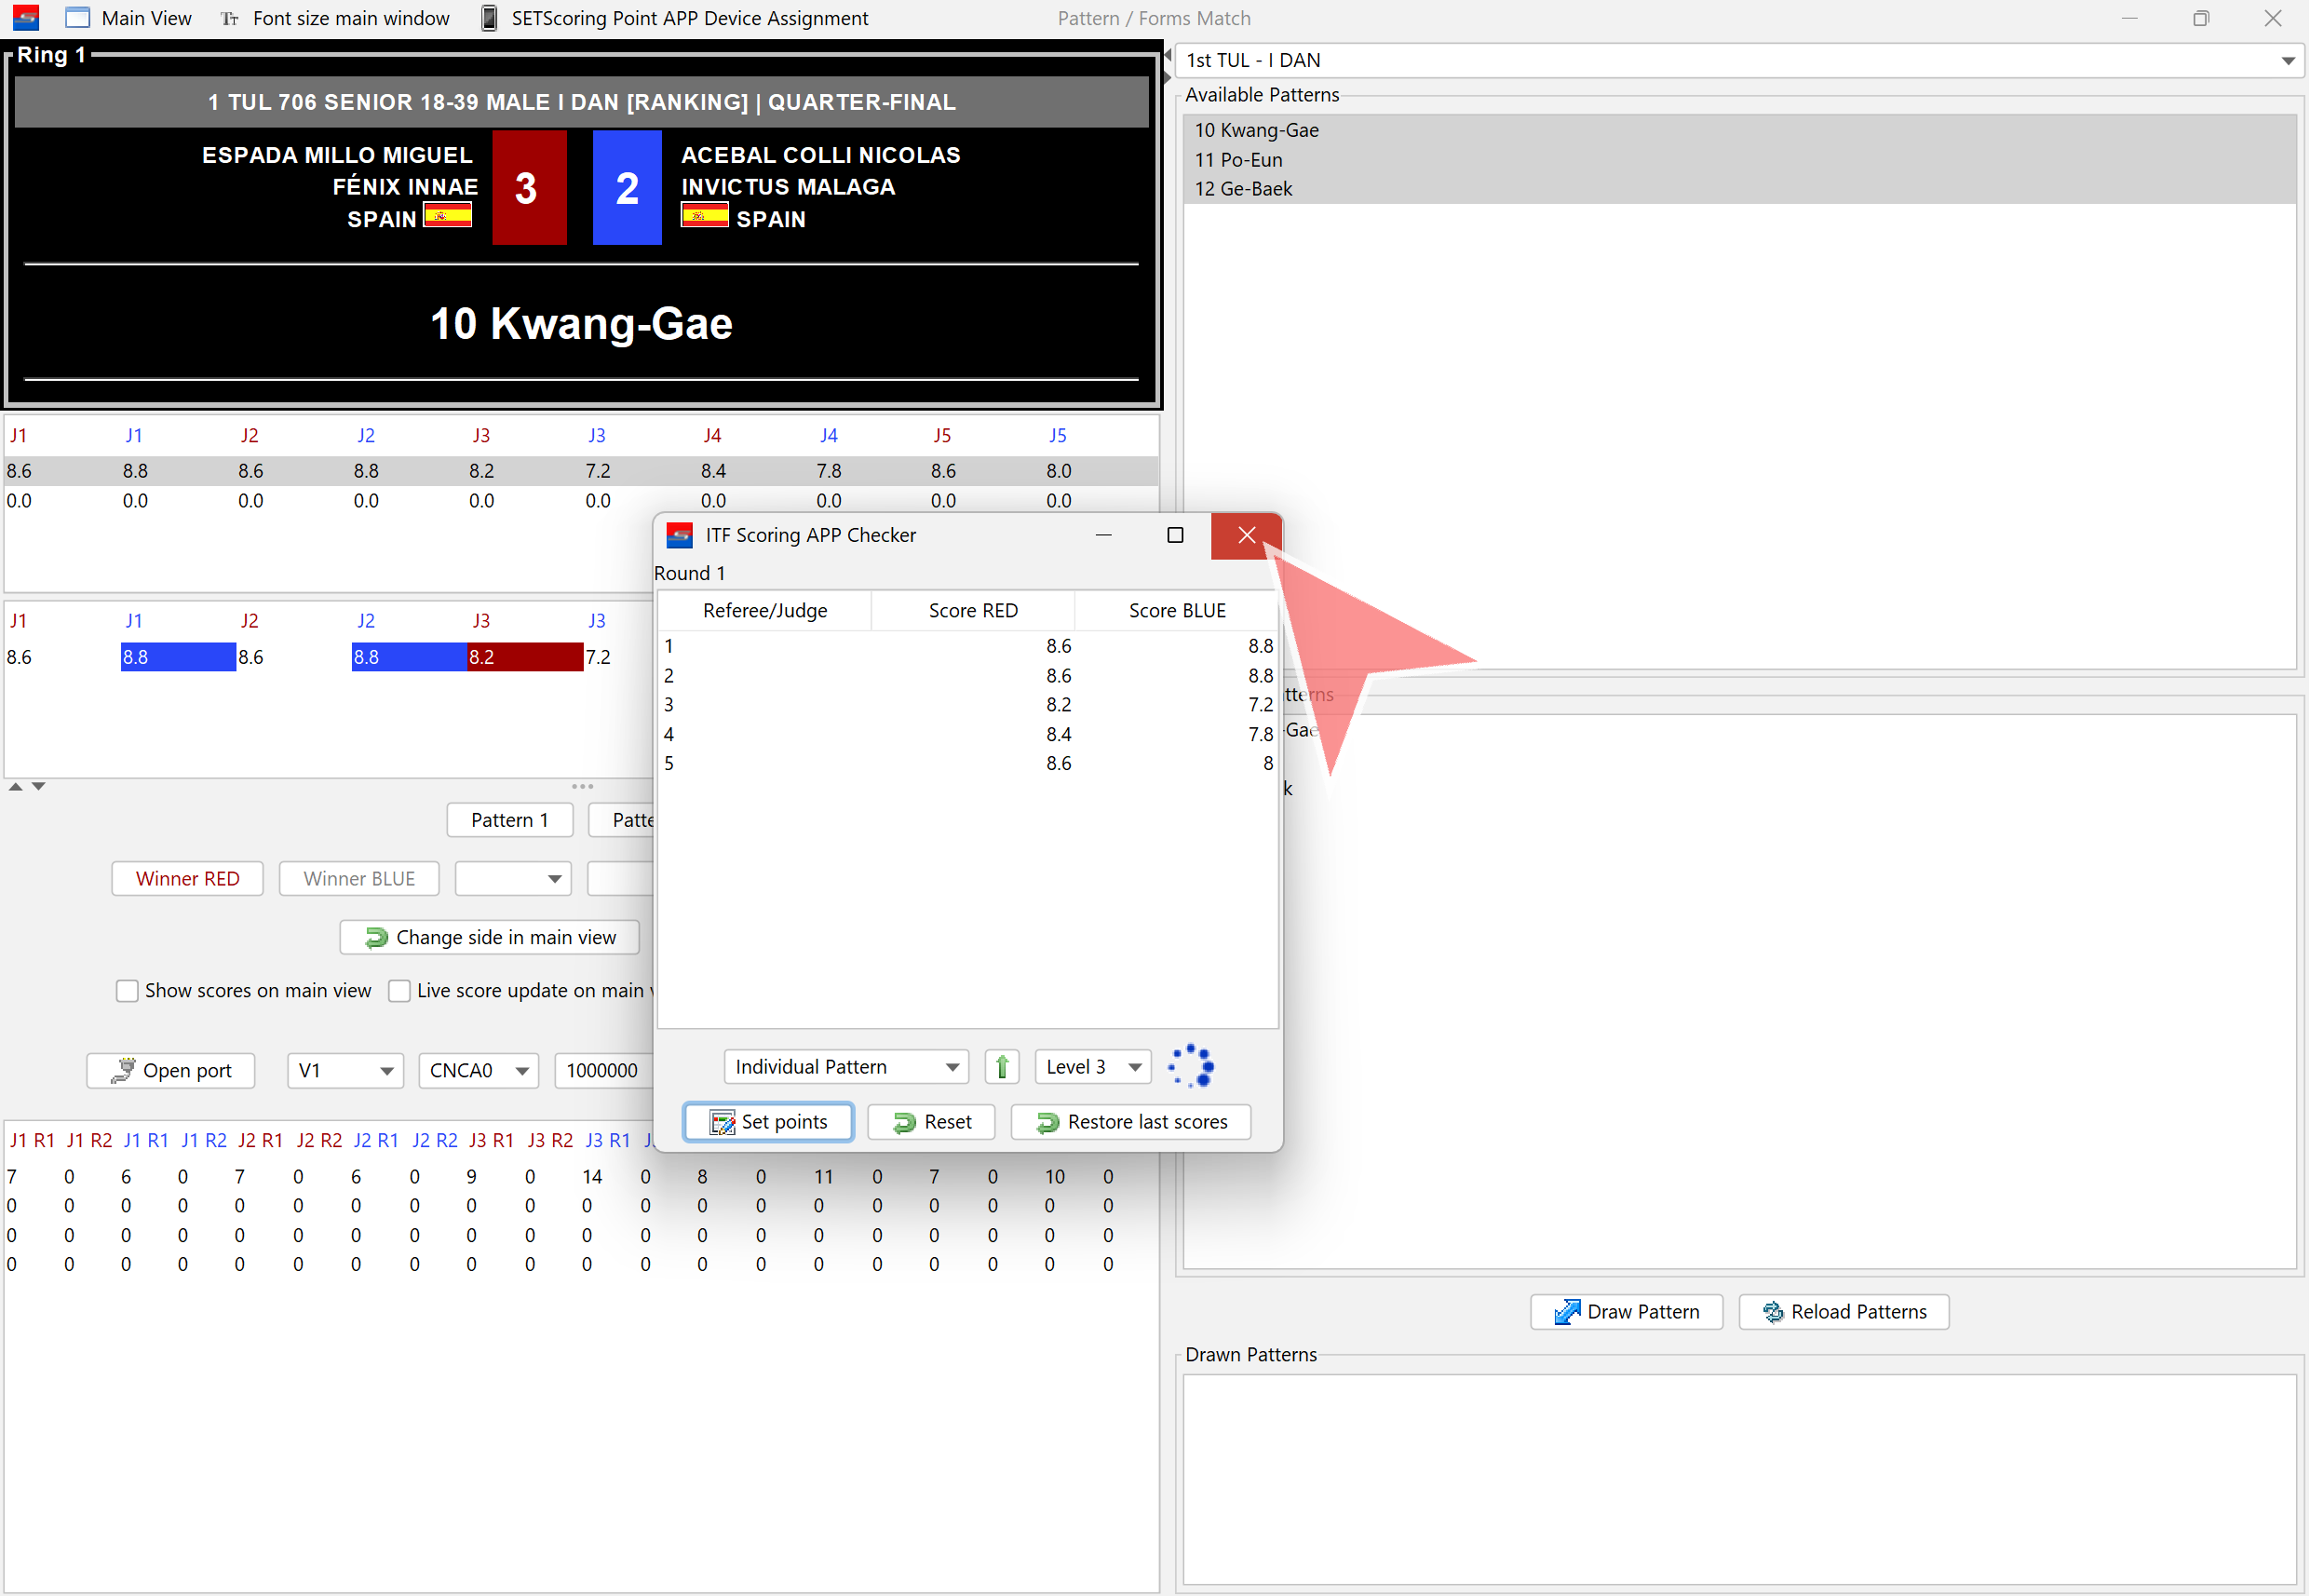
Confirm closing the window by clicking „Yes“.

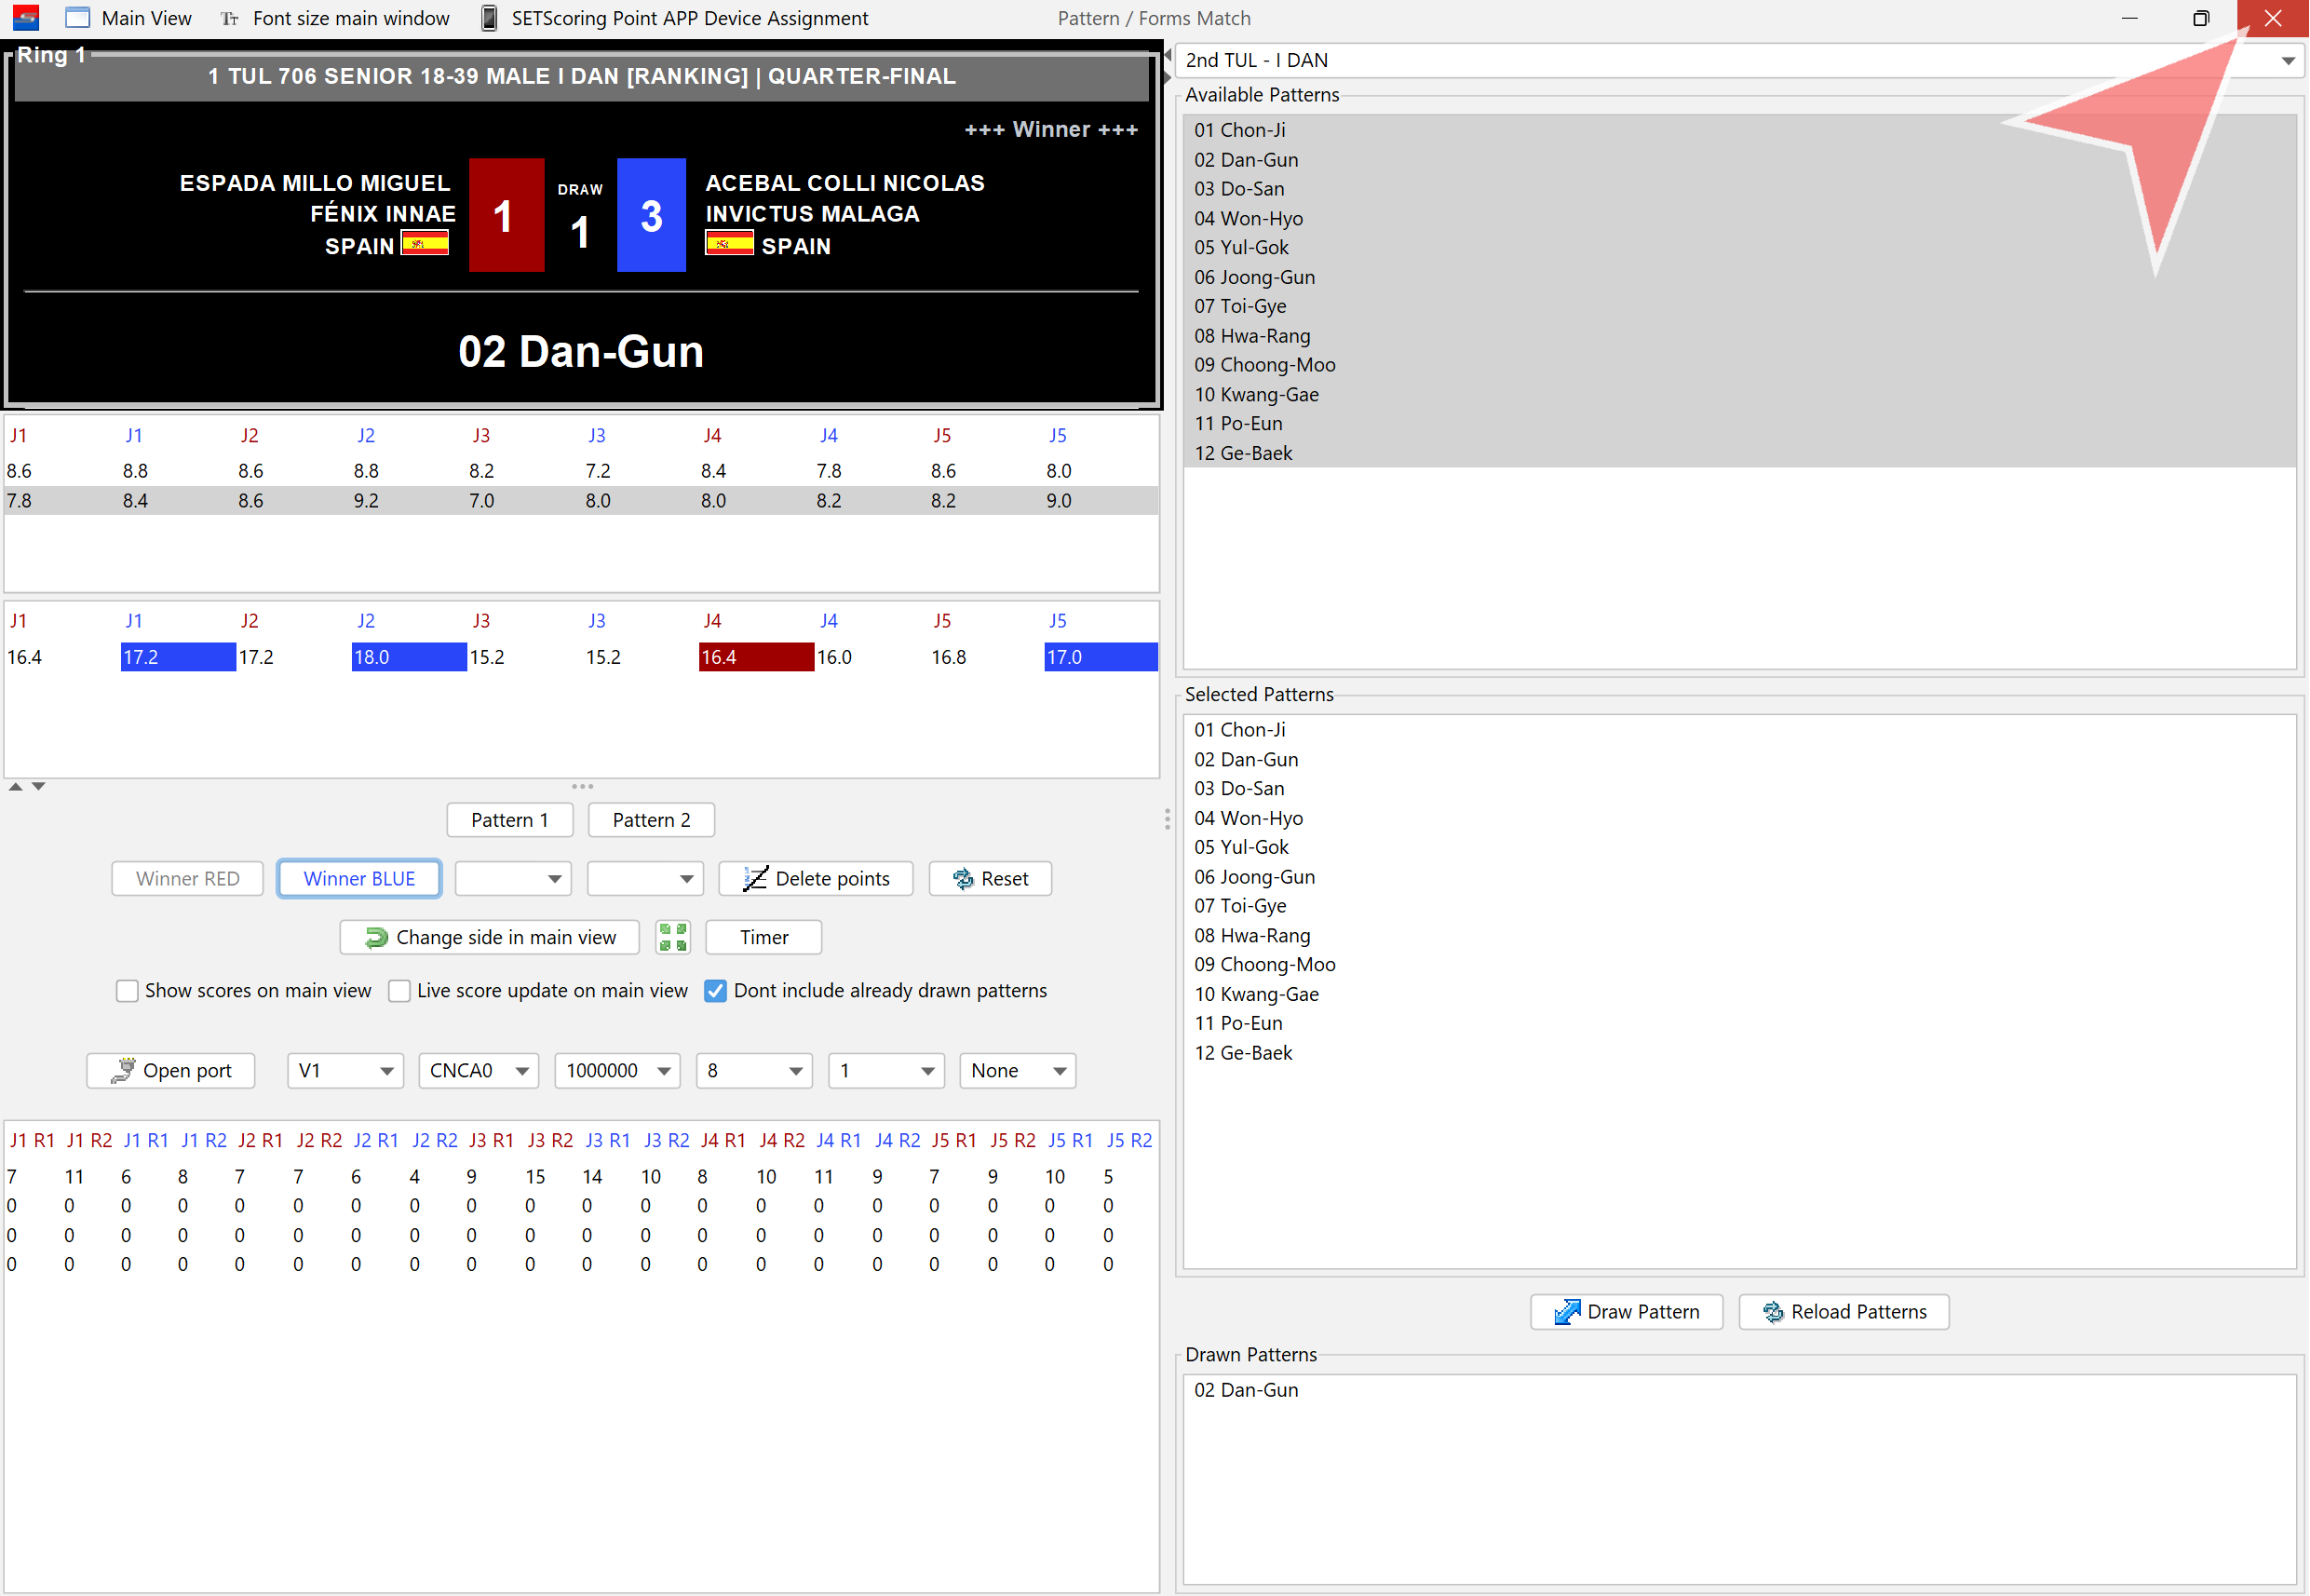
Pattern 2
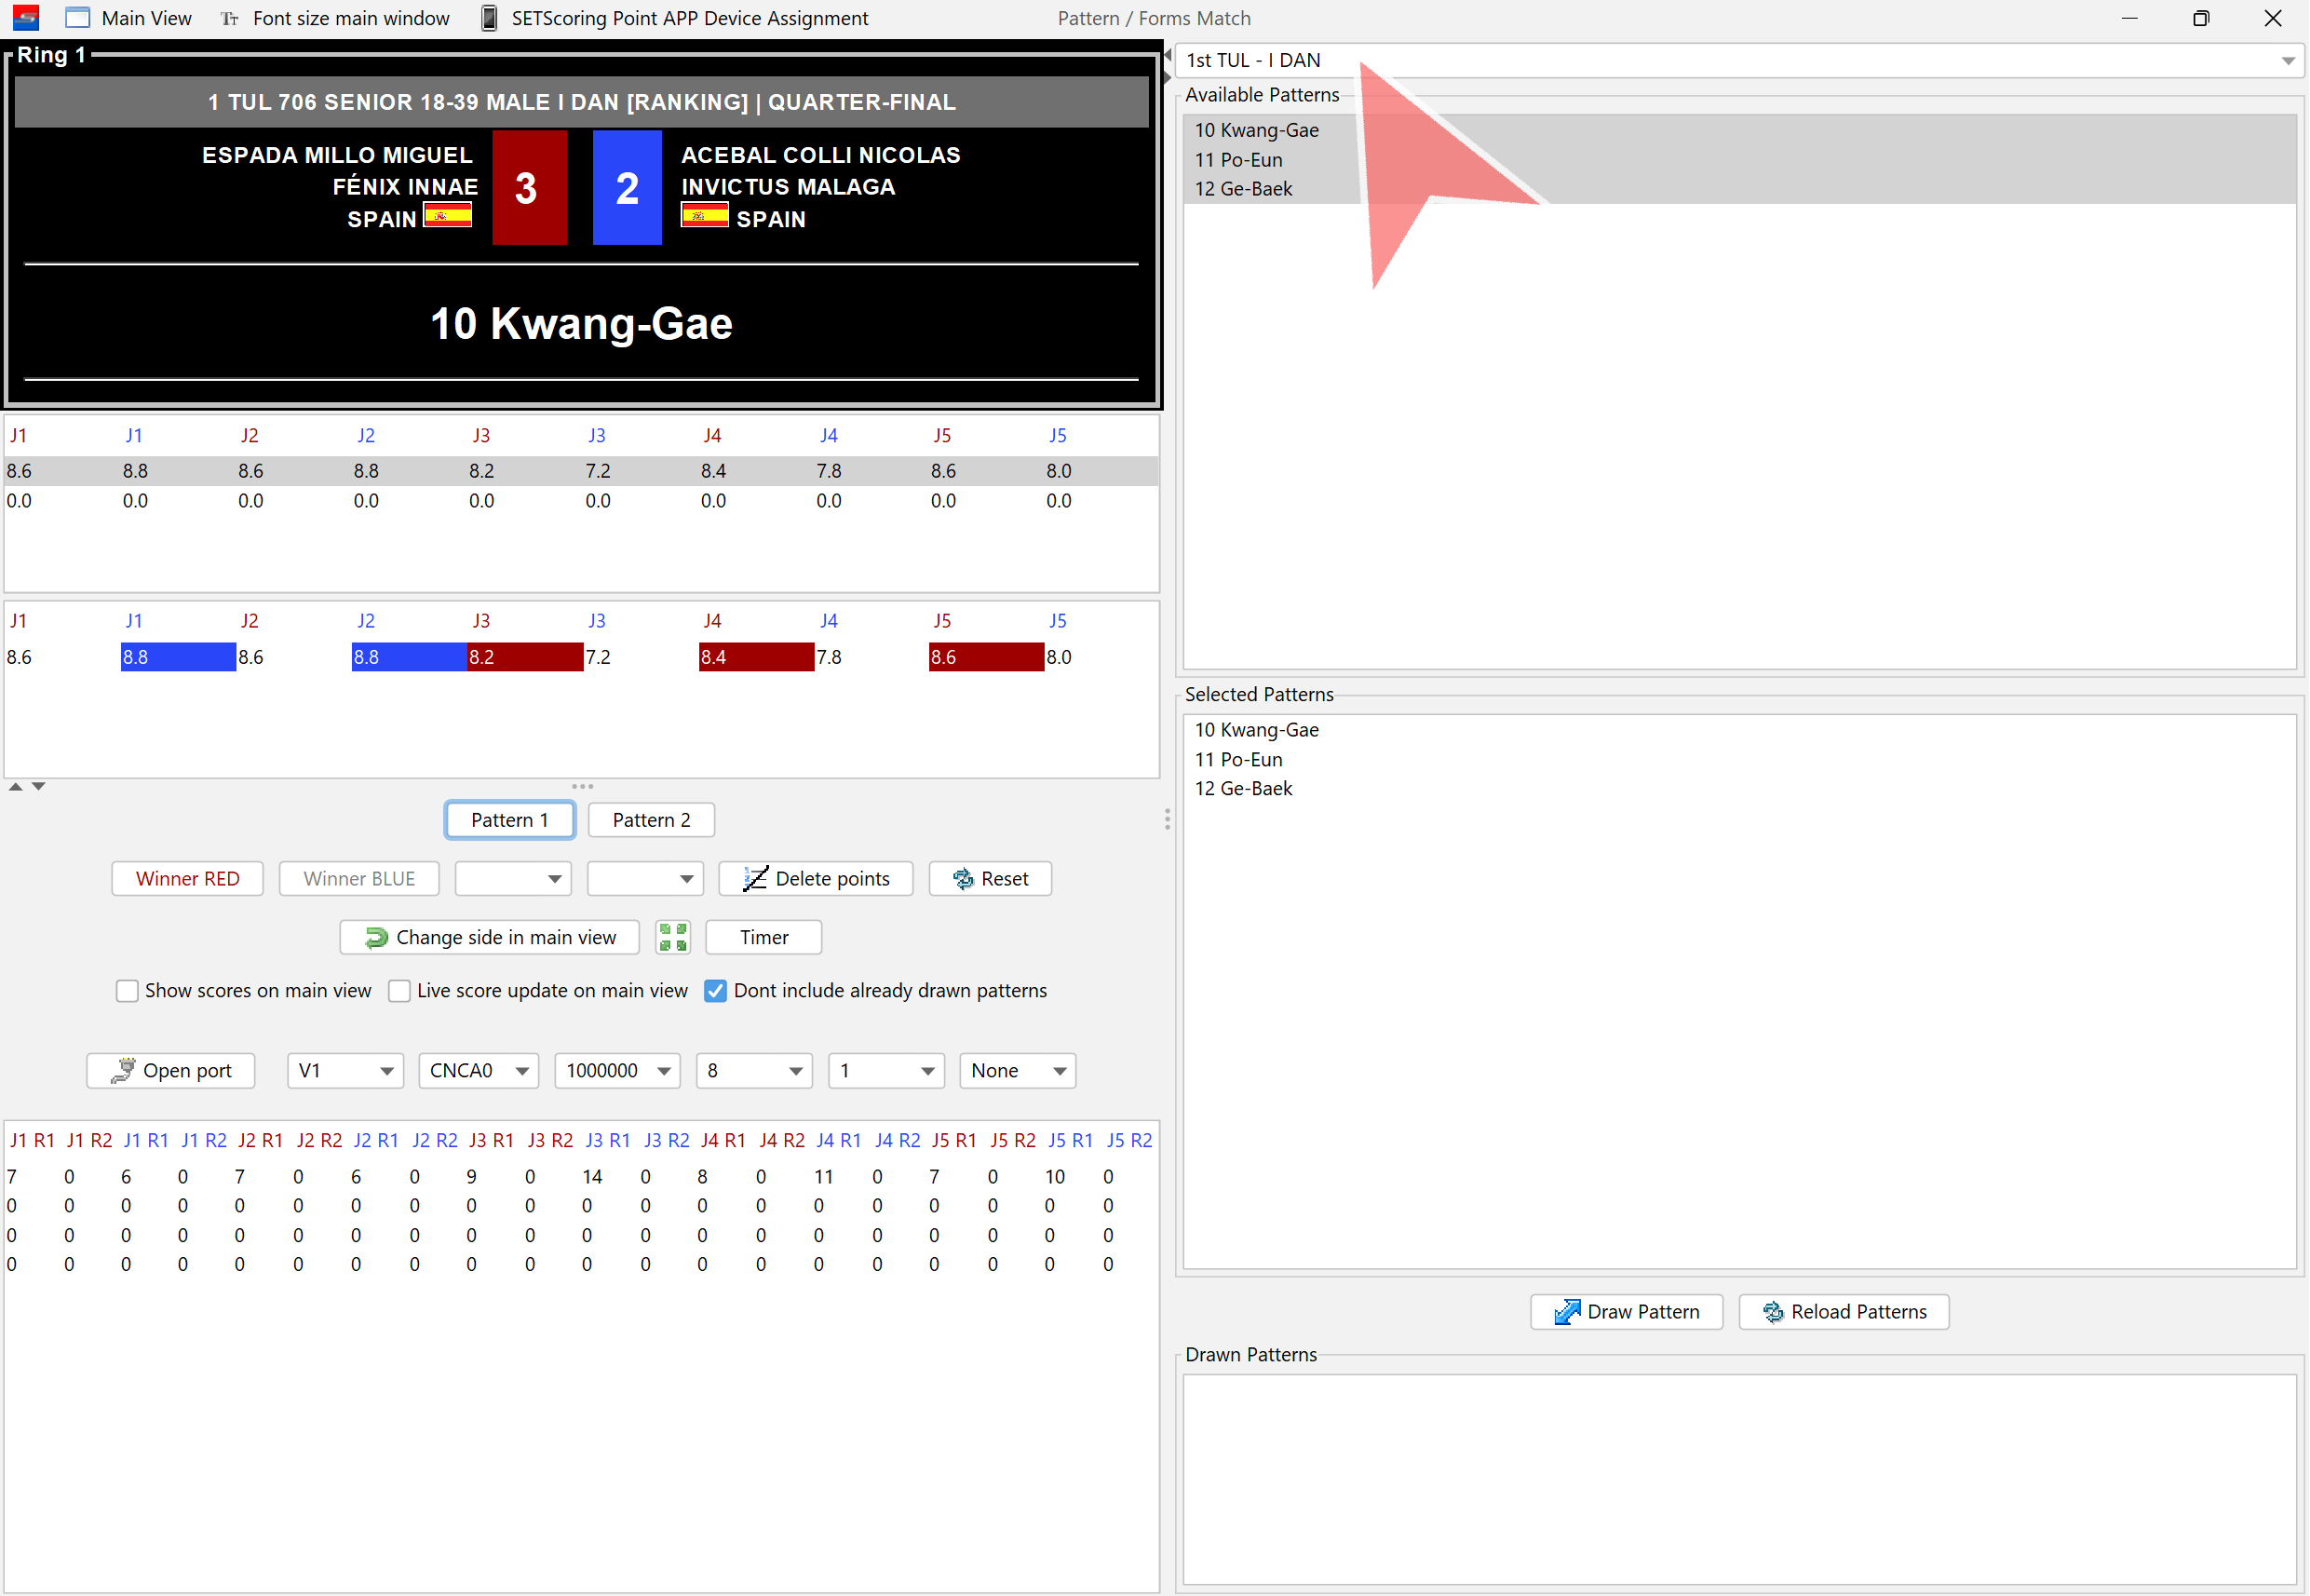
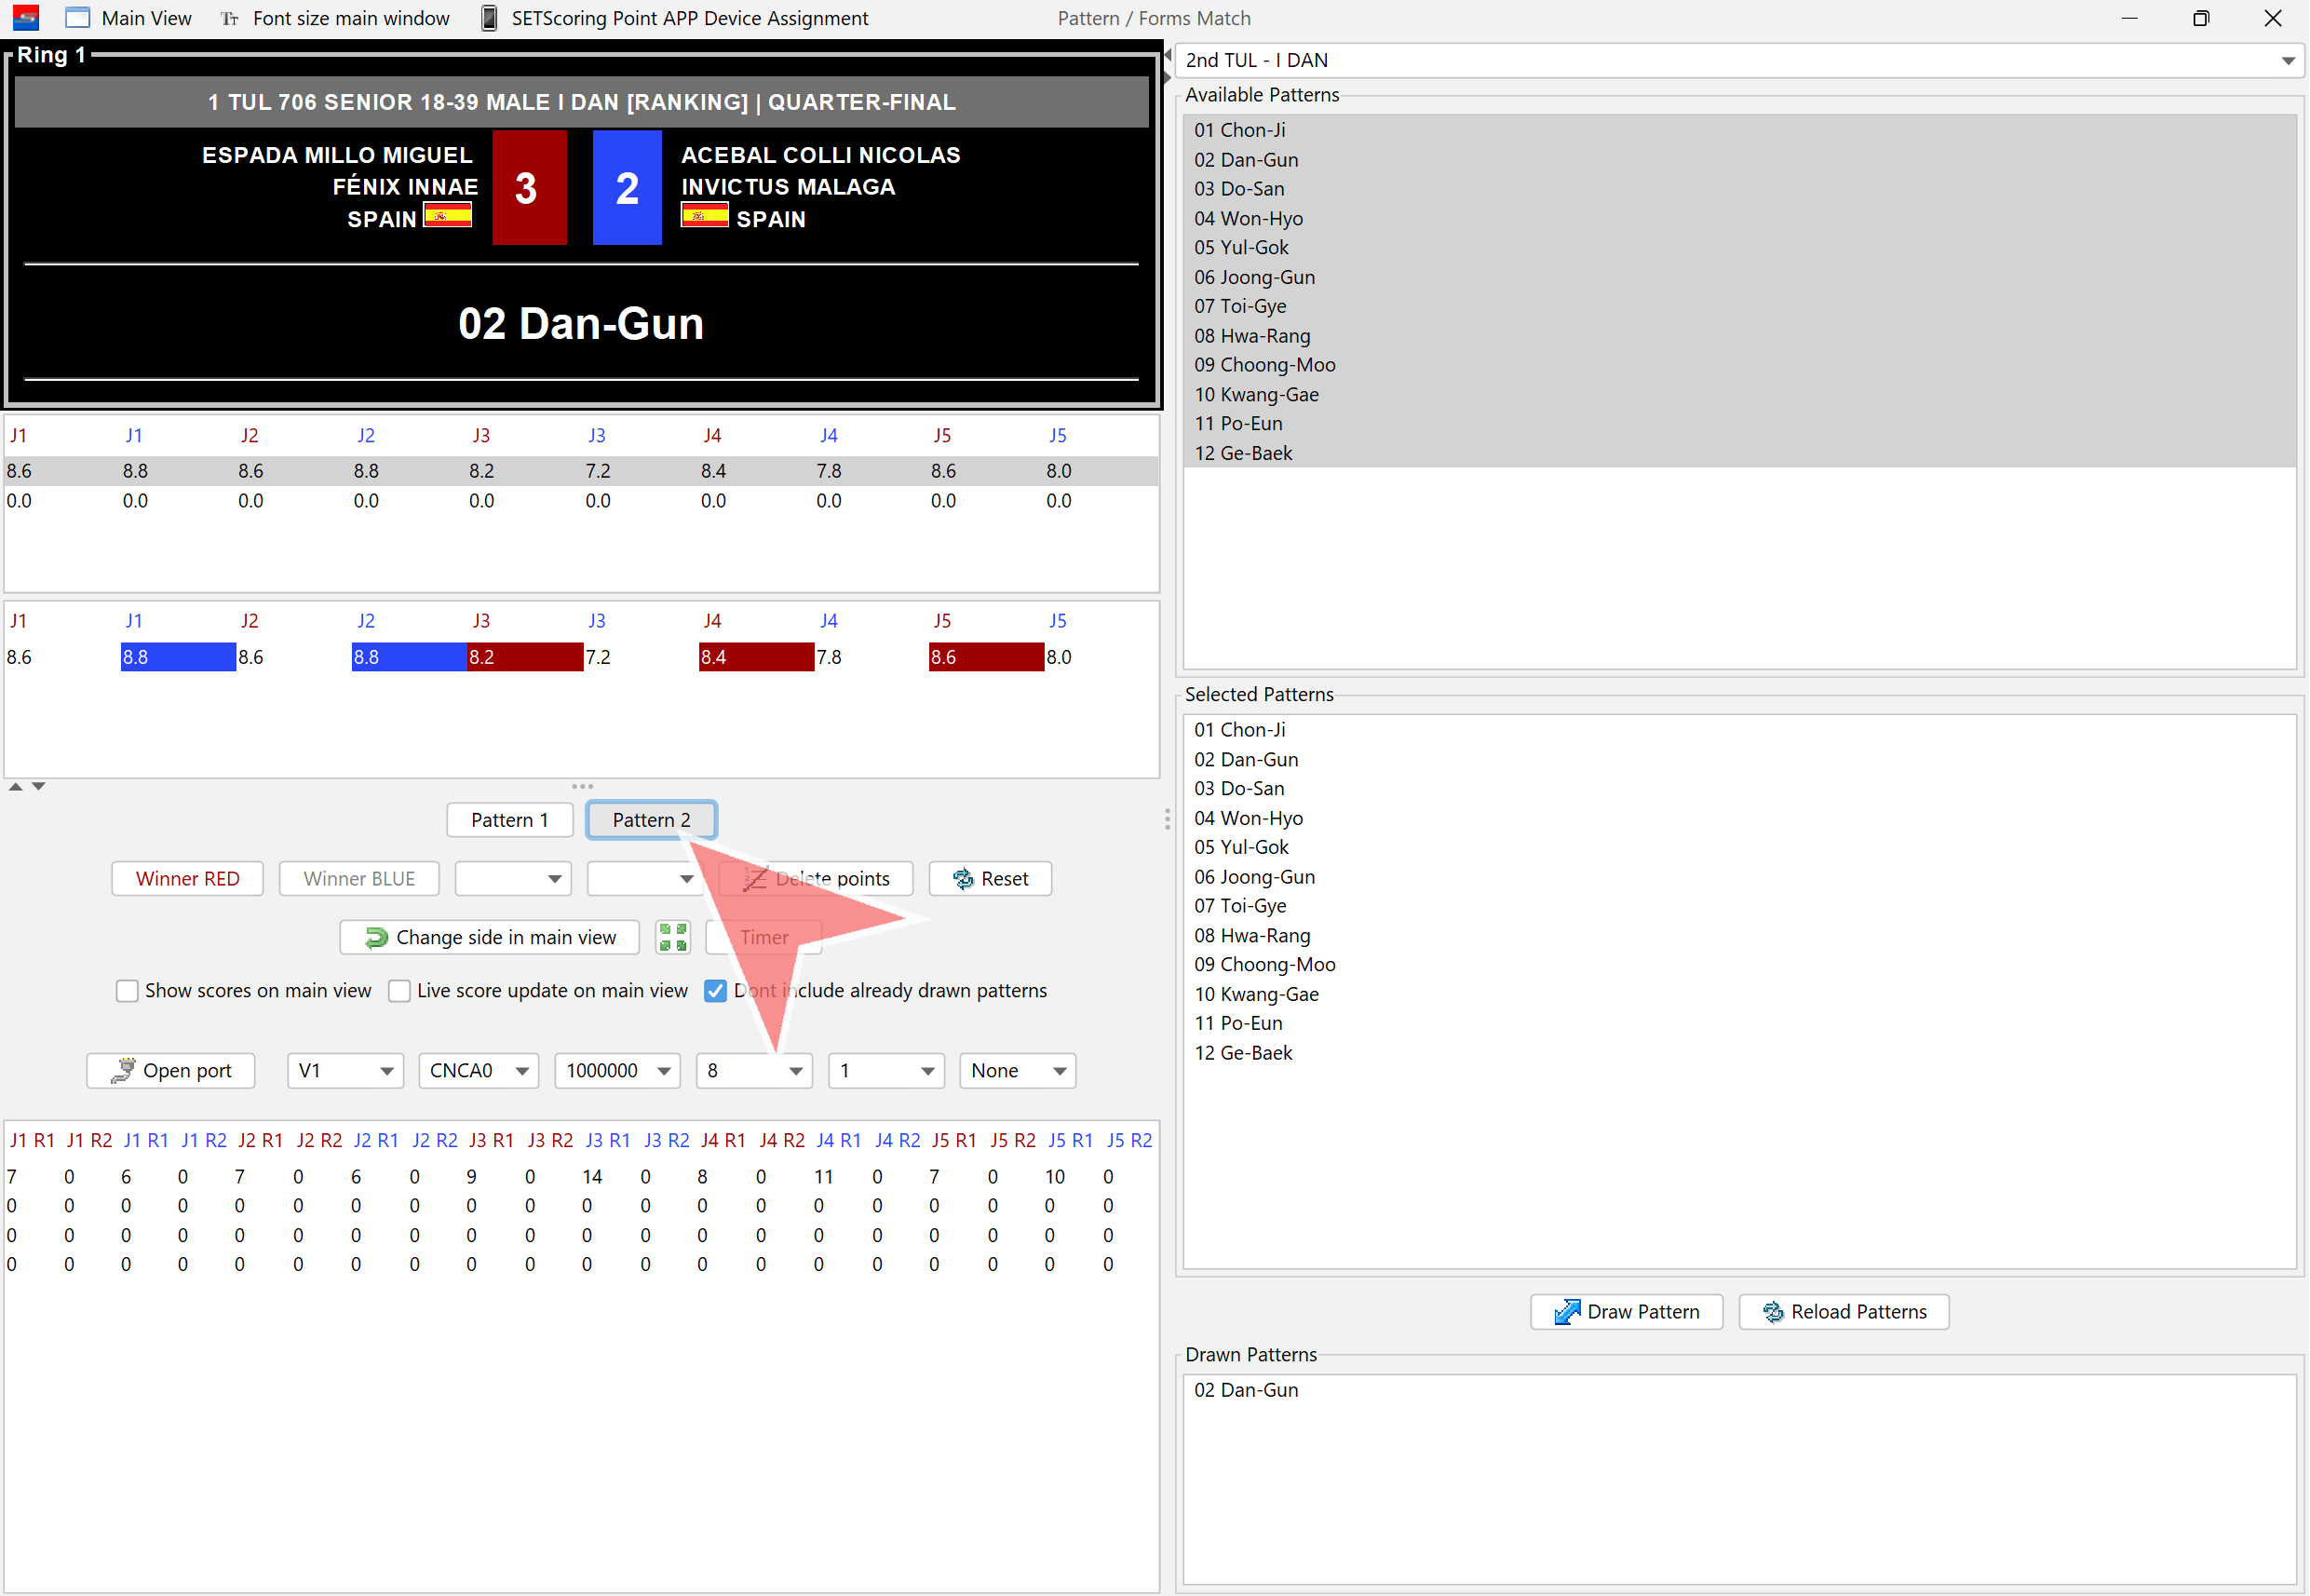
Click on the pre-selected patterns dropdown.
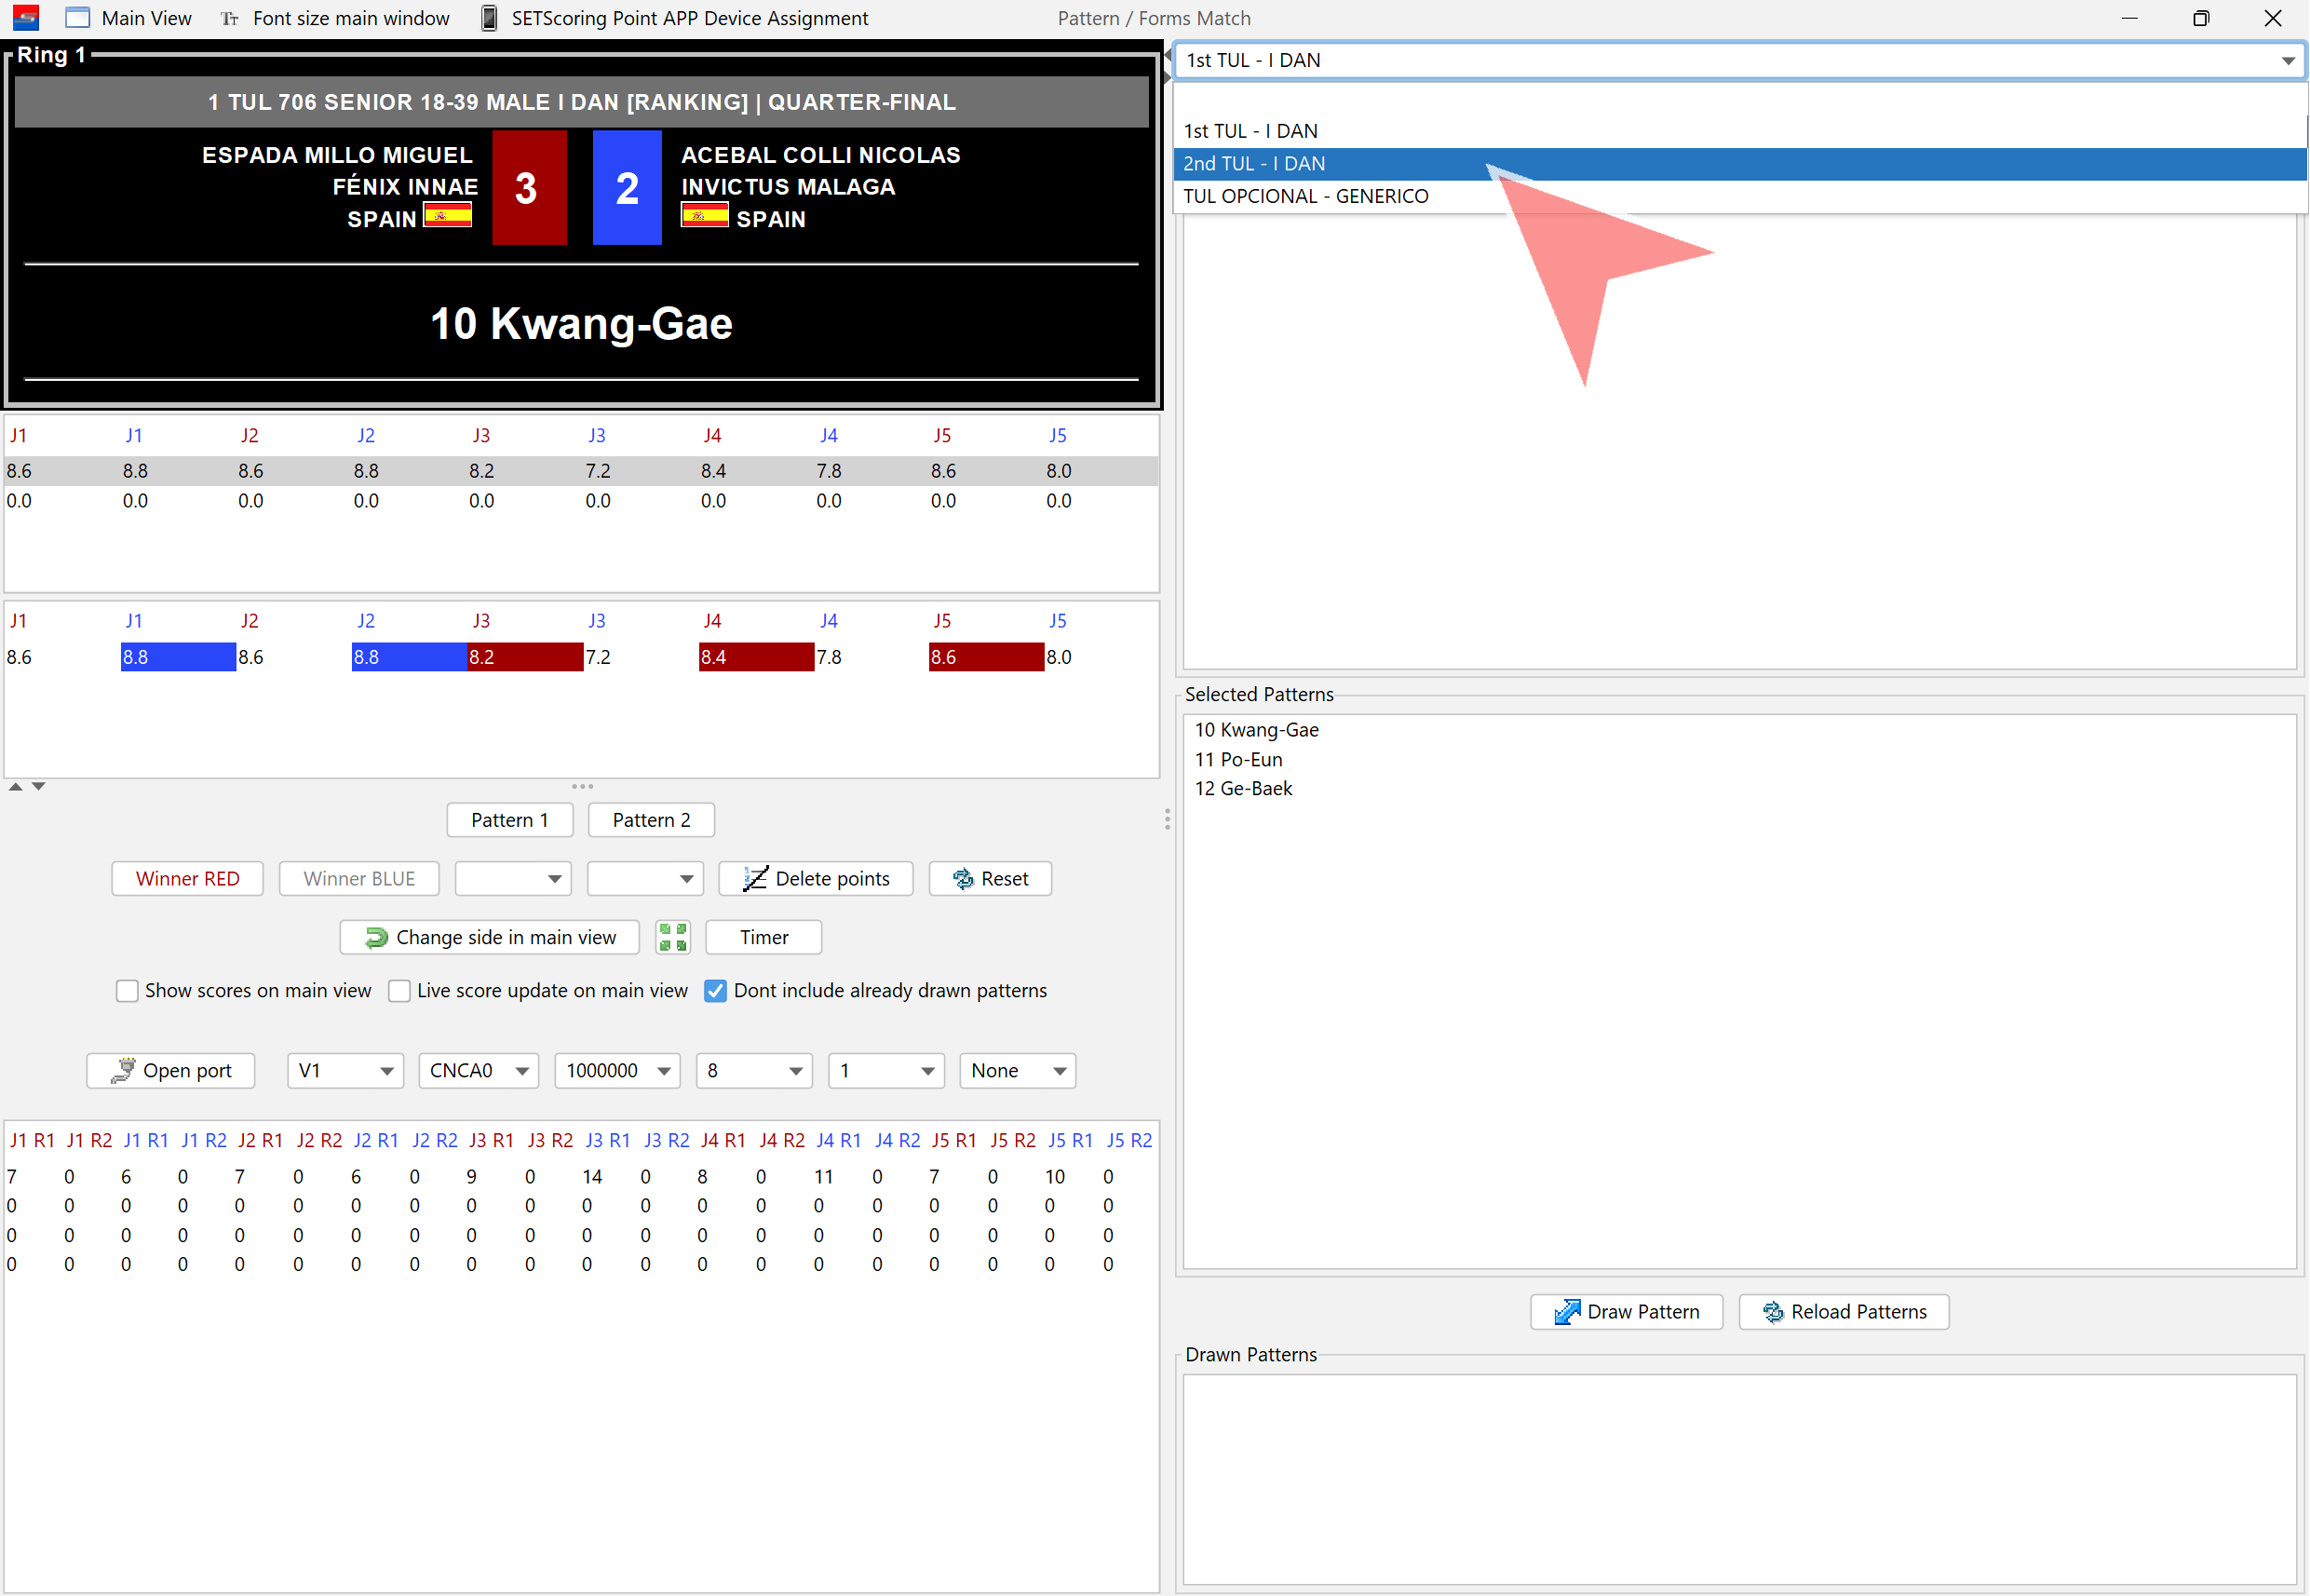
Select Pattern 2 or manually choose patterns to randomly draw the next one to be performed.
Click on „Draw Pattern“. A pattern that has already been drawn will not be included in this draw.
Confirm Pattern 2. It will be displayed on the screen once „Yes“ is clicked.

Click on „Pattern 2“ to open the scores window.
Click on the „Next Level“ button when moving to the next level.
When scoring for Pattern 2 is finished, click on „Set Points“. The scores will then be displayed on the main screen.
Close the Pattern 2 scores window.
Confirm closing the window by clicking „Yes“.

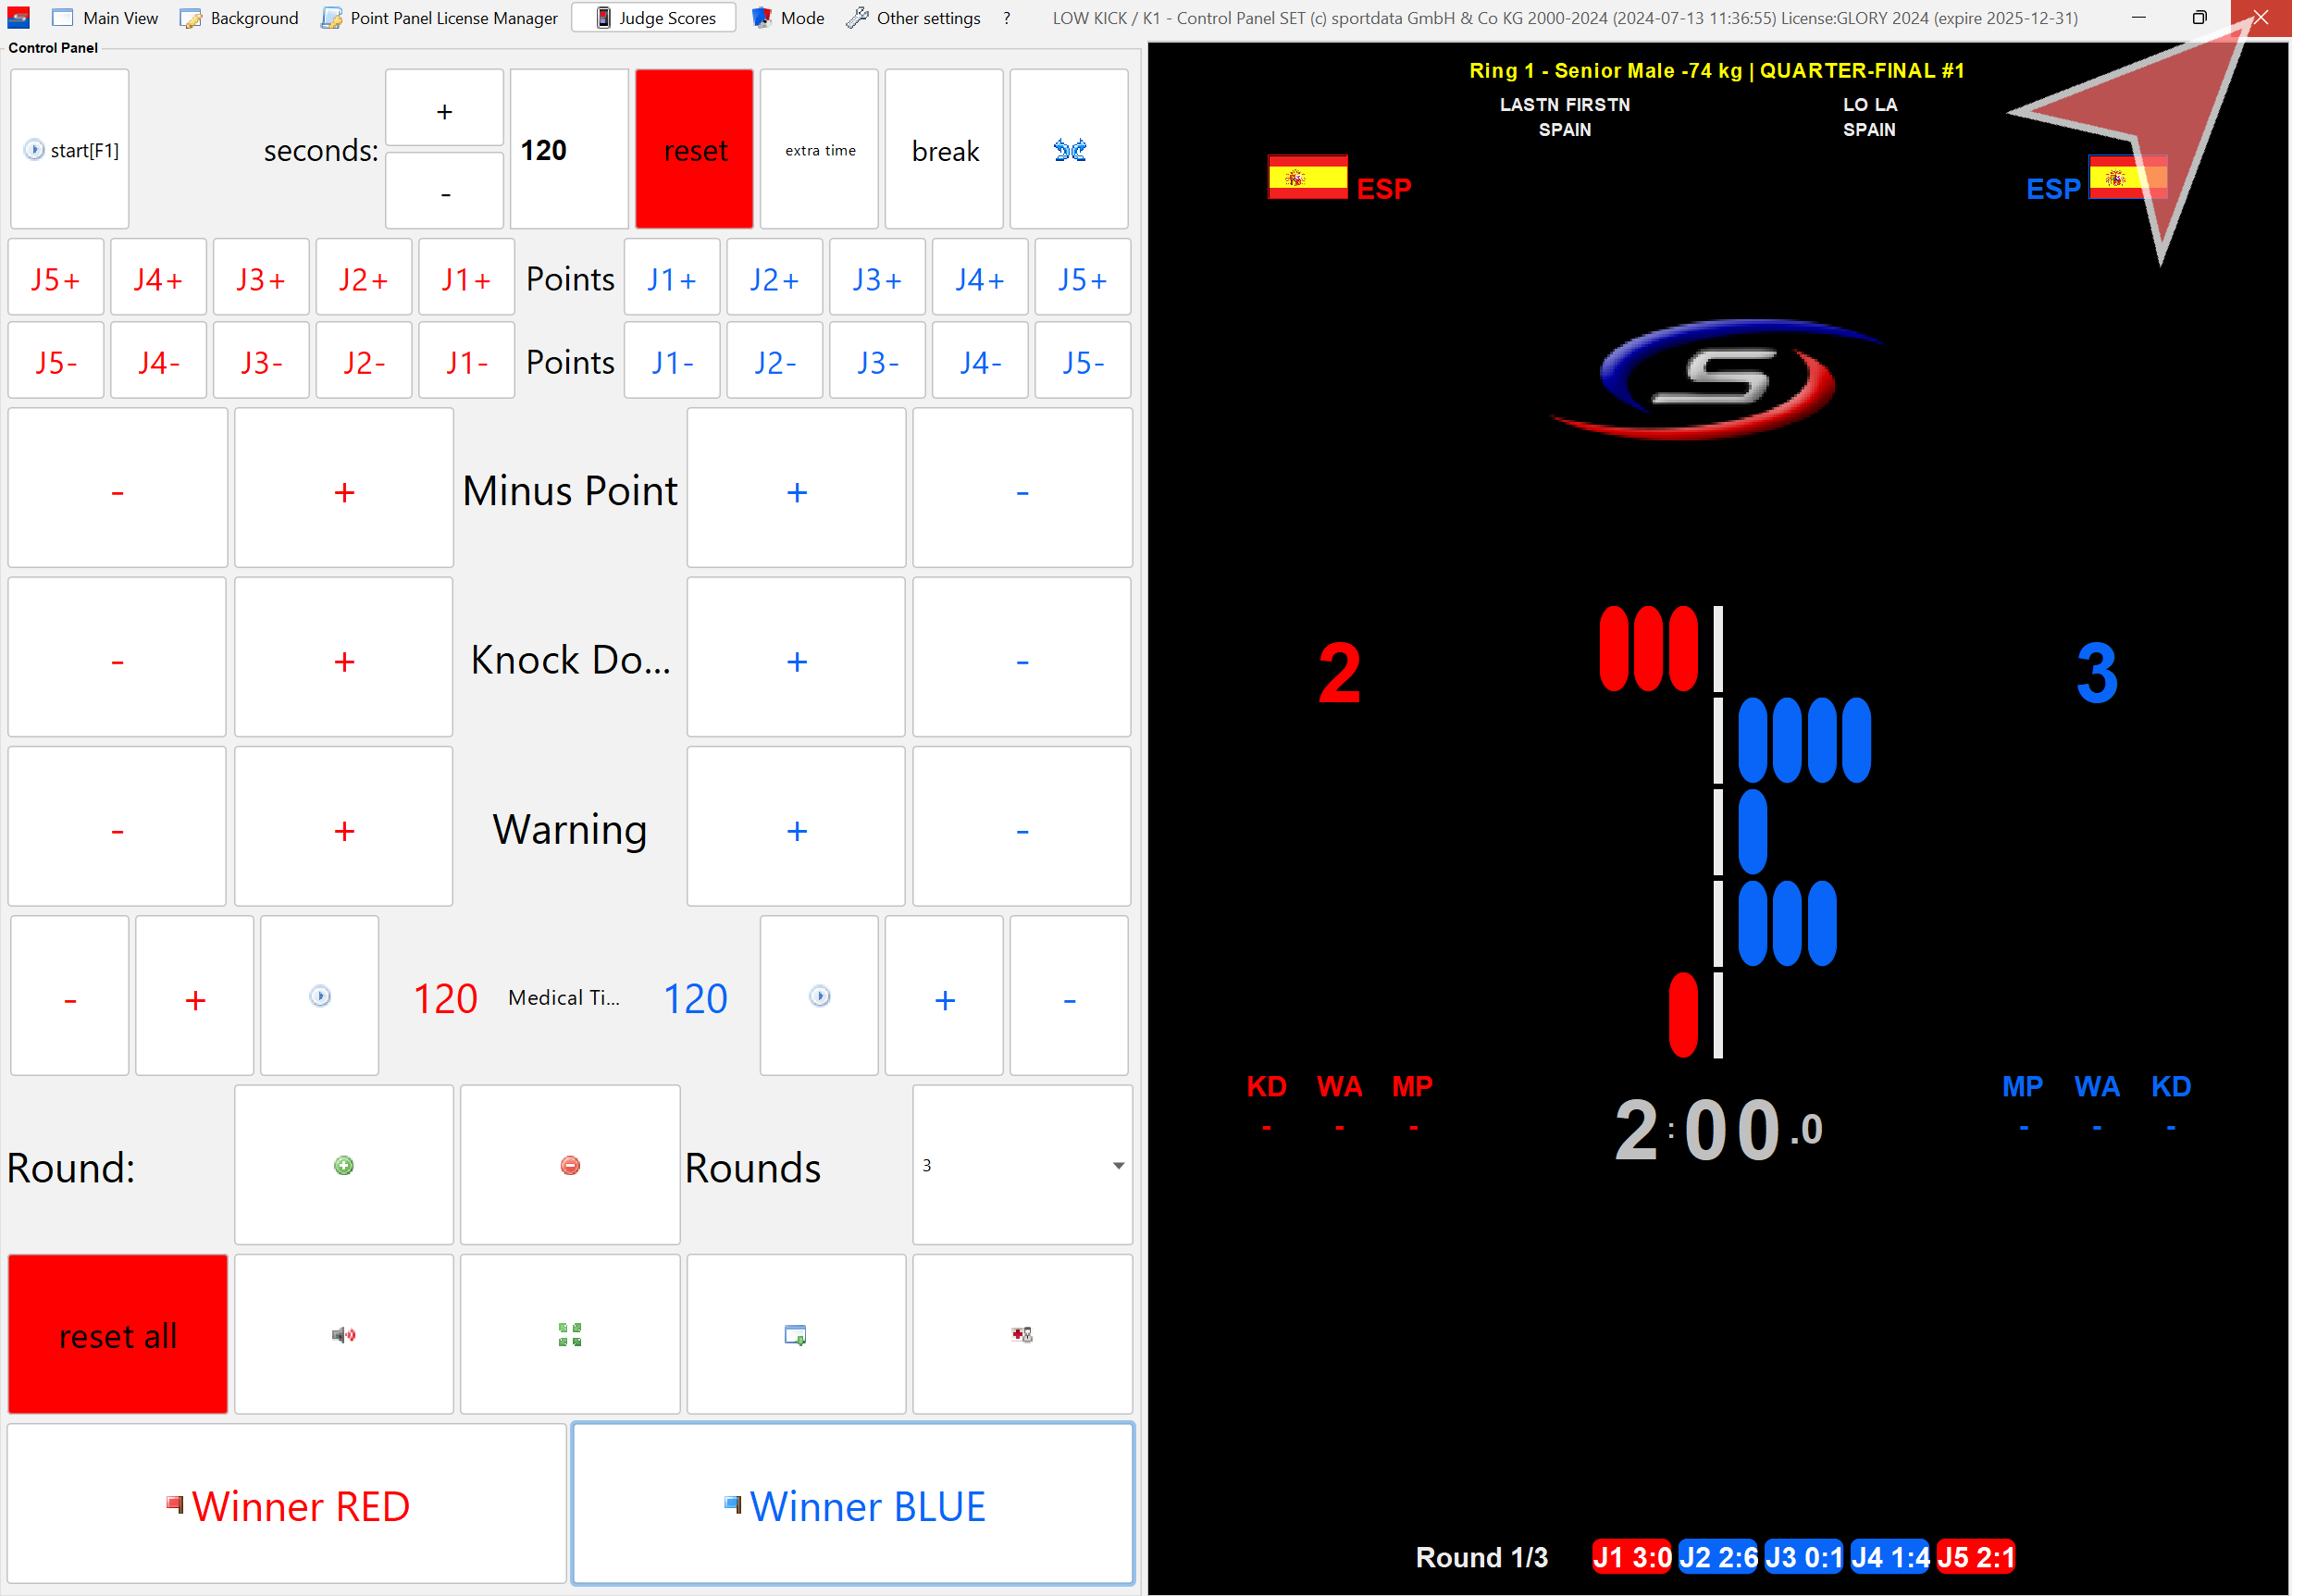
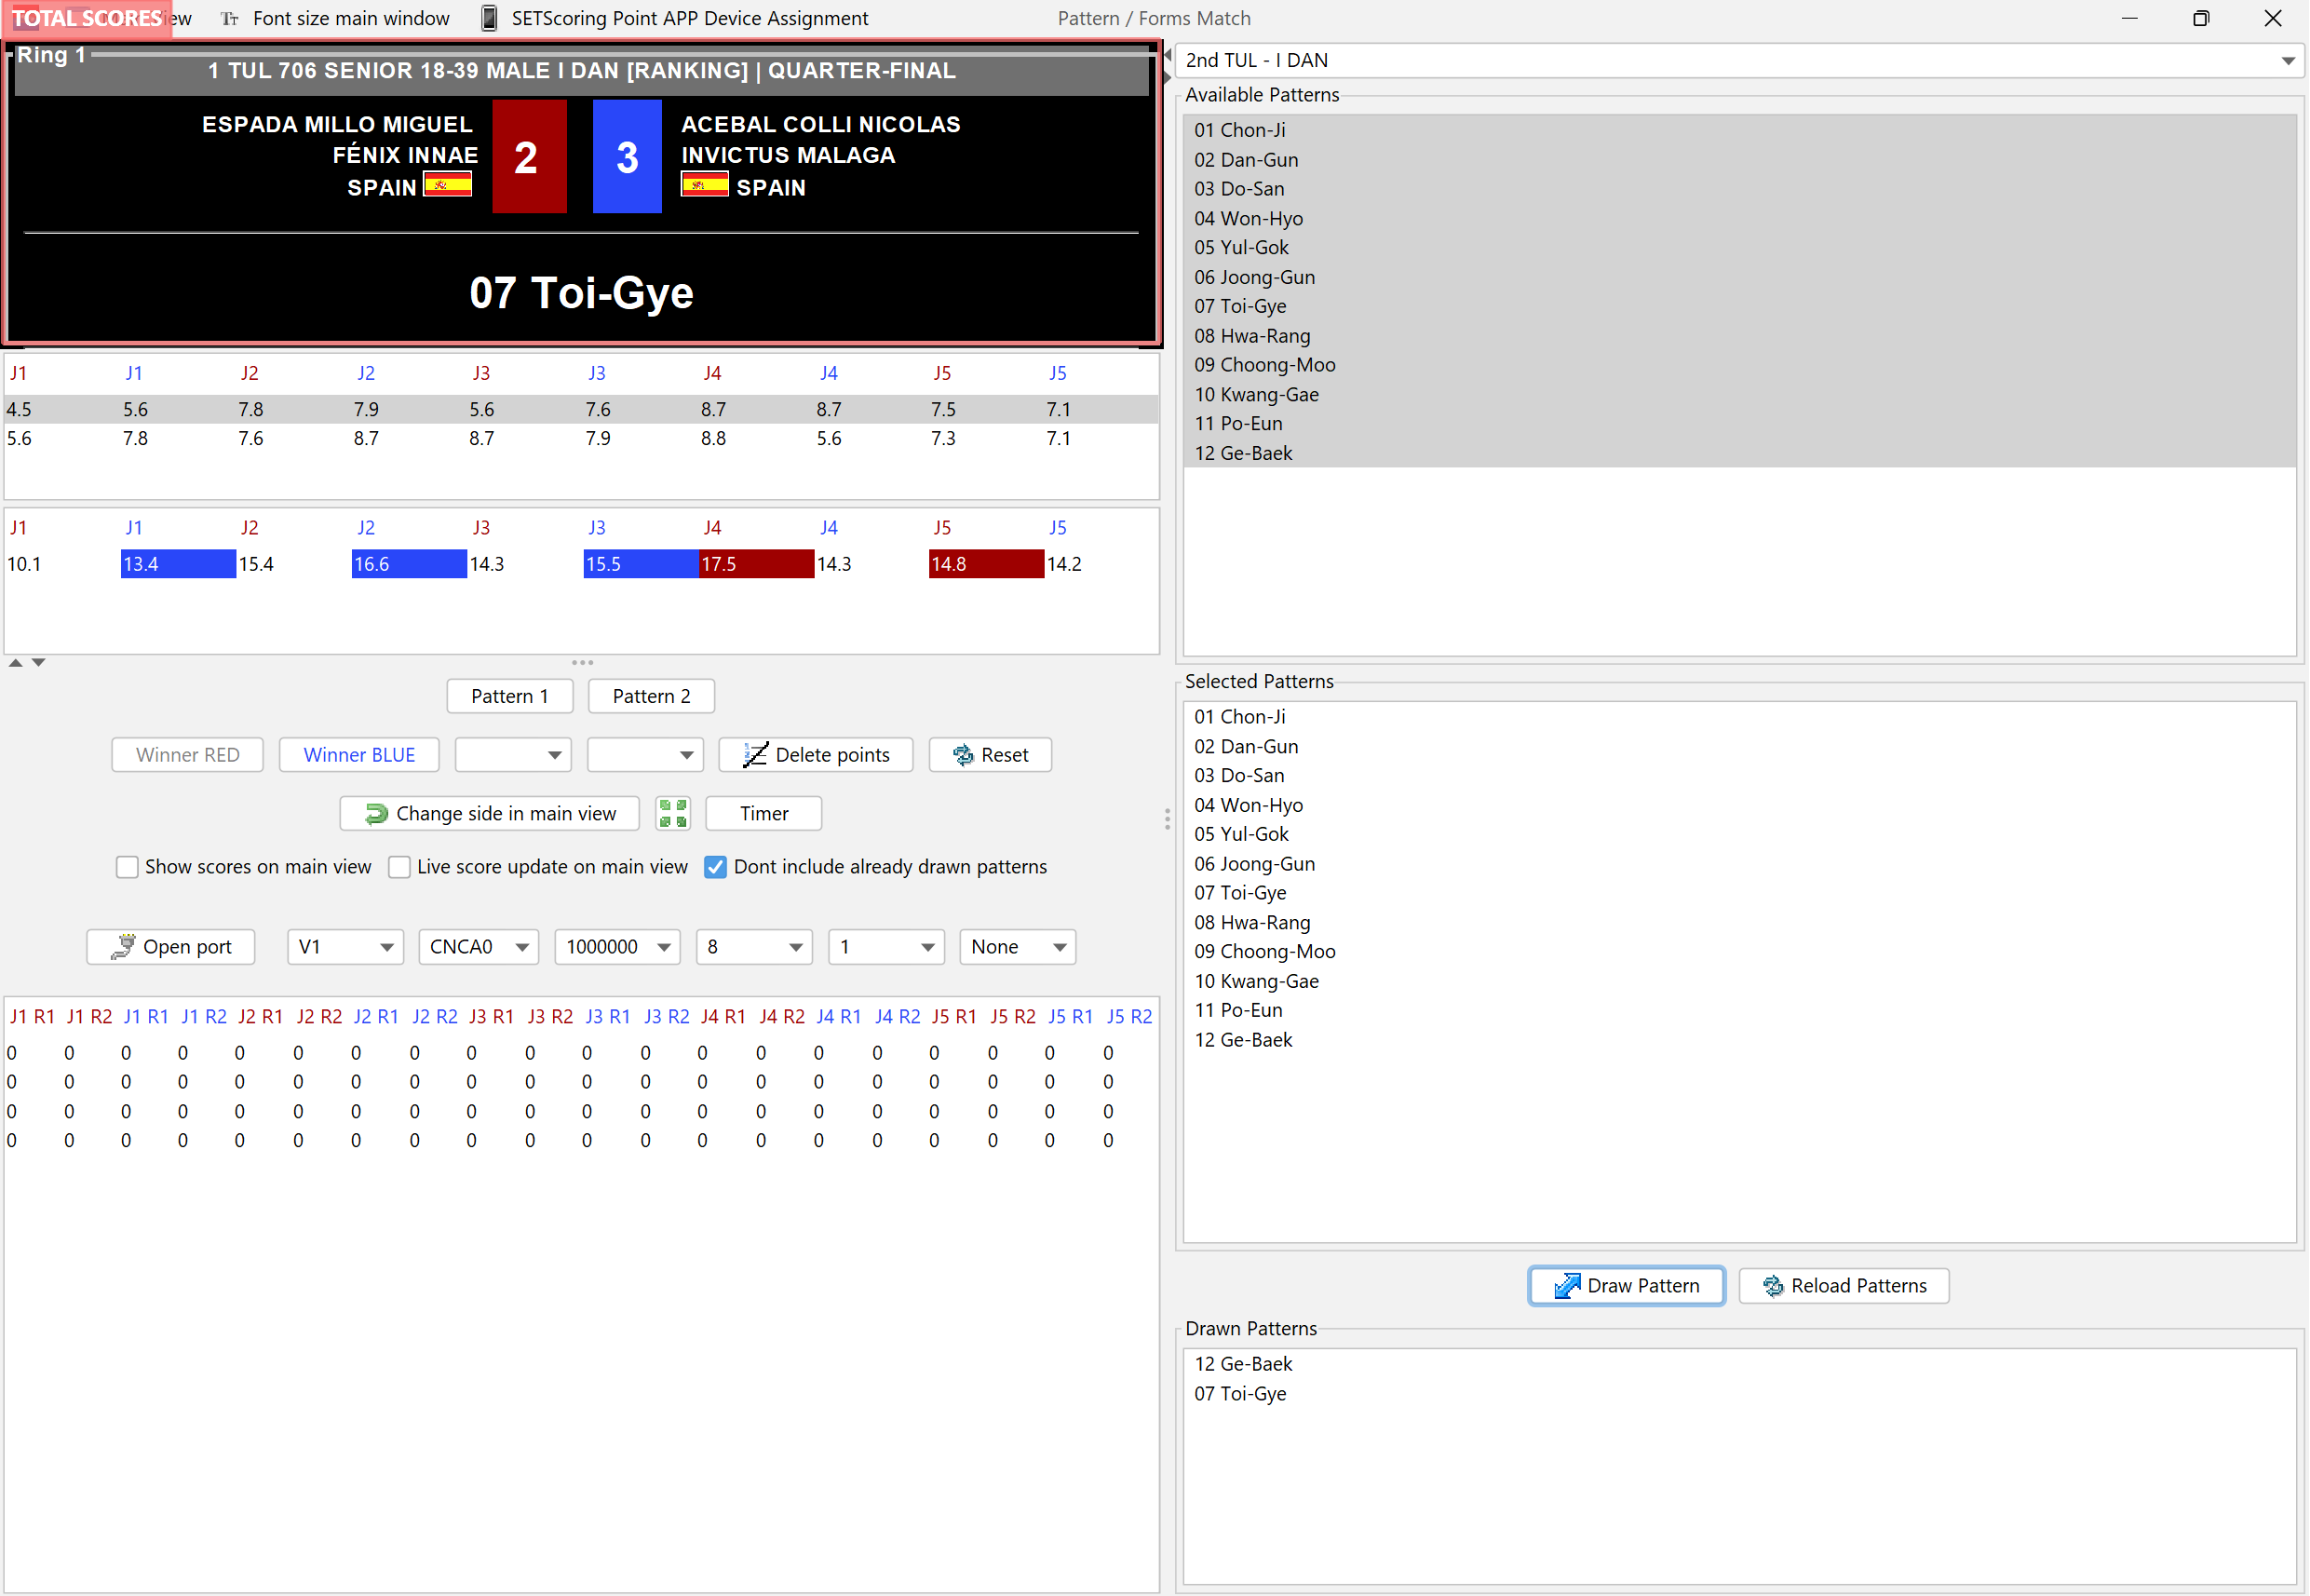
Total scores: Each score is the result from a judge, calculated by summing up the scores from both patterns.
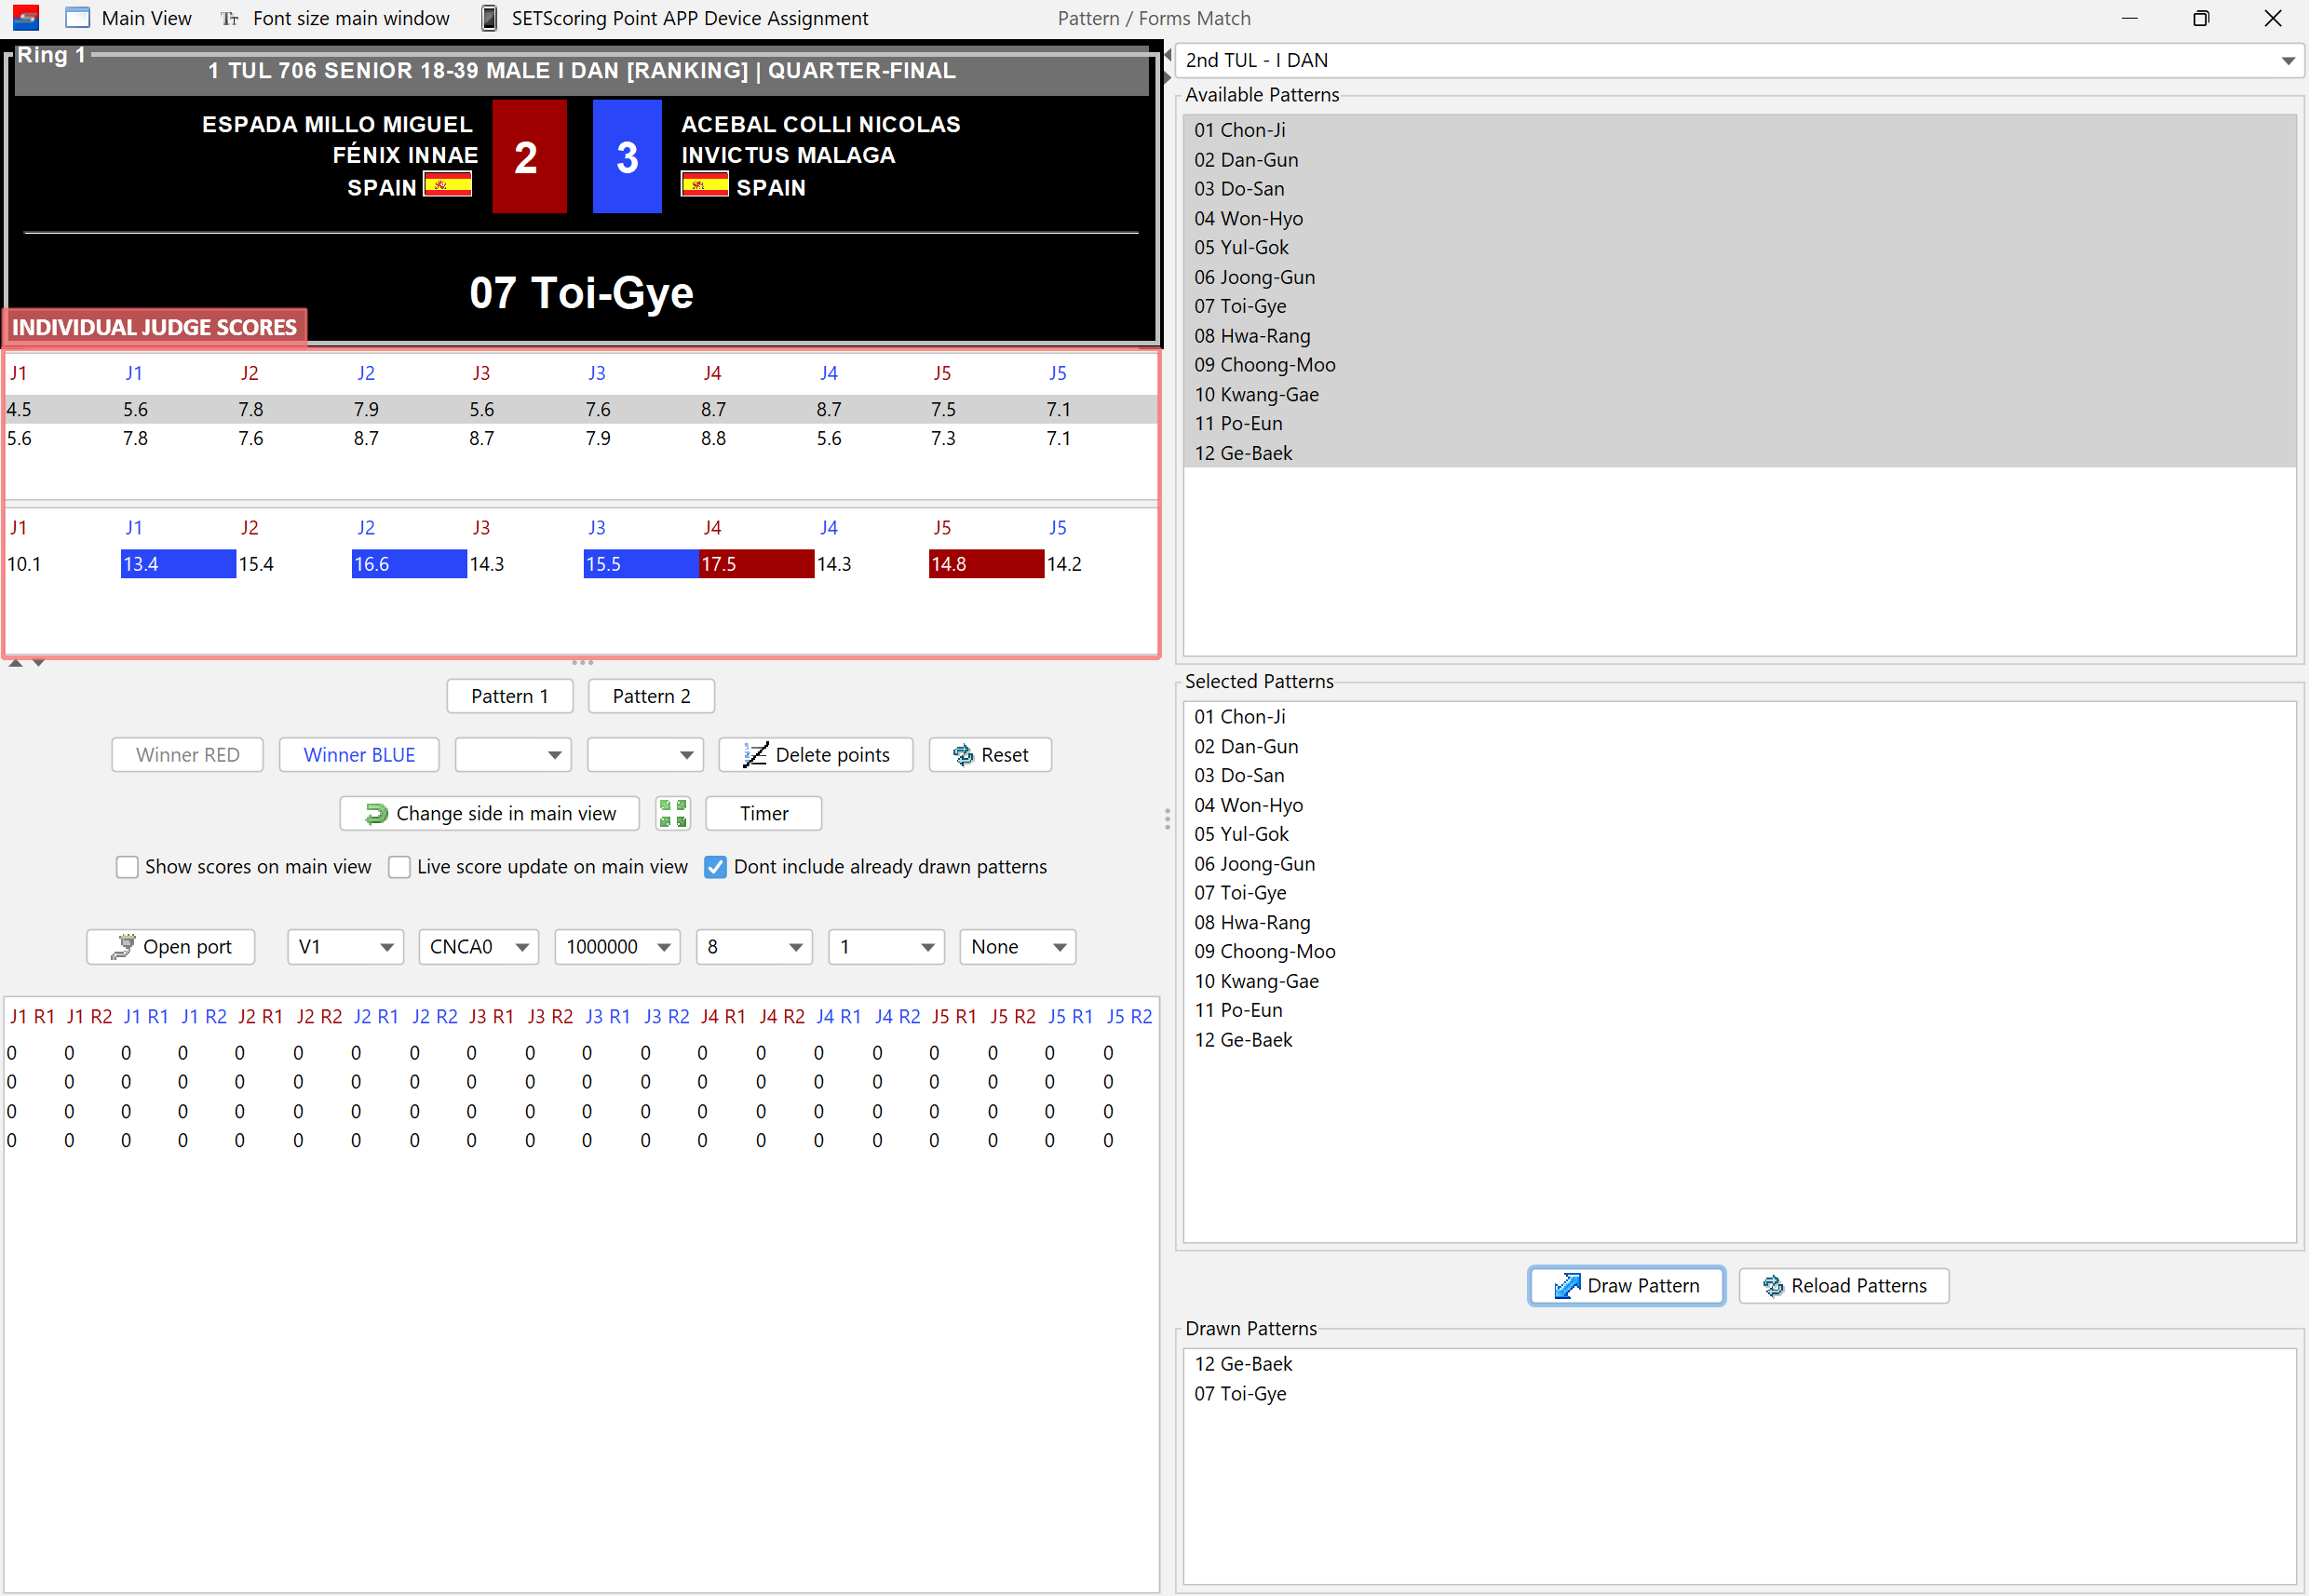
Individual scores from each judge for each pattern are displayed. The last row shows the total scores.
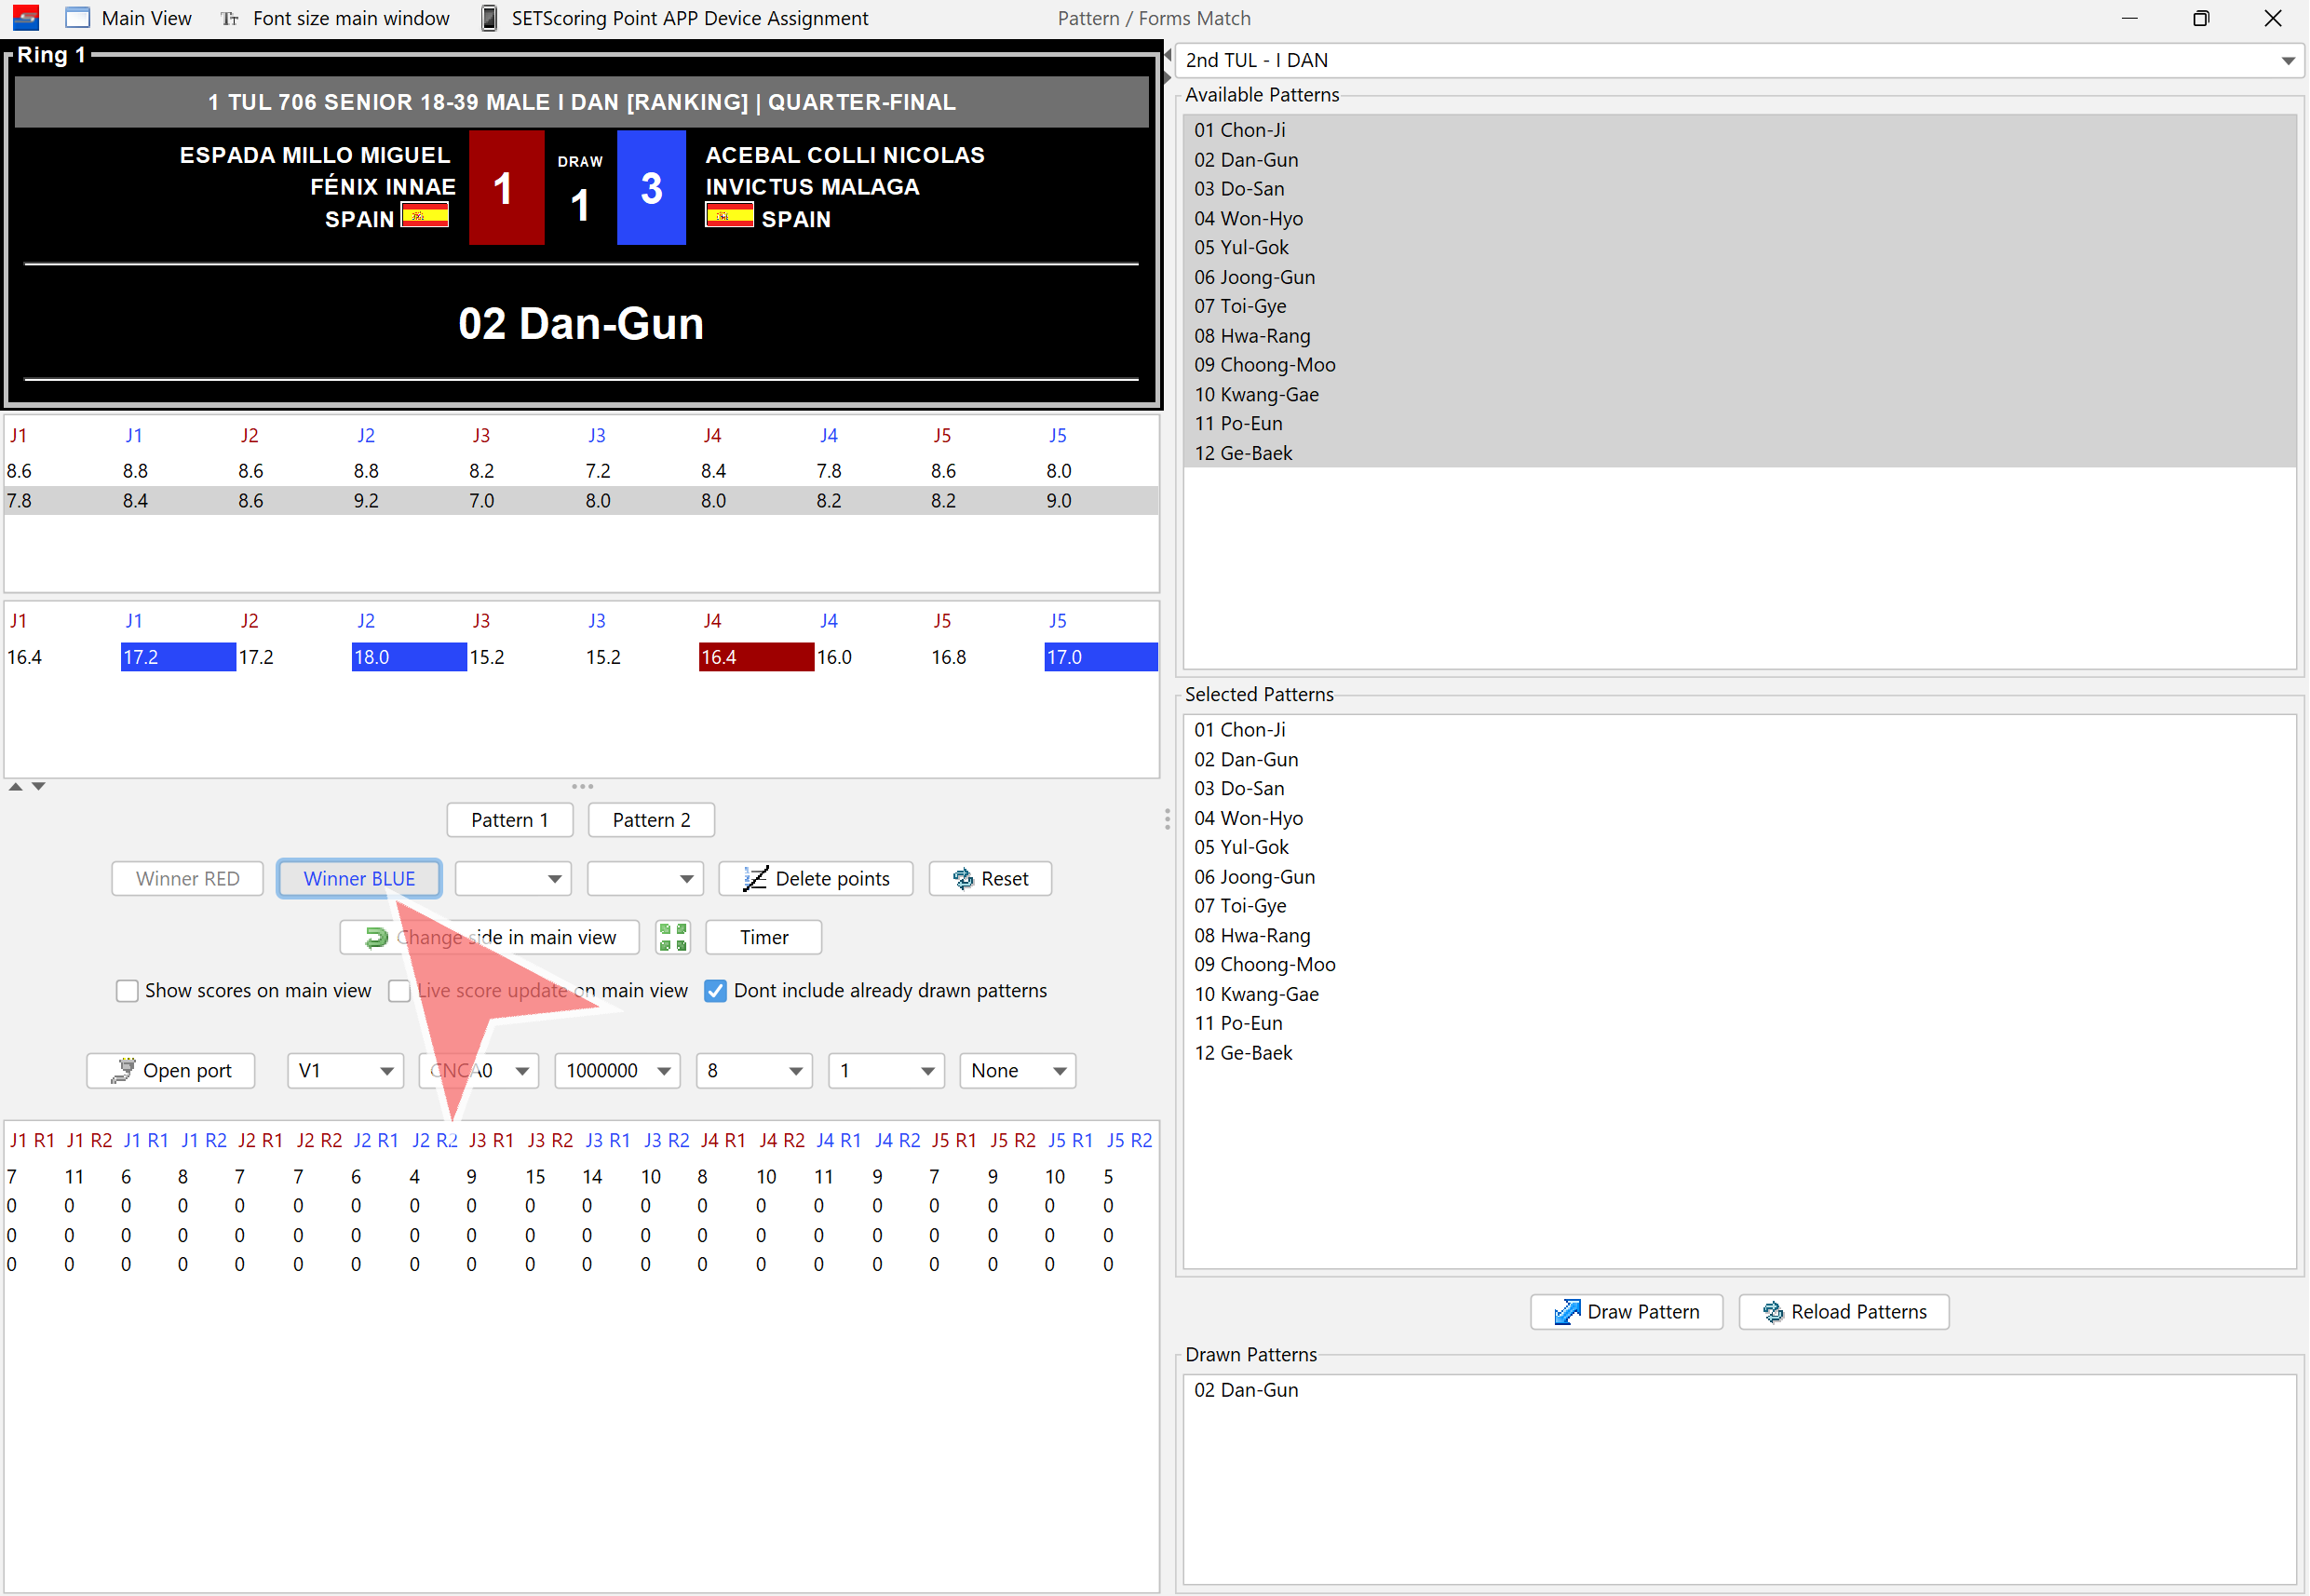
Click on „Winner RED“ or „Winner BLUE“ to save the winner.
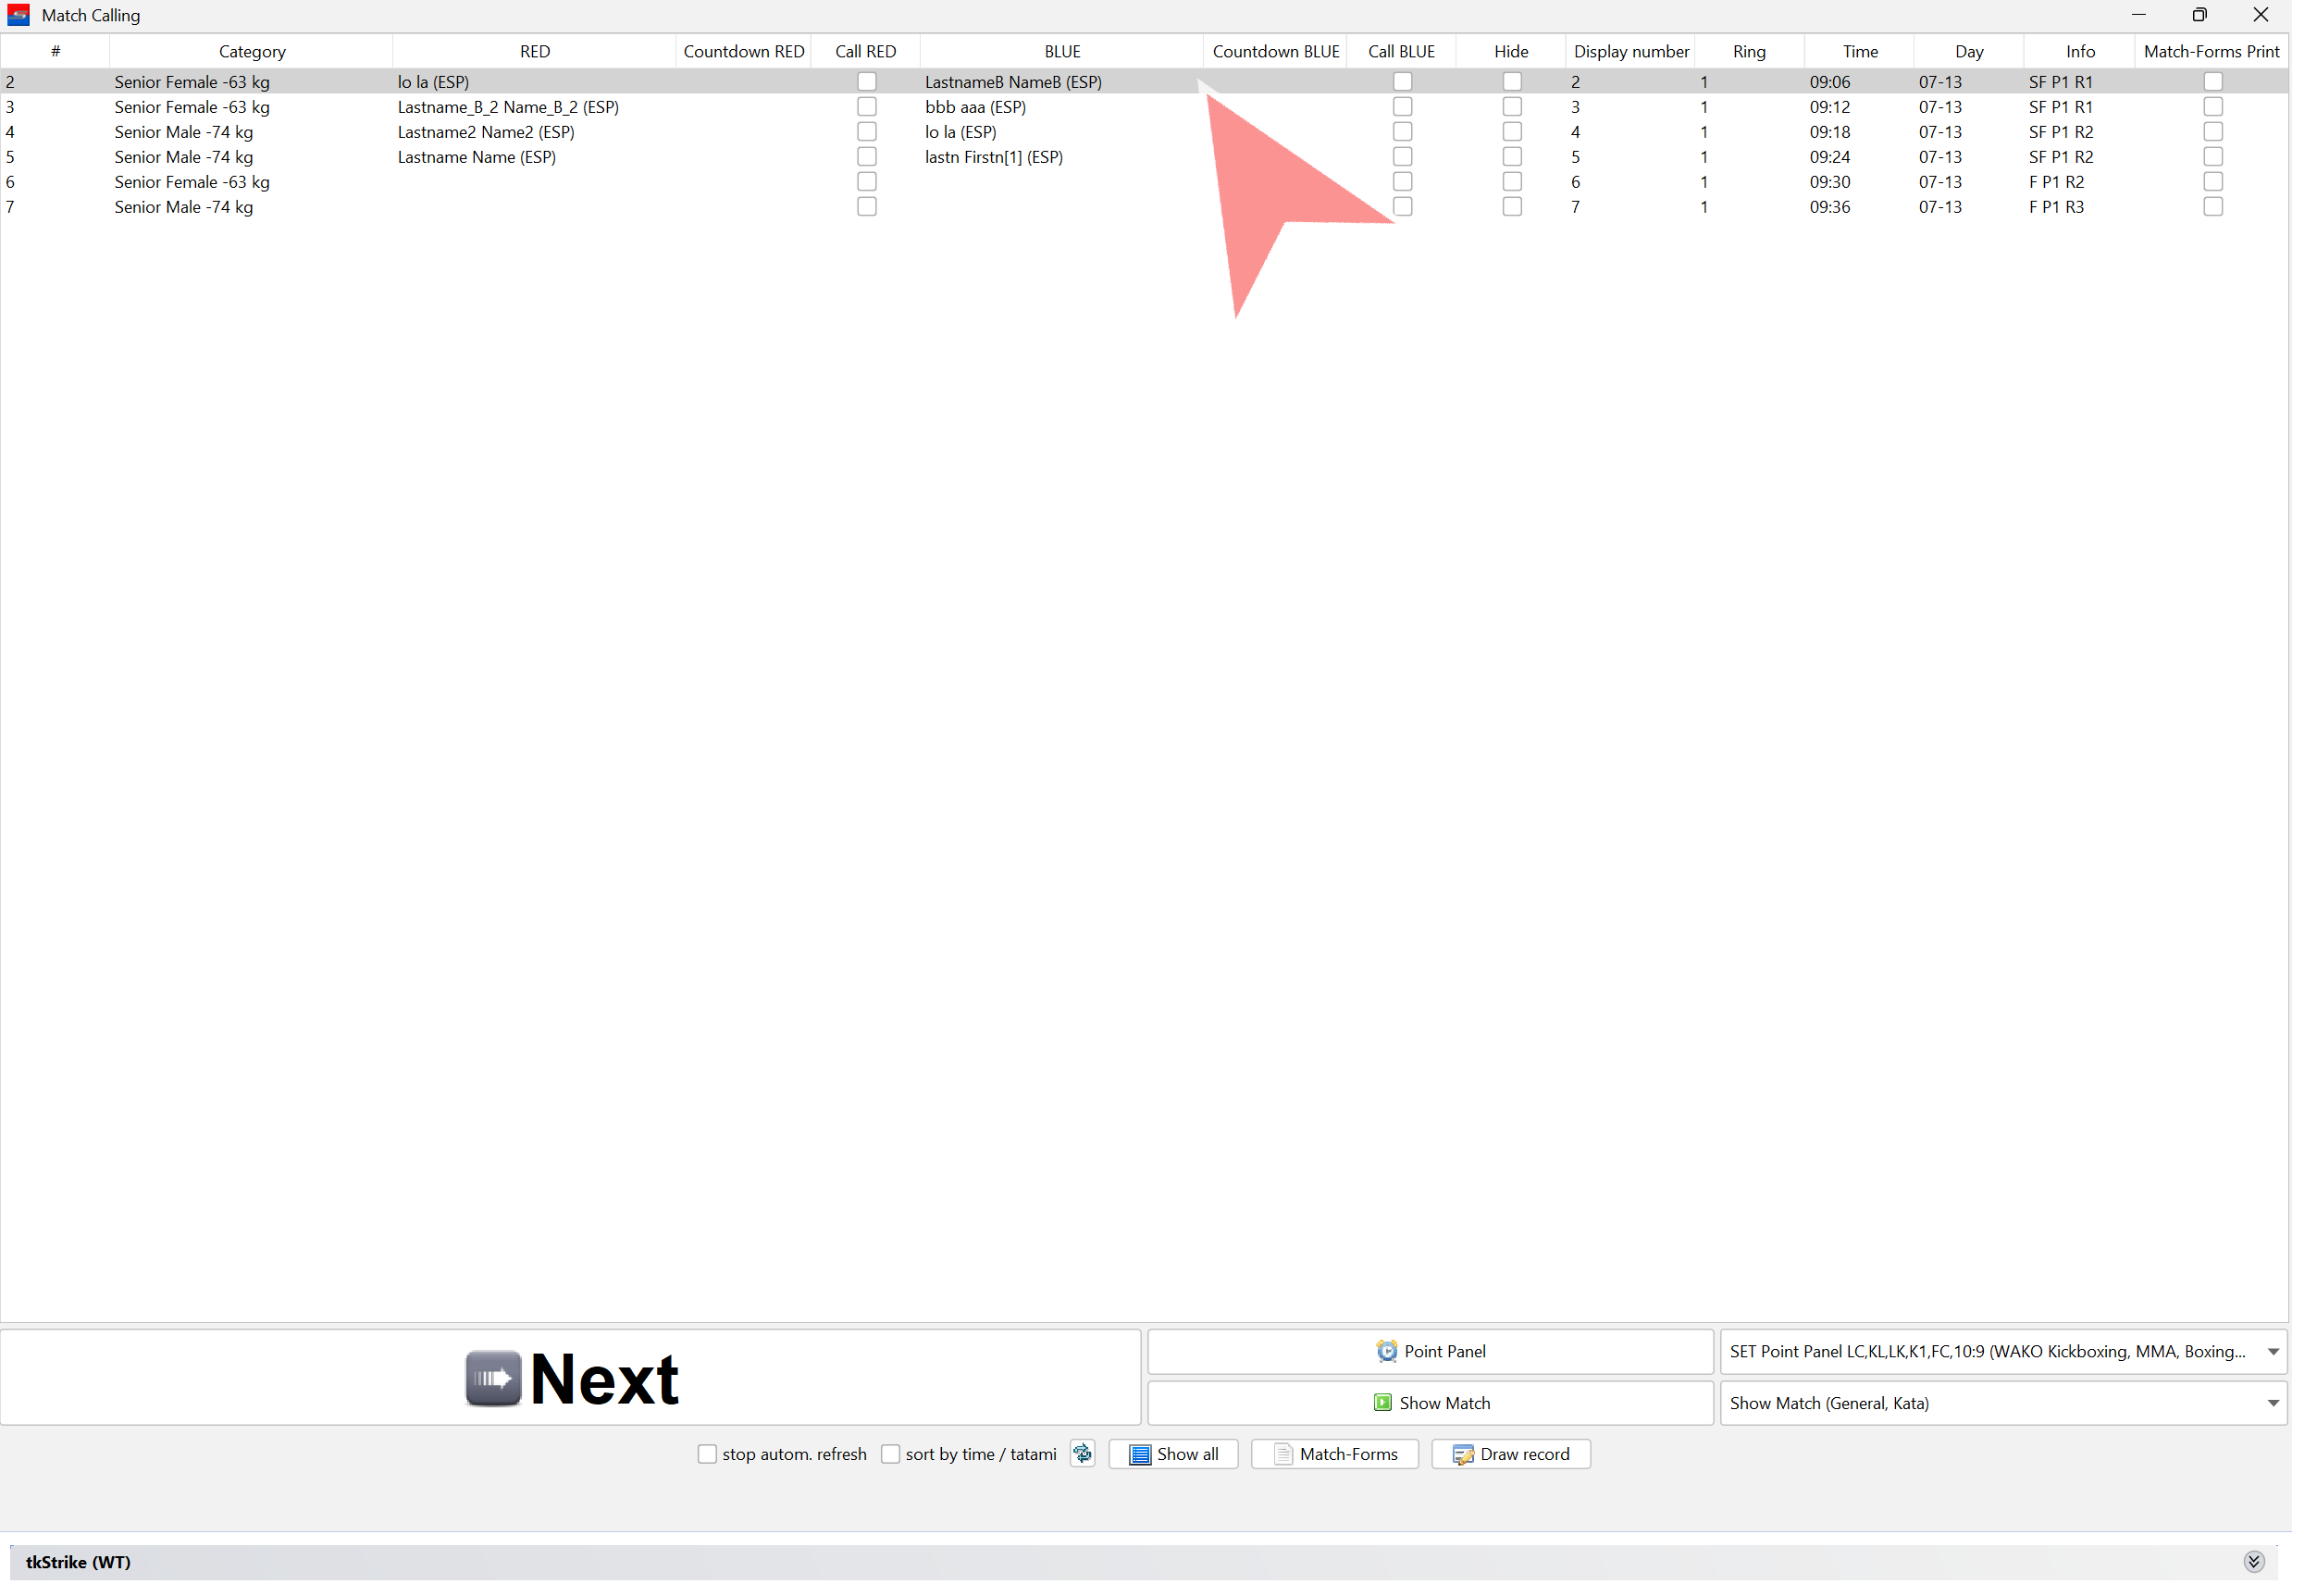
Close the match.
Open the next match and start again.