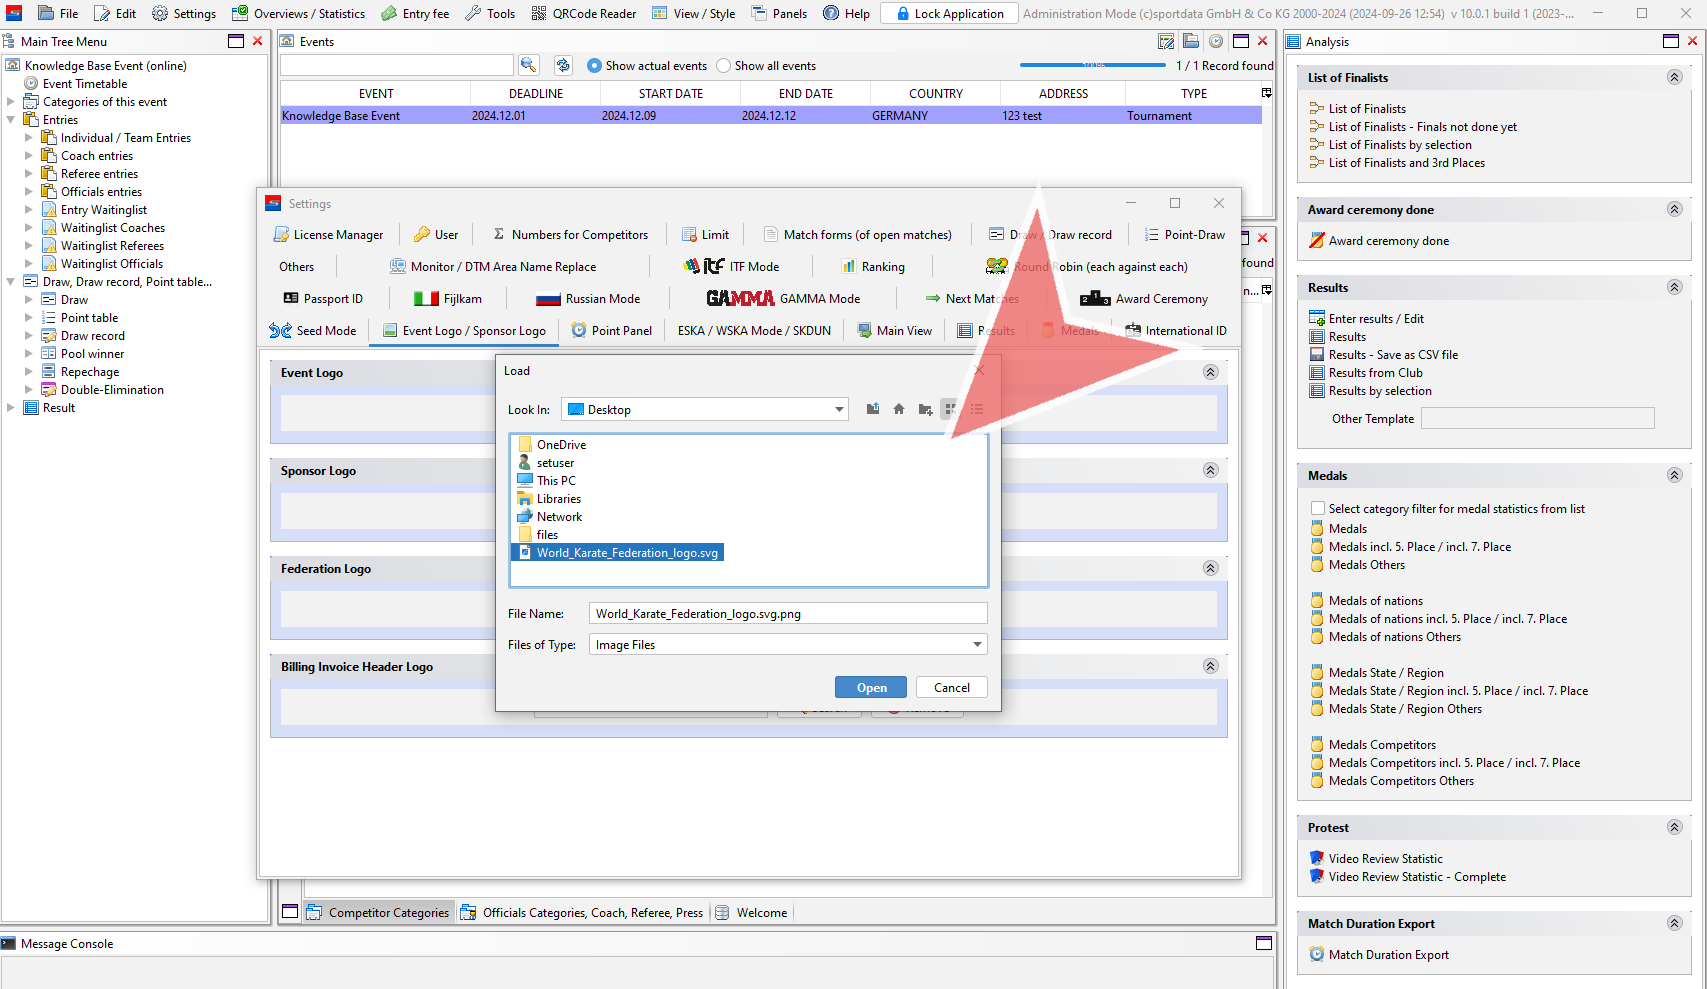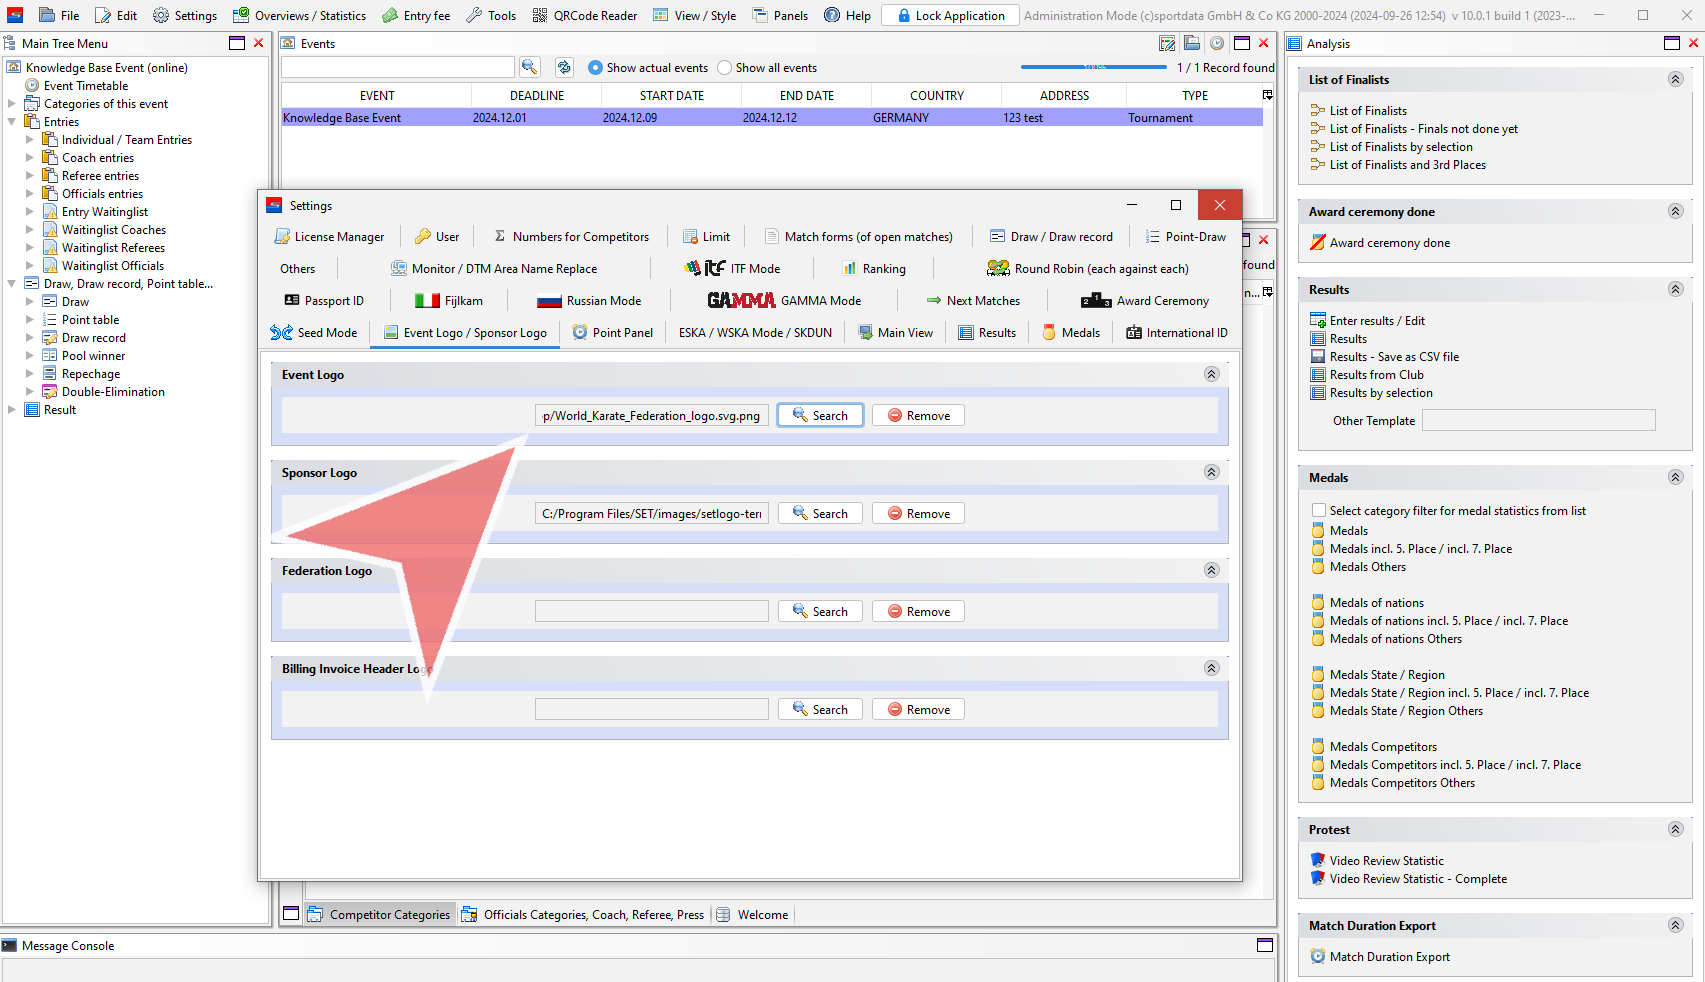
Add an Event Manager

Interactive Demo

How to add an Event Manager to your event

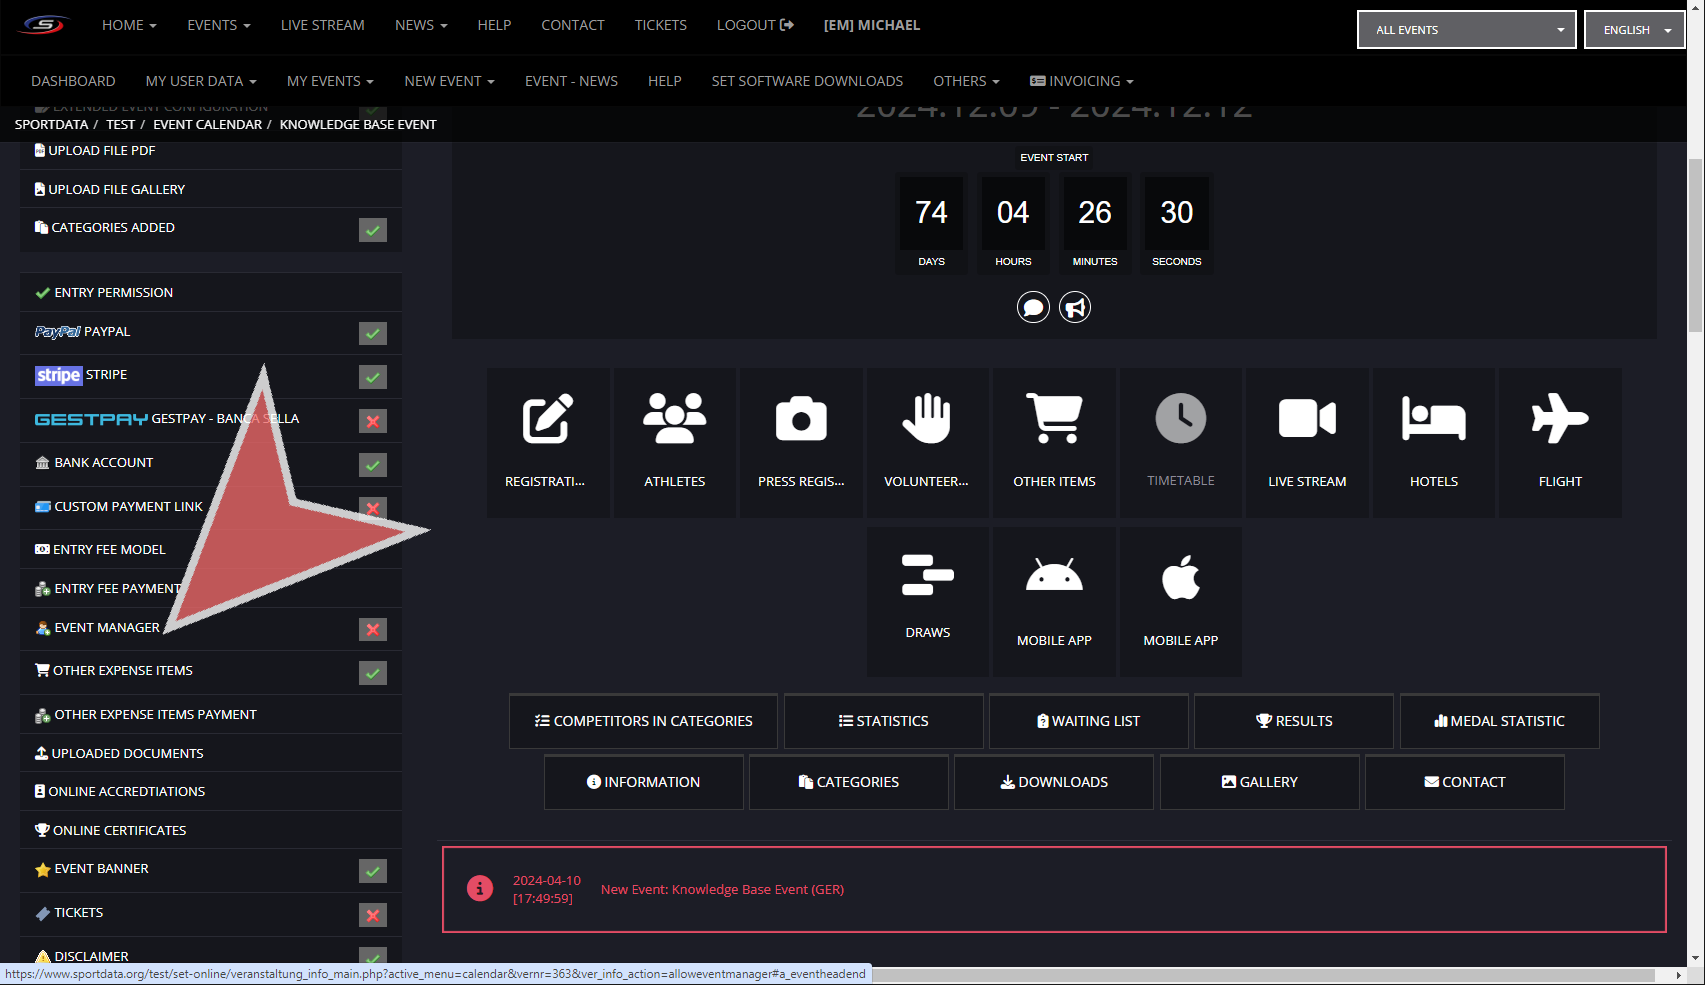
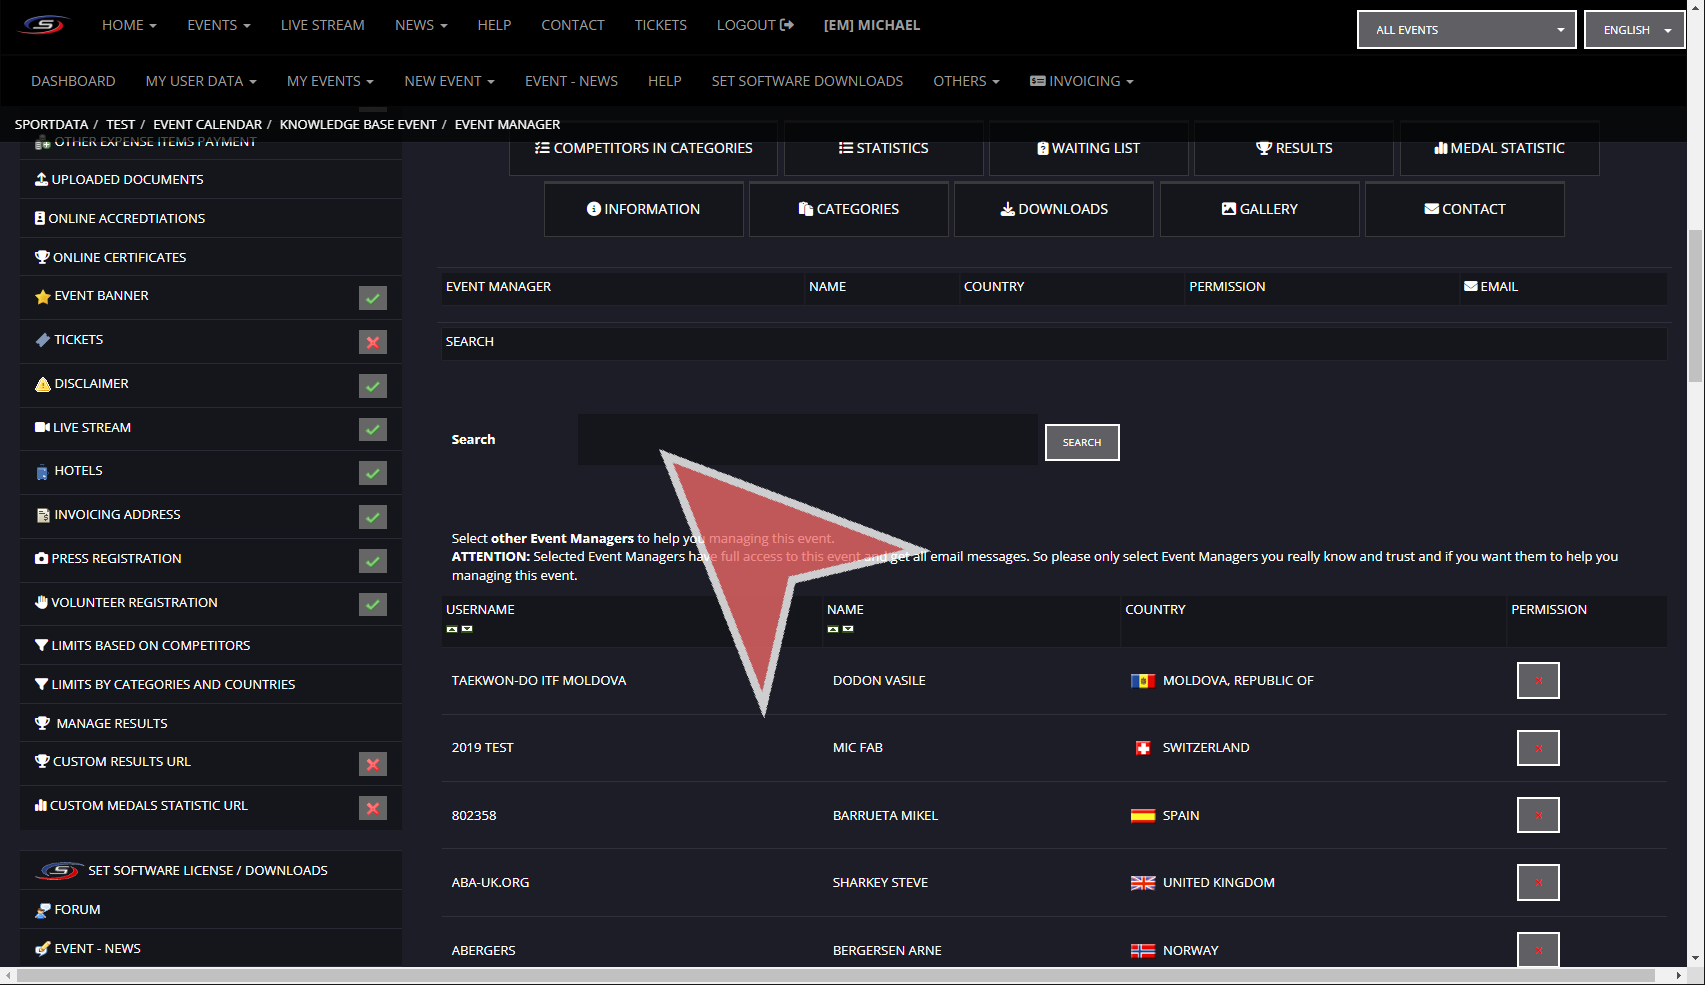
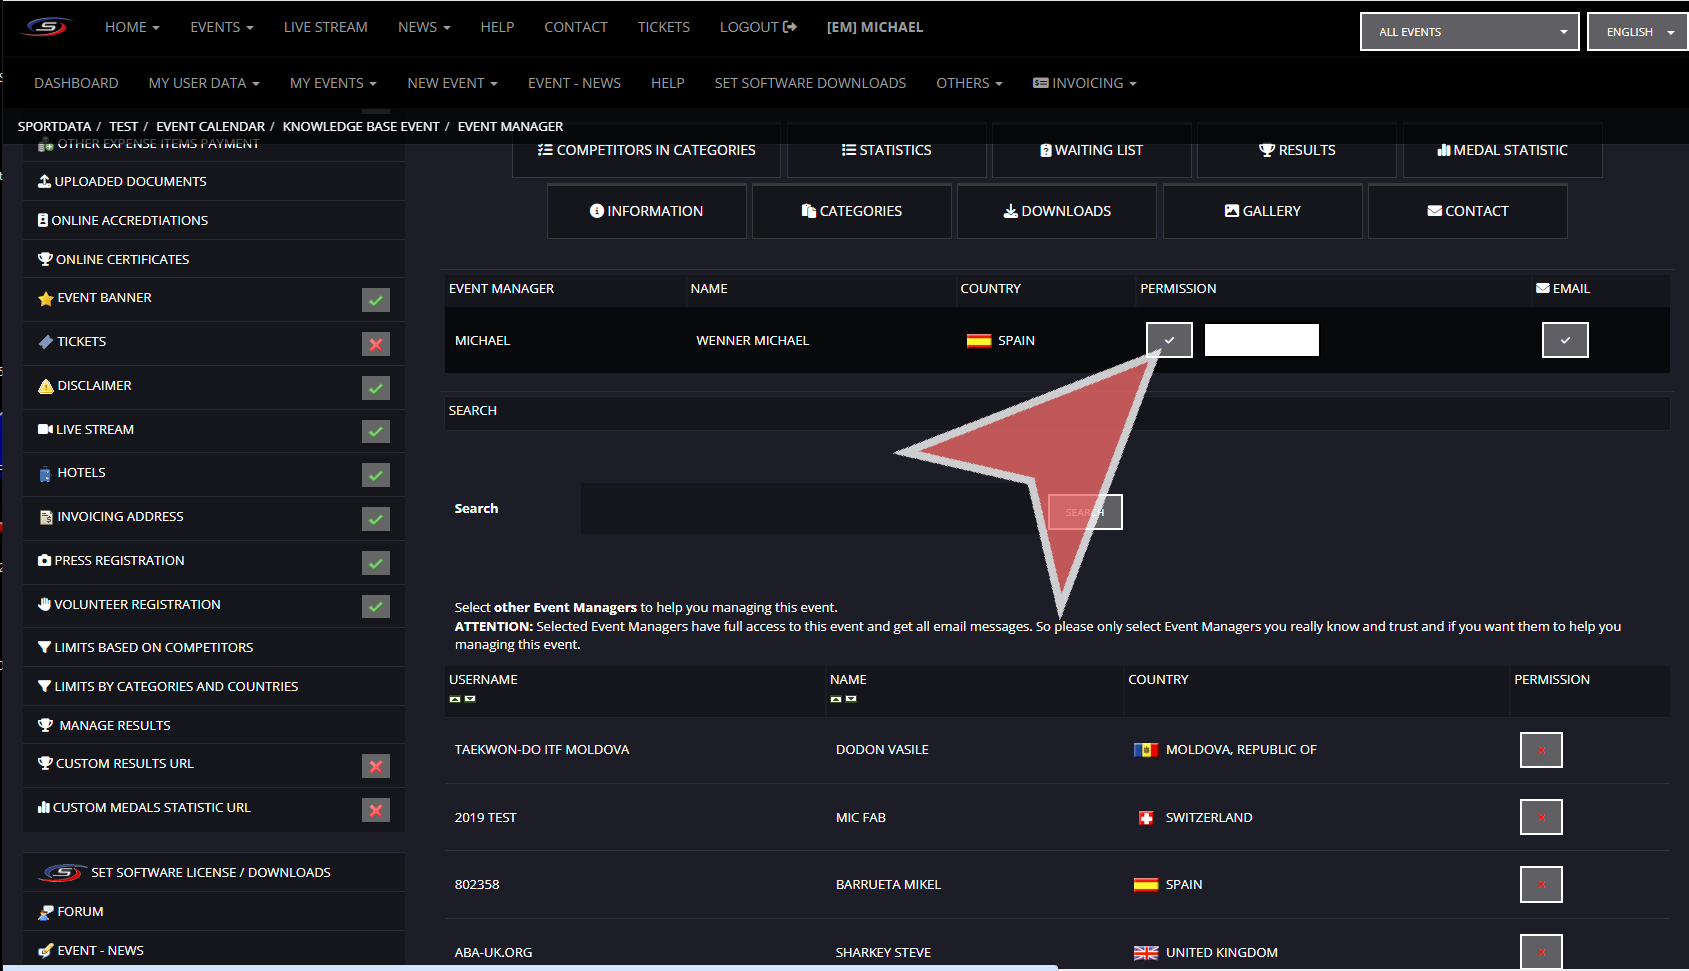
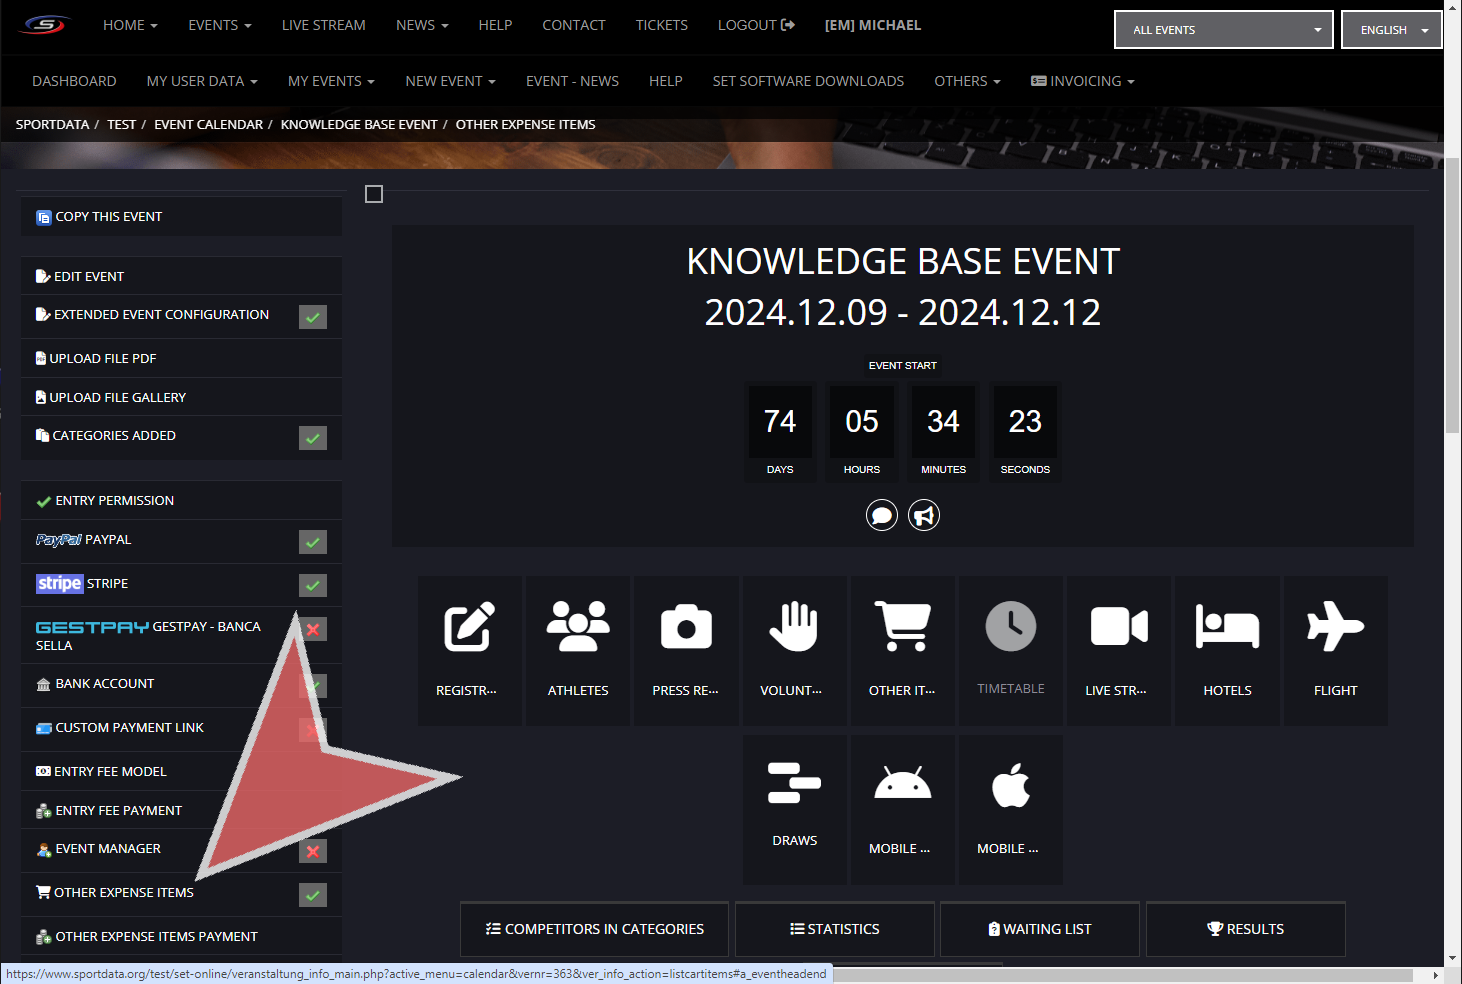
In your event manager page, go down the checklist on the left hand side to “EVENT MANAGER”.


Search for Event Manager Profile

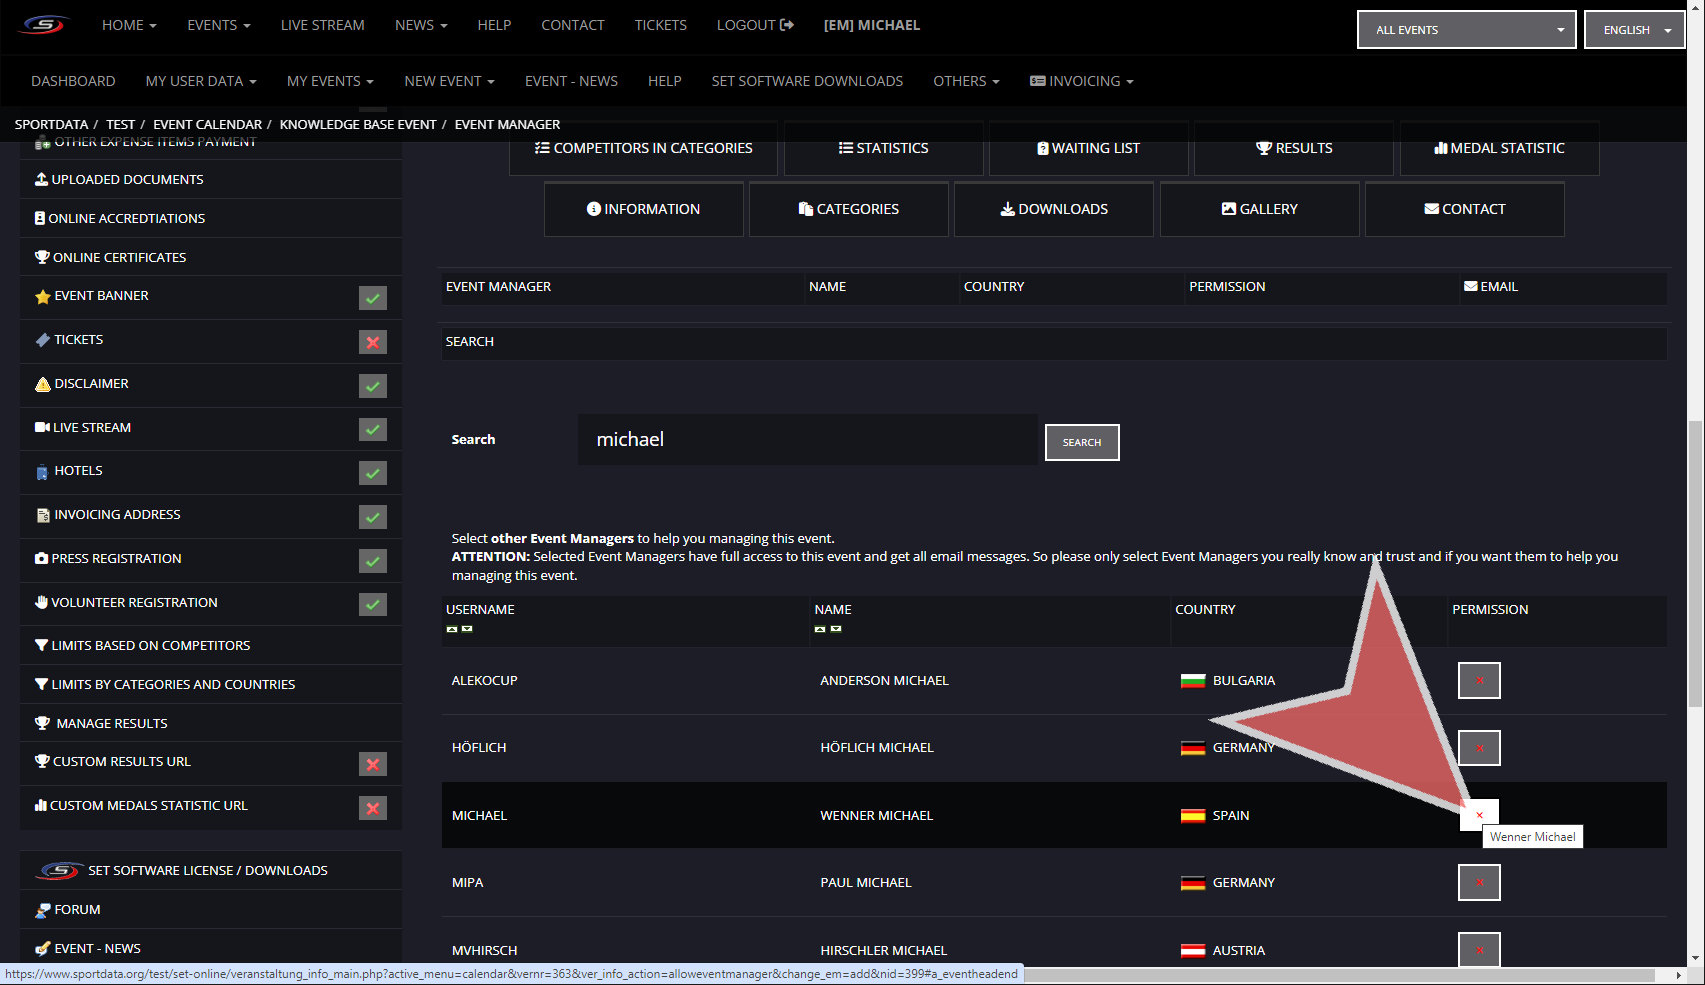
Look for the event manager in the search bar

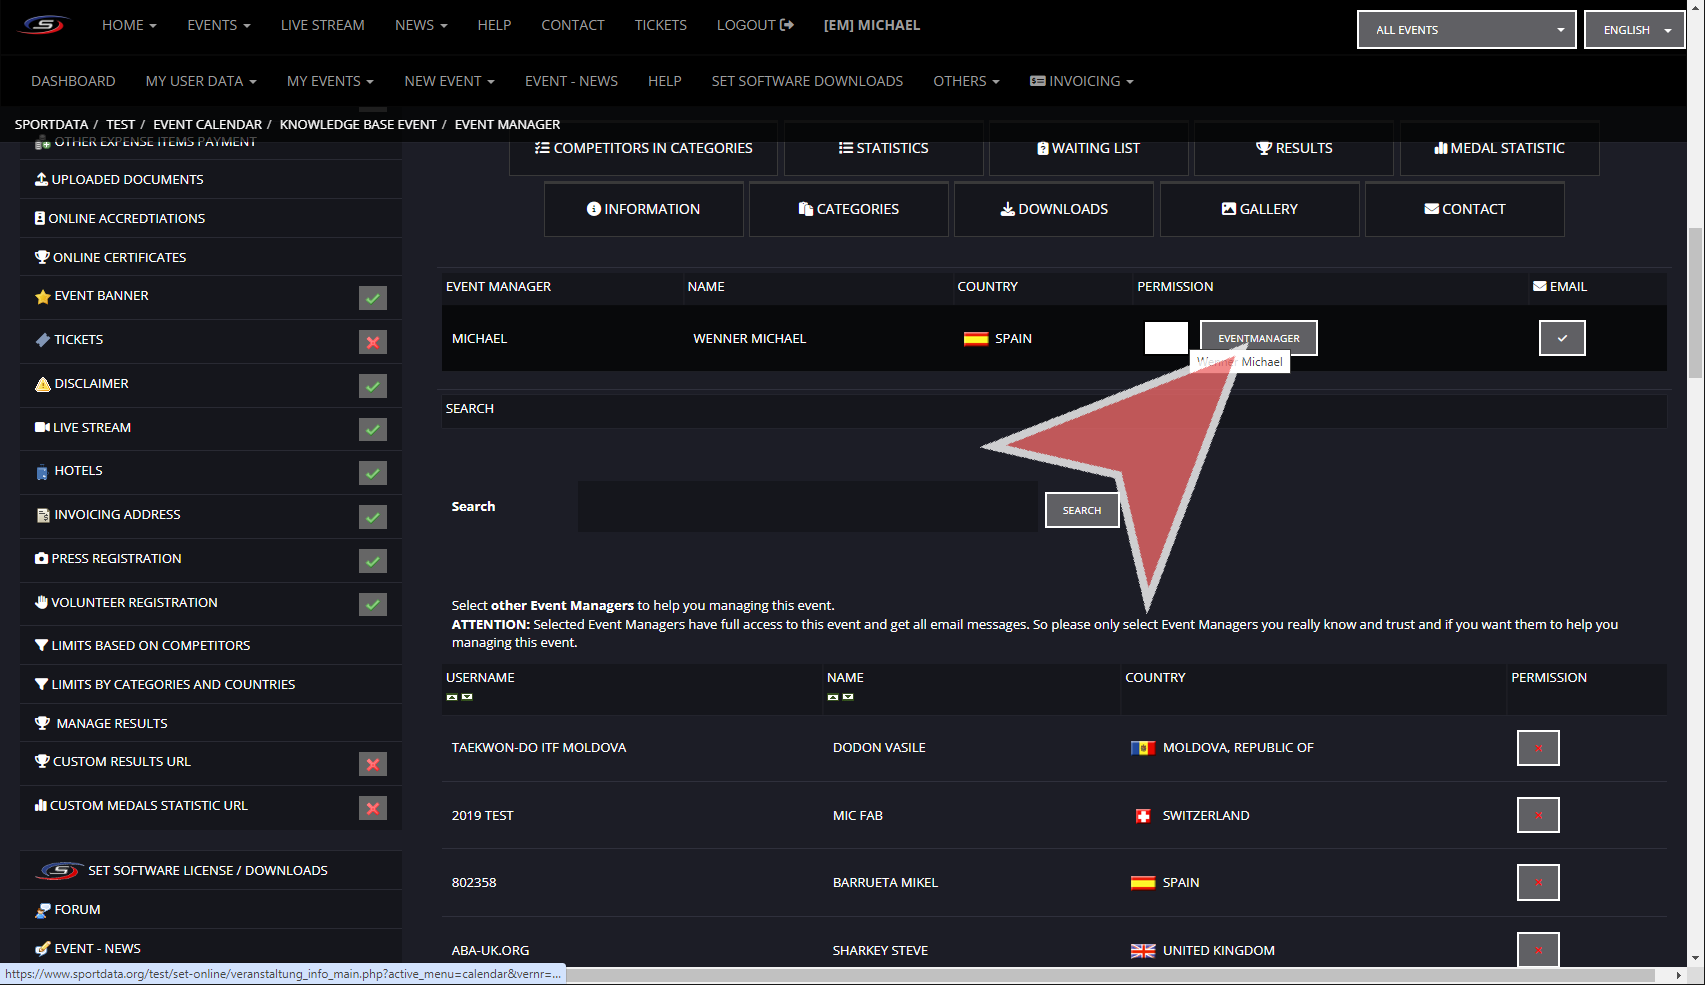
Select the event manager by clicking on the permissions button on the right column next to the name.


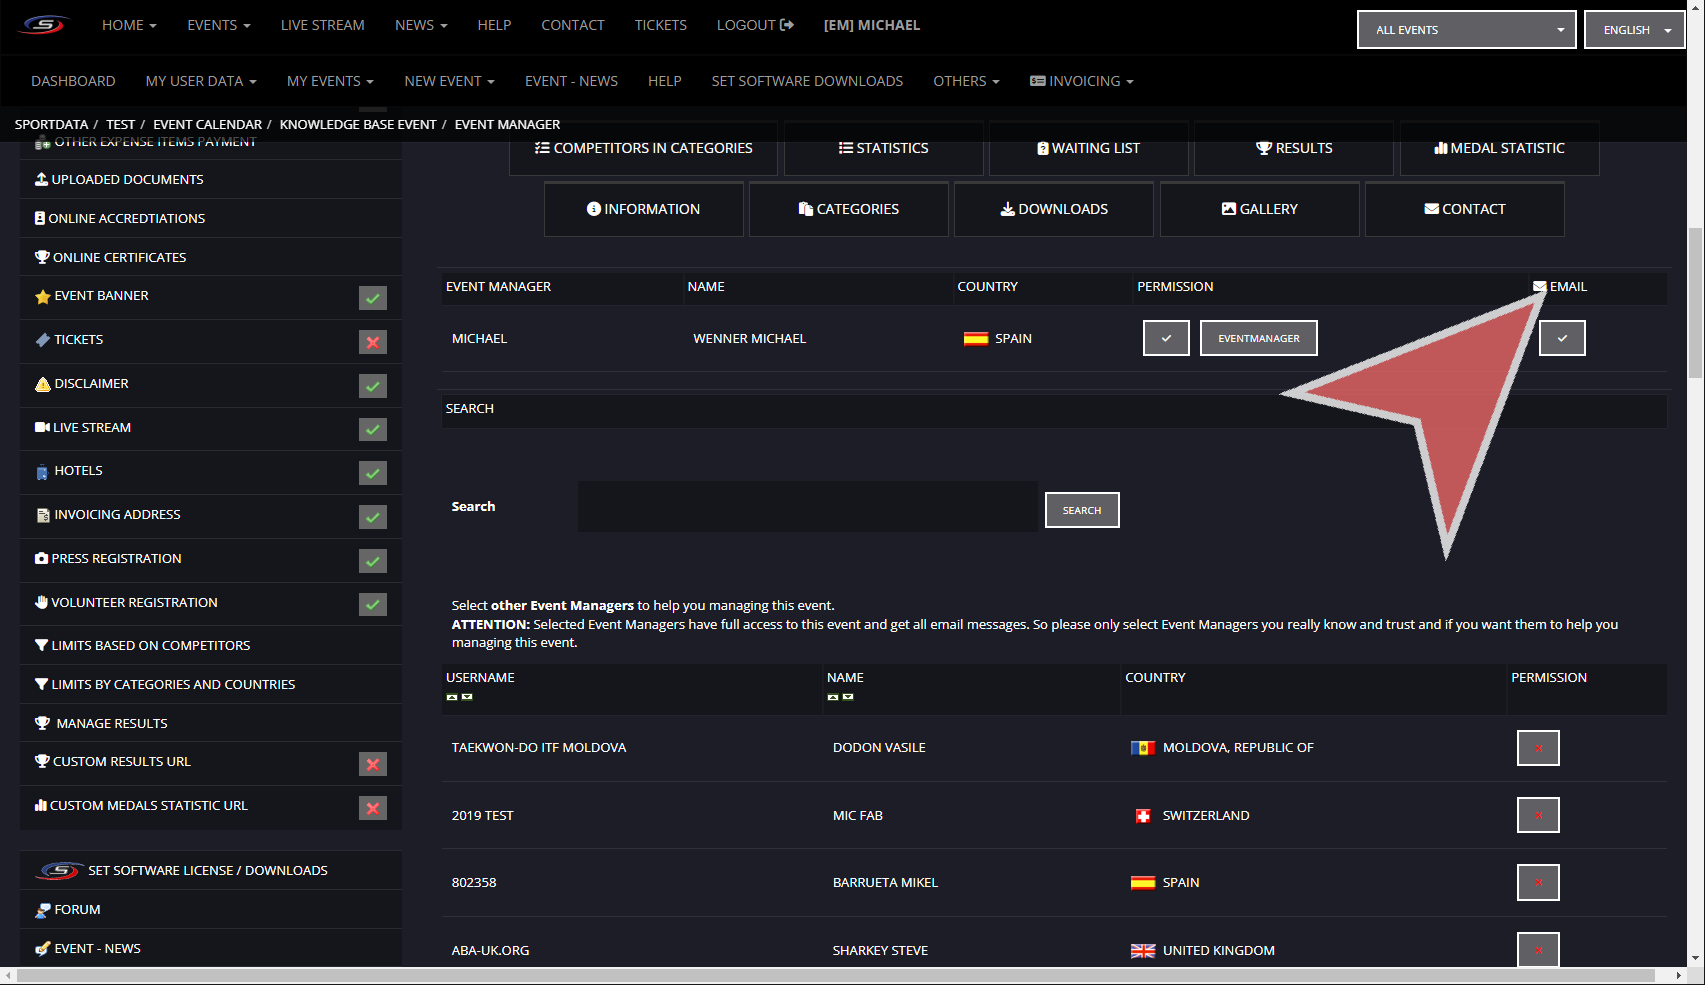
Edit Permission

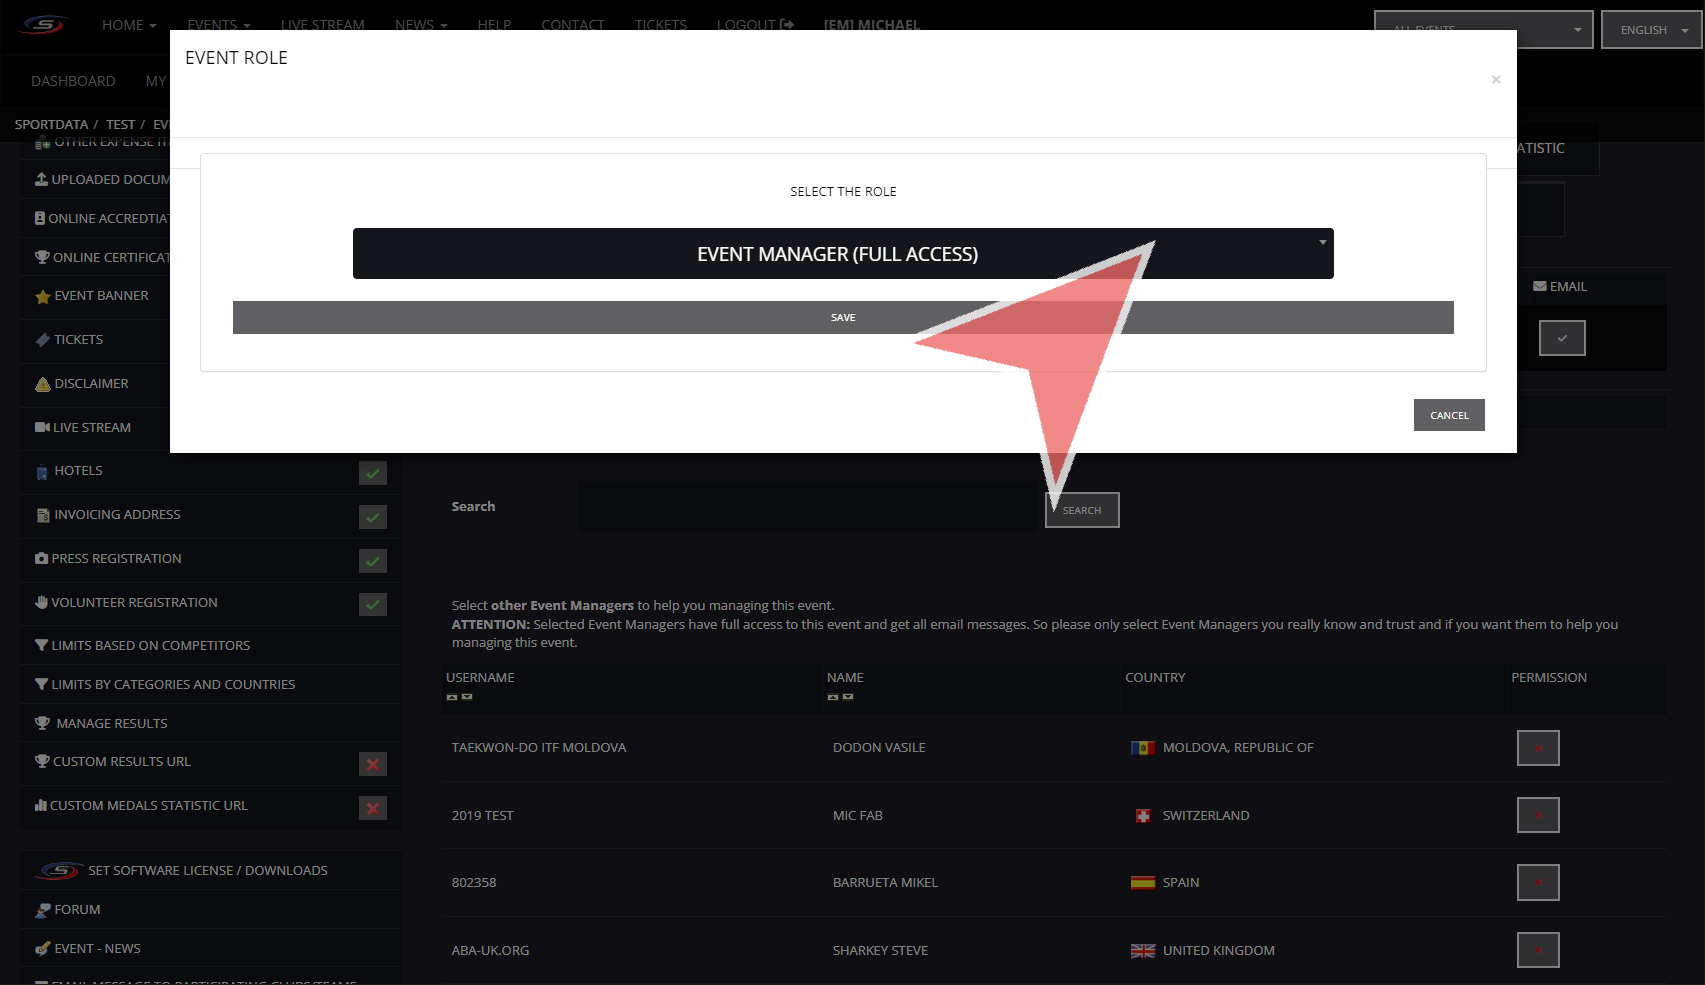
To grant selective access to the event managers, click the event manager button under permission.

Within this section, select the role by clicking Event Manager (full access).


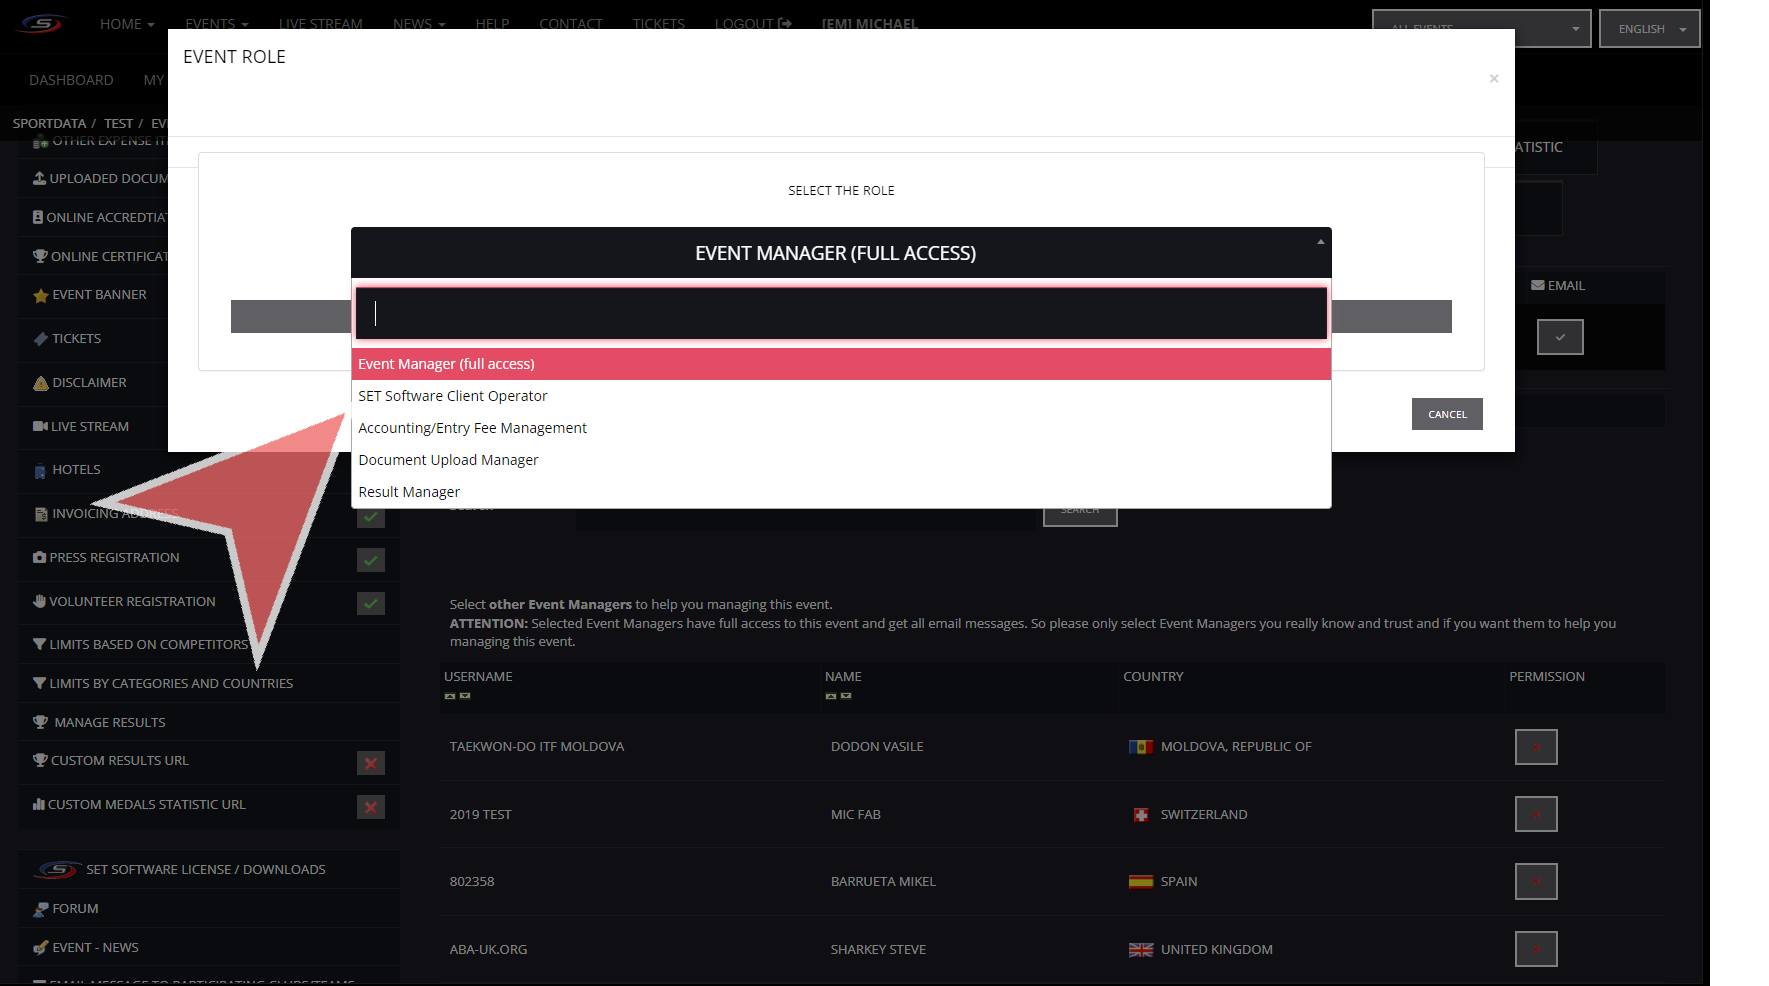
Permission types

The Set Software Client Operator will grant access to the SET OVR software.
The Accounting/Entry Fee Management will grant access to entry fee payment records.
Document Upload Manager will grant access to the person to upload documents.
Result Manager will have access to the web results.


Remove permissions

To remove the permission from this event manager, click the check button under the permission.


Stop Automatic Emails

By clicking the email button, than you will stop the event manager from receiving the automatic emails generated by the event i.e. new entry emails

Create and manage views in Sports-ID

Interactive Demo

How to save a new view in Sports-ID

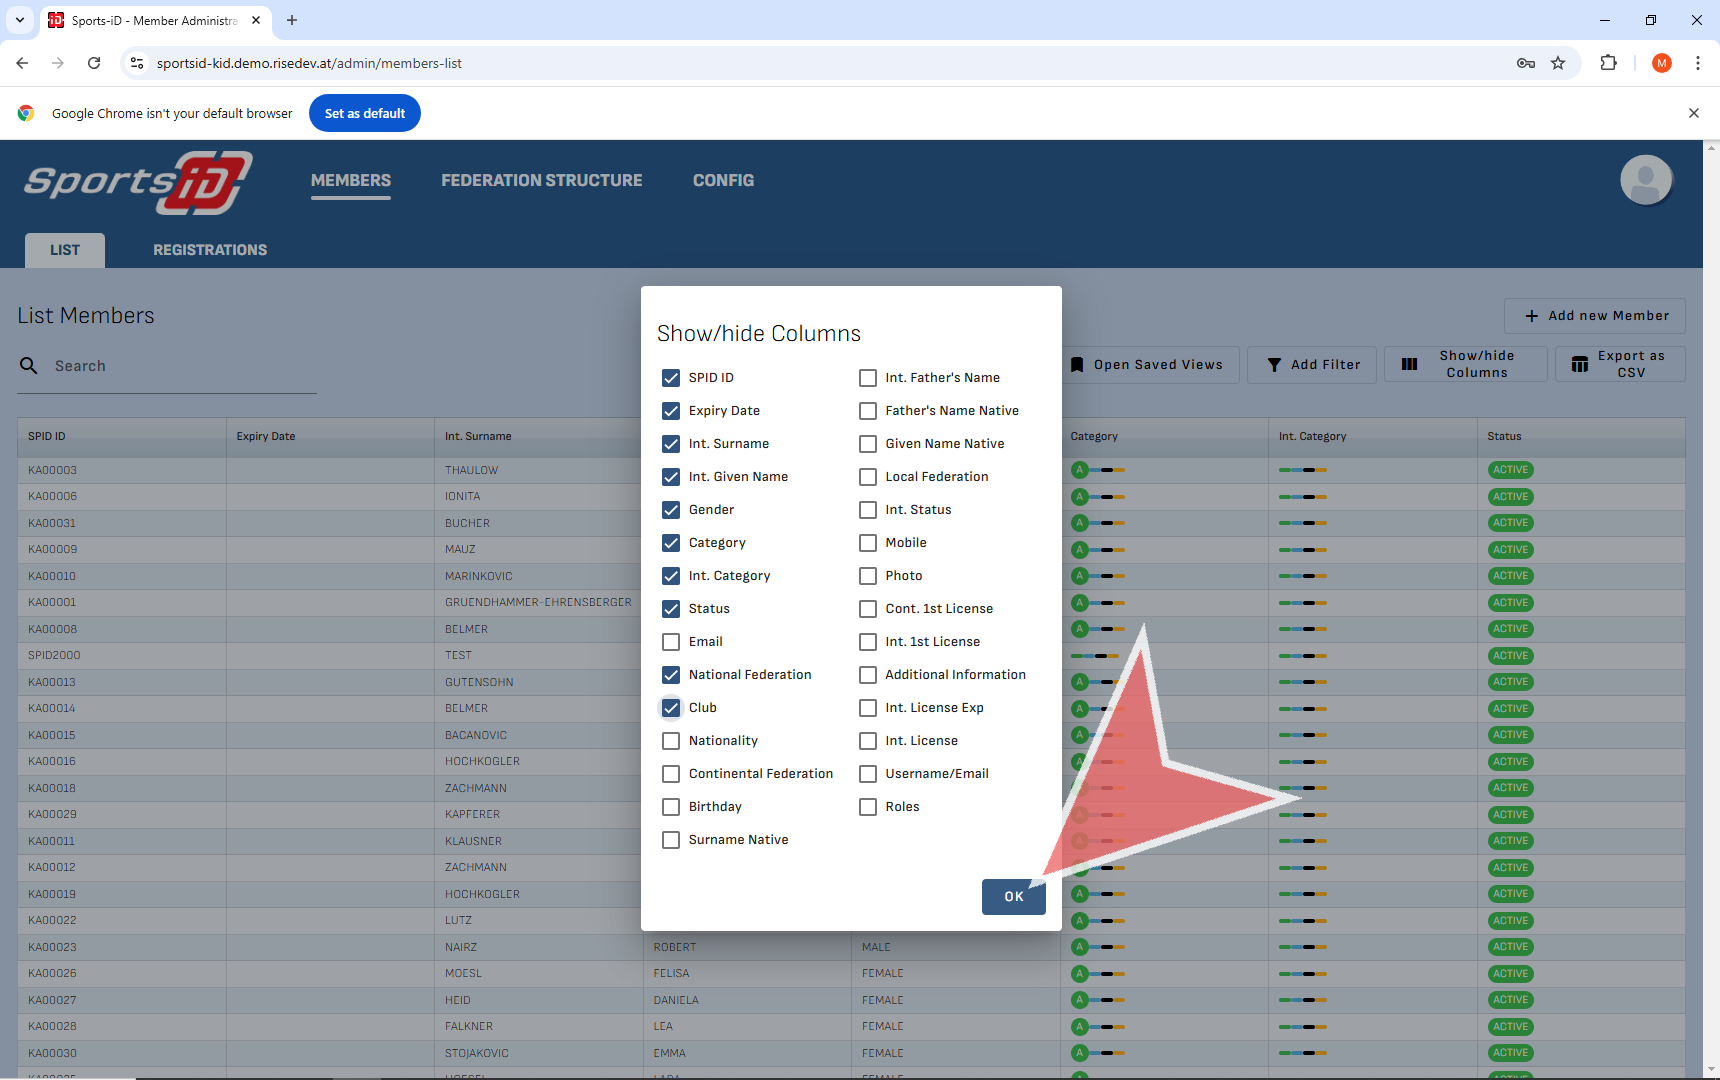
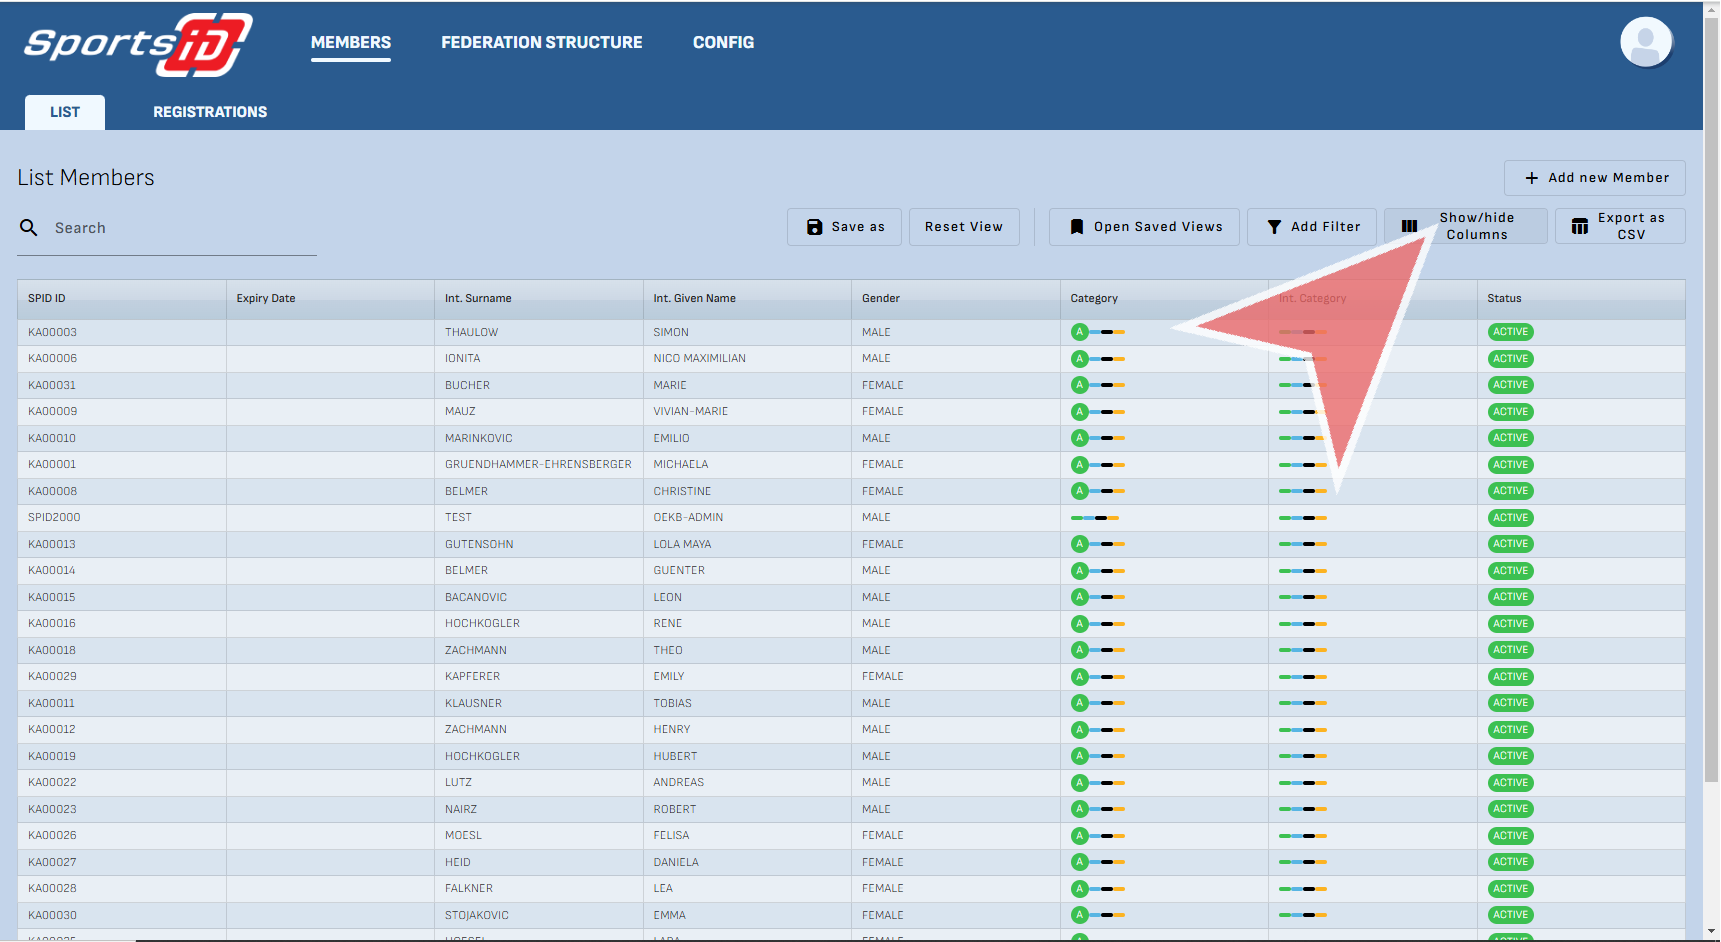
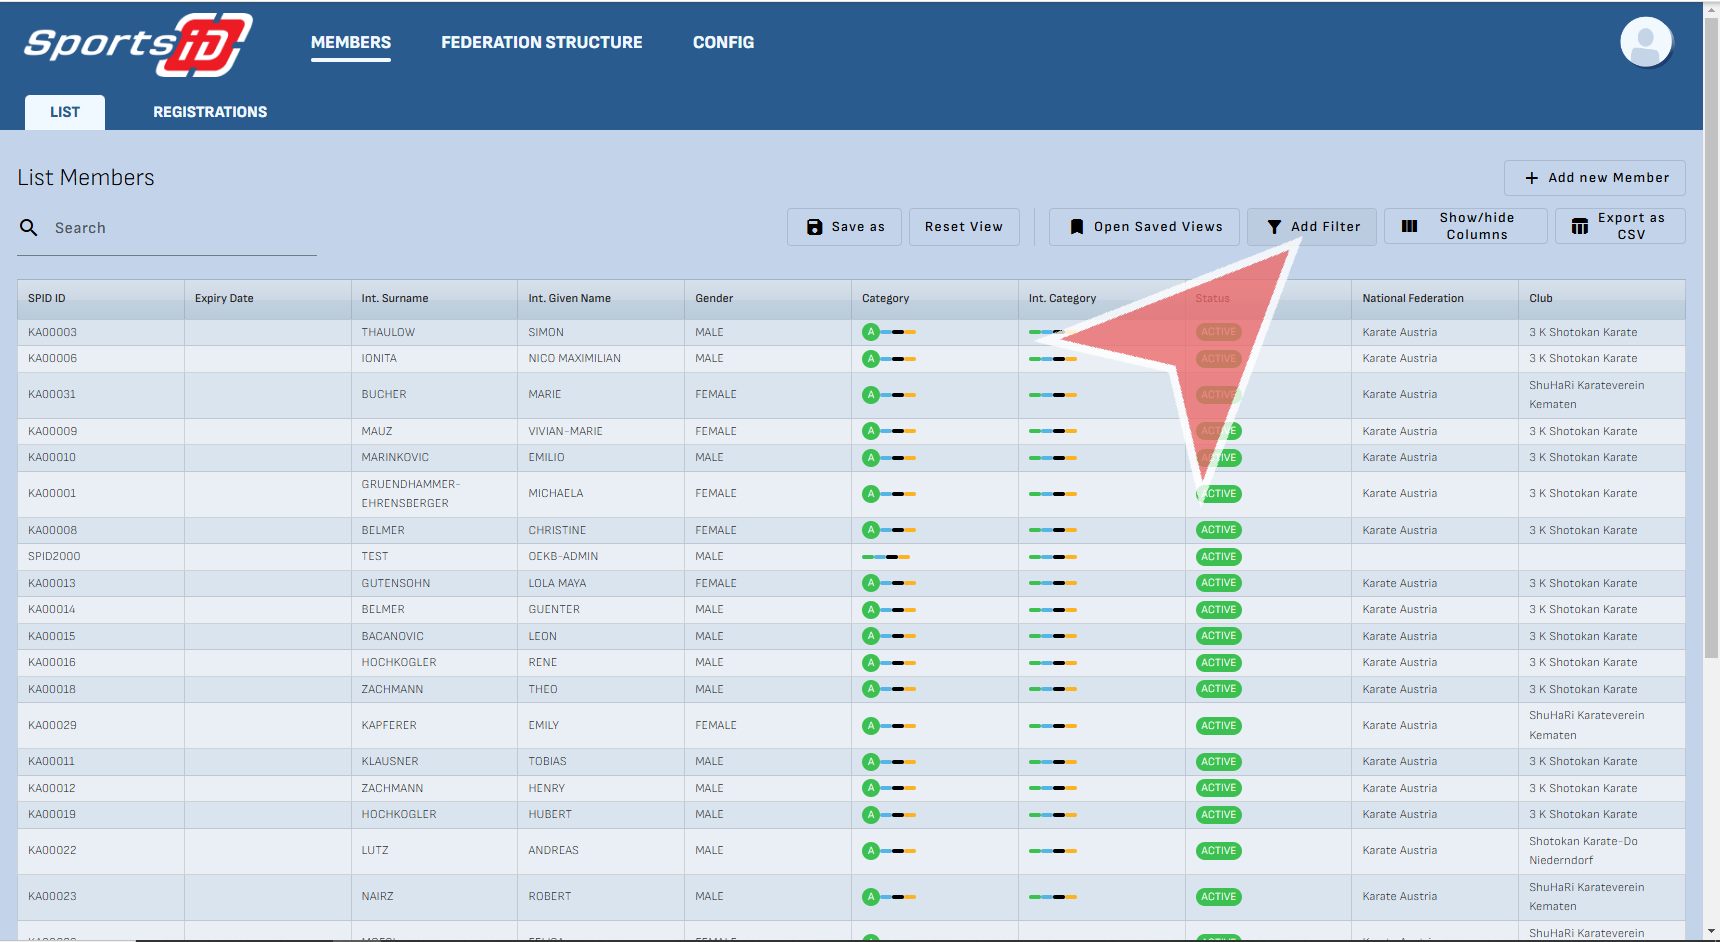
To start, determine which columns you would like to show or hide, Click on ‘Show/hide Columns’.

After selecting the fields you require, press okay to continue.

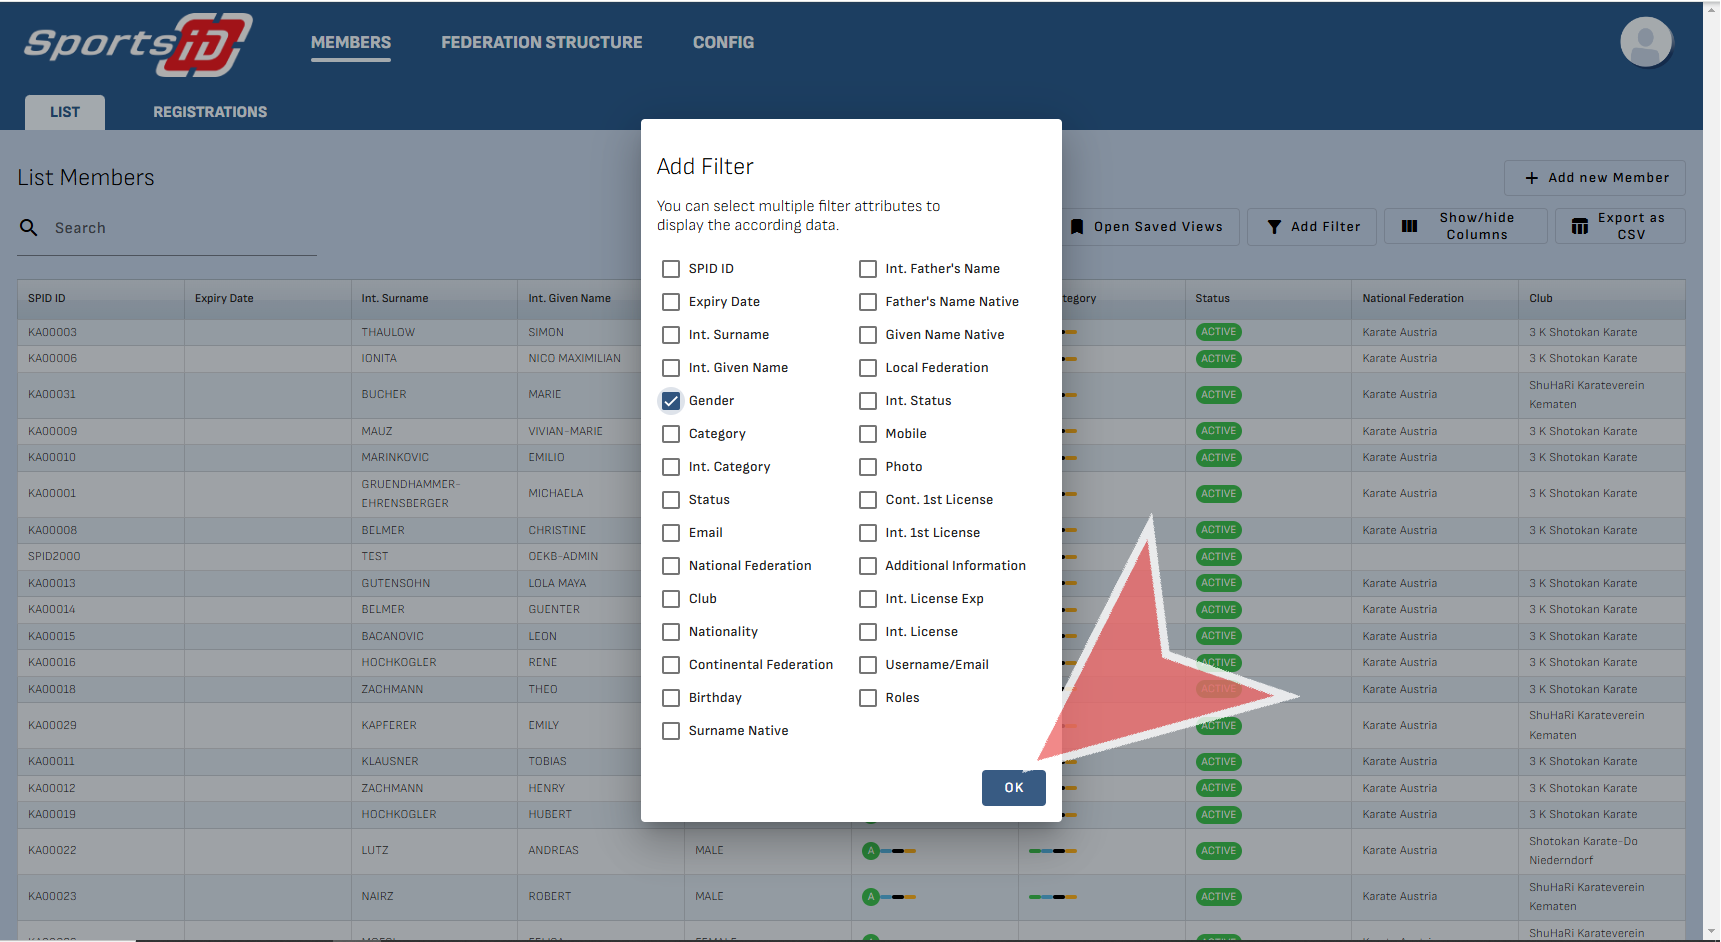
Next, if you have any filters you would like to apply to your list, then click ‘Add Filter’.

Once you have selected your filter criteria, press ‘OK’.

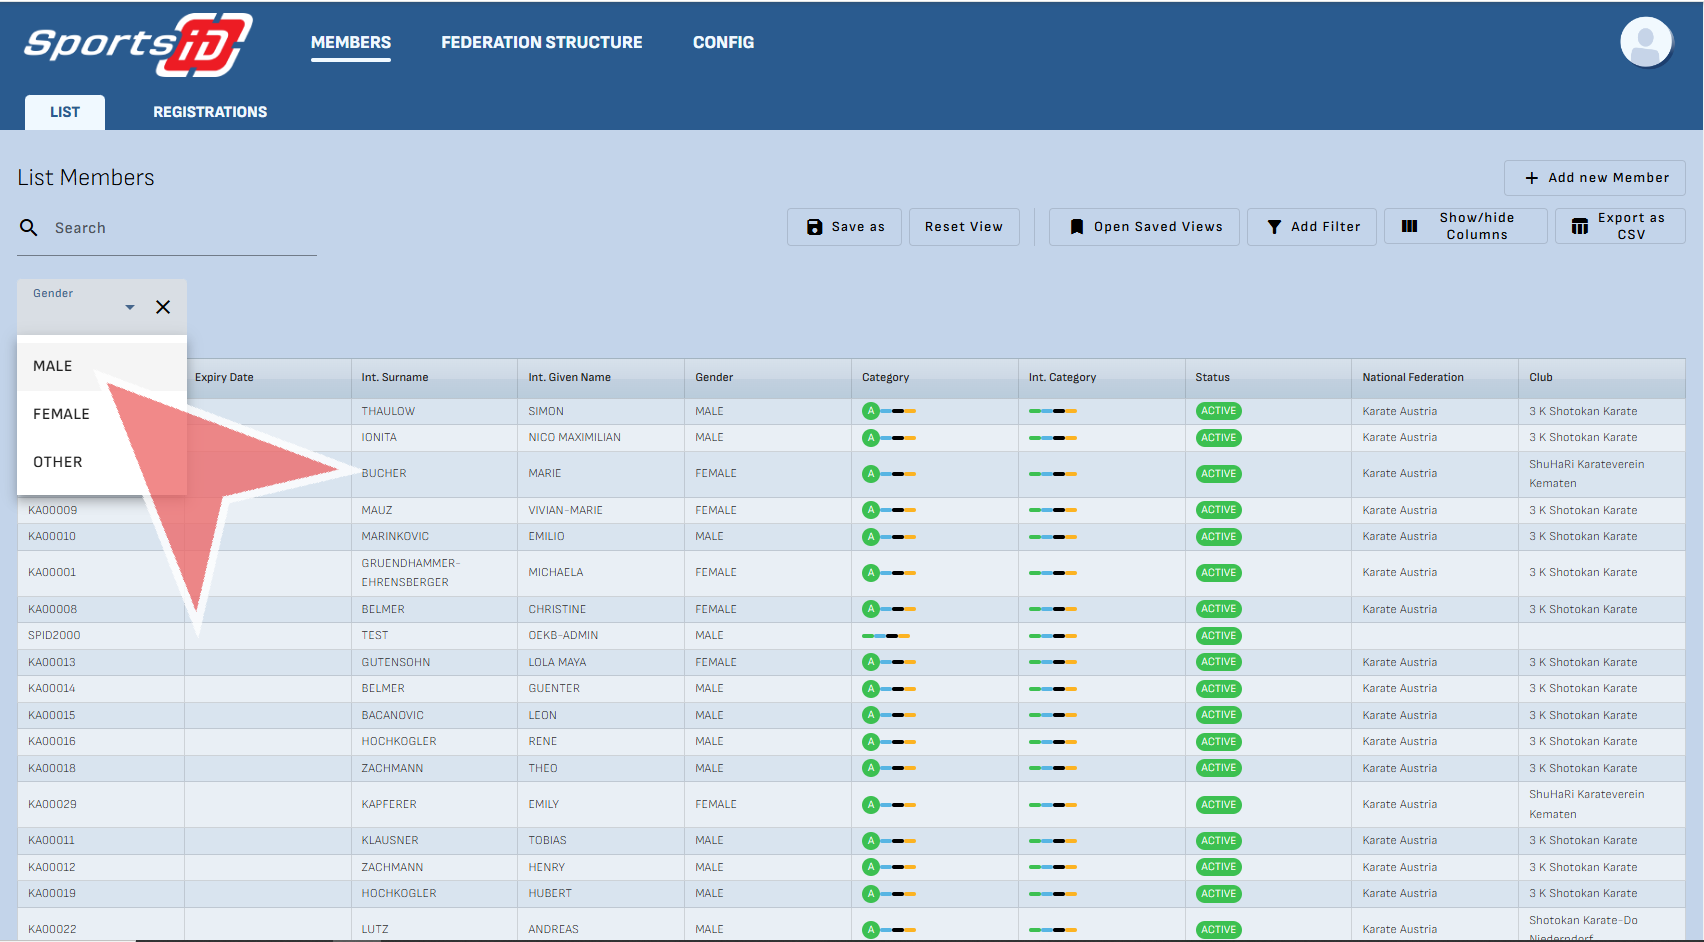
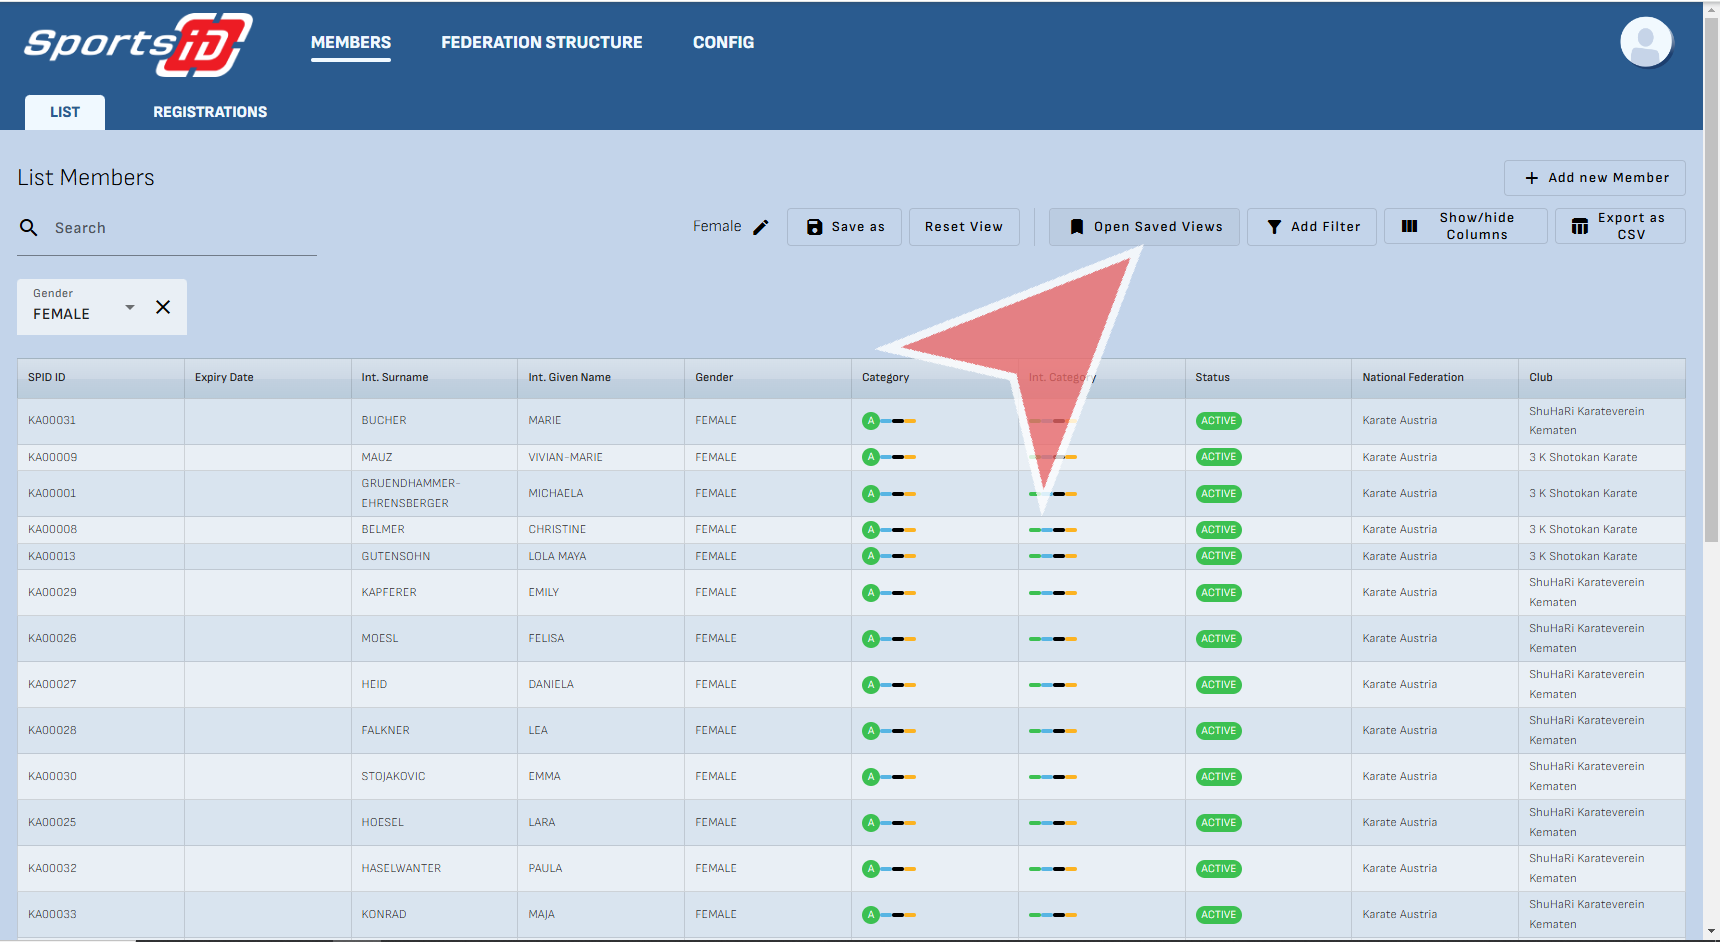
Below the search bar, the filter options will appear in a drop down menu. Click to selected the filter you wish to apply.

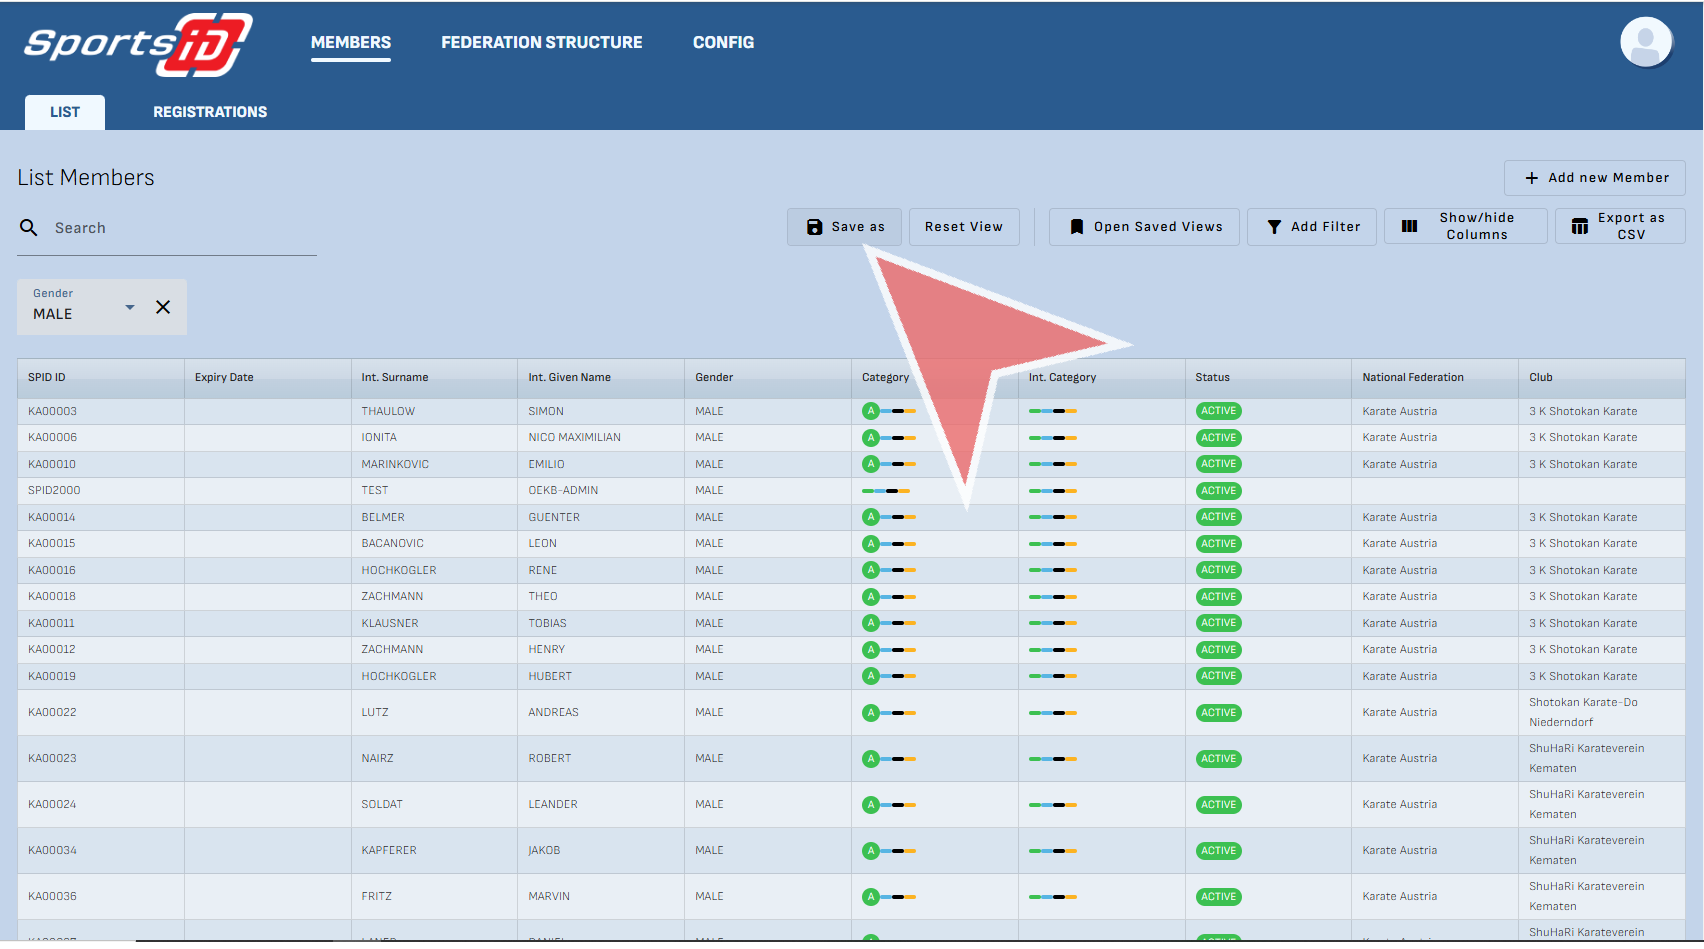
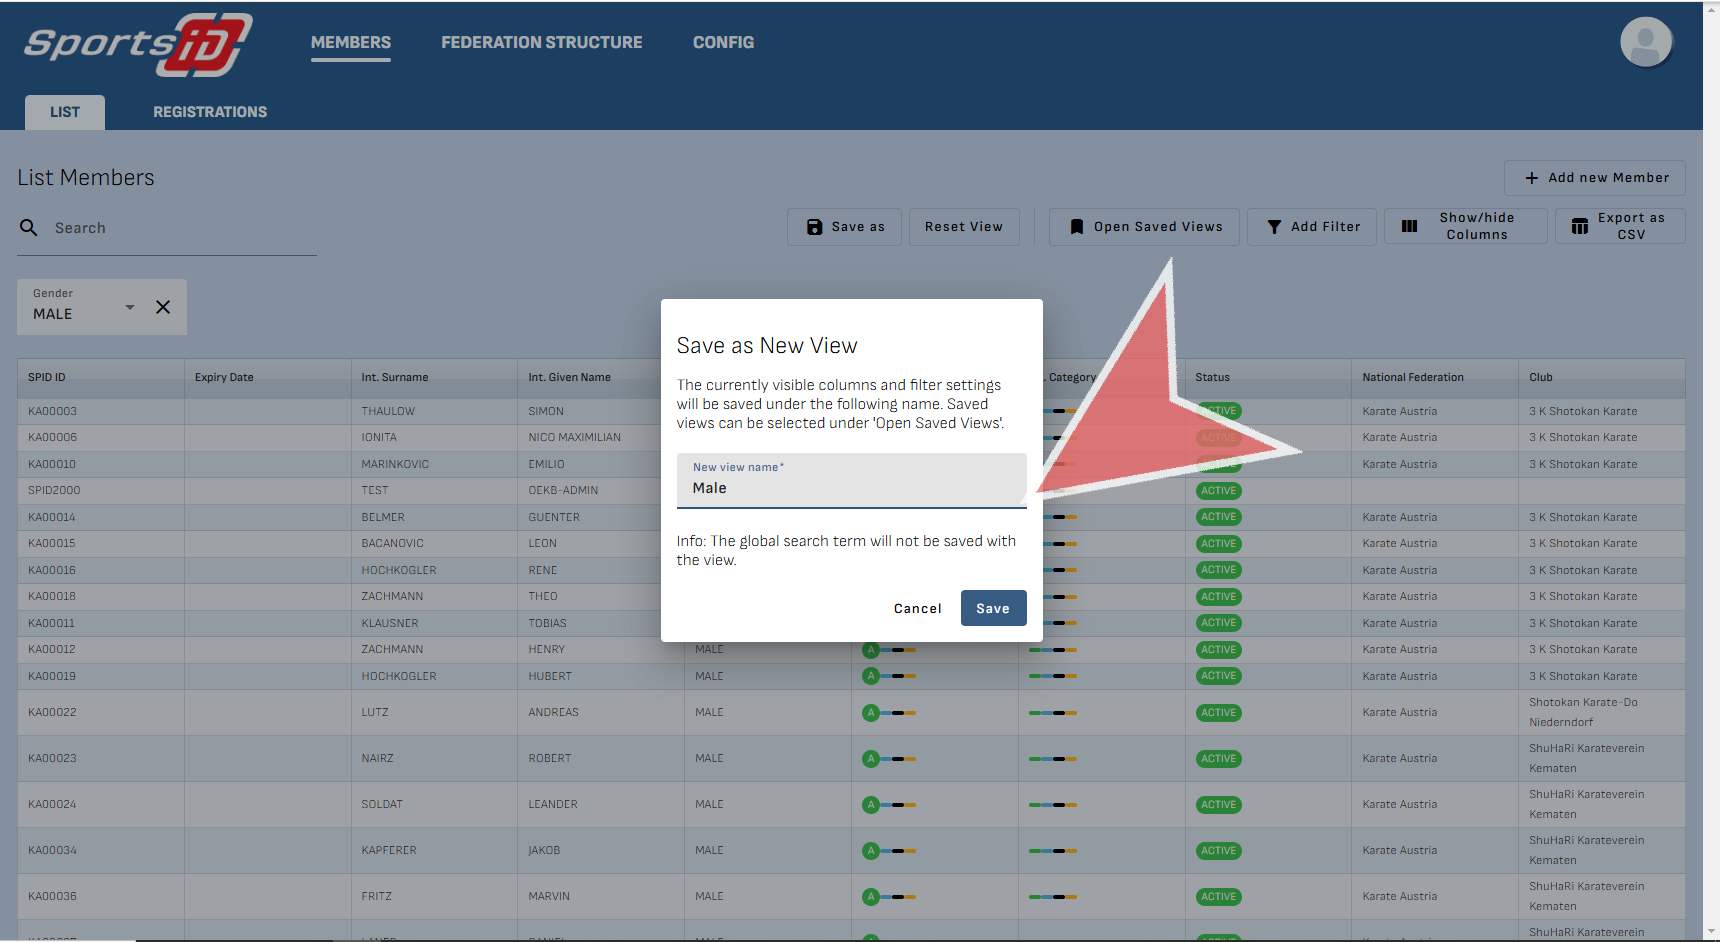
If you would like to reuse this list in the future, you can click on ‘Save As’ to save it.

Click on the option labeled ‘New View Name’ and give it an appropriate title.

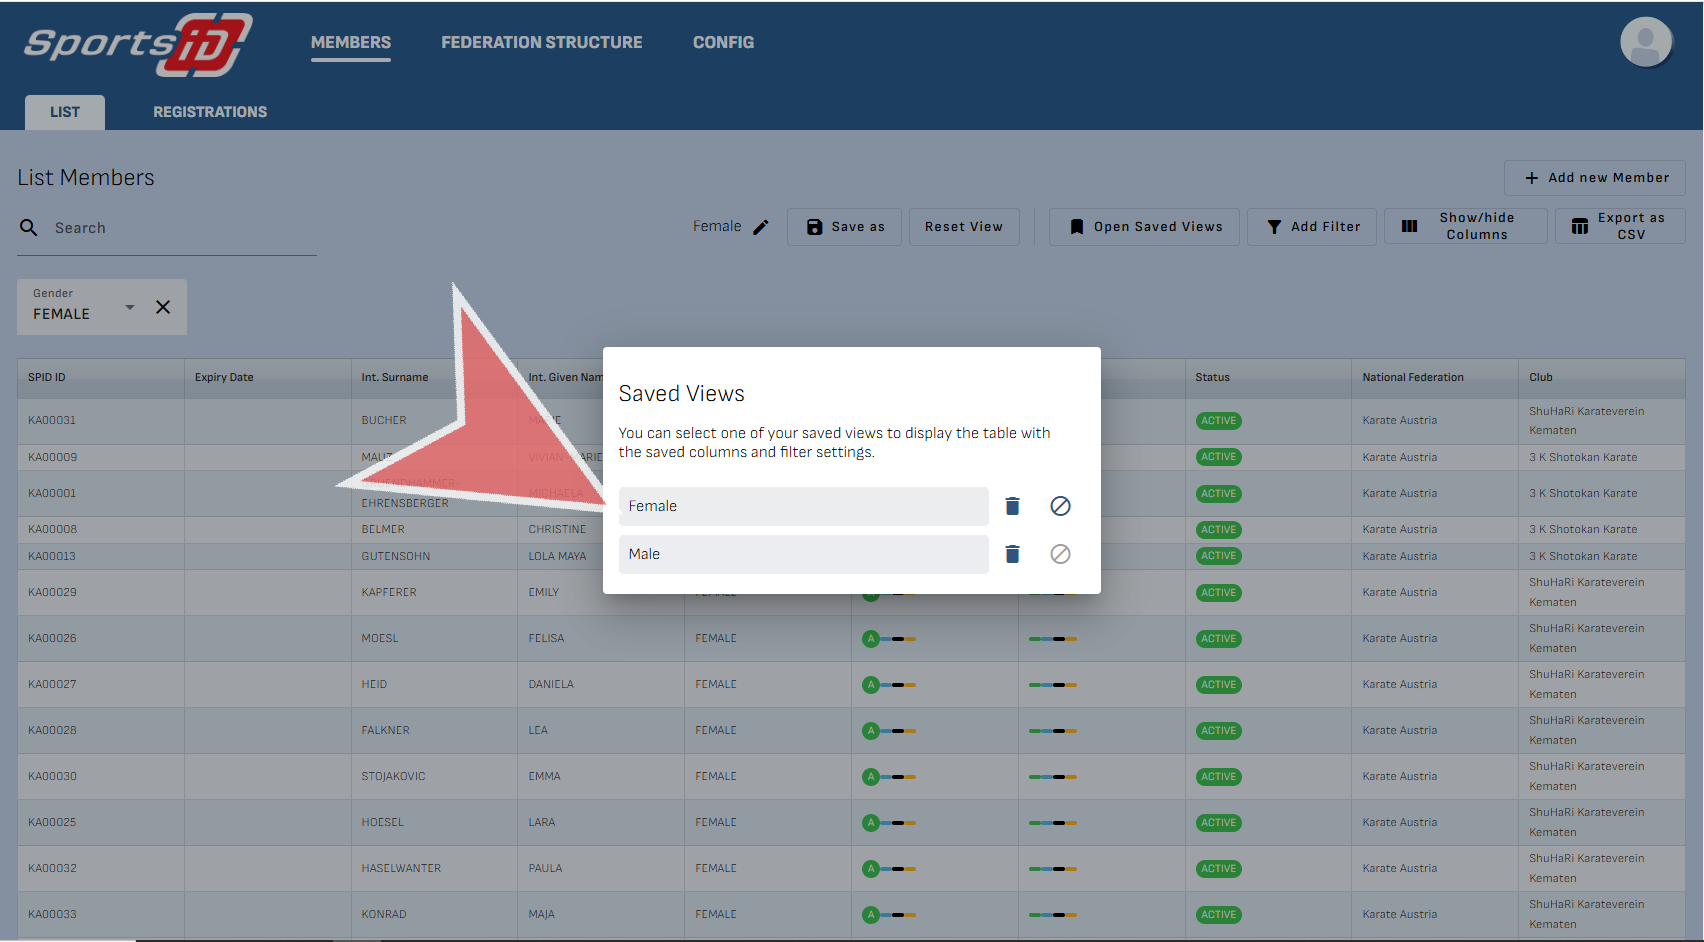
To see all your lists, go to ‘Open Saved Views’.

Here, you can select the a previously saved list by clicking on the title.

Register on Sports ID

Interactive Demo

How to register on Sports-ID

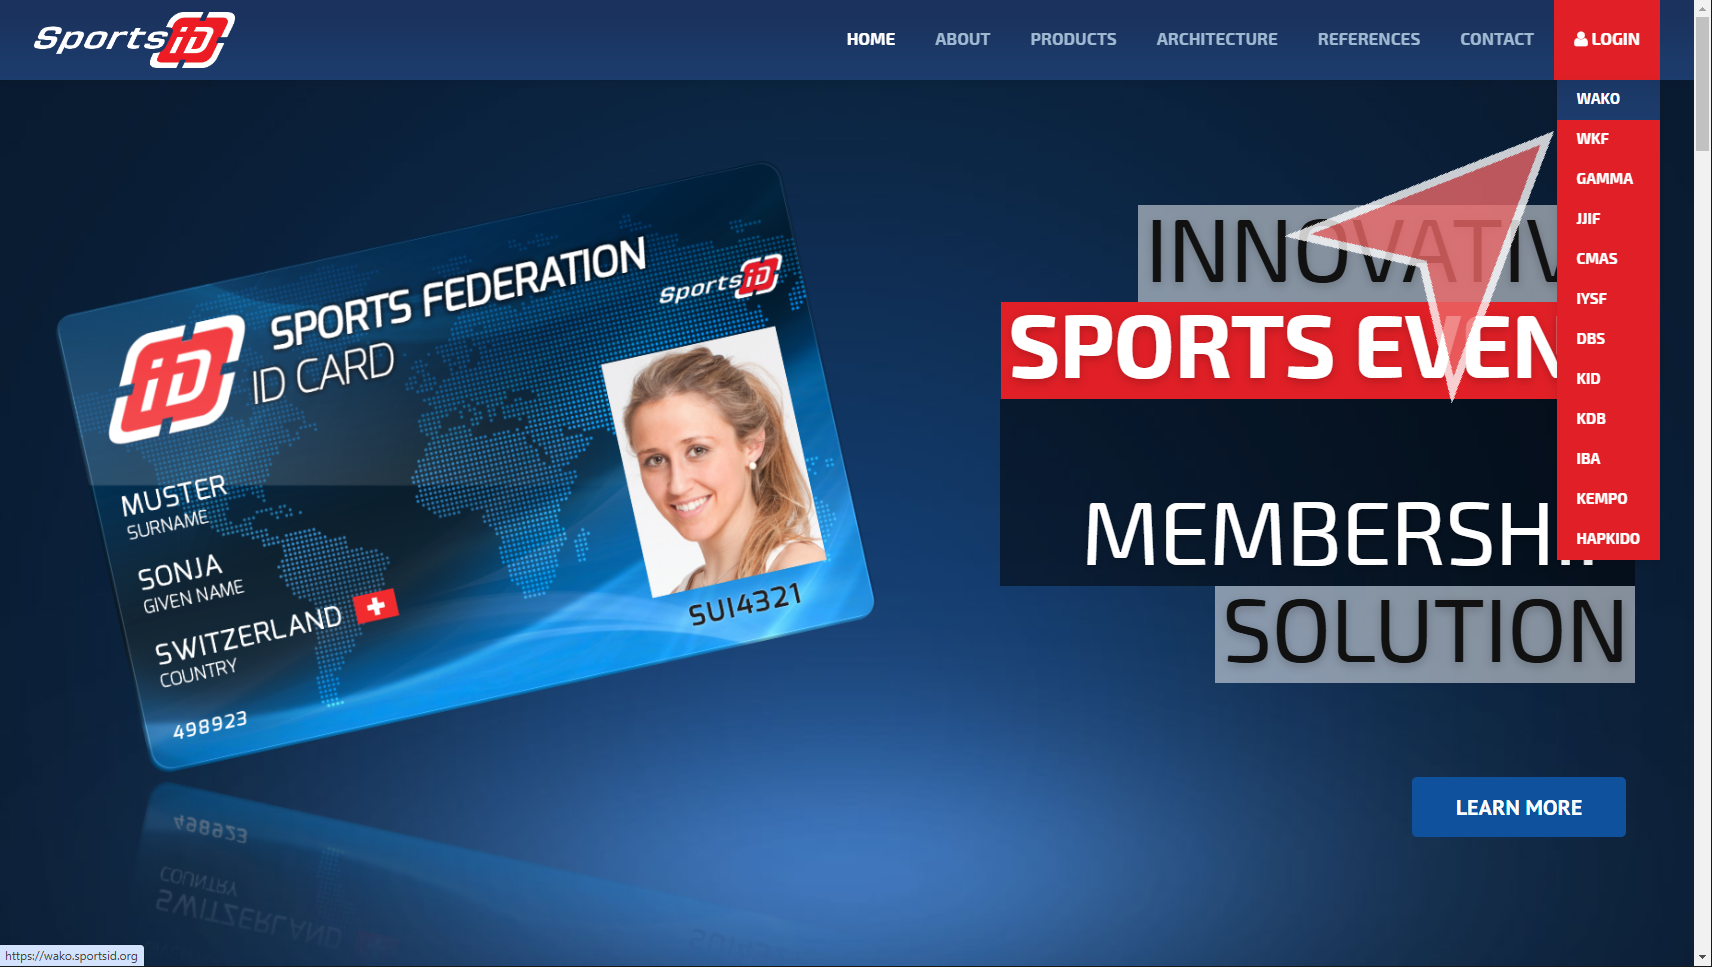
To register on Sportsid, you can go to sportsid.org and select an organization.

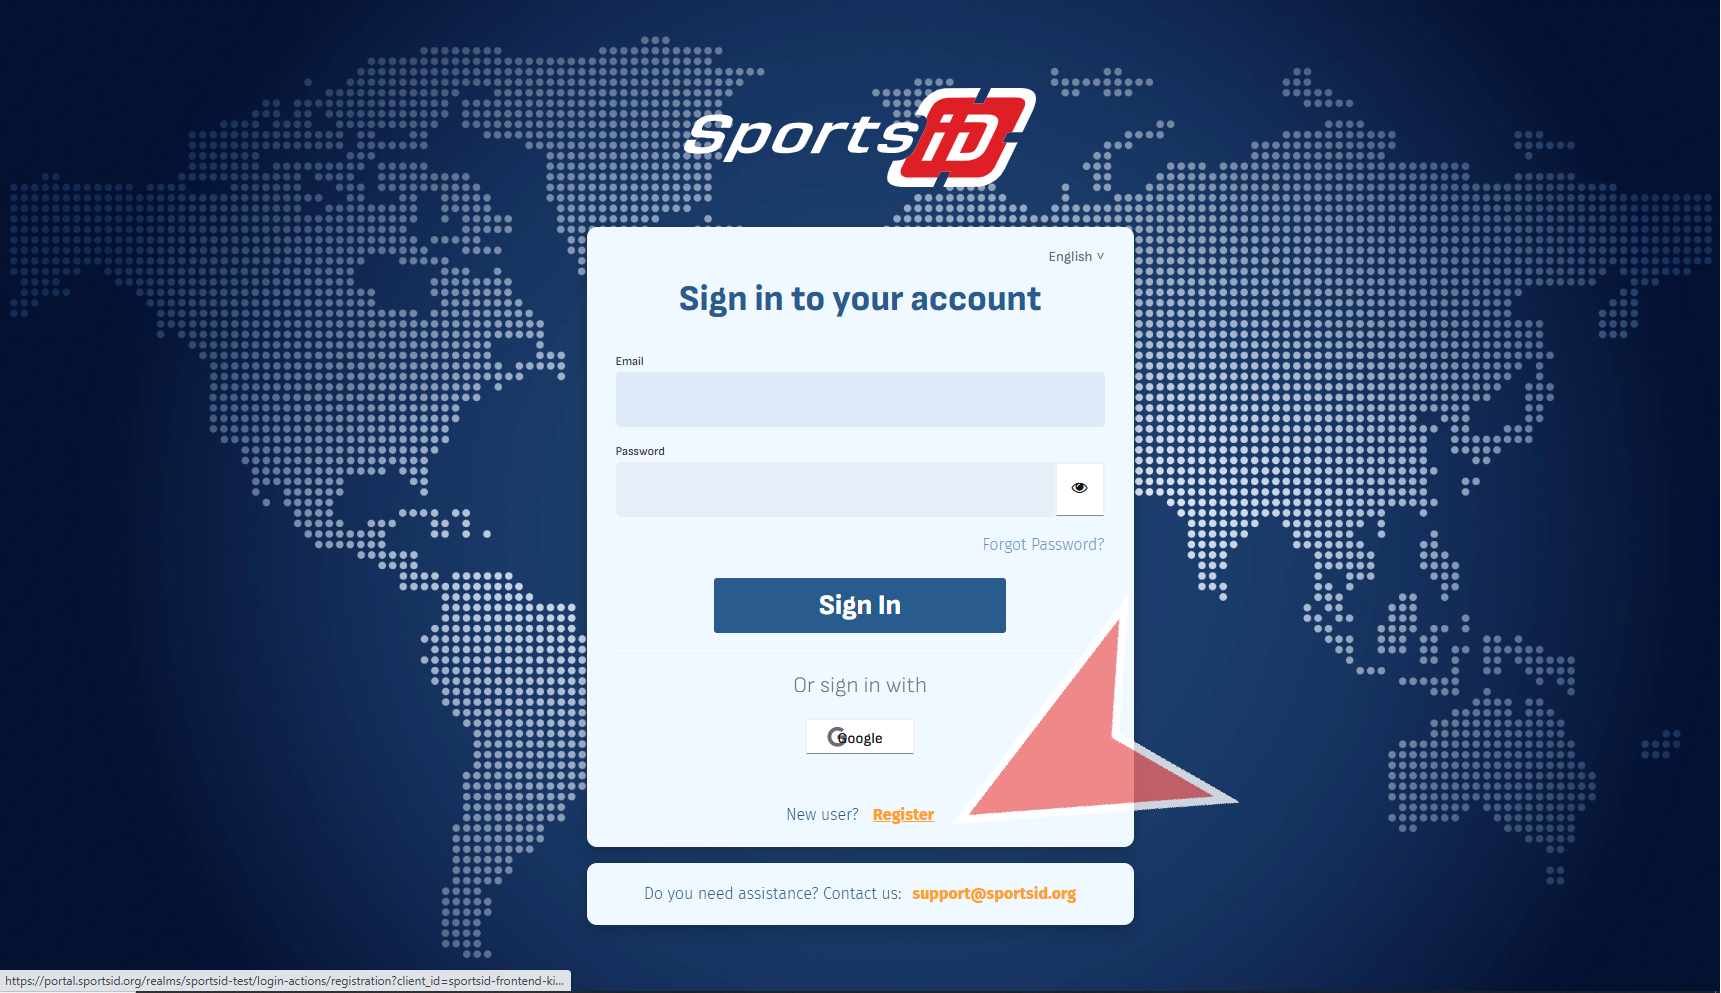
To create an account, go to ‘New User’ and click register.

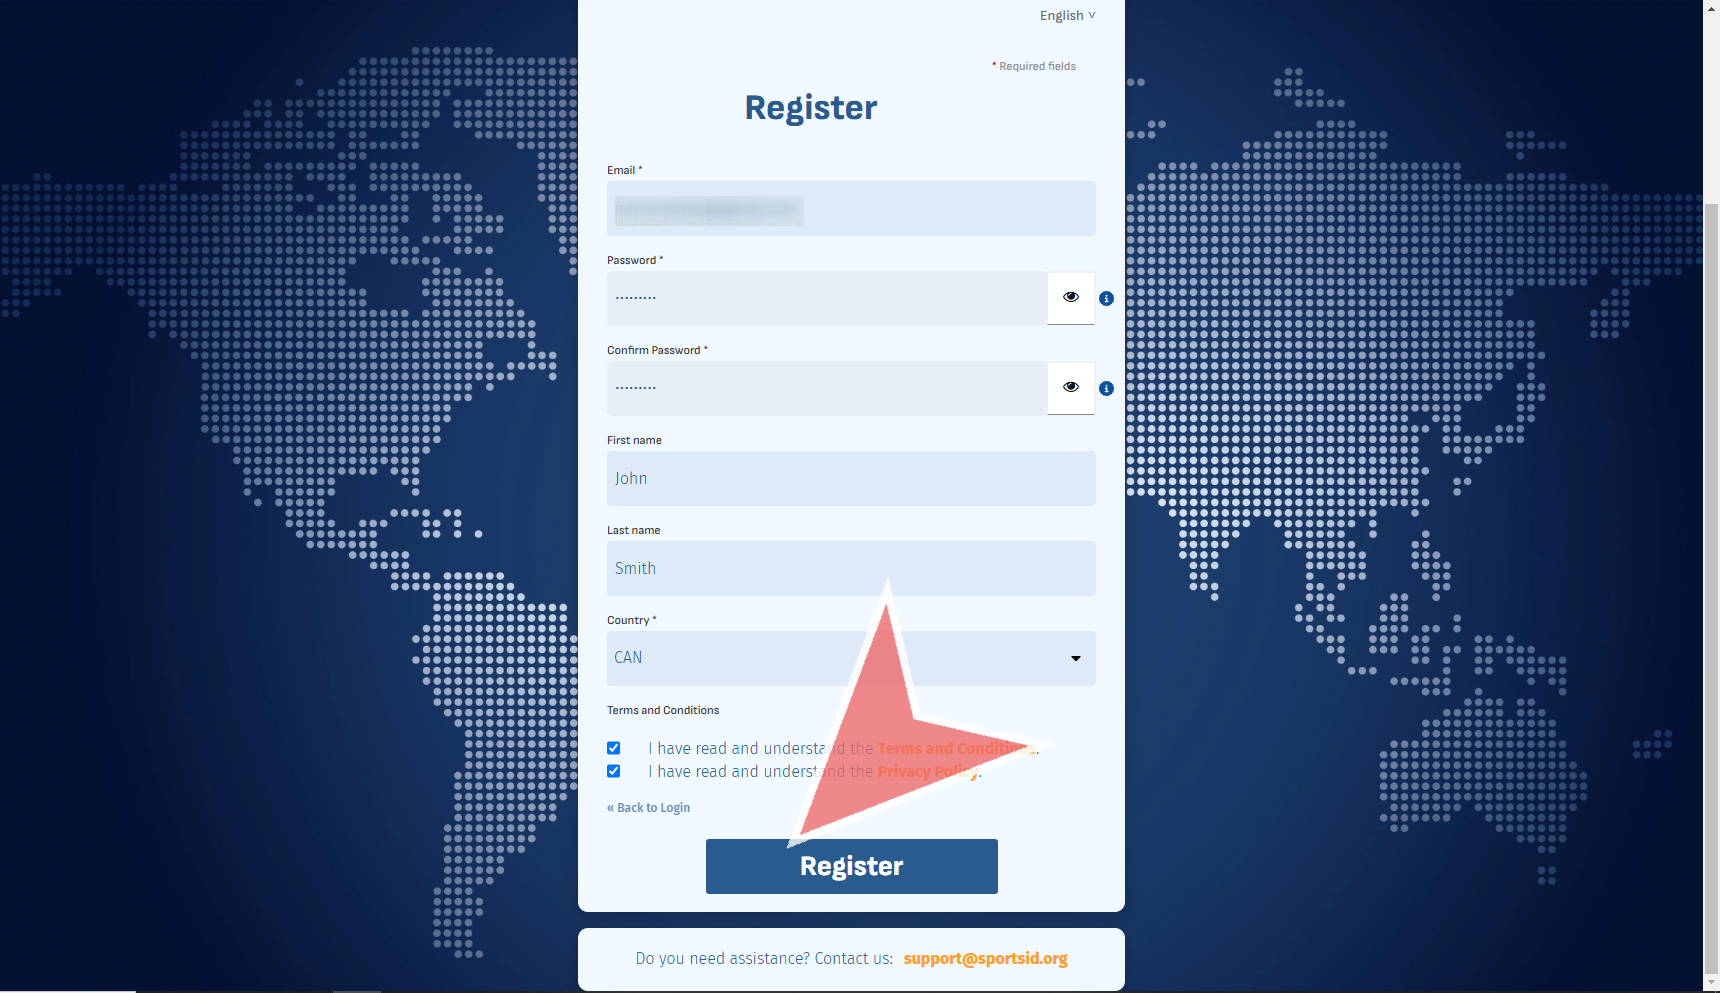
Fill out the fields, agree to the terms and conditions and click on the ‘Register’ button.

Return to the portal.sportsid.org page and click on the “Sign in to Sports ID Test” option.

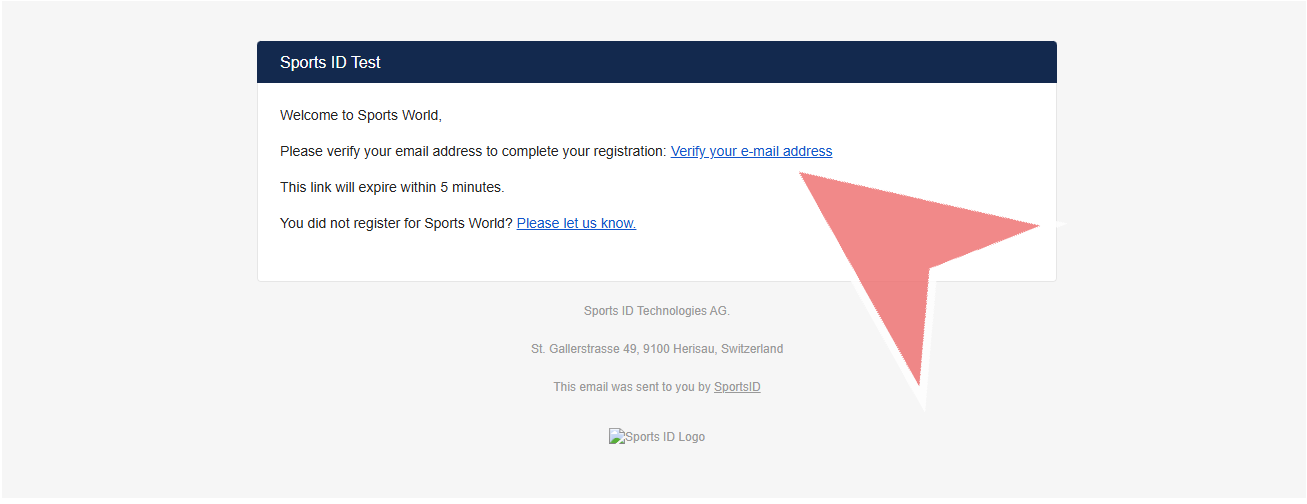
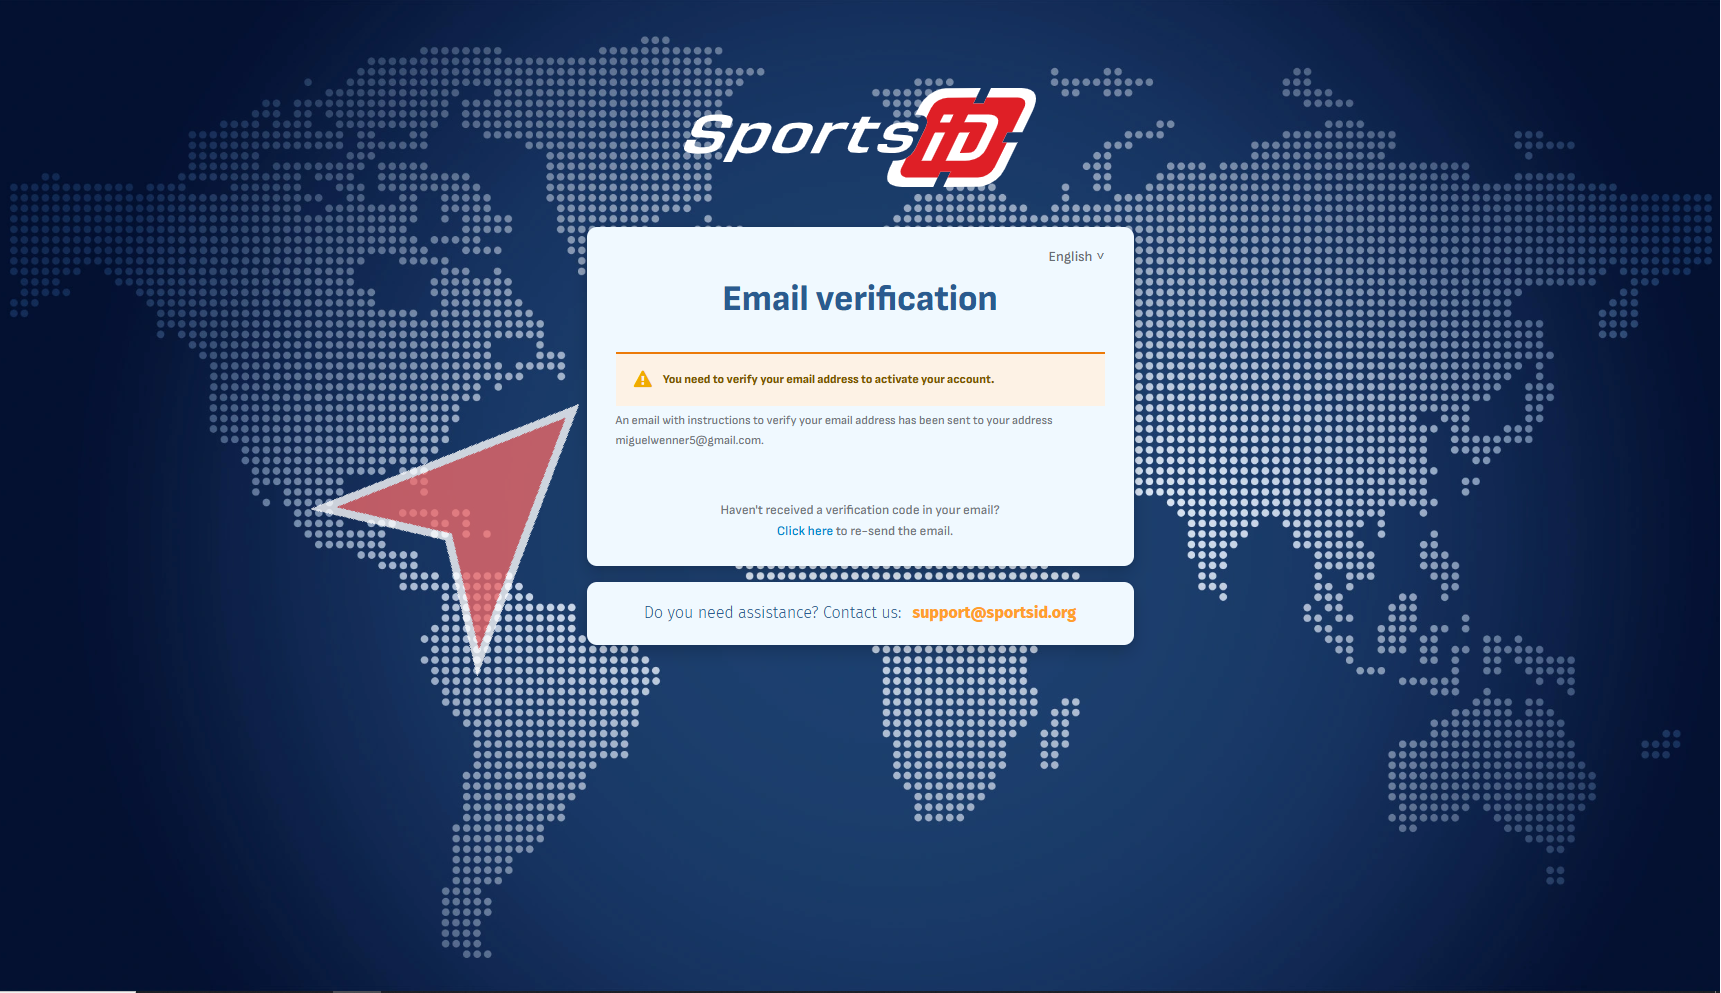
Shortly after, you will receive an email with the subject ‘Verify your email’, where you can click on the ‘verify your email address# hyperlink.

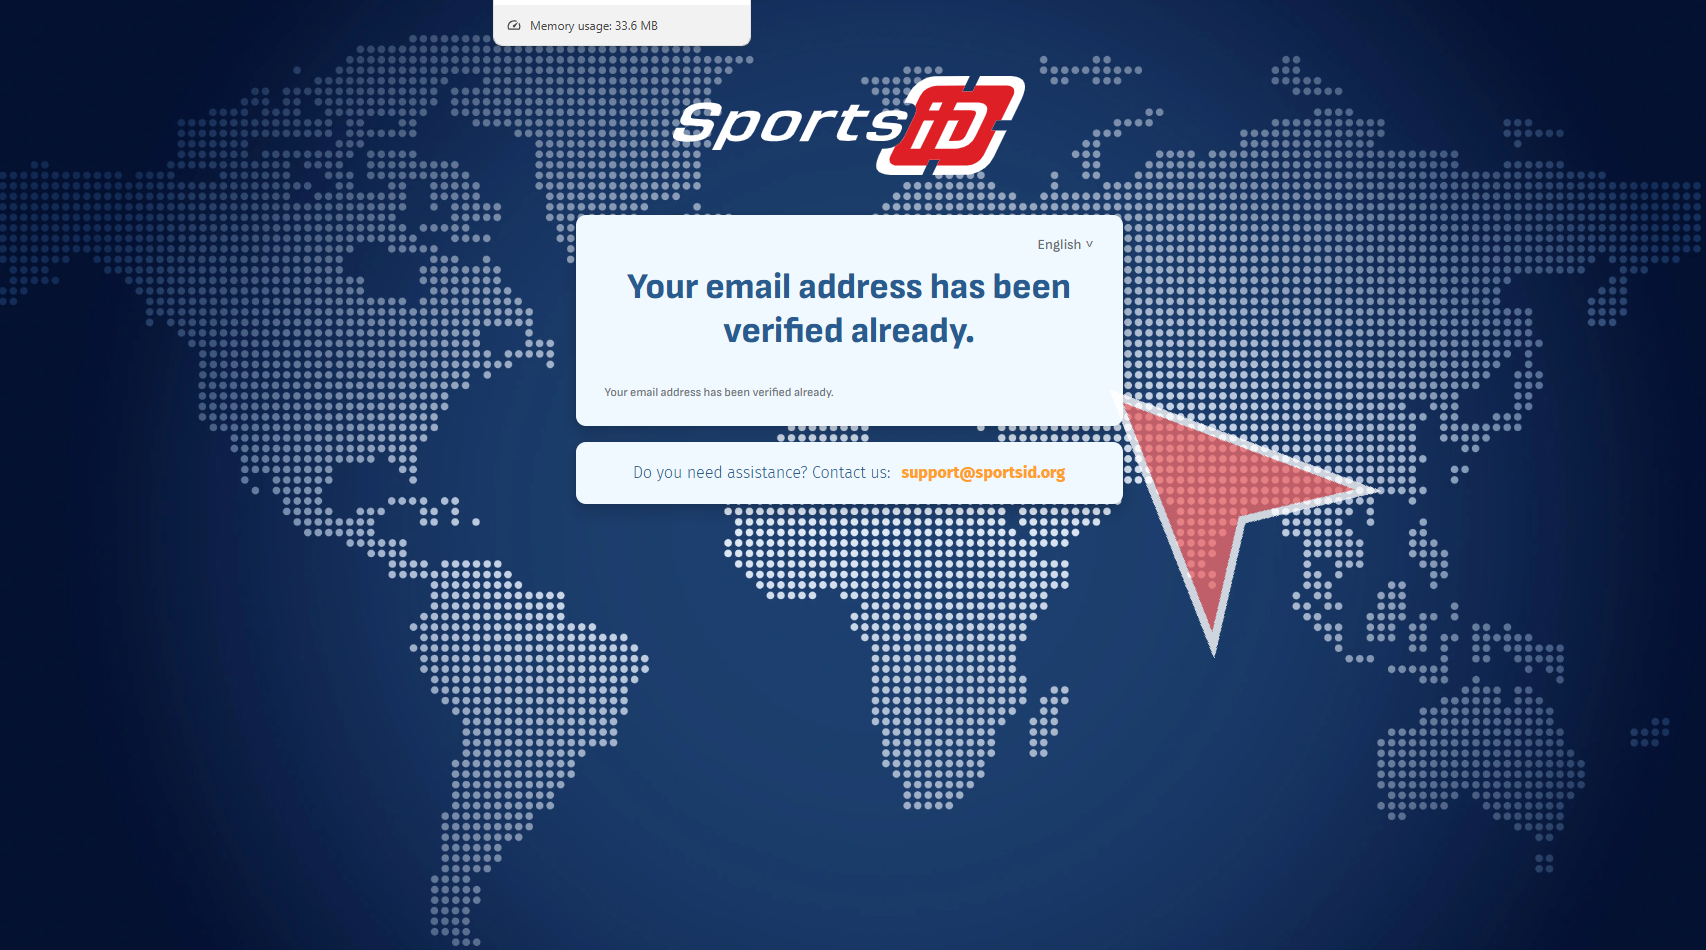
A window will appear confirming your email has been verified.

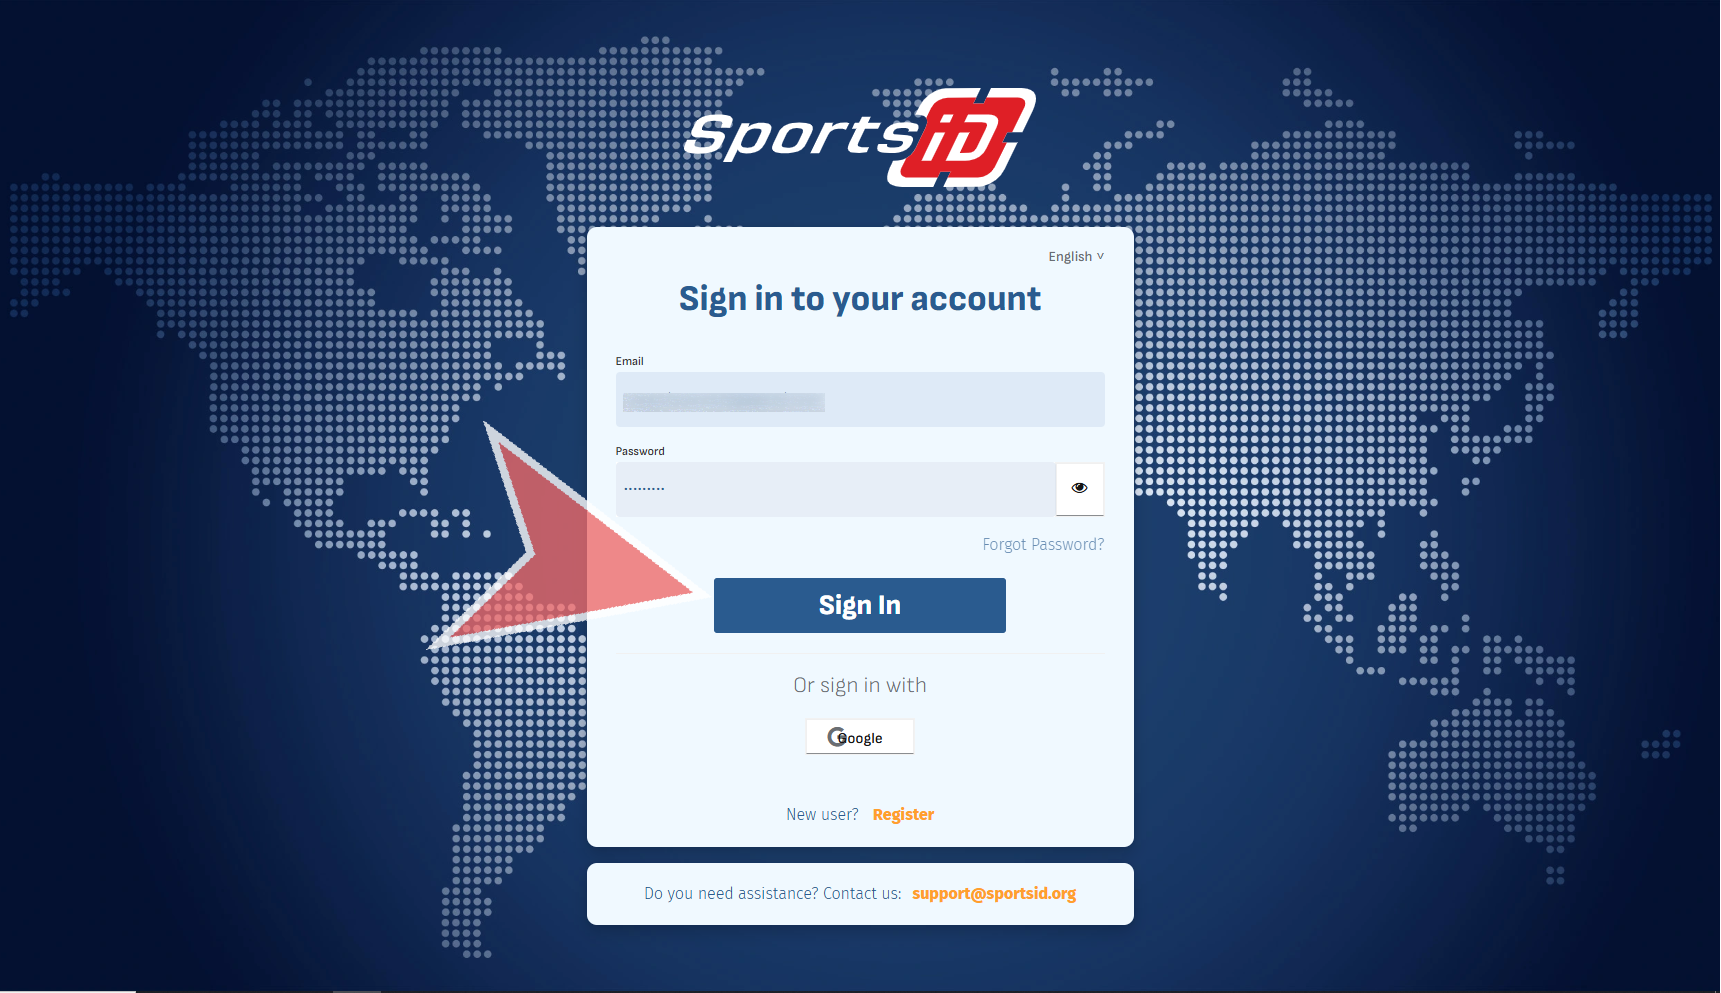
Now, you may enter your email and password created in the previous steps, to access you profile. Click on the ‘Sign in’ button to proceed.

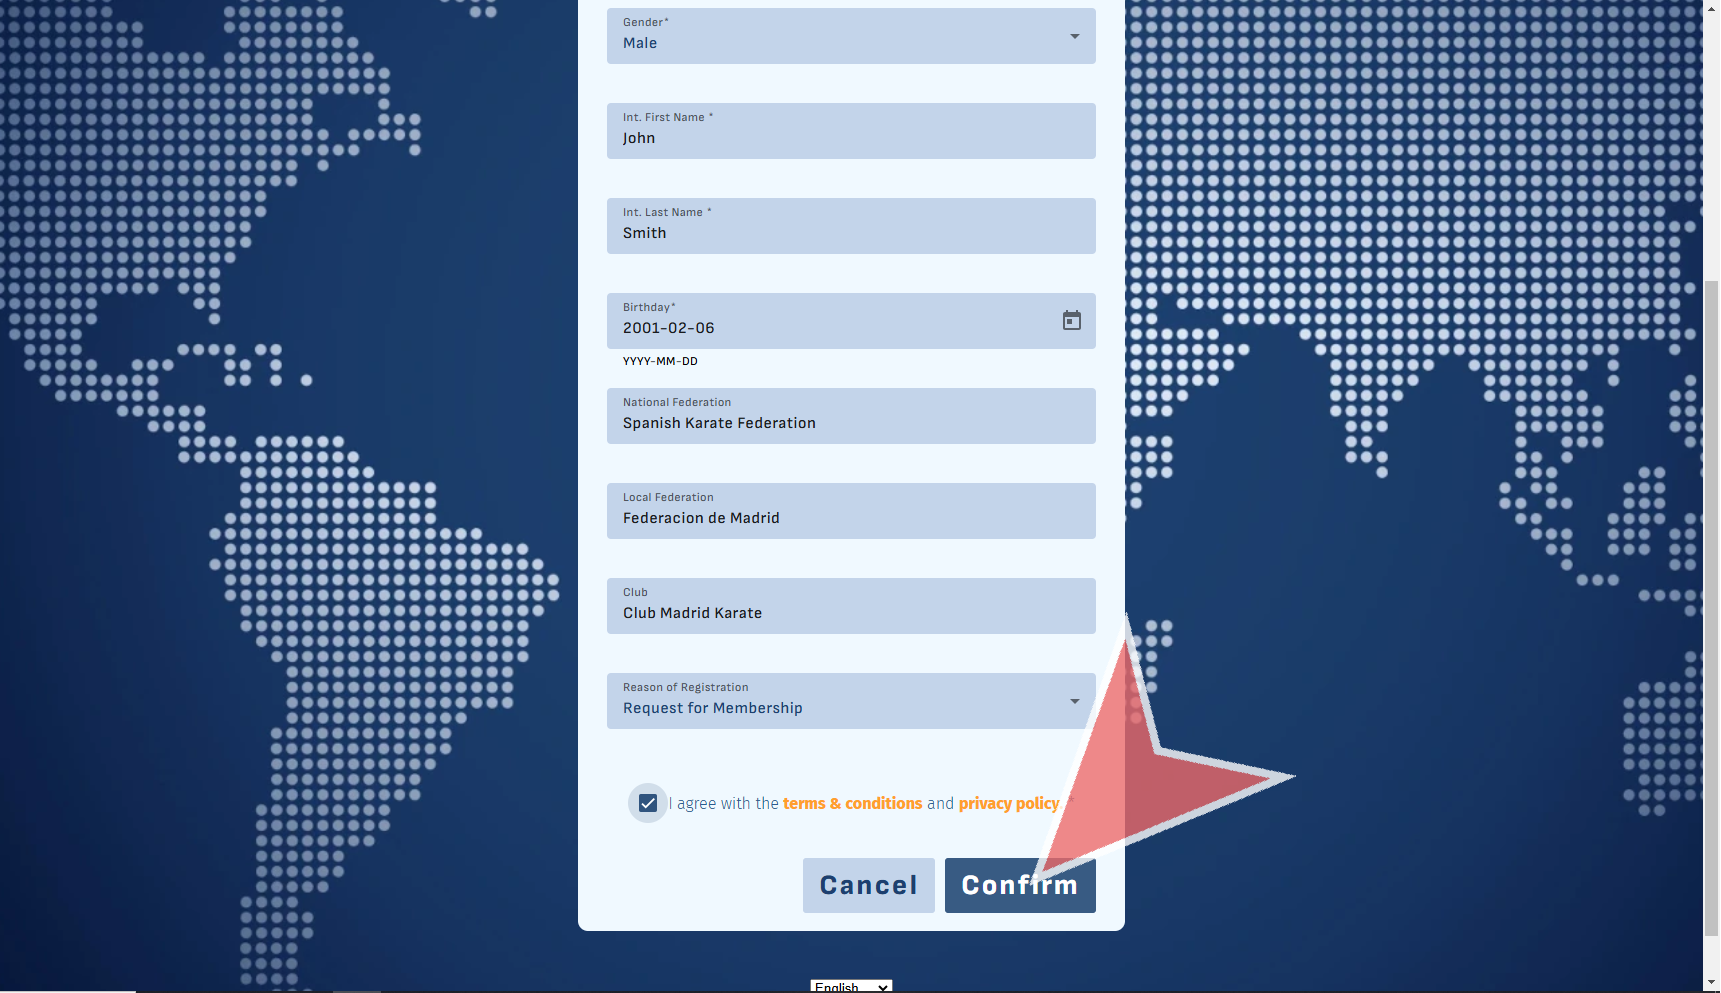
Fill out the federations and clubs you belong to and confirm the reason for your registration.

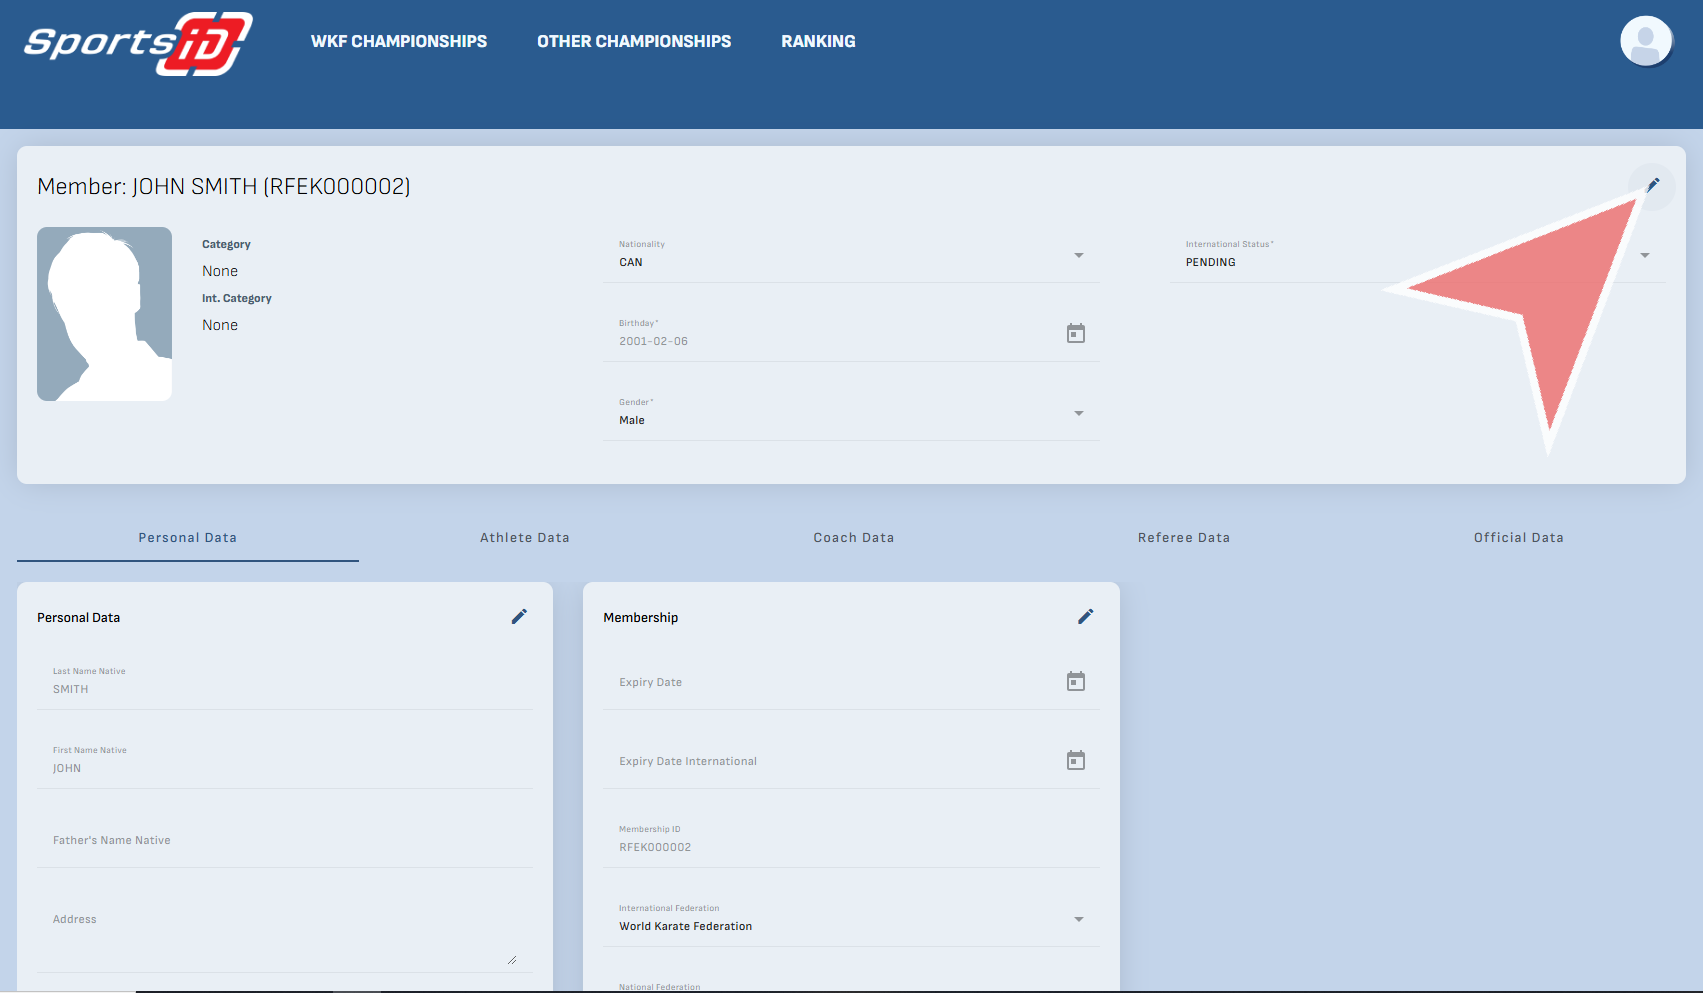
On your profile page, update your photo and details by clicking the edit icon. Your status will be updated by your federations.

You can also update your Personal information.

Finally, you can also edit the federations, and club to which you belong.

Activate the Mail Module and send emails to members

Interactive Demo

How to activate the mail Module and send emails to members

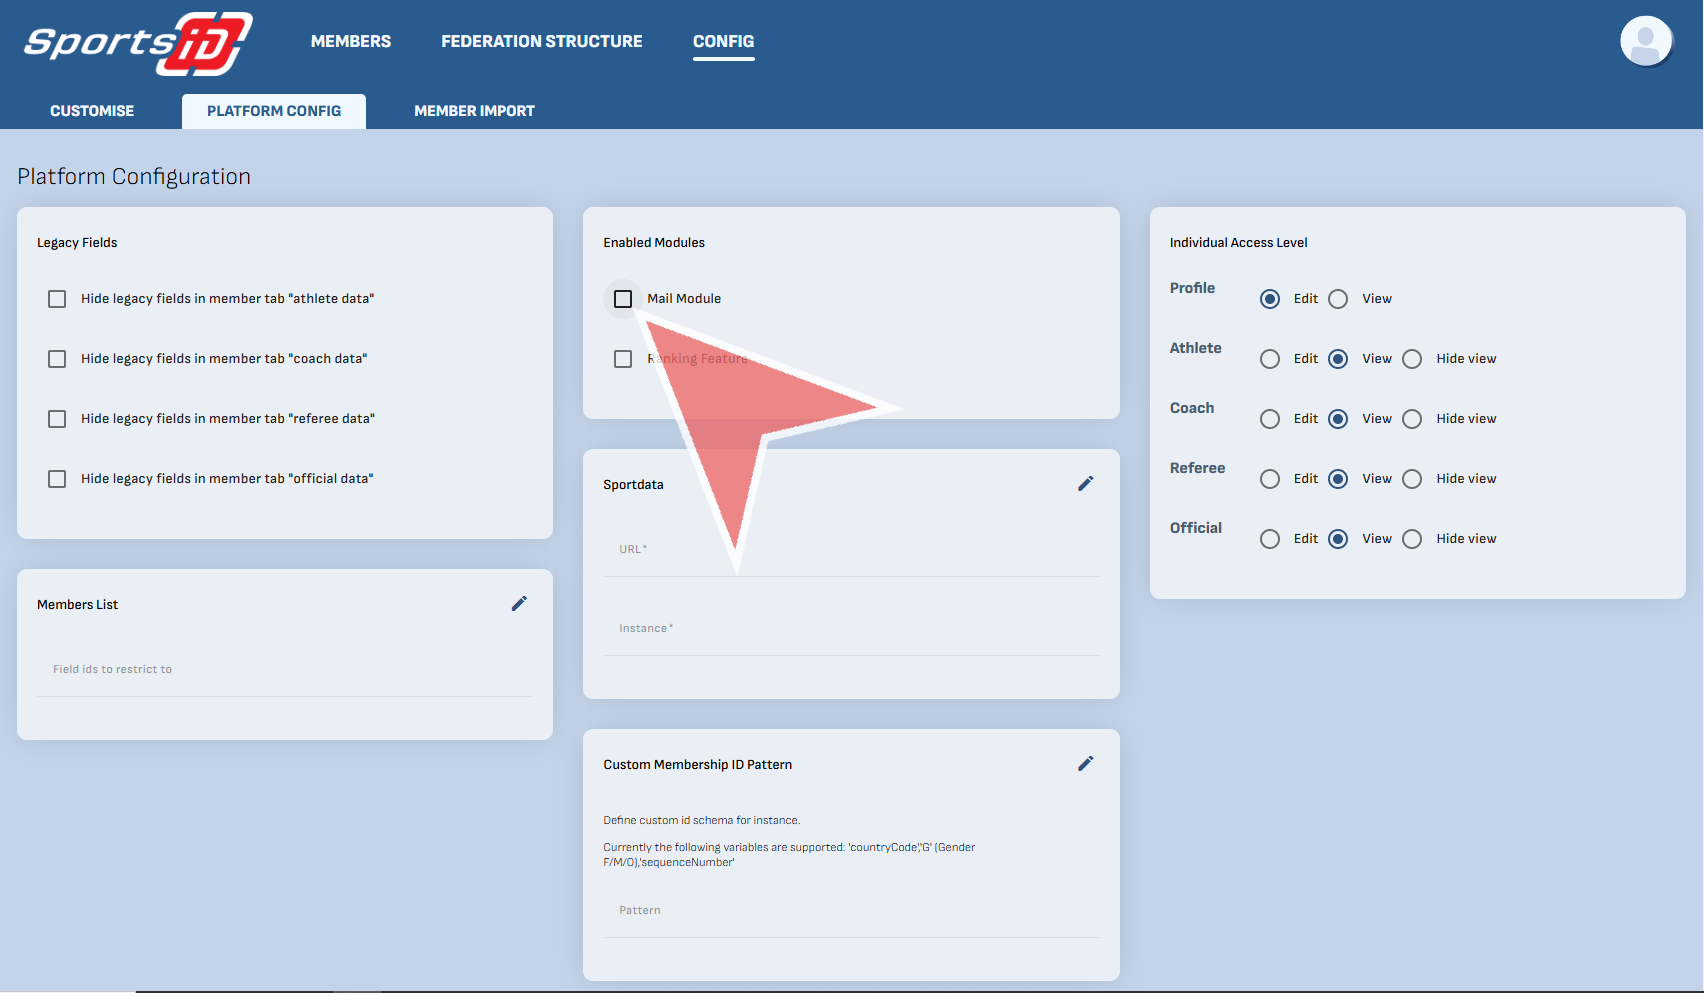
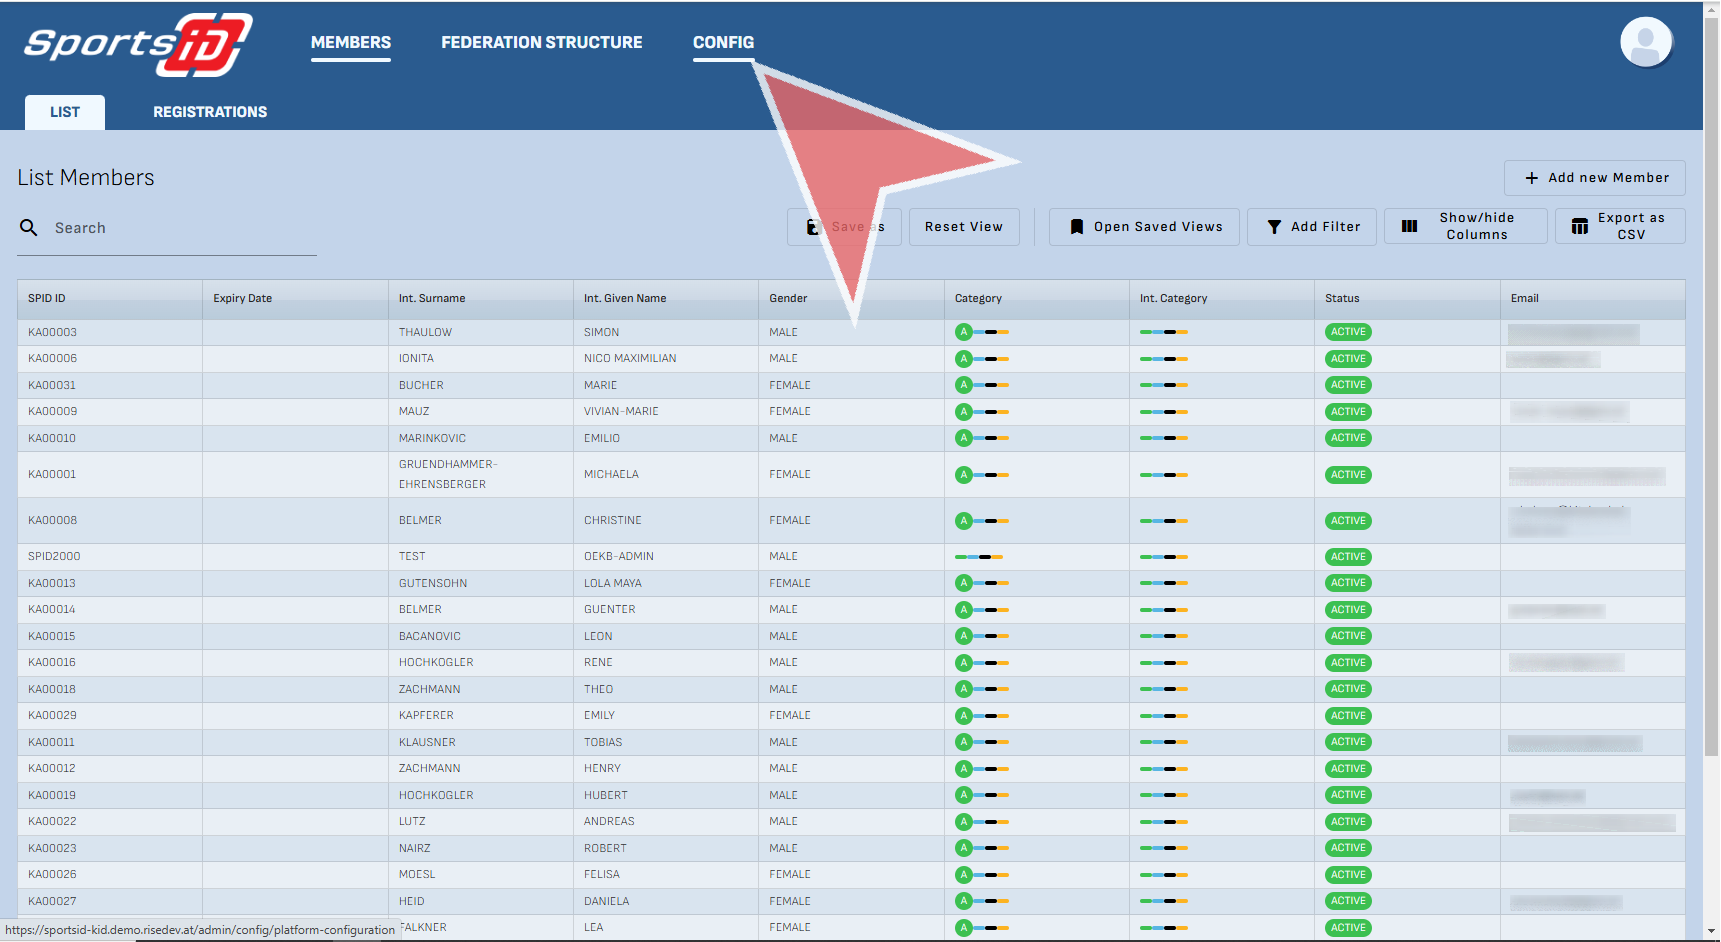
While in your administrator account, go to configuration to enable the mailing module.

Next, find and click on the checkbox labeled Mail Module.

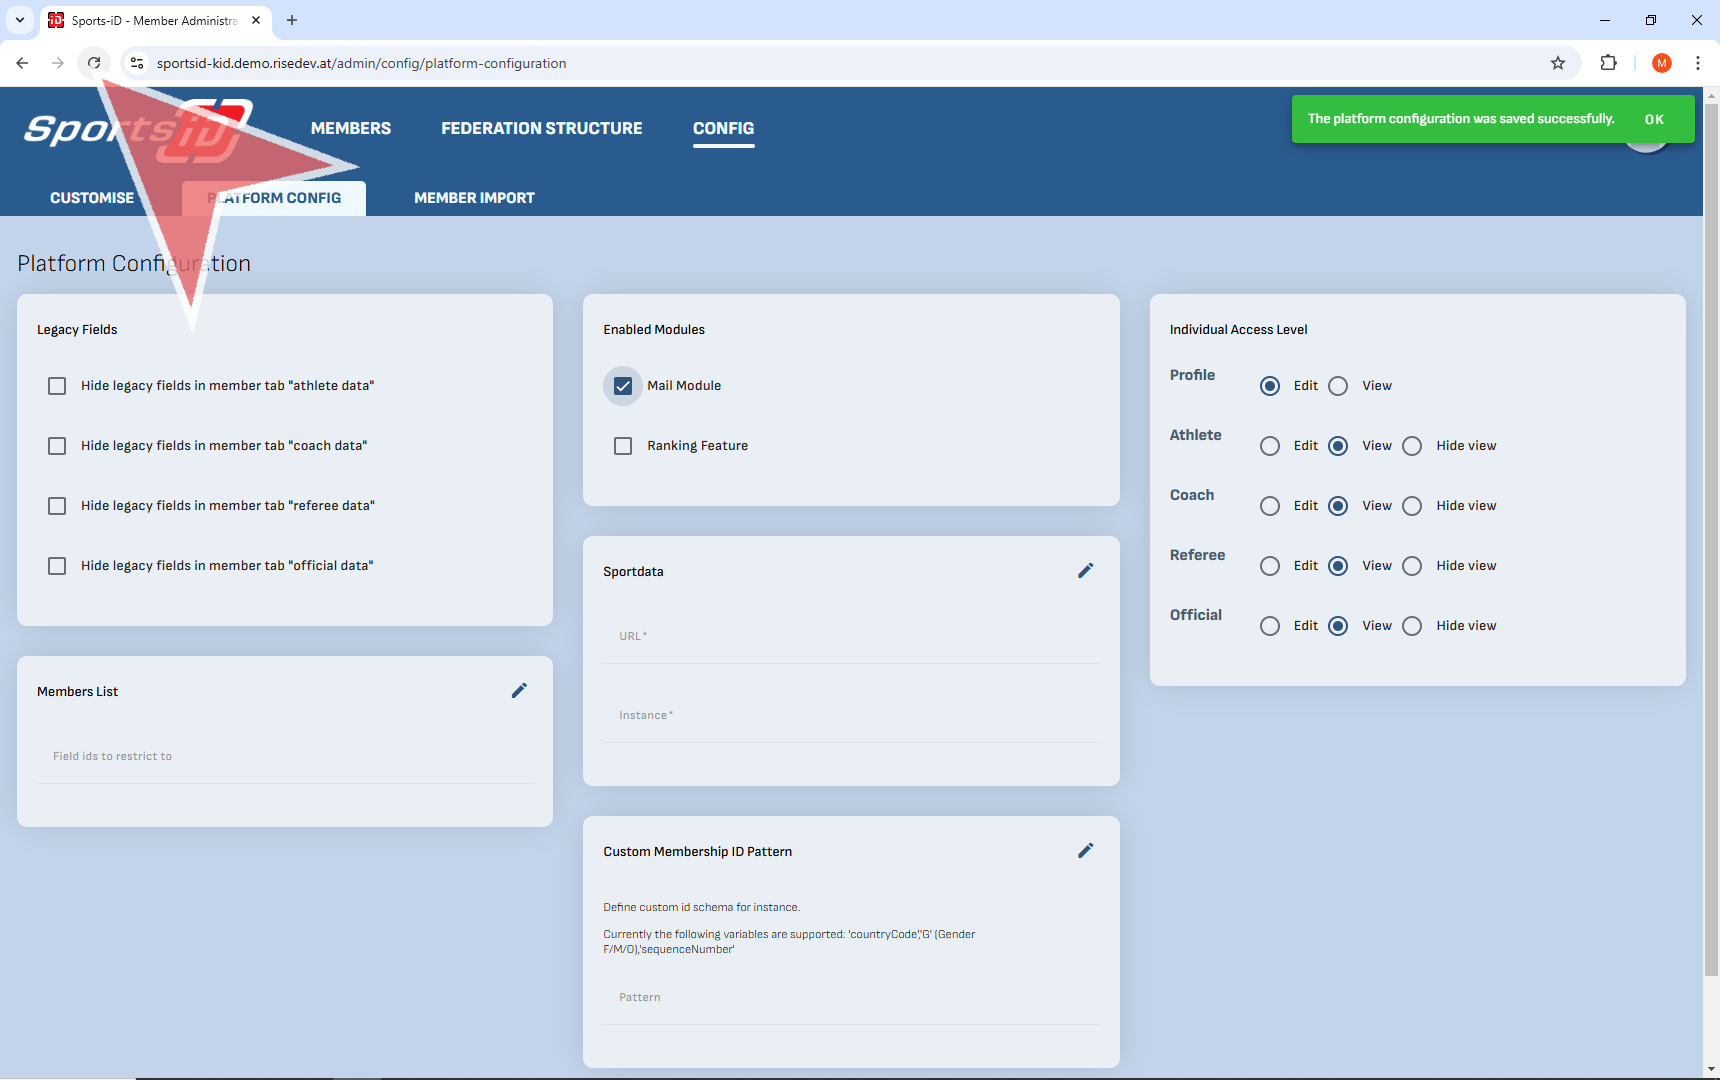
After that, look for the Reload button and give it a click to see the Mail Module.

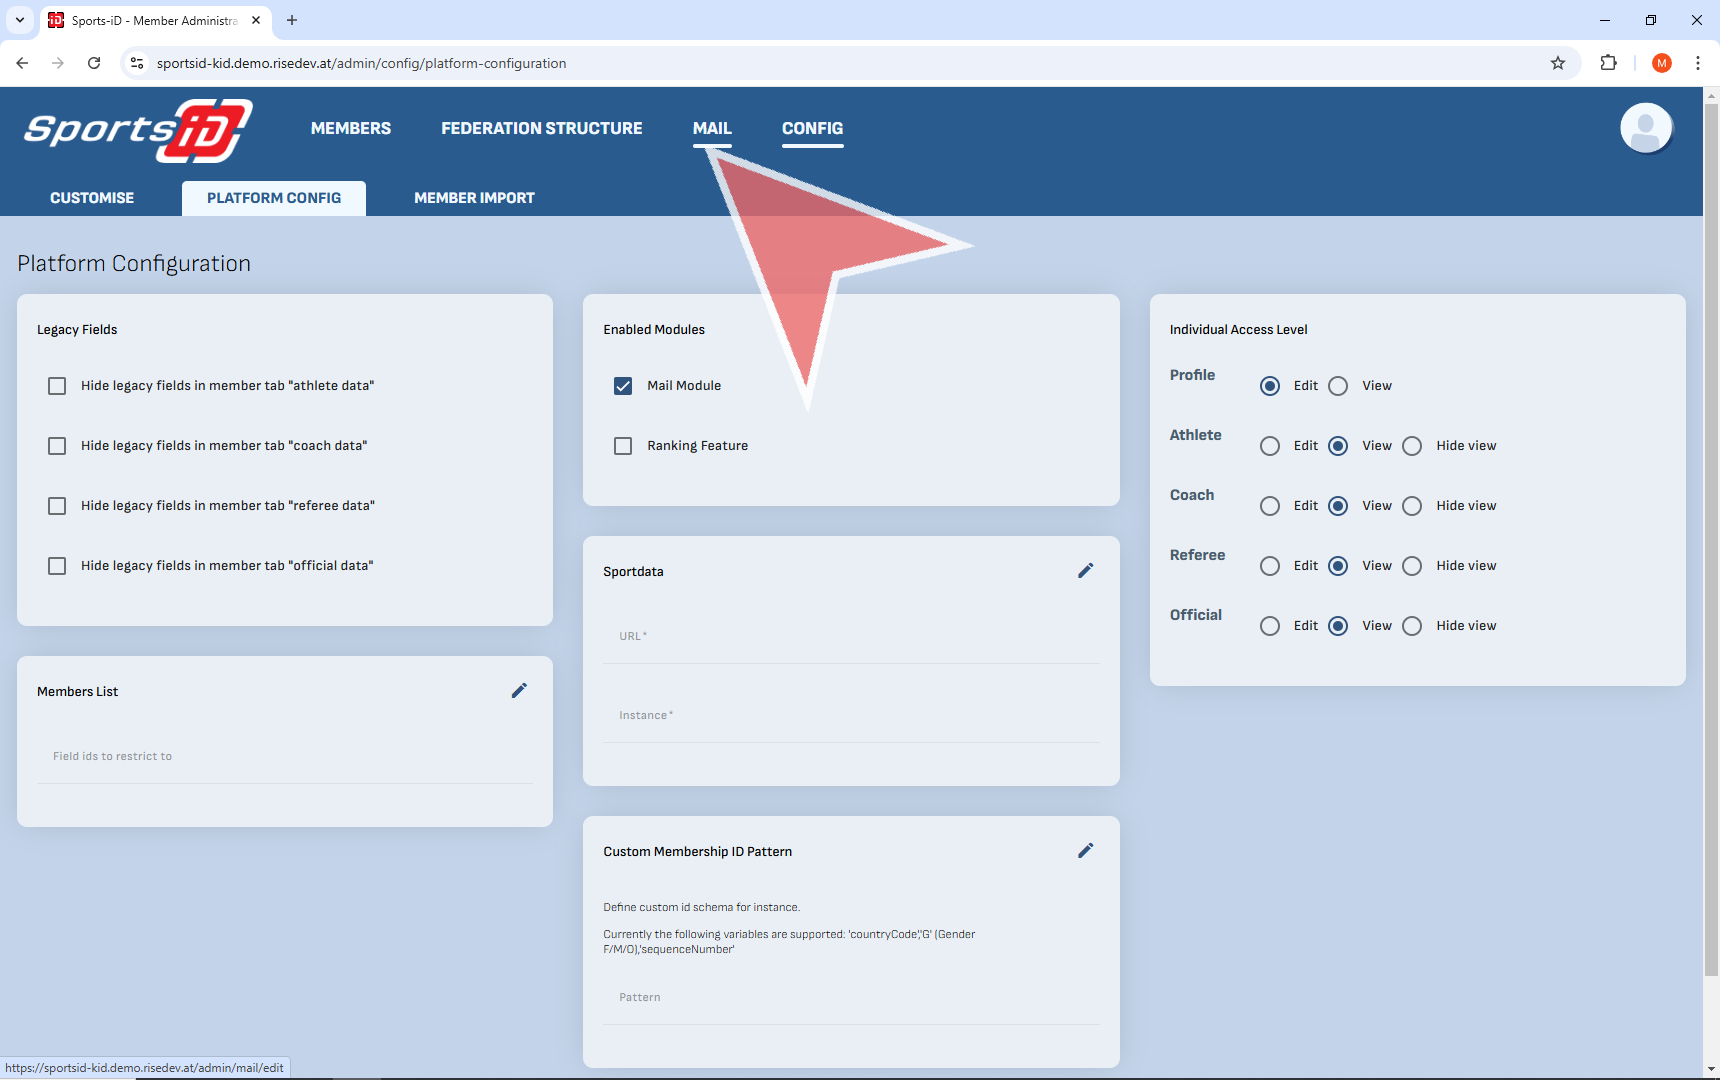
As you can see, the Mail Module appears next to configuration. Click on it to begin preparing your email for your members.

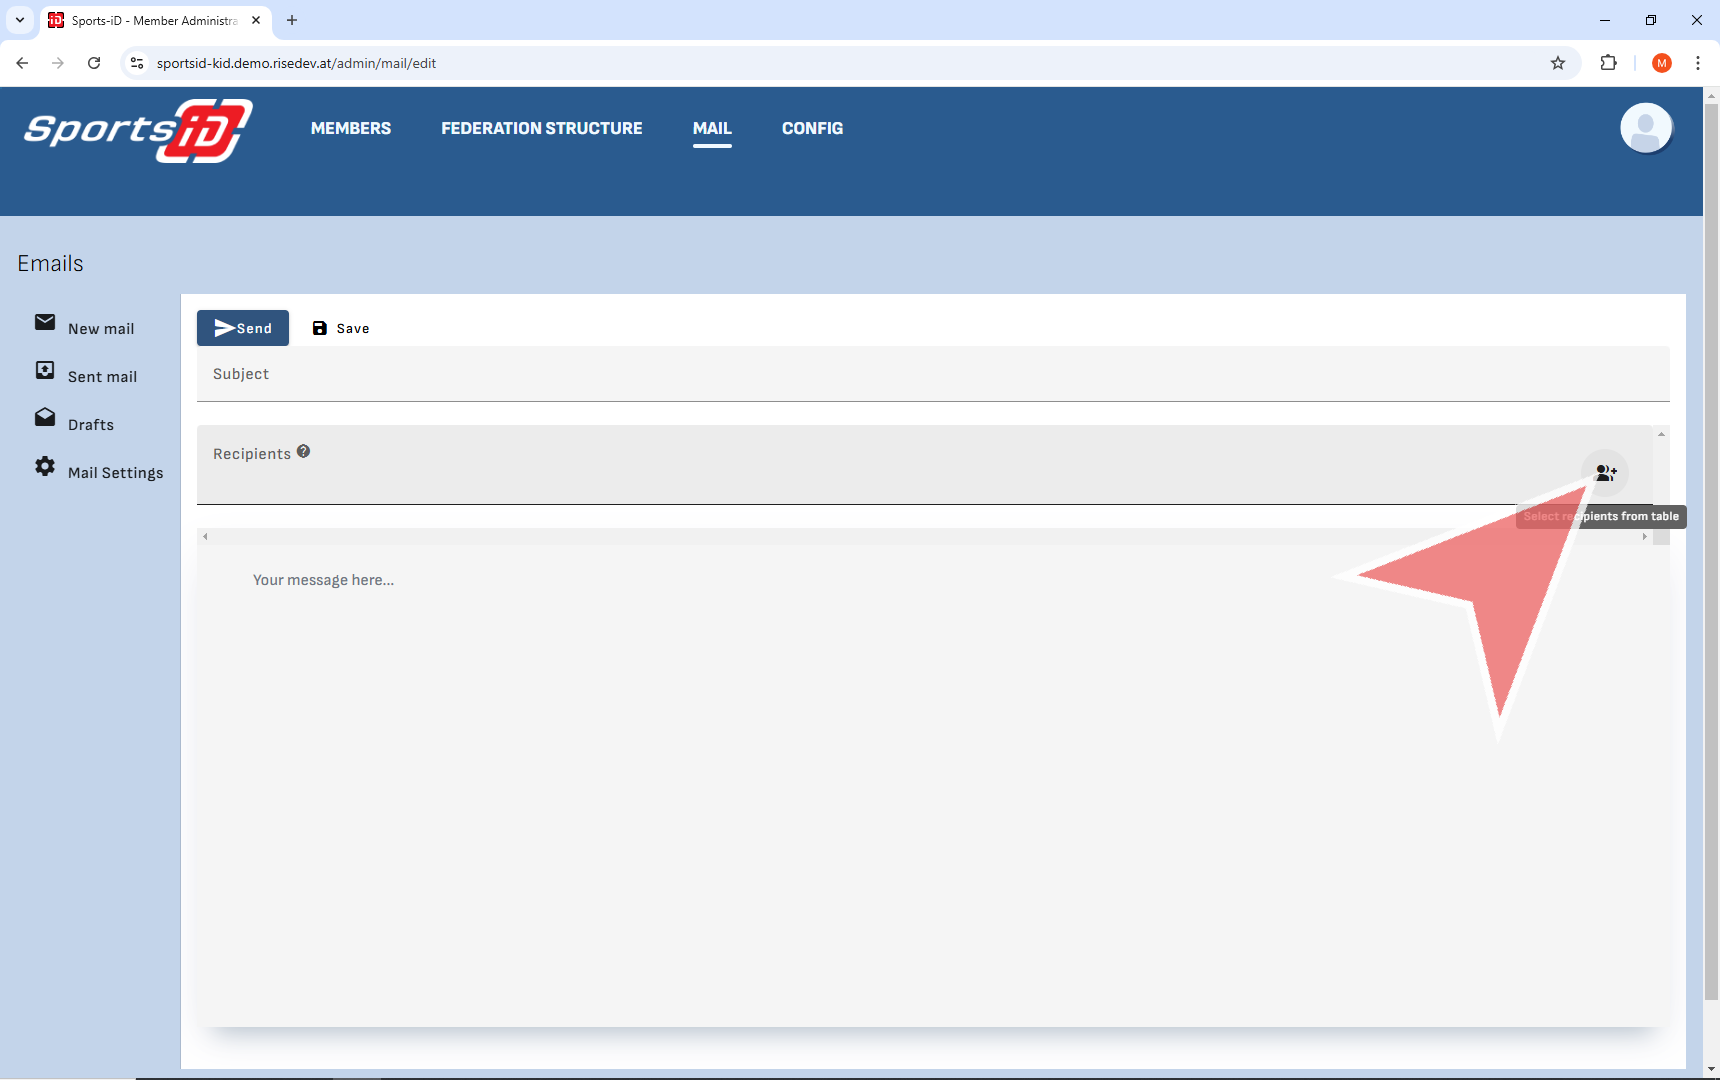
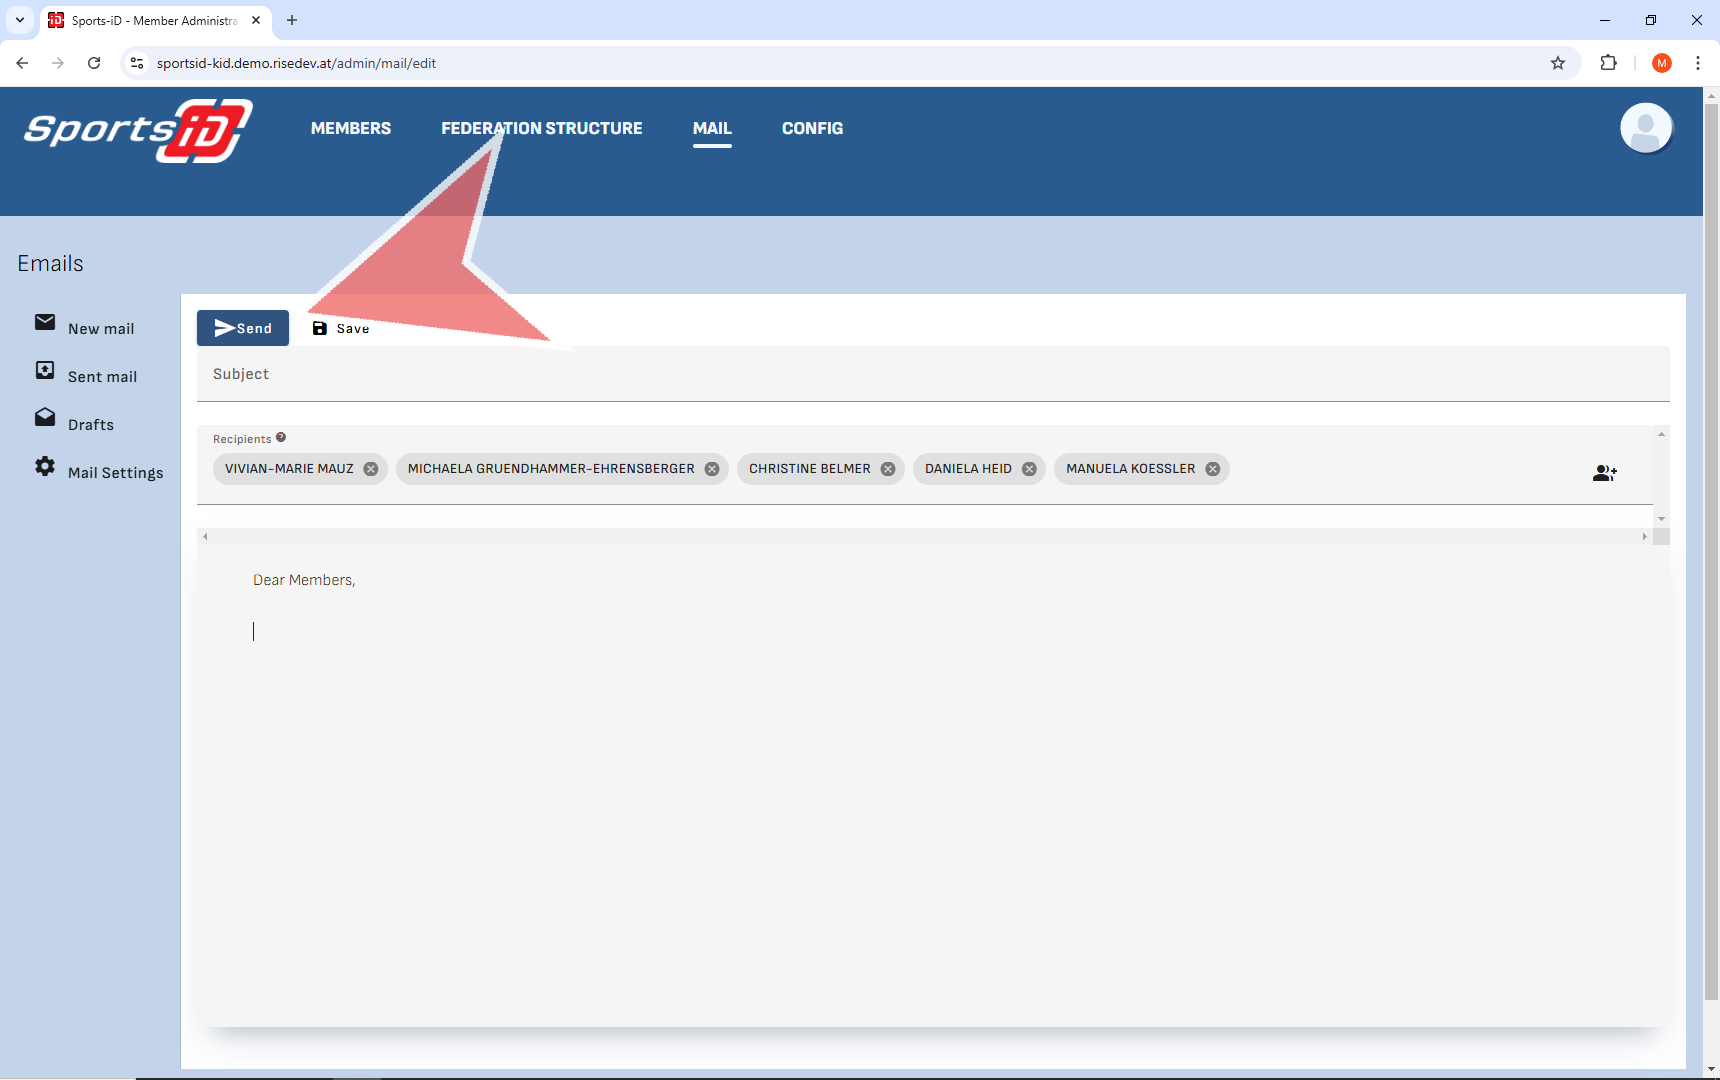
In the mail module, you can select the recipients by clicking the person icon in the recipients field.

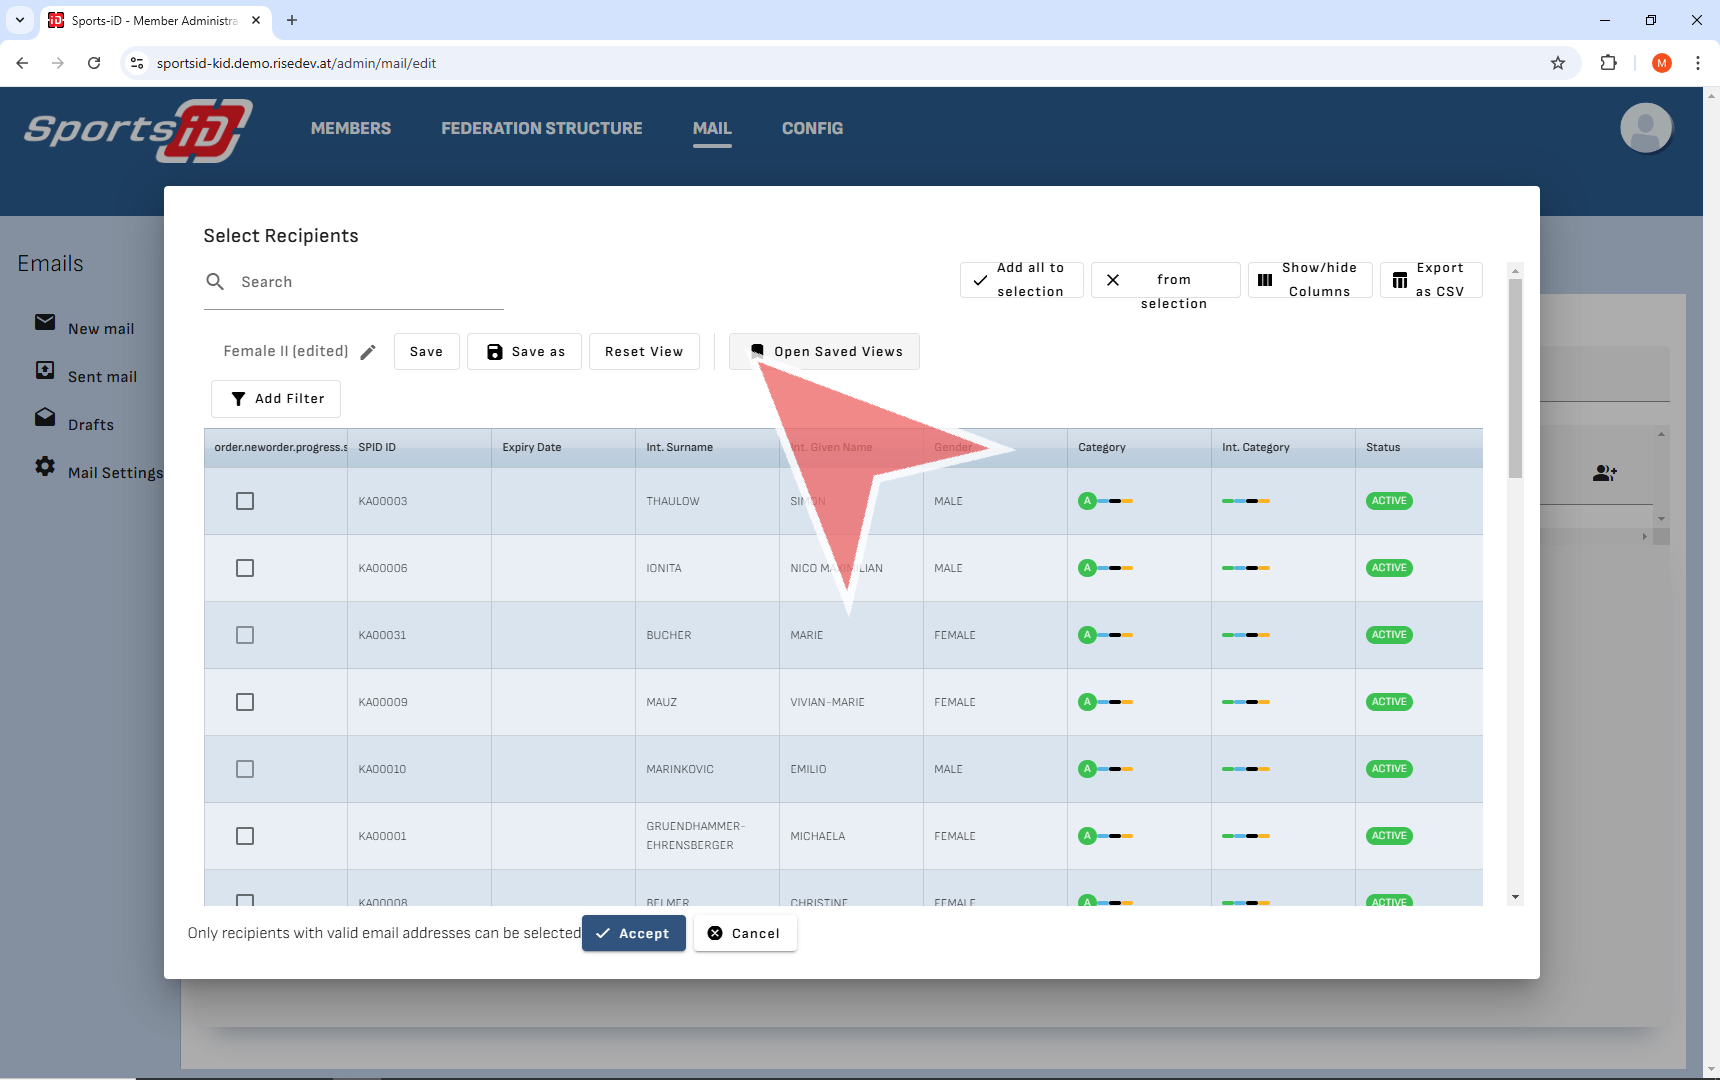
Either select individual members by ticking the box in the first coloumn, searching in the search bar, or opening a saved view. You can also create new saved views with new filters and different with different coloumns, then you can save them and use them in the future by clicking save as.

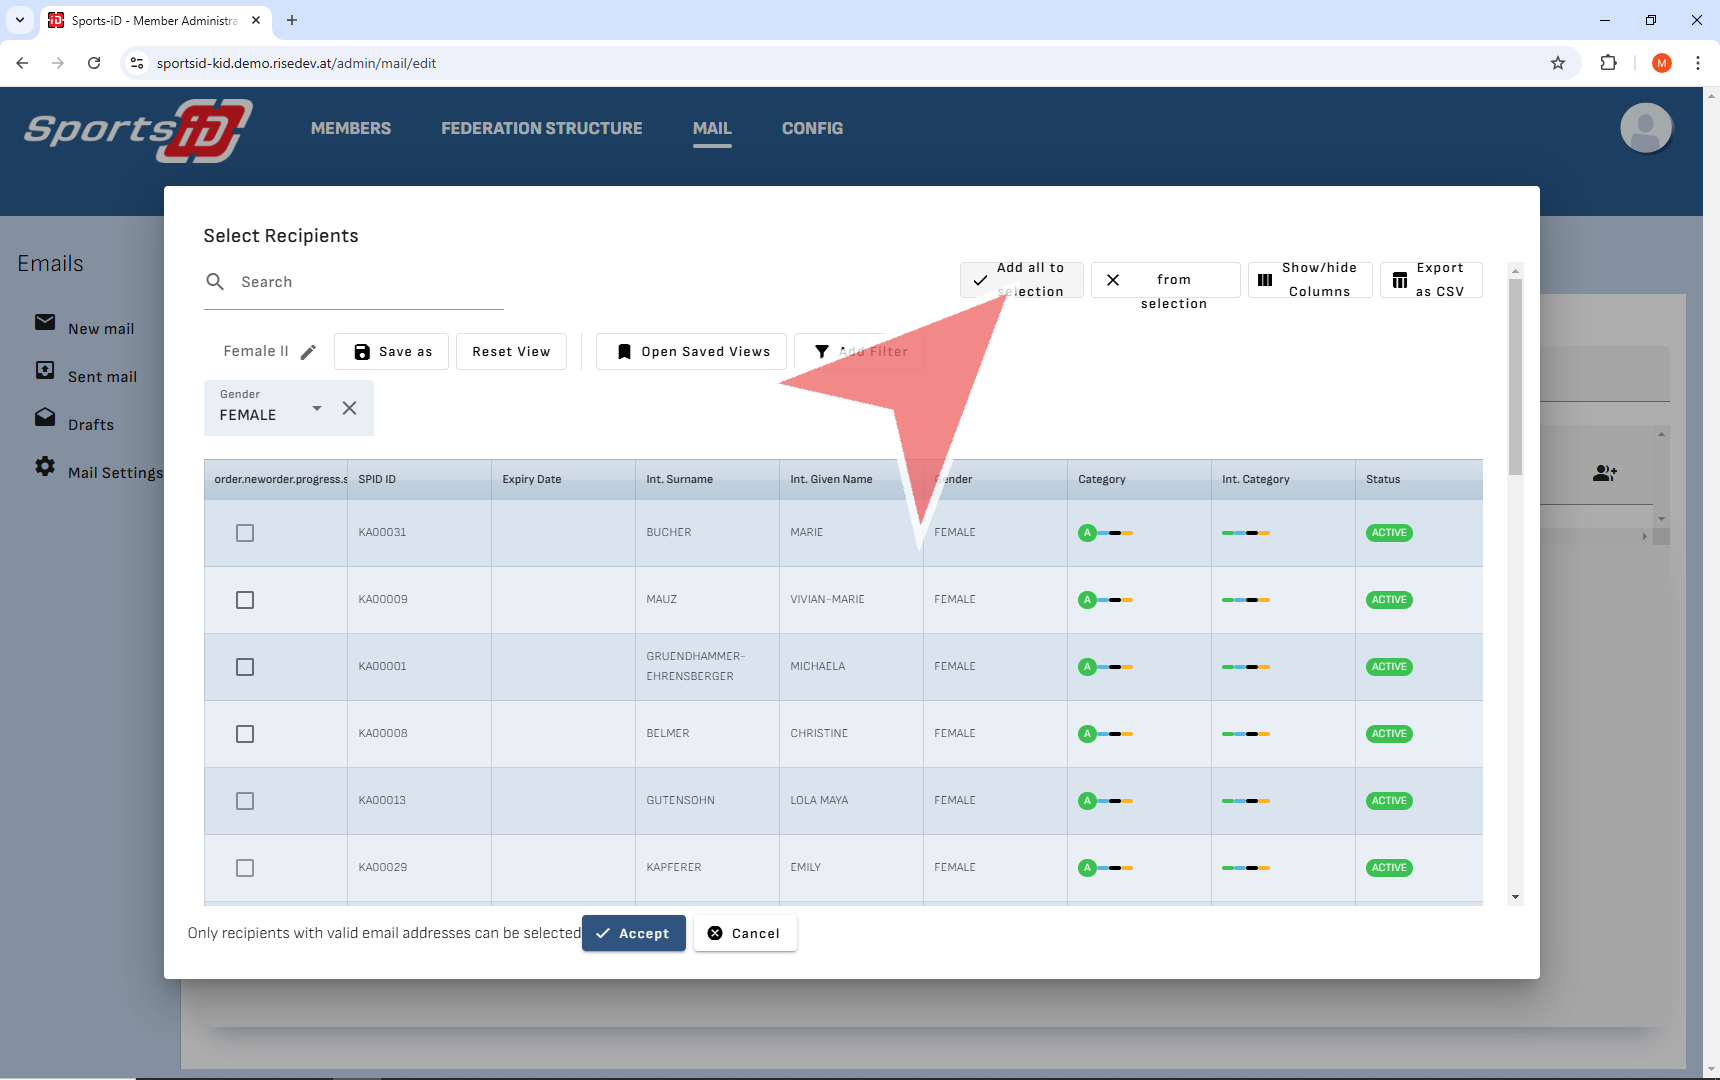
Once you have selected the view you wish to select from, you can click individual or add all to the selection. This will select all members with an email in your list.

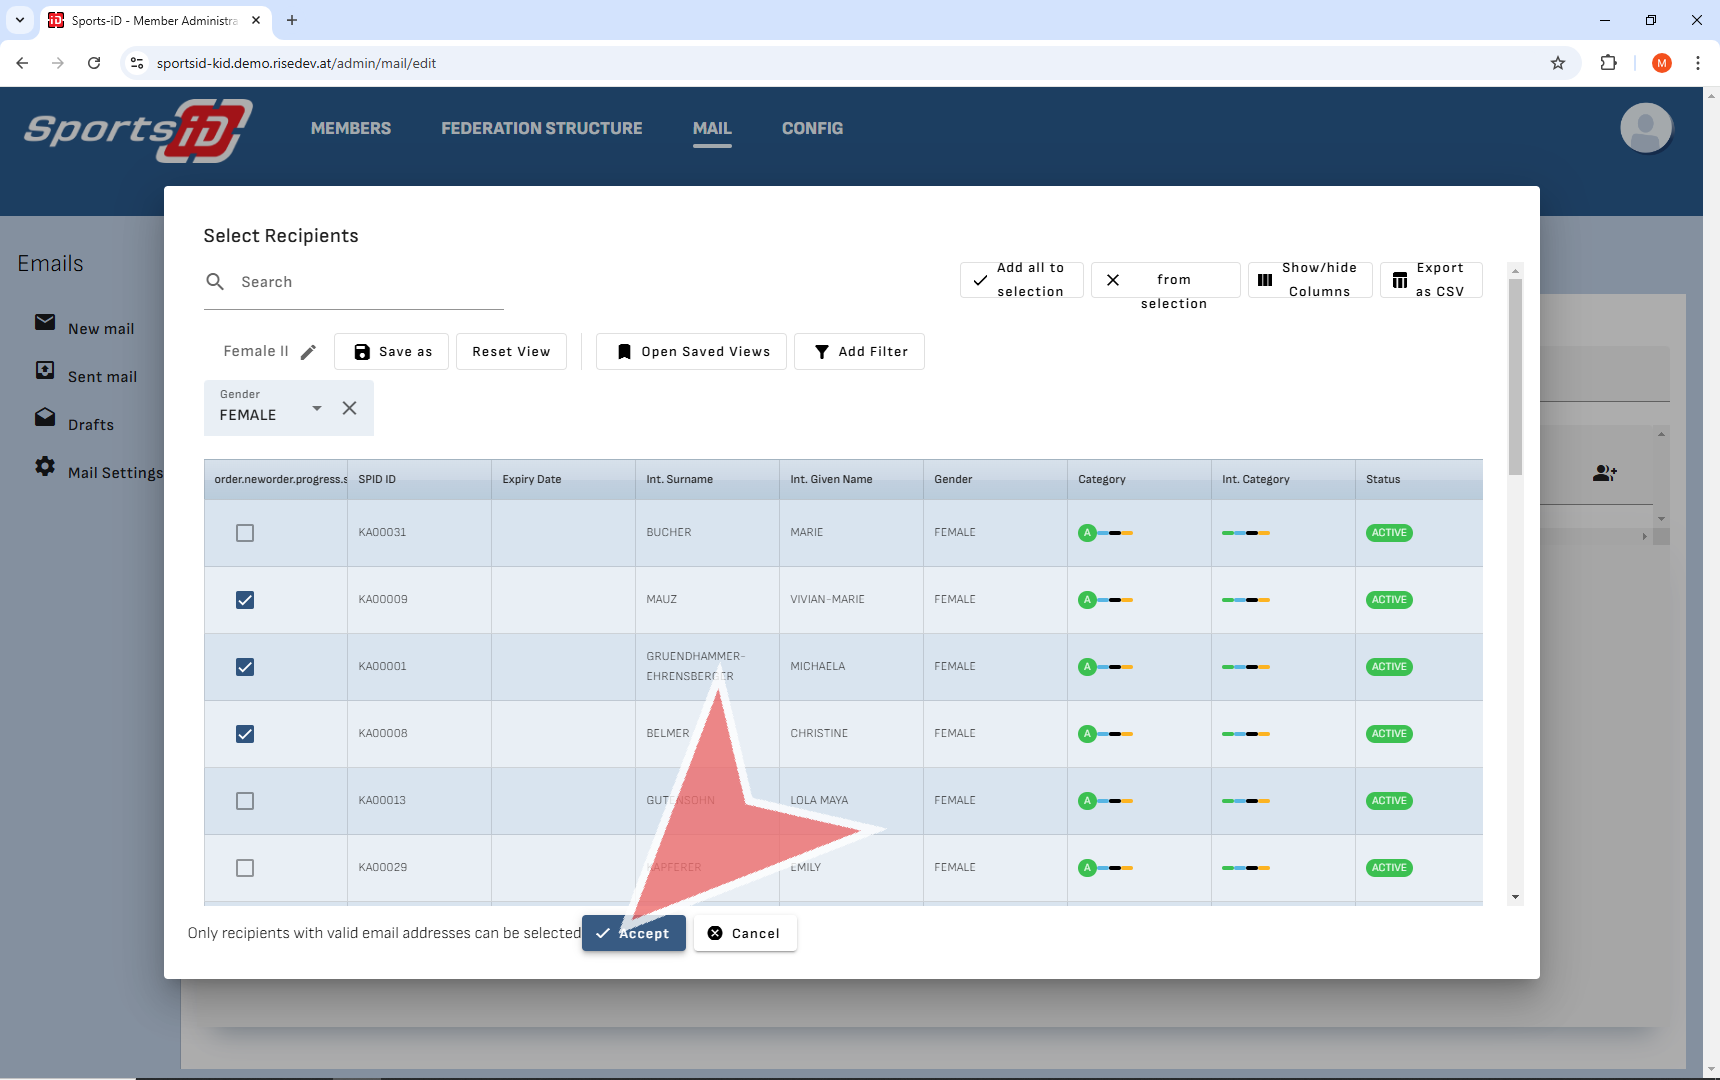
When ready, press accept to add the email addresses to the email.

To finish, write the message to your members, with a subject and press send.

Approve individual membership requests

Interactive Demo

 
How to approve membership requests

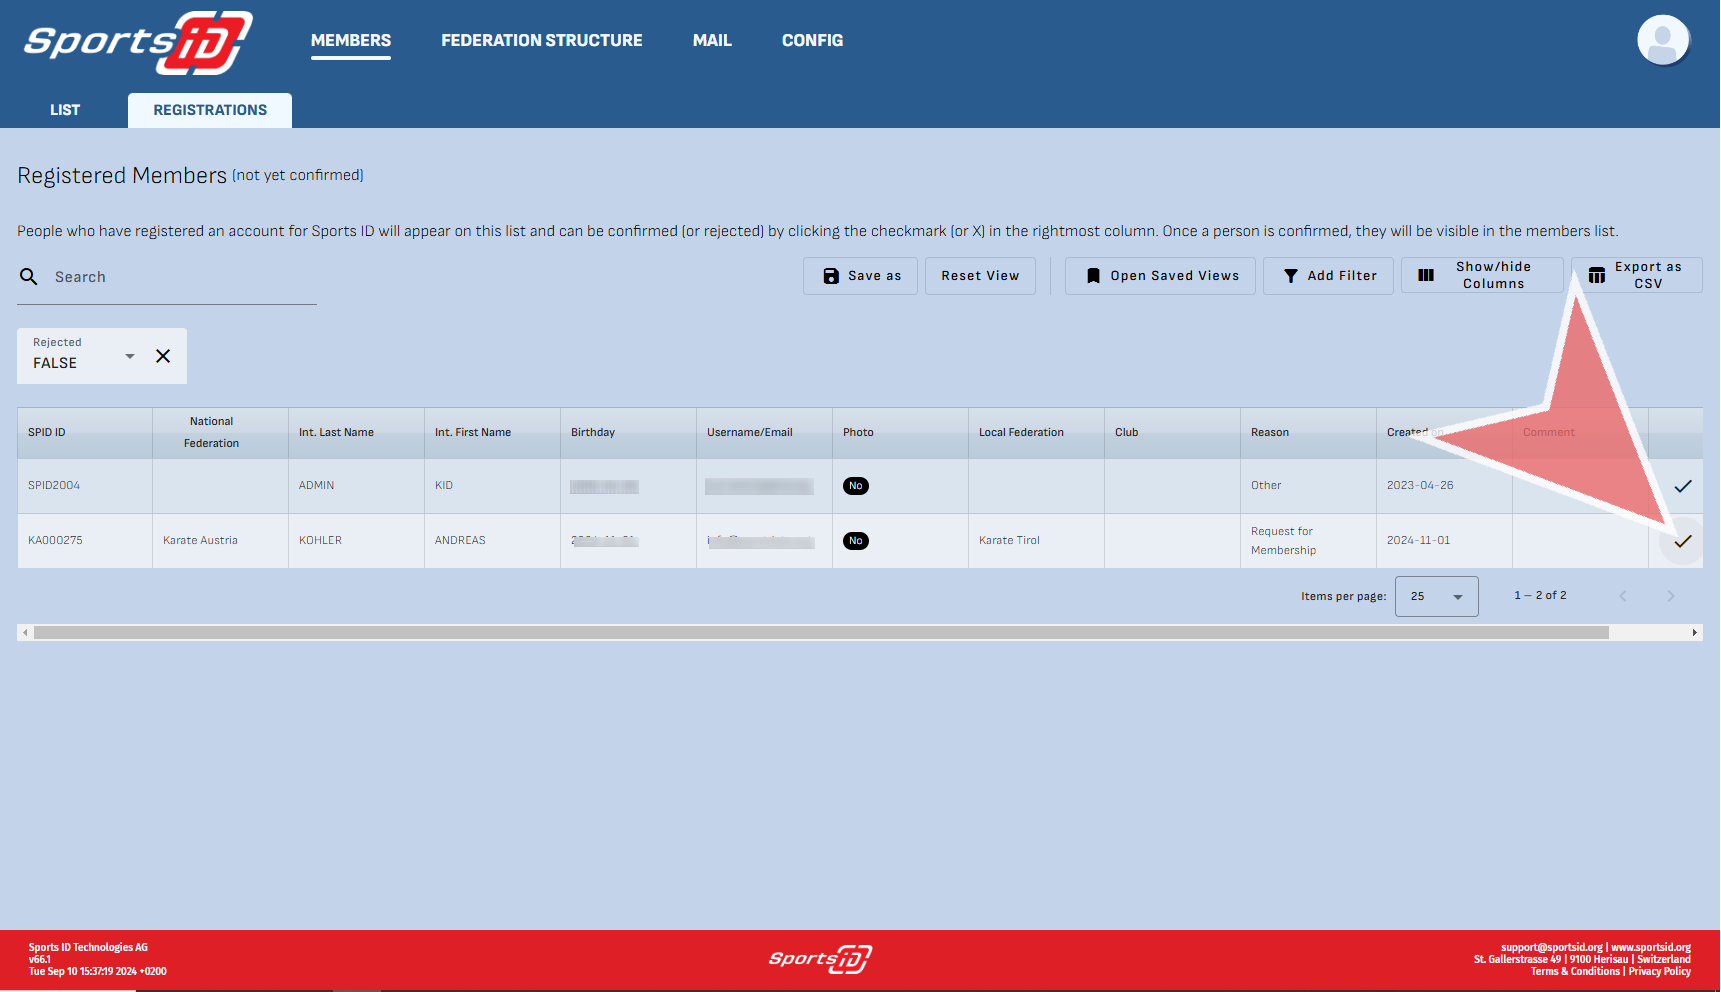
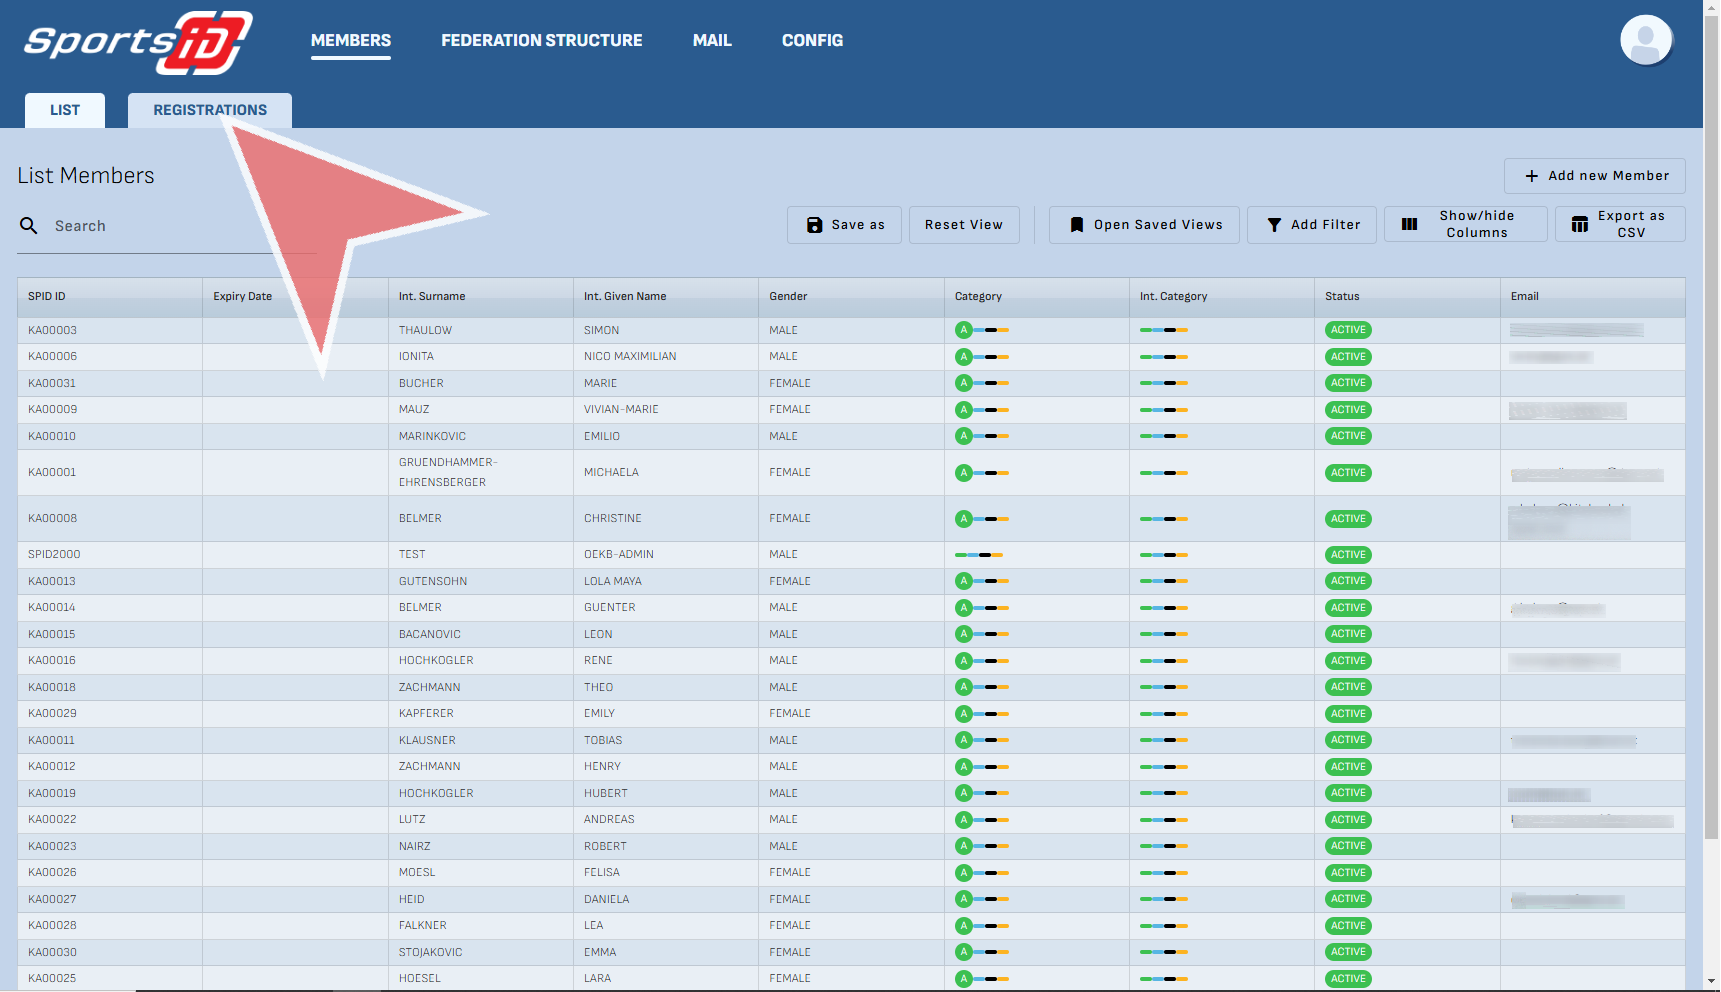
To approve new member that have registered, click on the ‘Registration’ tab to see all pending members.

You can see all members who have not been approved. In order to approve their registration, click the check mark on the right hand side and the account will be transferred to the Member’s ‘List’ Tab.

Change status & add category

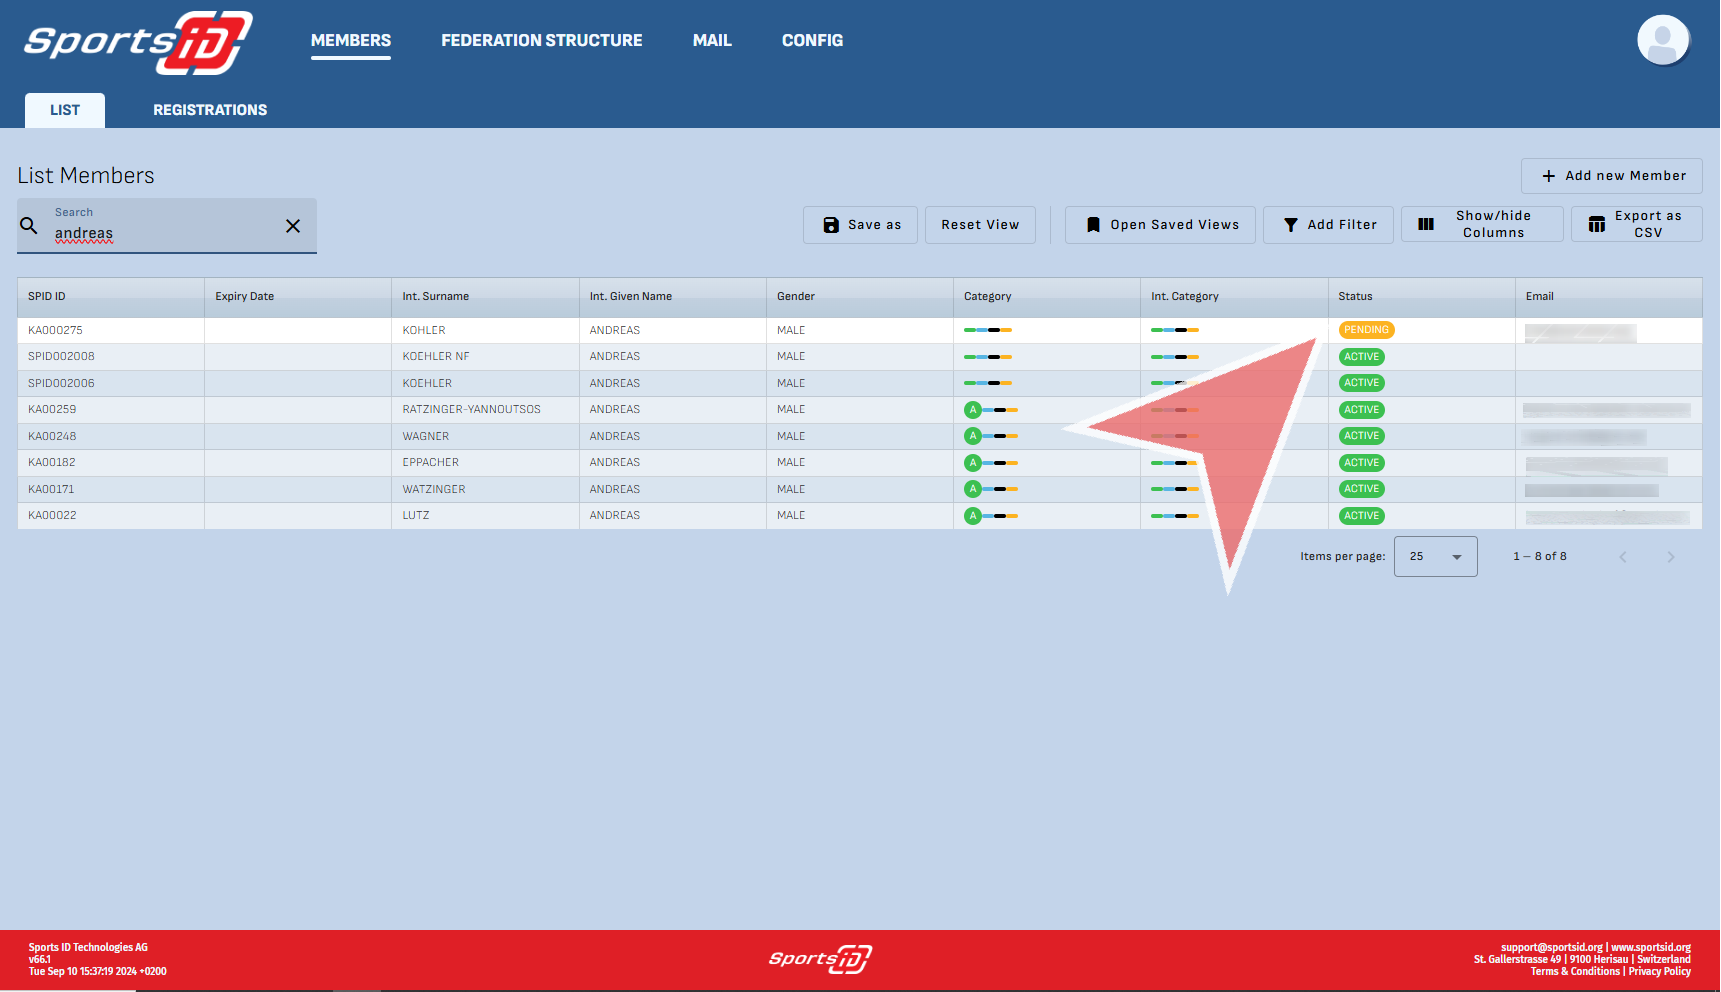
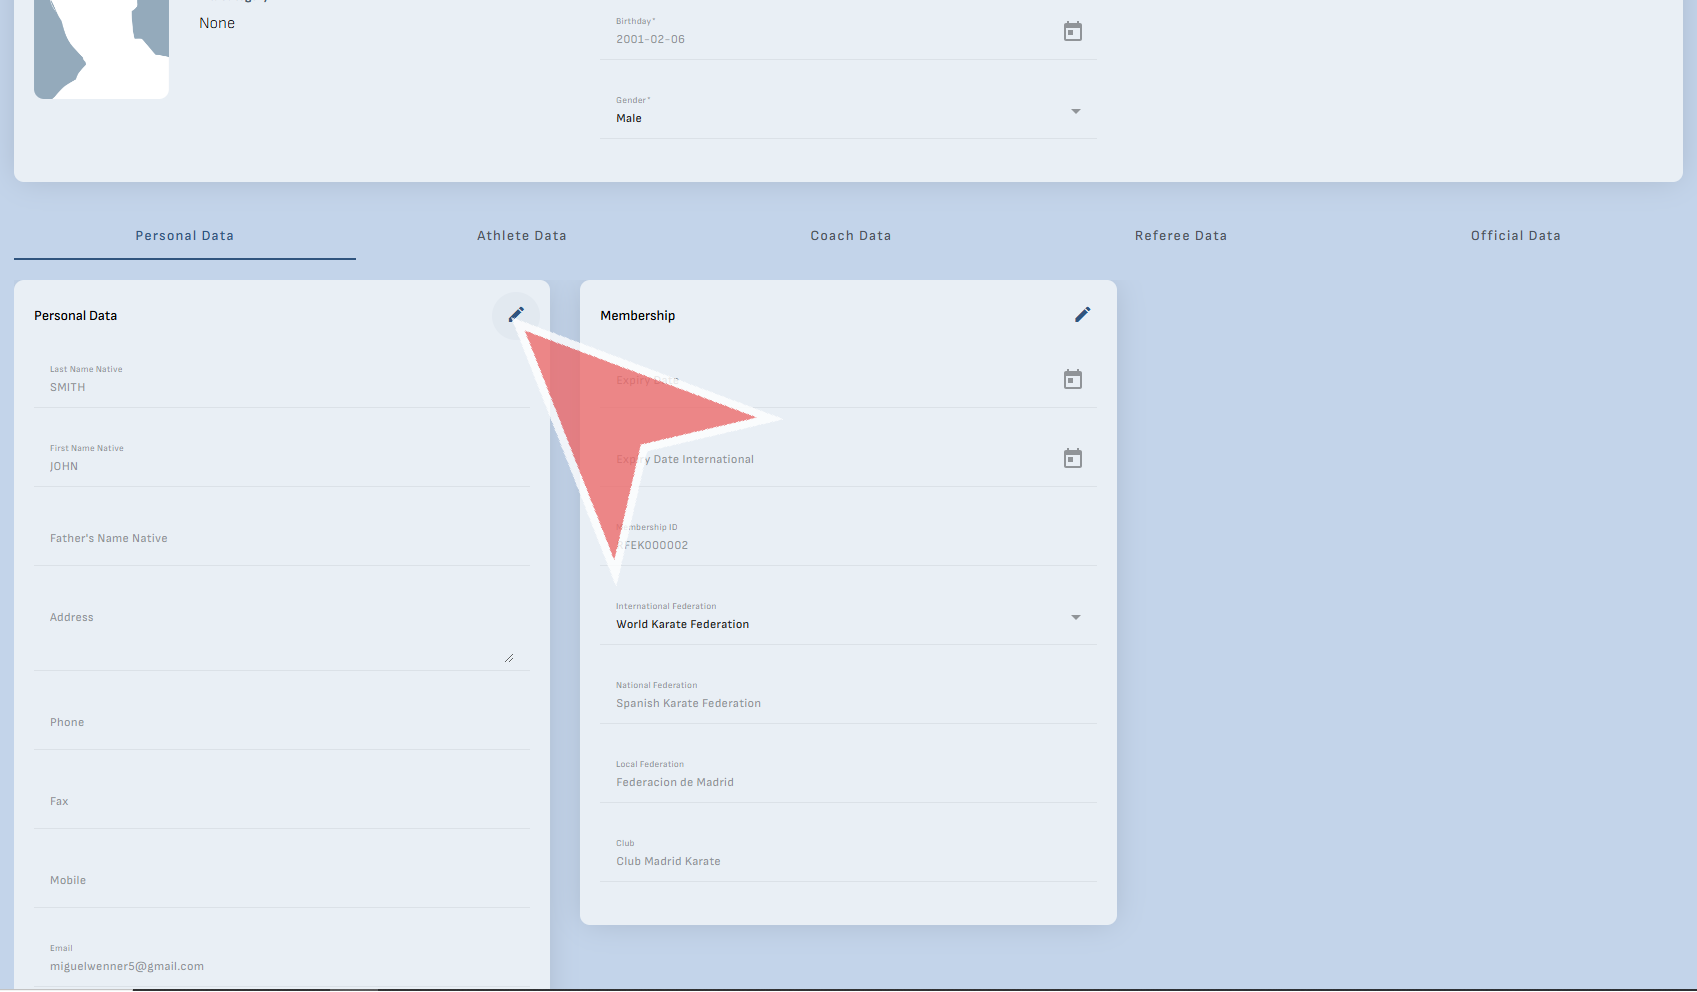
You will see that the status of the individual is pending, and has no category (athlete coach, referee) assigned to them. Click on the profile to edit their data.
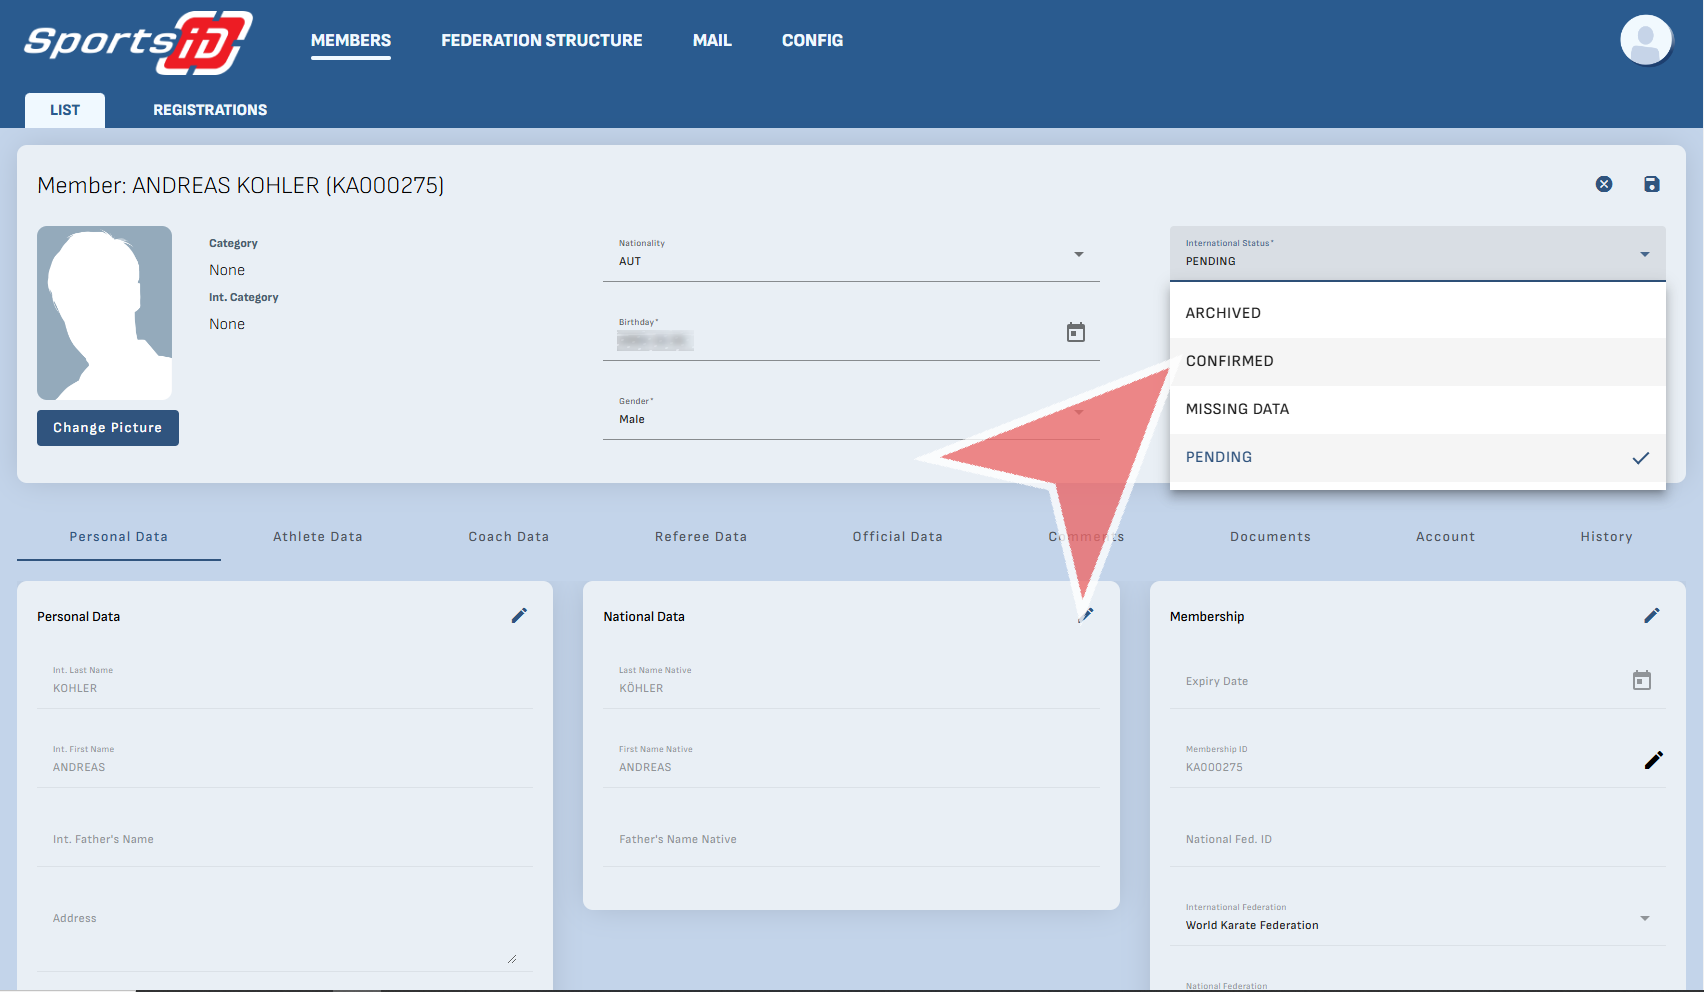
International Status

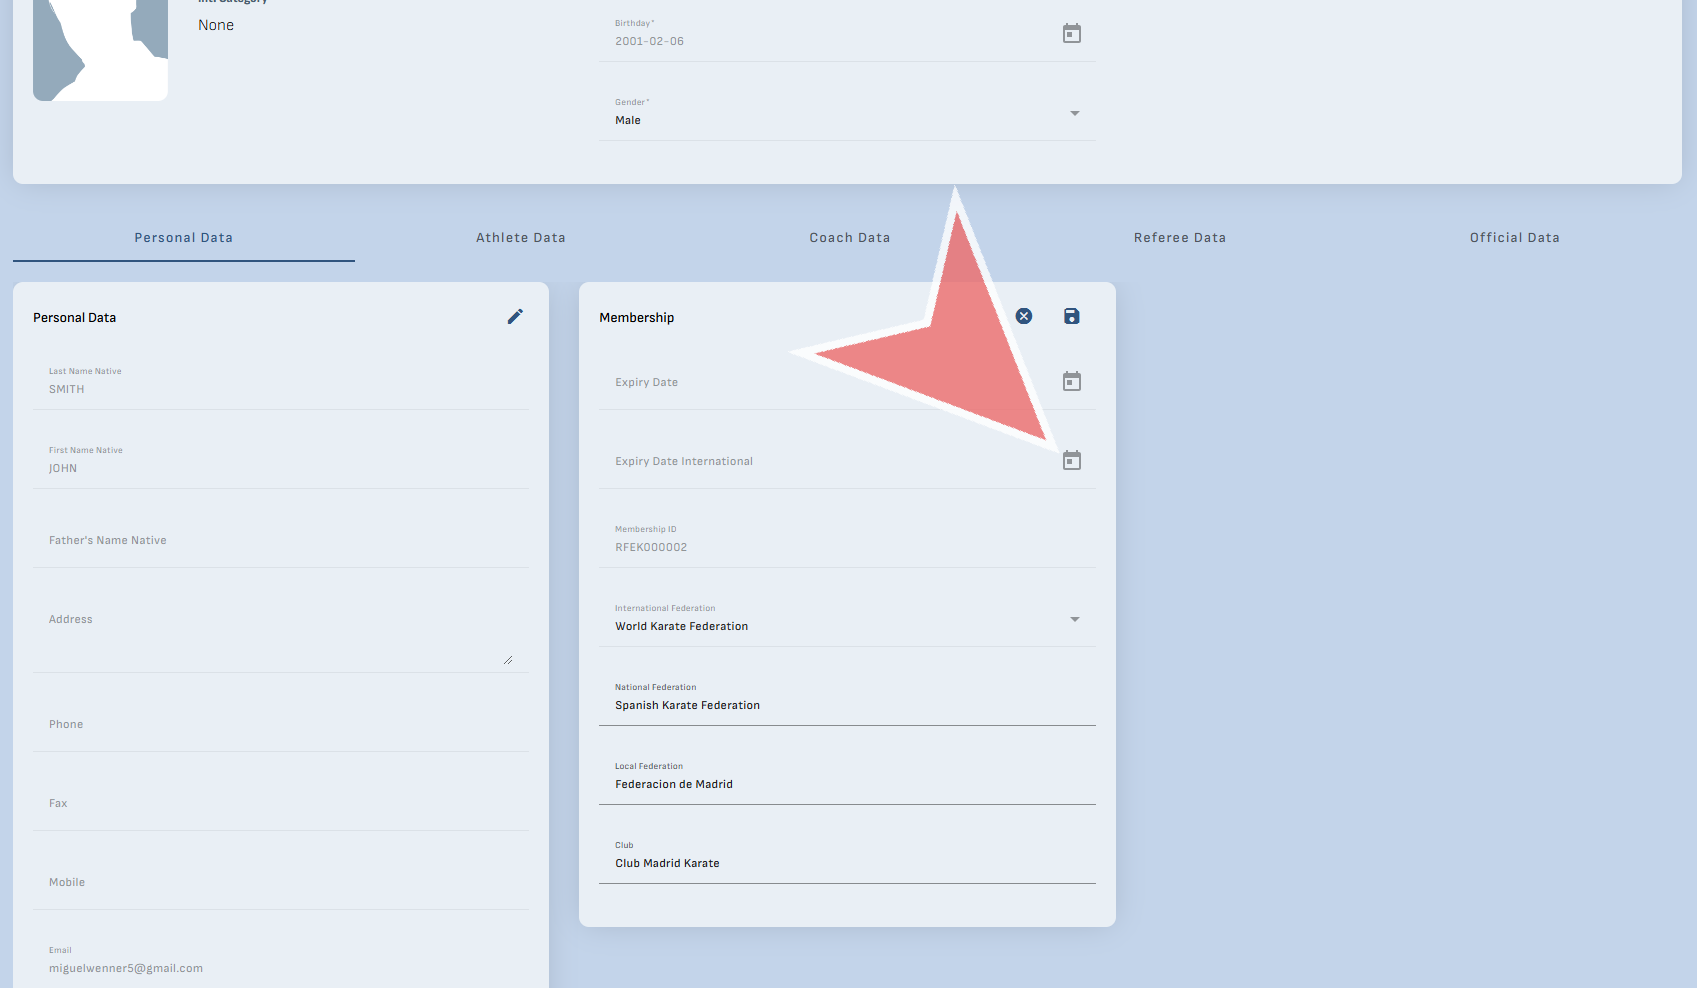
Now, as the international federation you can confirm a new member as internationally active by clicking on ‘International Status’ field and selecting ‘Confirm’. Additional you could add ‘Archived’ if the account becomes inactive, or ‘Missing Data’ if you are waiting for them to provide additional information like a photo or certificates.

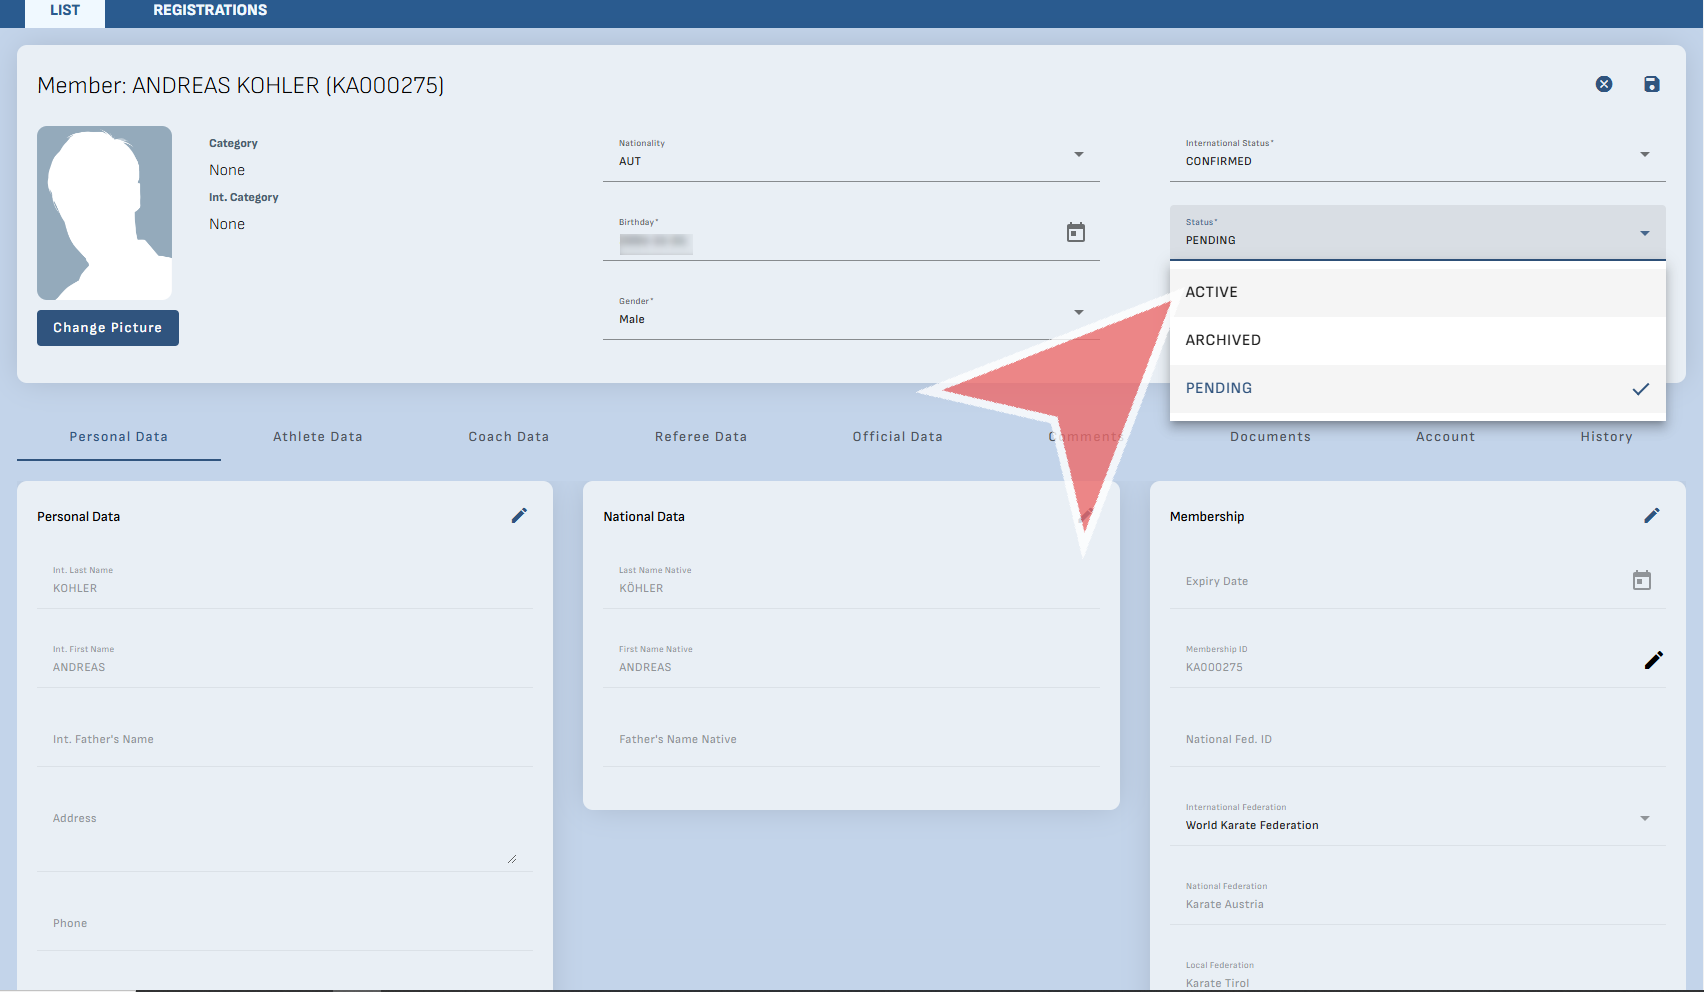
Status

Parallel to the international status, there is also the status within your structure which you can decided as a federations.

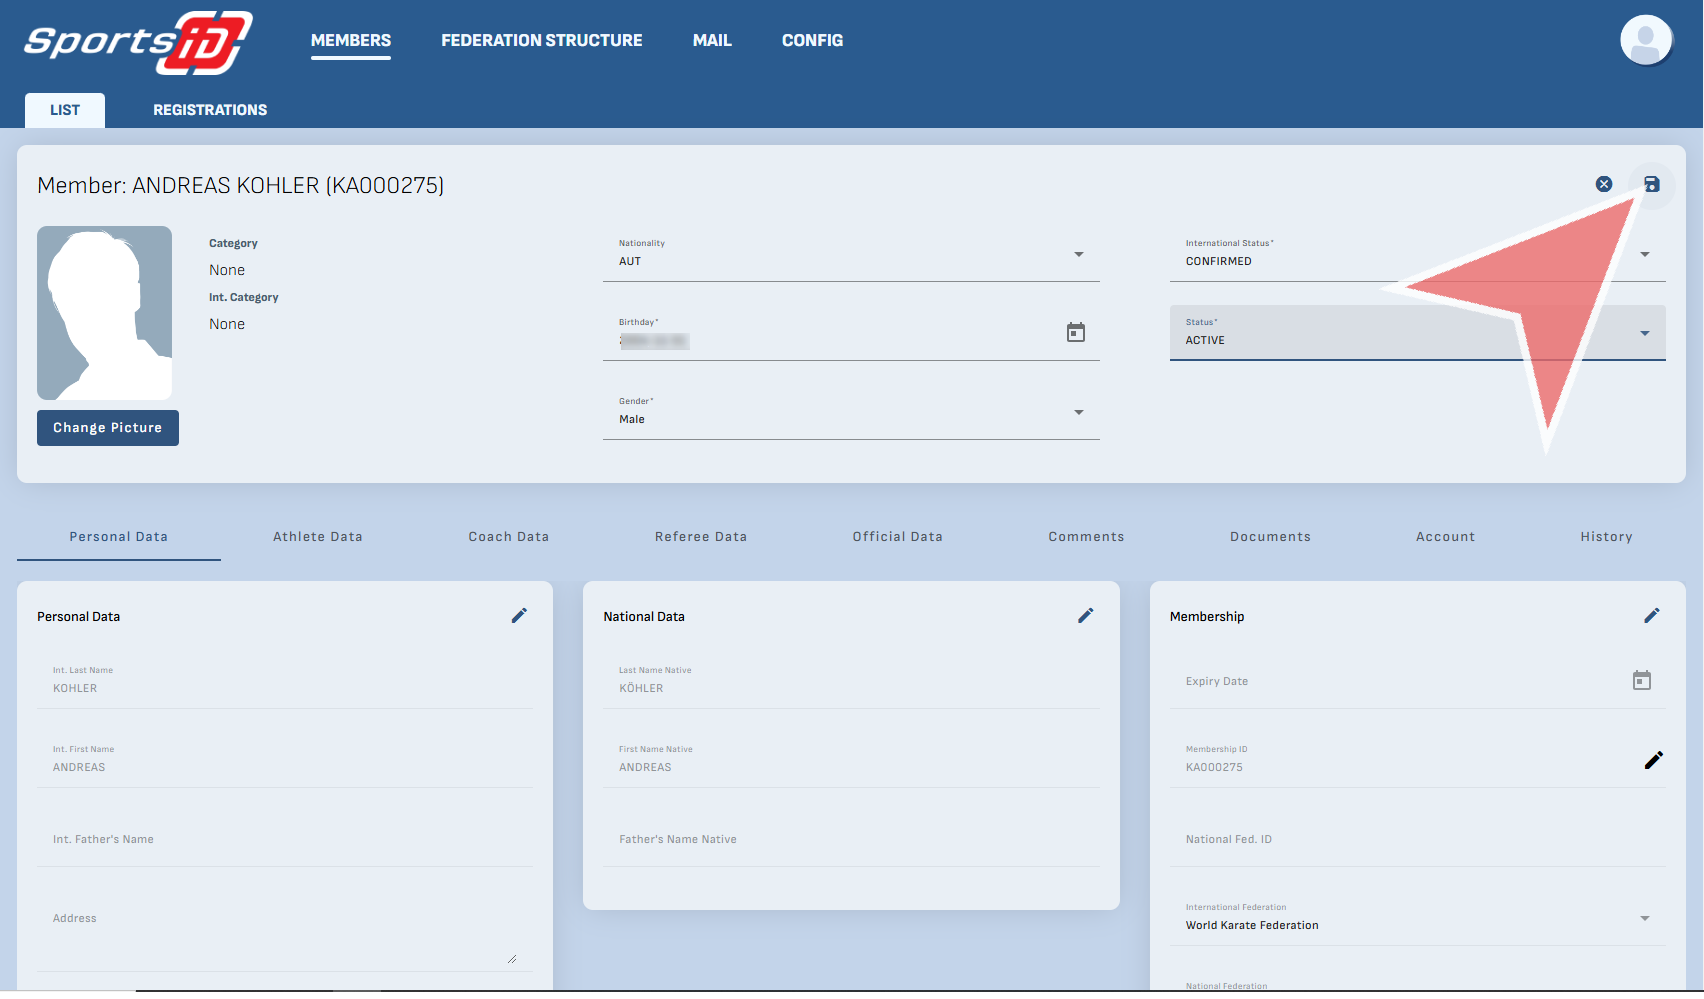
To save, click the ‘Save’ Icon.

Finally, you will notice that their status has been changed to ‘Active’.

Add a new member manually in Sports-ID

Interactive Demo

 
How to add a new member manually in Sports-ID

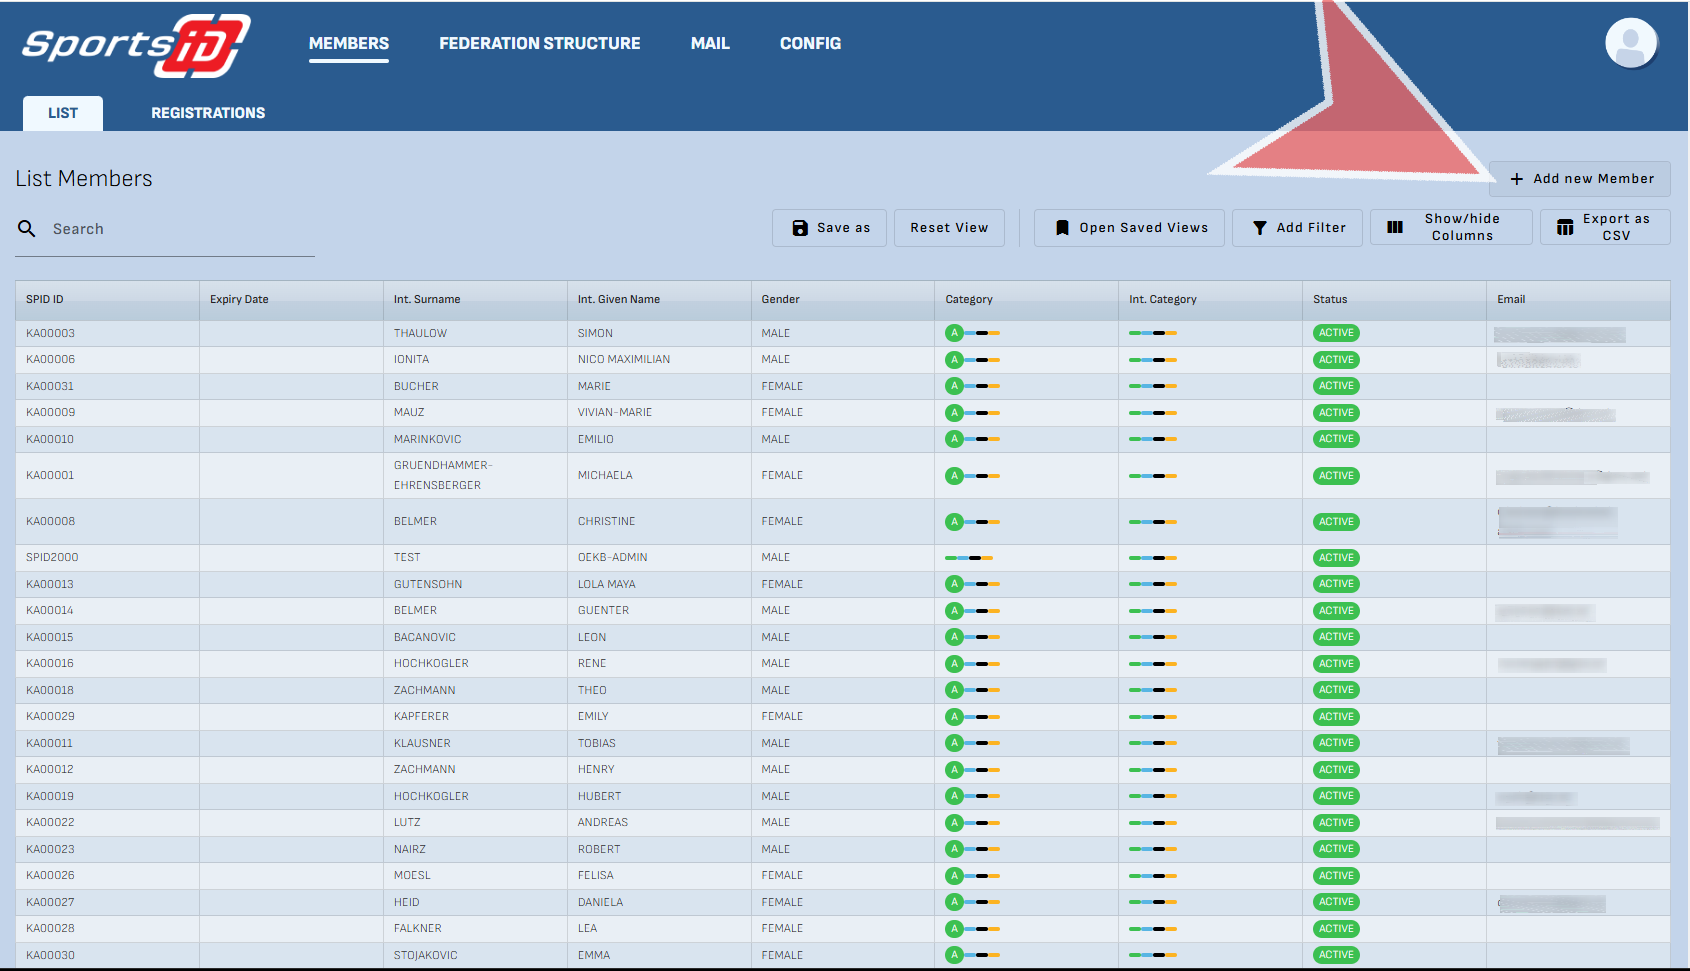
To add a new member, click on the button labeled ‘Add New Member’.

Now, simply fill out the information and click ‘Add New Member’.

Edit Profile Status

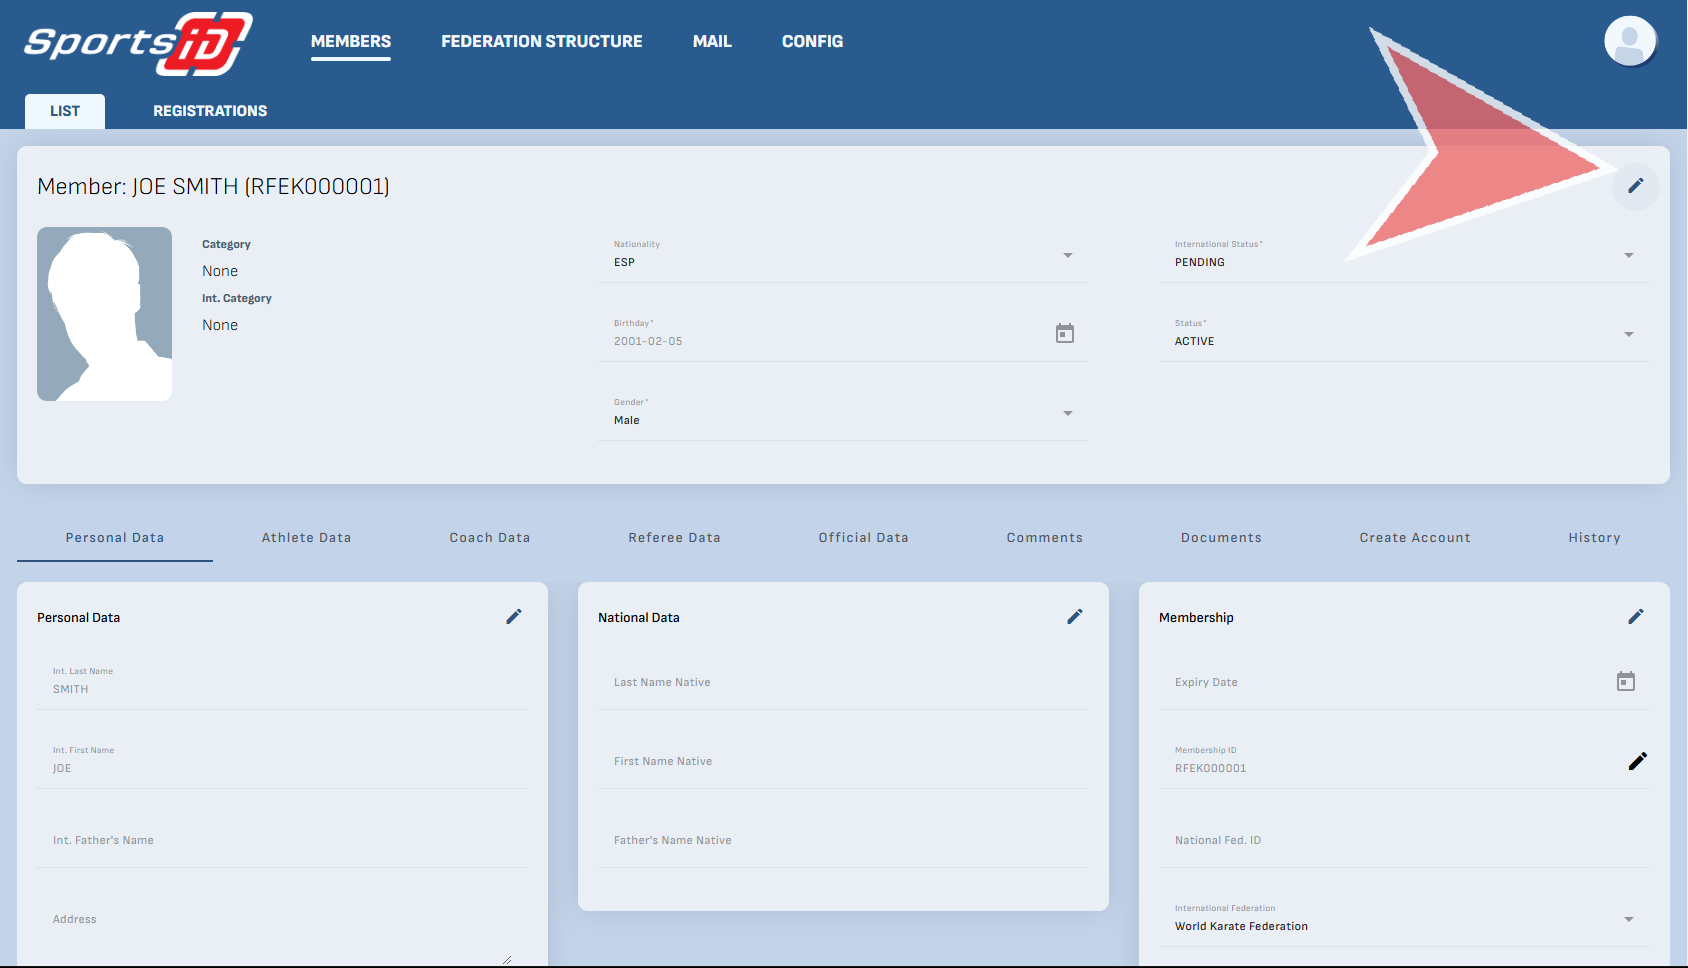
To edit the status of the new member, click on the edit icon on the top right corner and select Active, Pending or Archived.

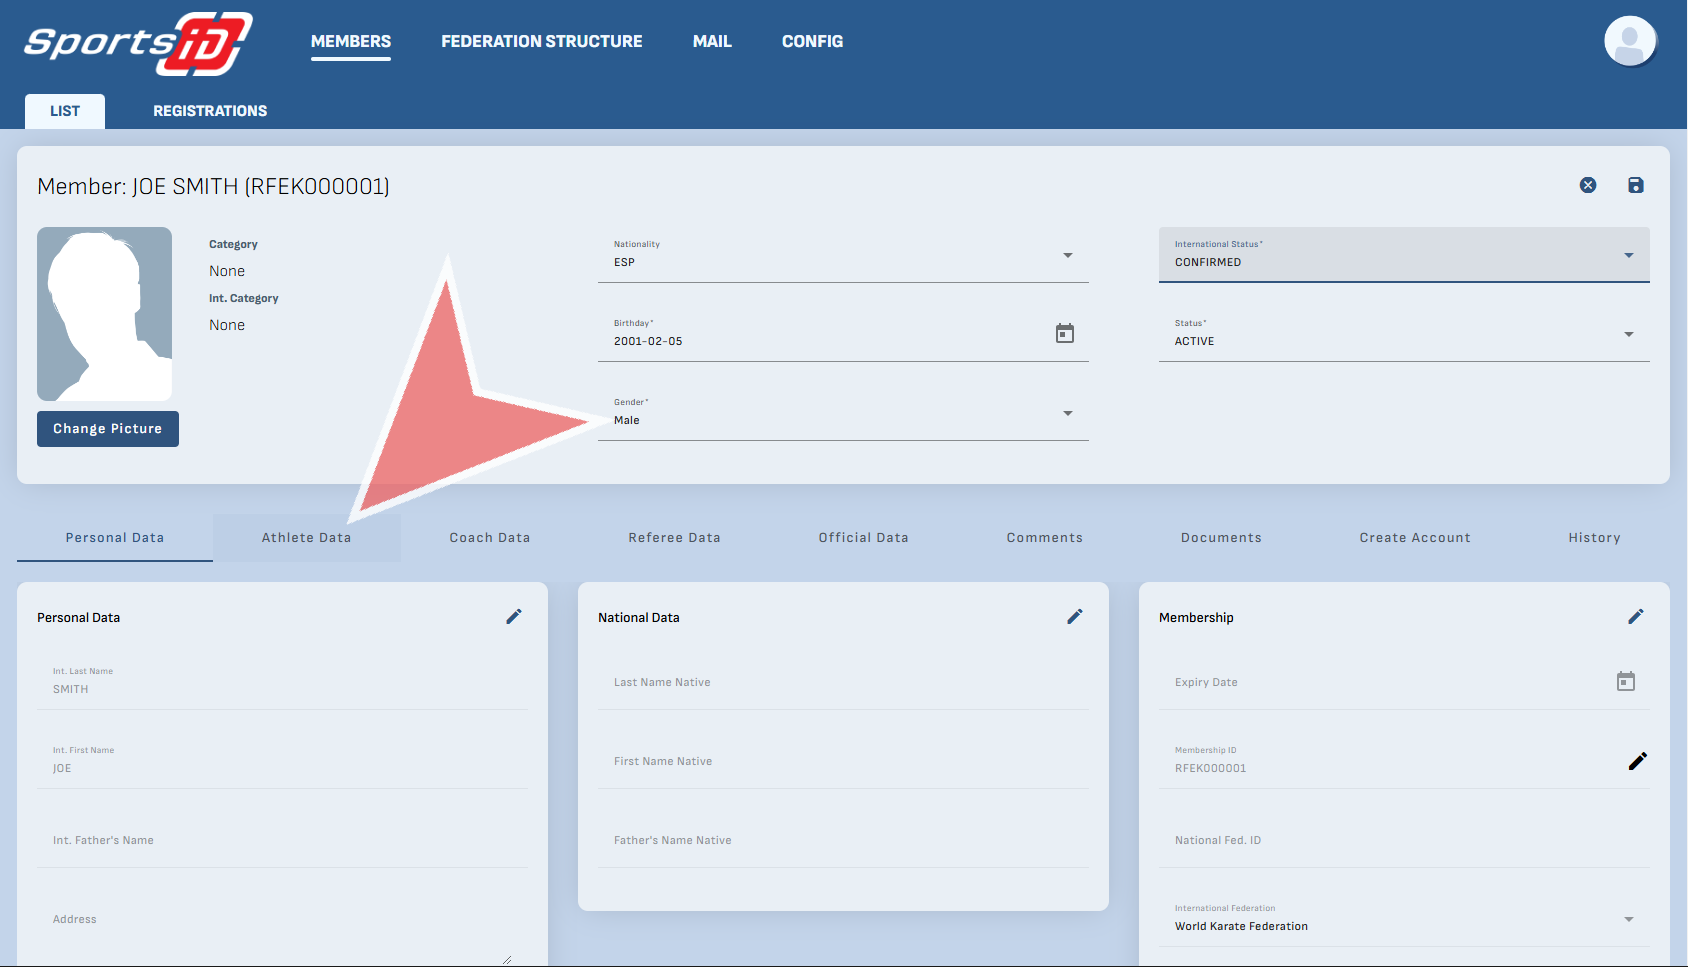
Additionally, there are multiple tabs where the data can be edited including personal, athlete, coach, referee, official. You can also add private or public comments, or documents to their profile.

Add a document

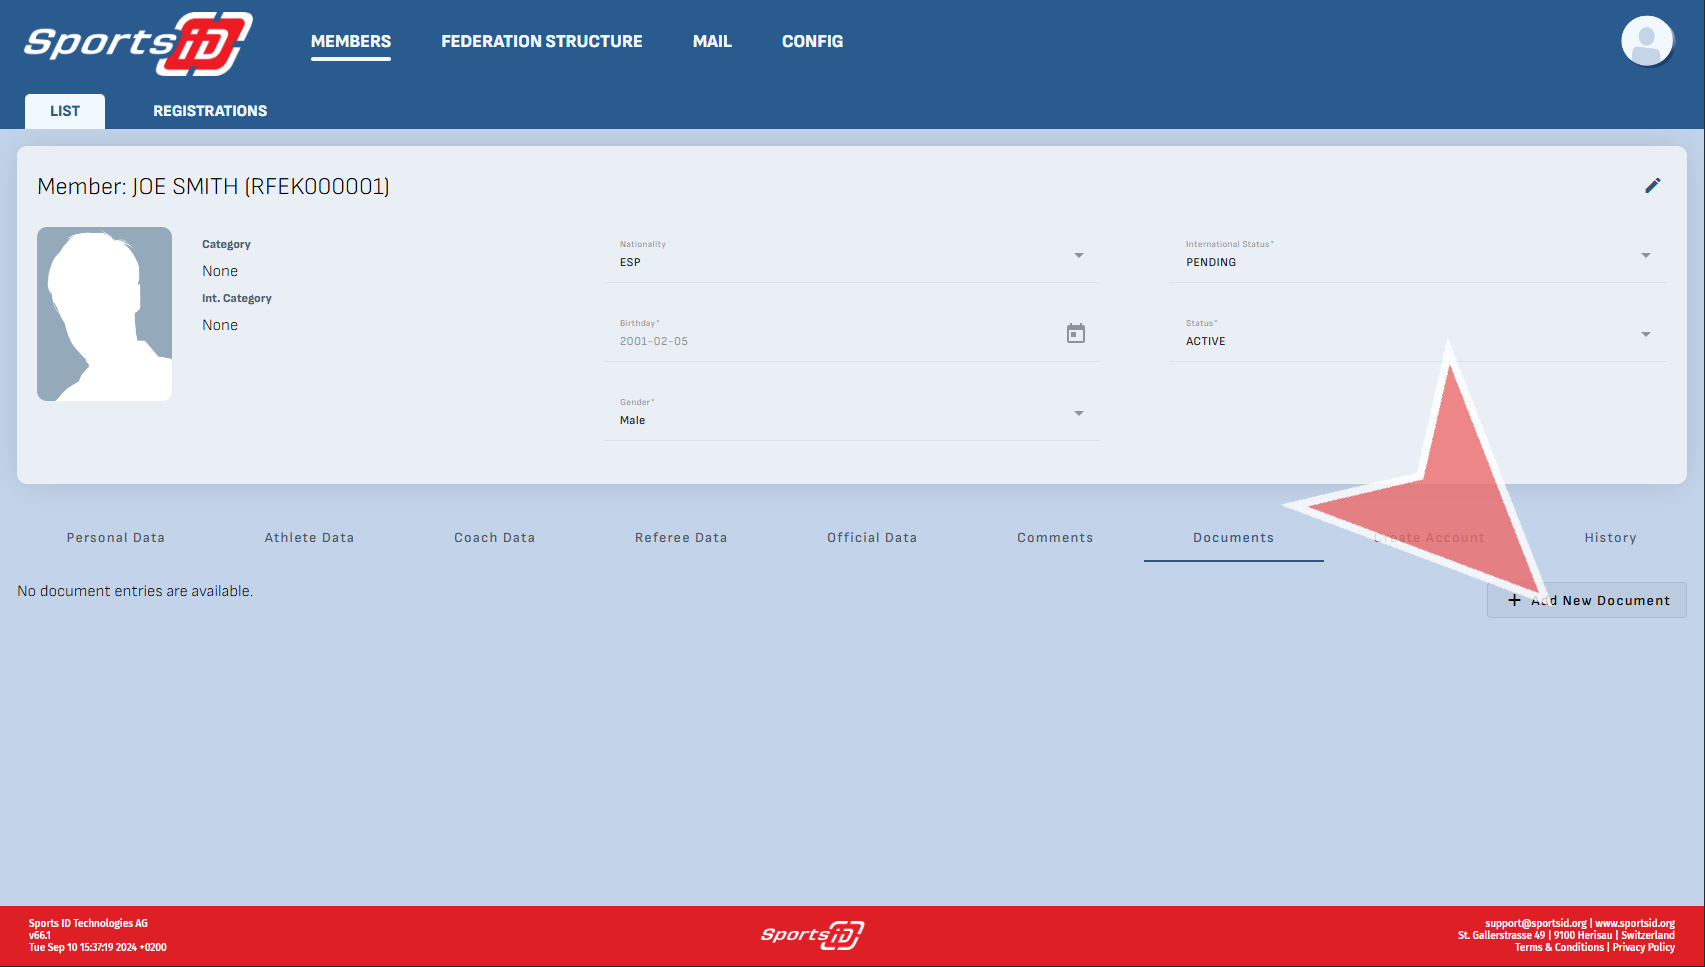
Click ‘Add New Document’

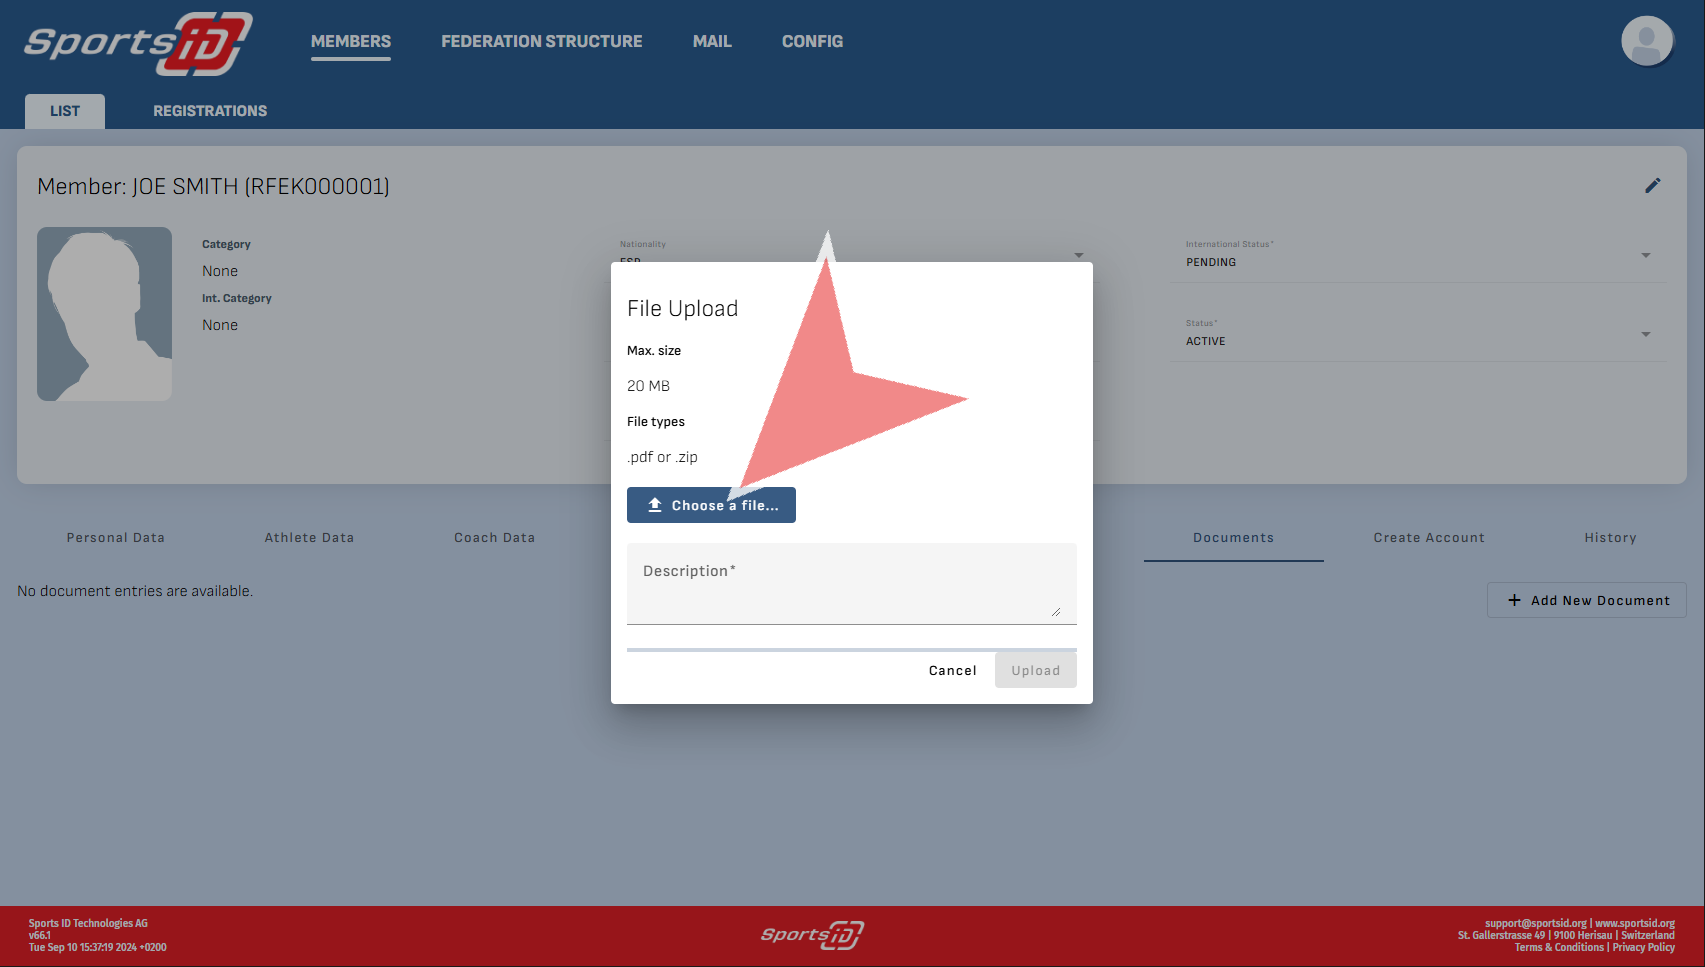
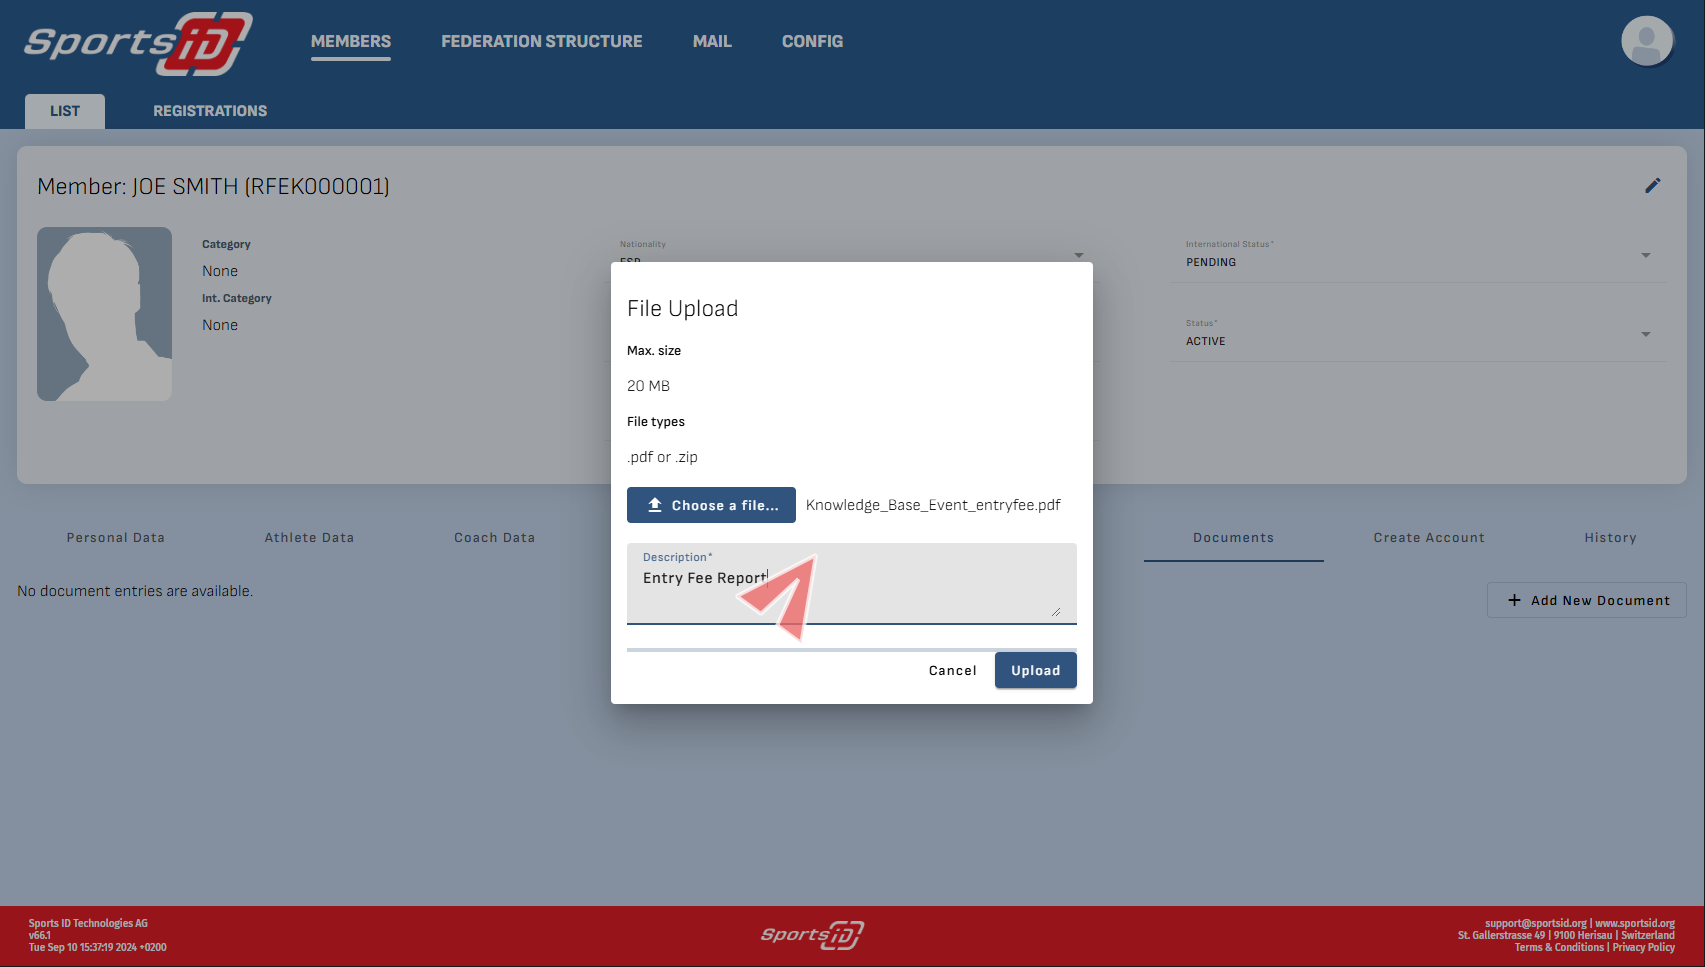
Chose a file.

Provide a description for the document you have just uploaded and press the ‘Upload’ button when finished

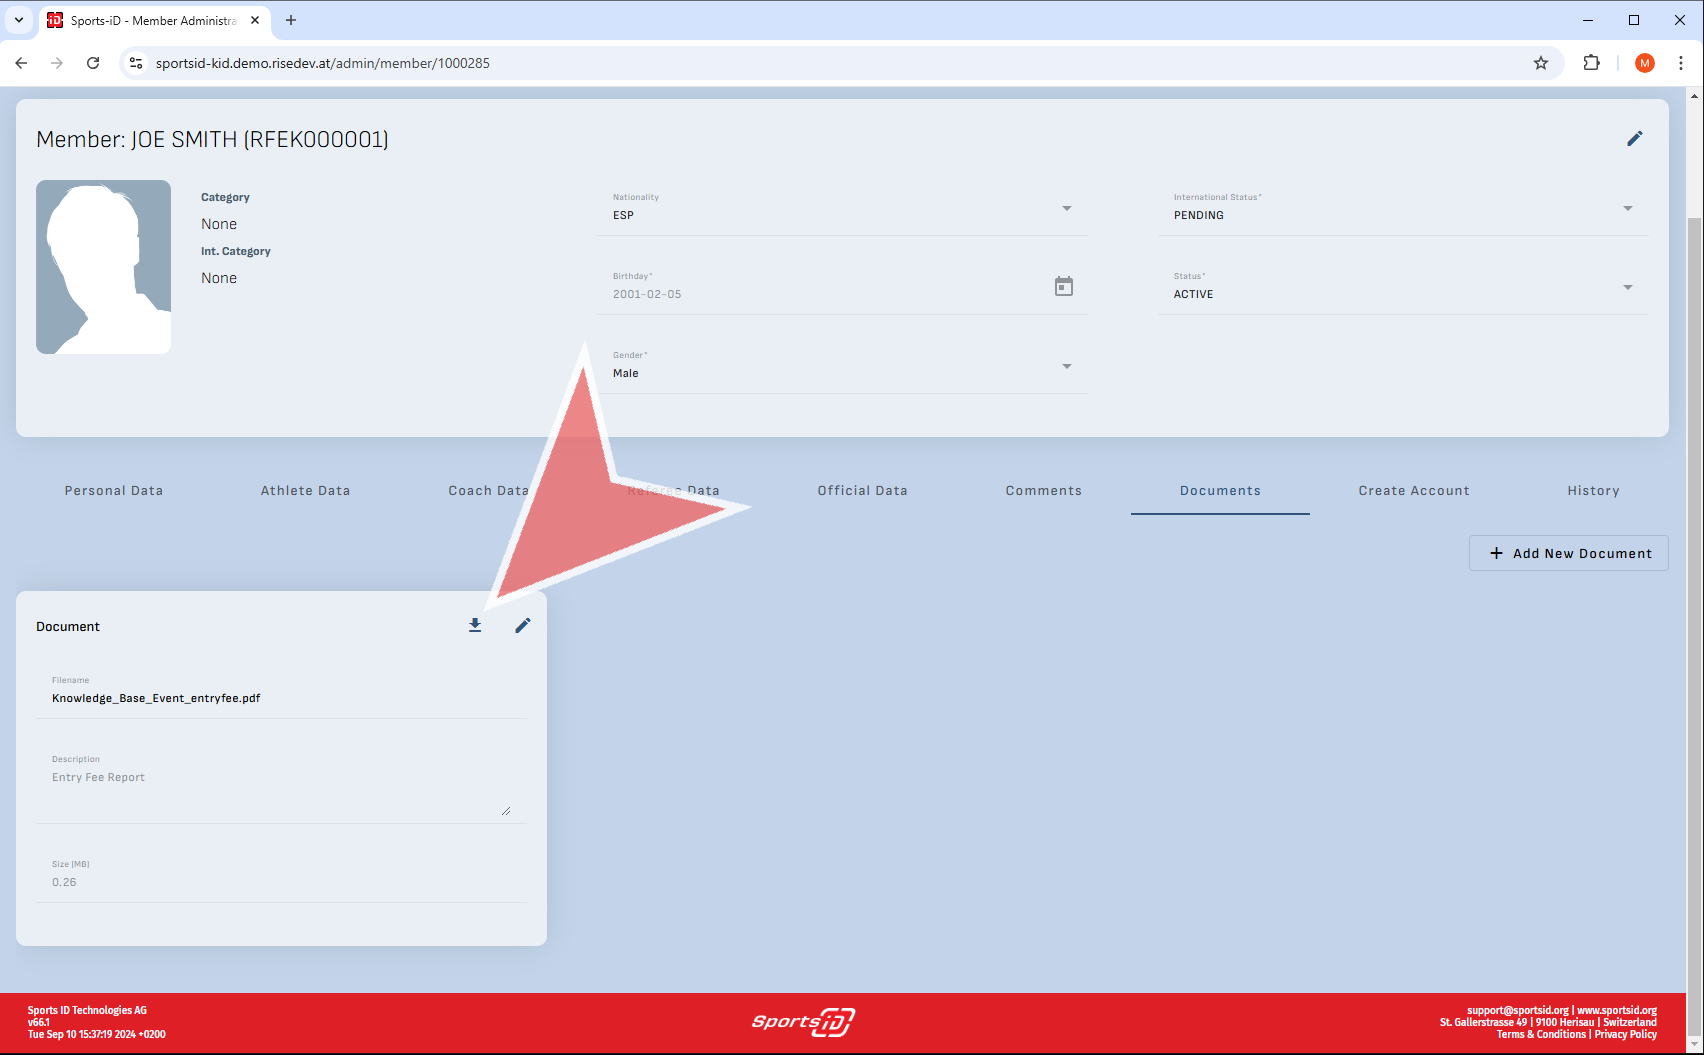
The upload document can now be seen by those with access and can be downloaded by clicking the Download Icon next to the edit Icon. You can upload multiple documents.

Create account by adding email

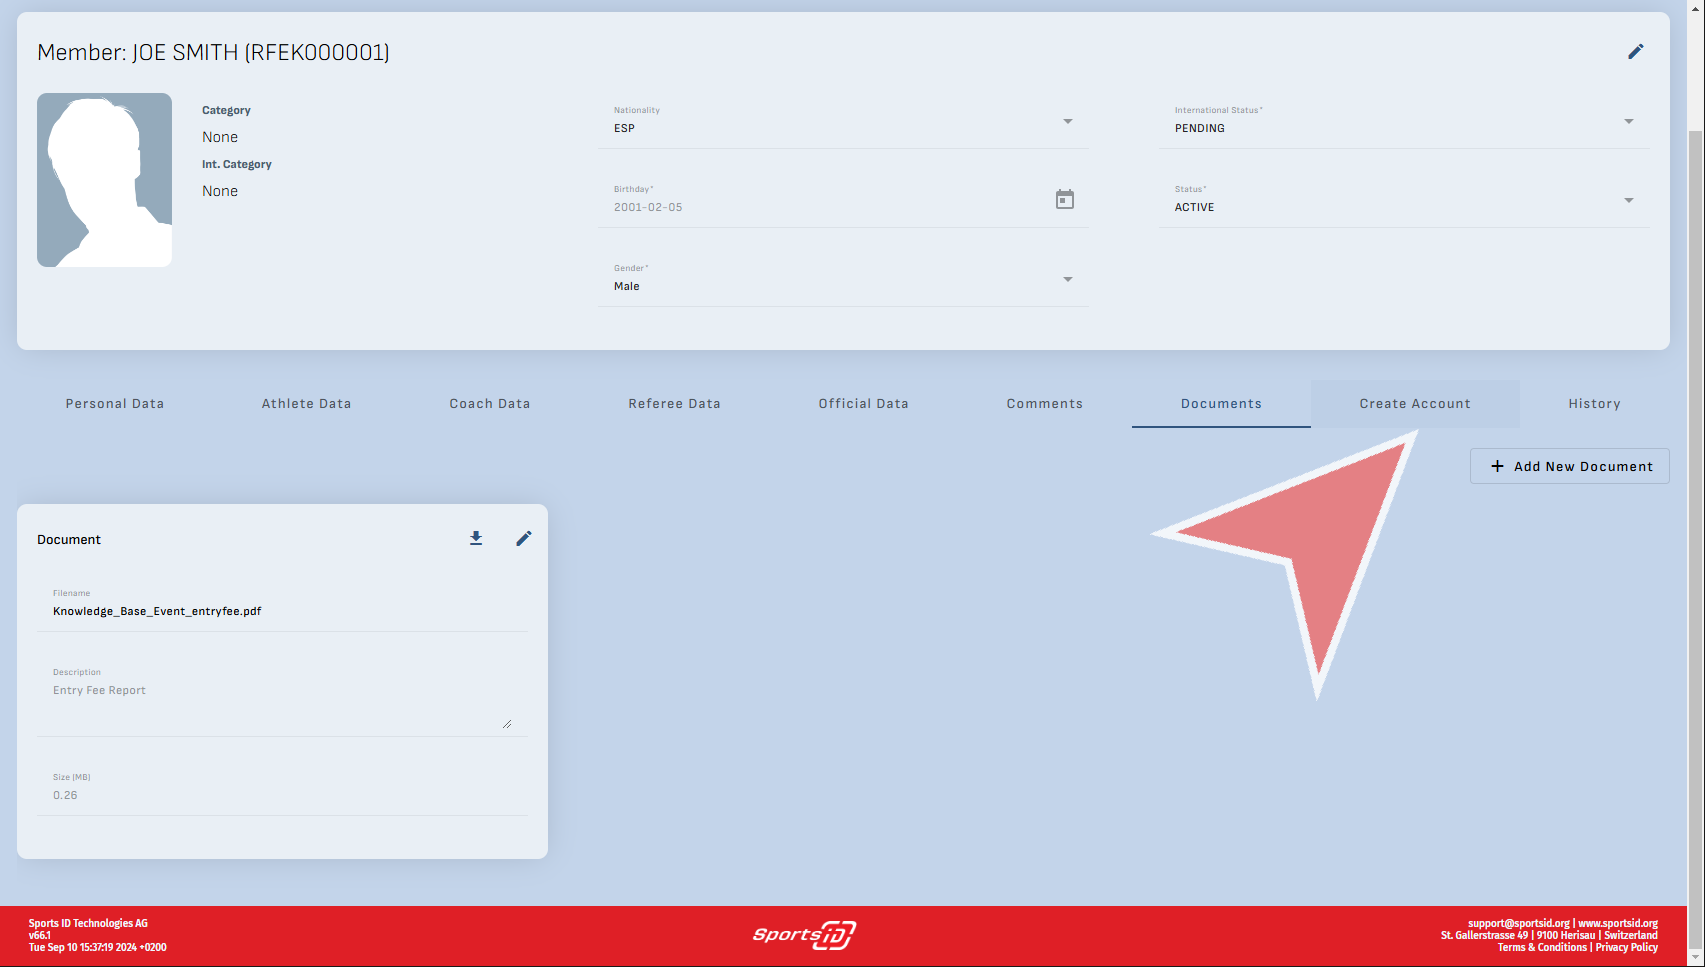
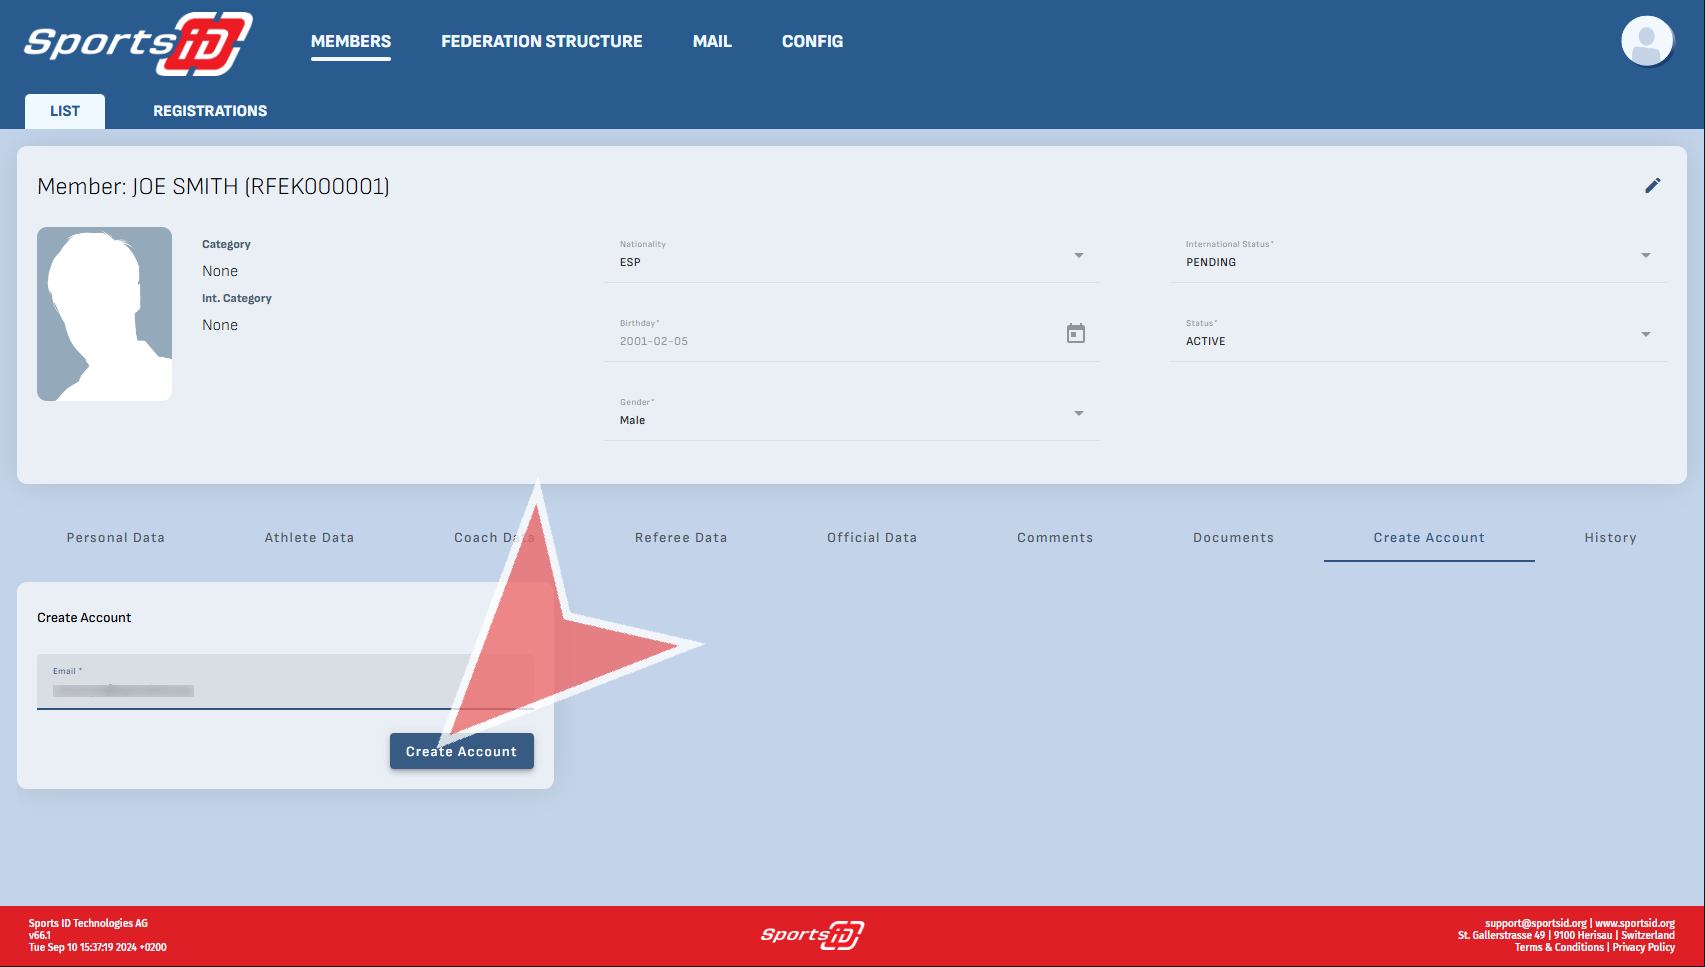
Additionally, by going to the tab ‘create account’ you can add an email account.

Add an email to link to the account.

If an existing account has the same email, you will be notified and asked whether you would like to replace the old one with the new one. A reminder only one email may be associated with one account.

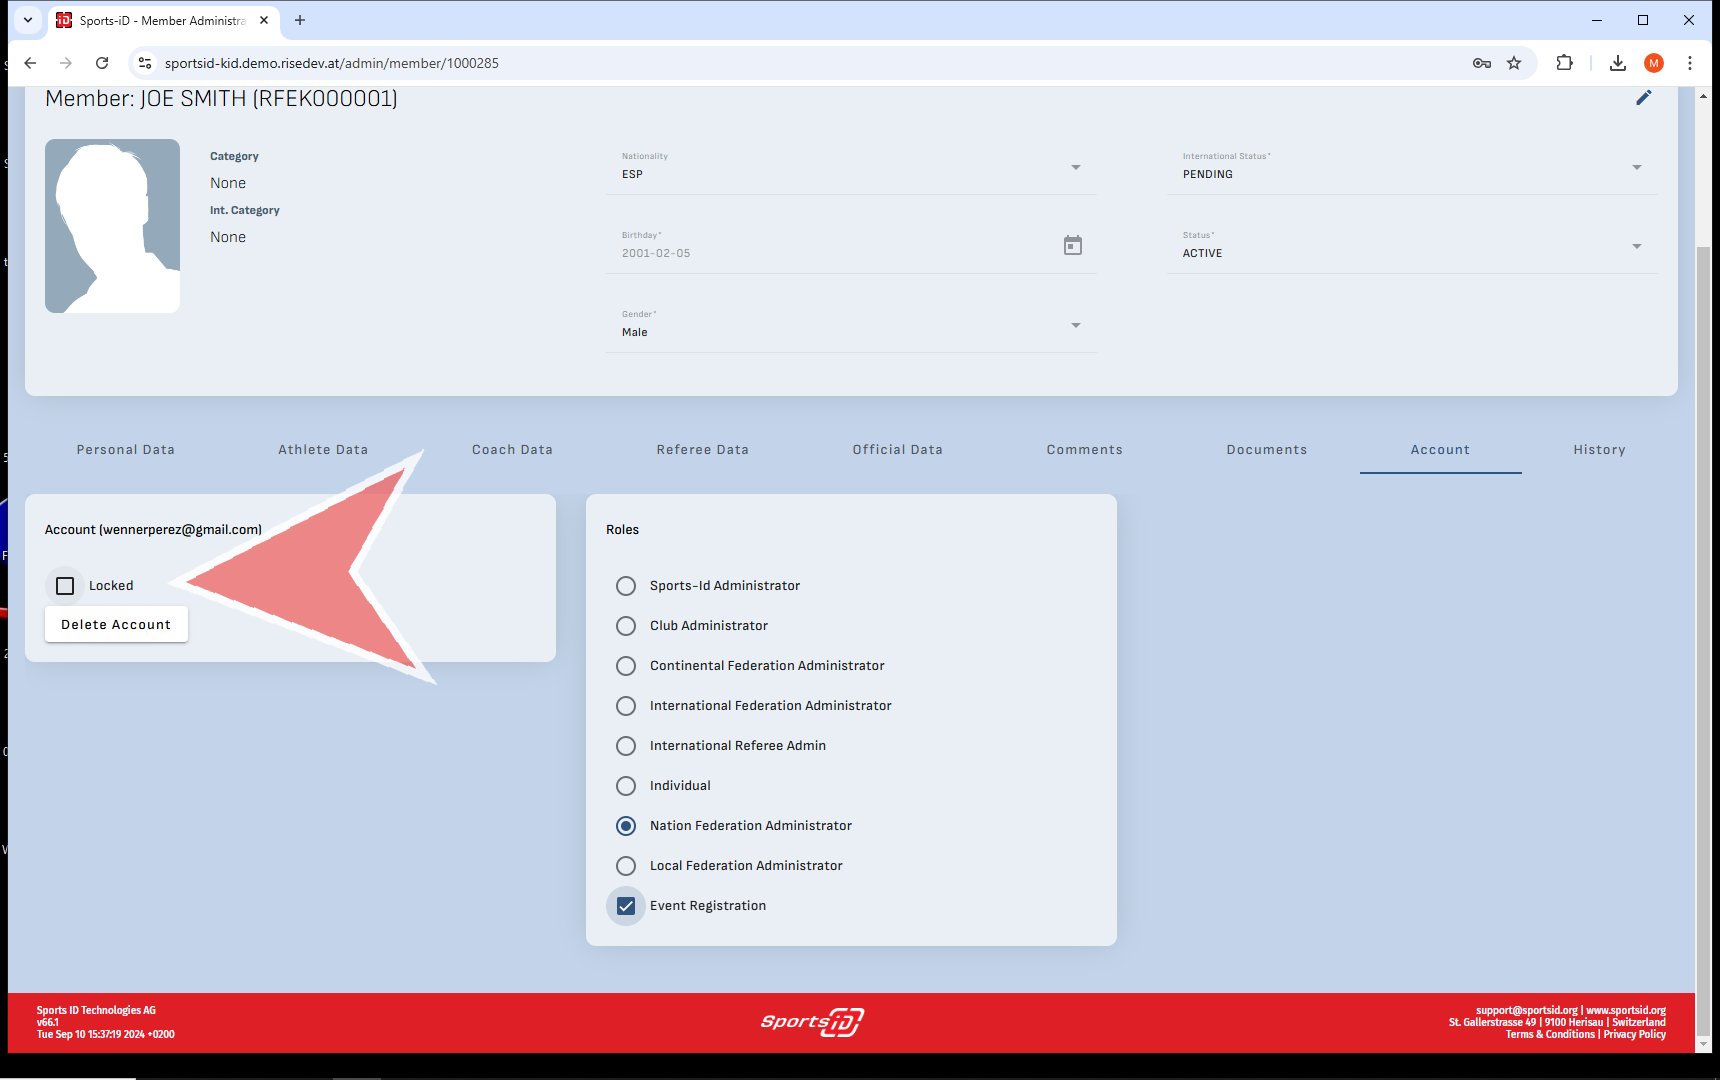
Select the role this account will have and if they will be able to register others to events which would be the case for clubs.

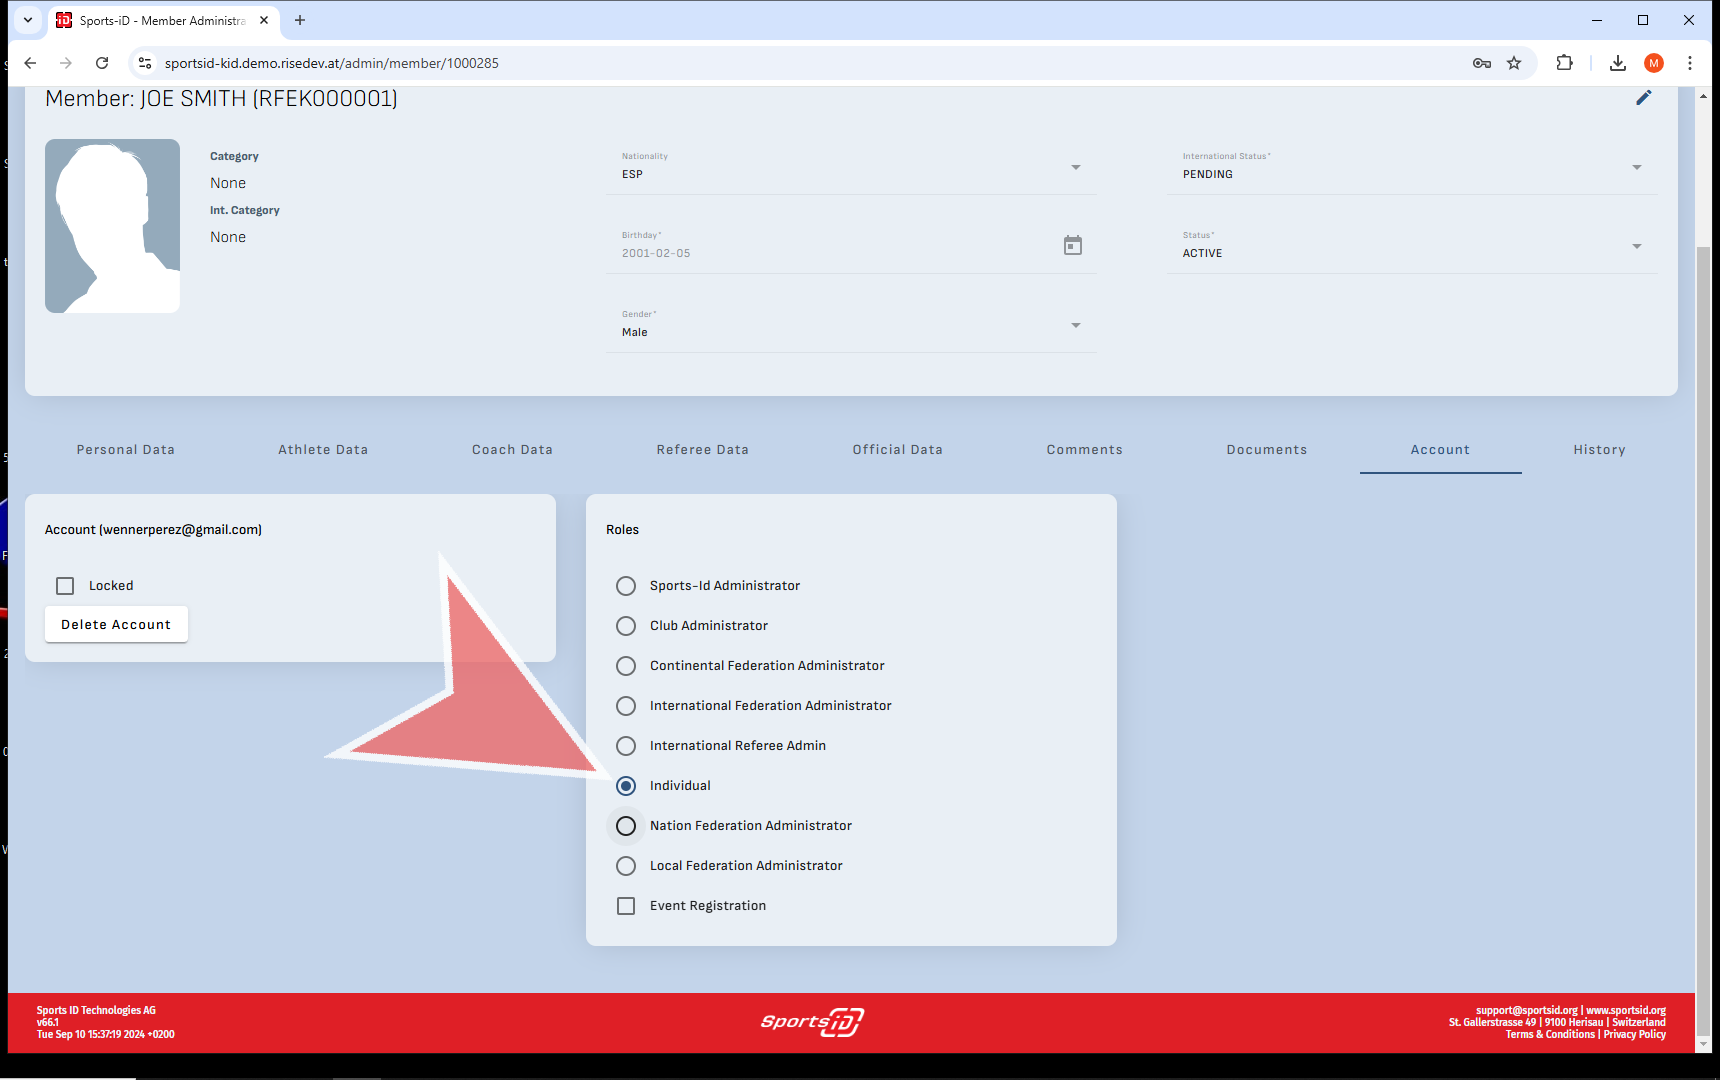
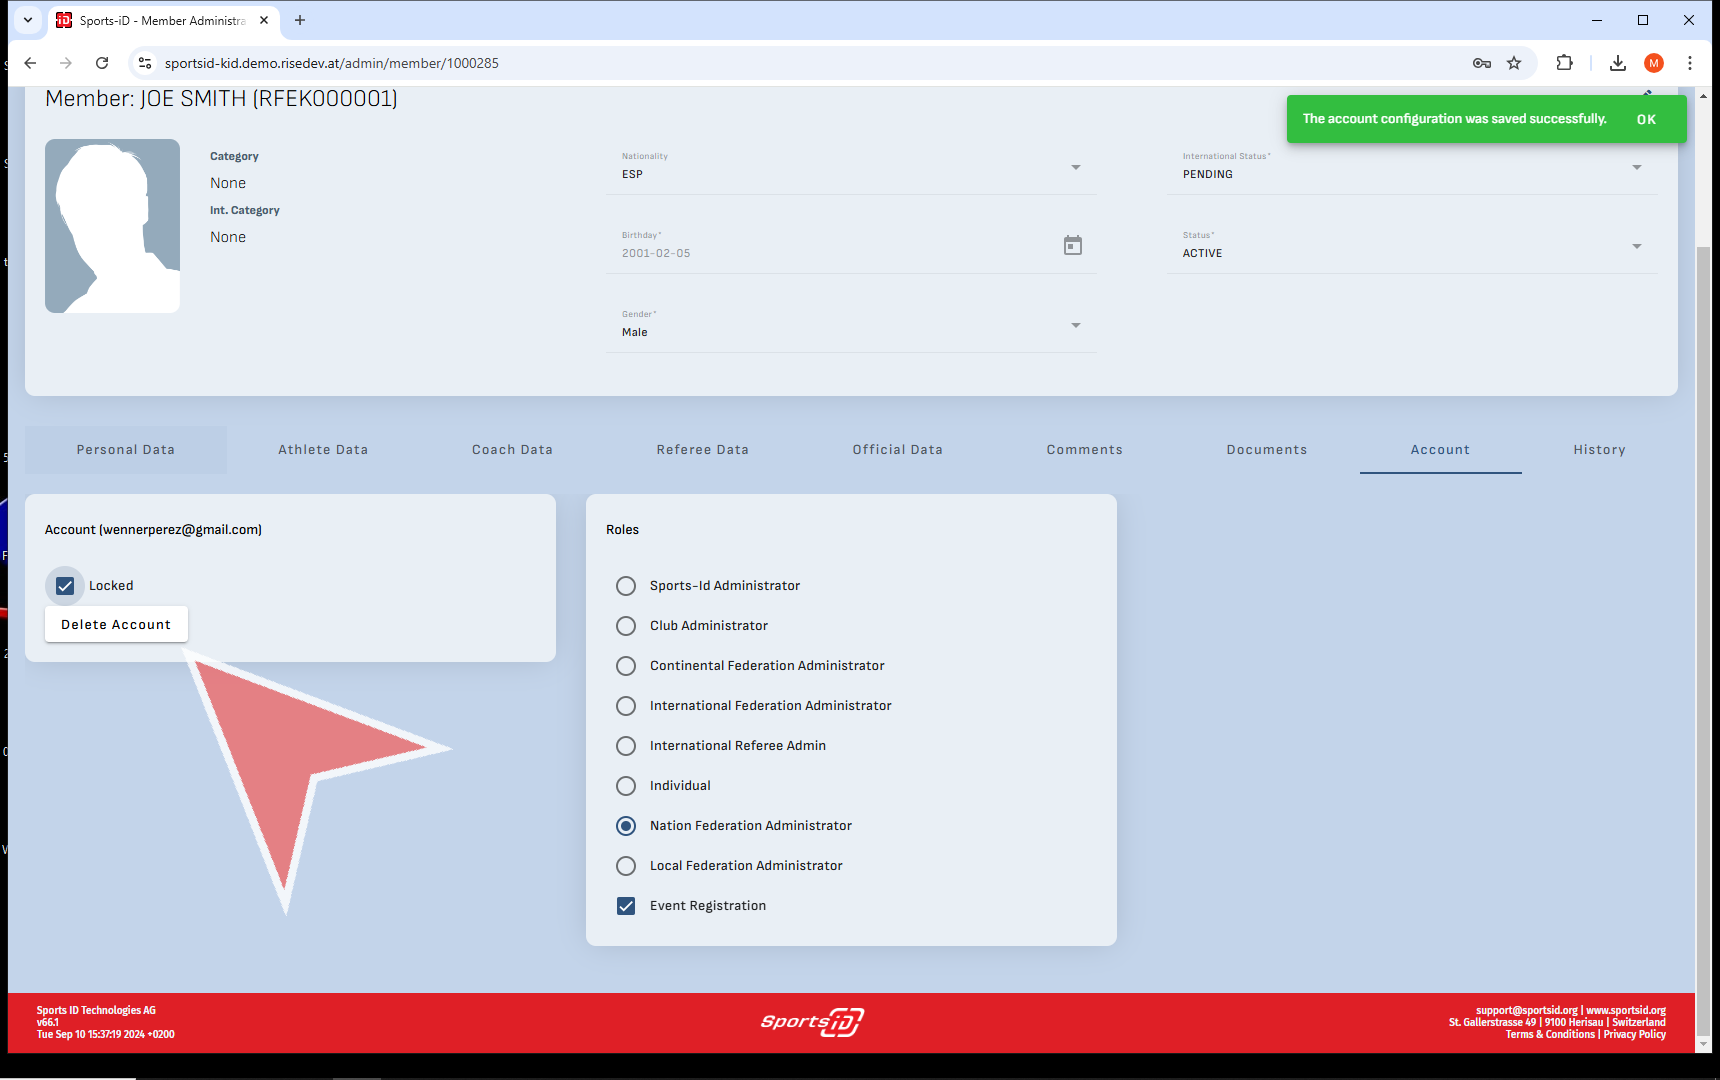
If you wanted to lock or block a member from accessing their profile you can tick the locked checkbox.

If you wanted to delete the account you can also do so in this tab.

Upload merchandise for sale – other expense items

Interactive Demo

Event Manager – Event Page

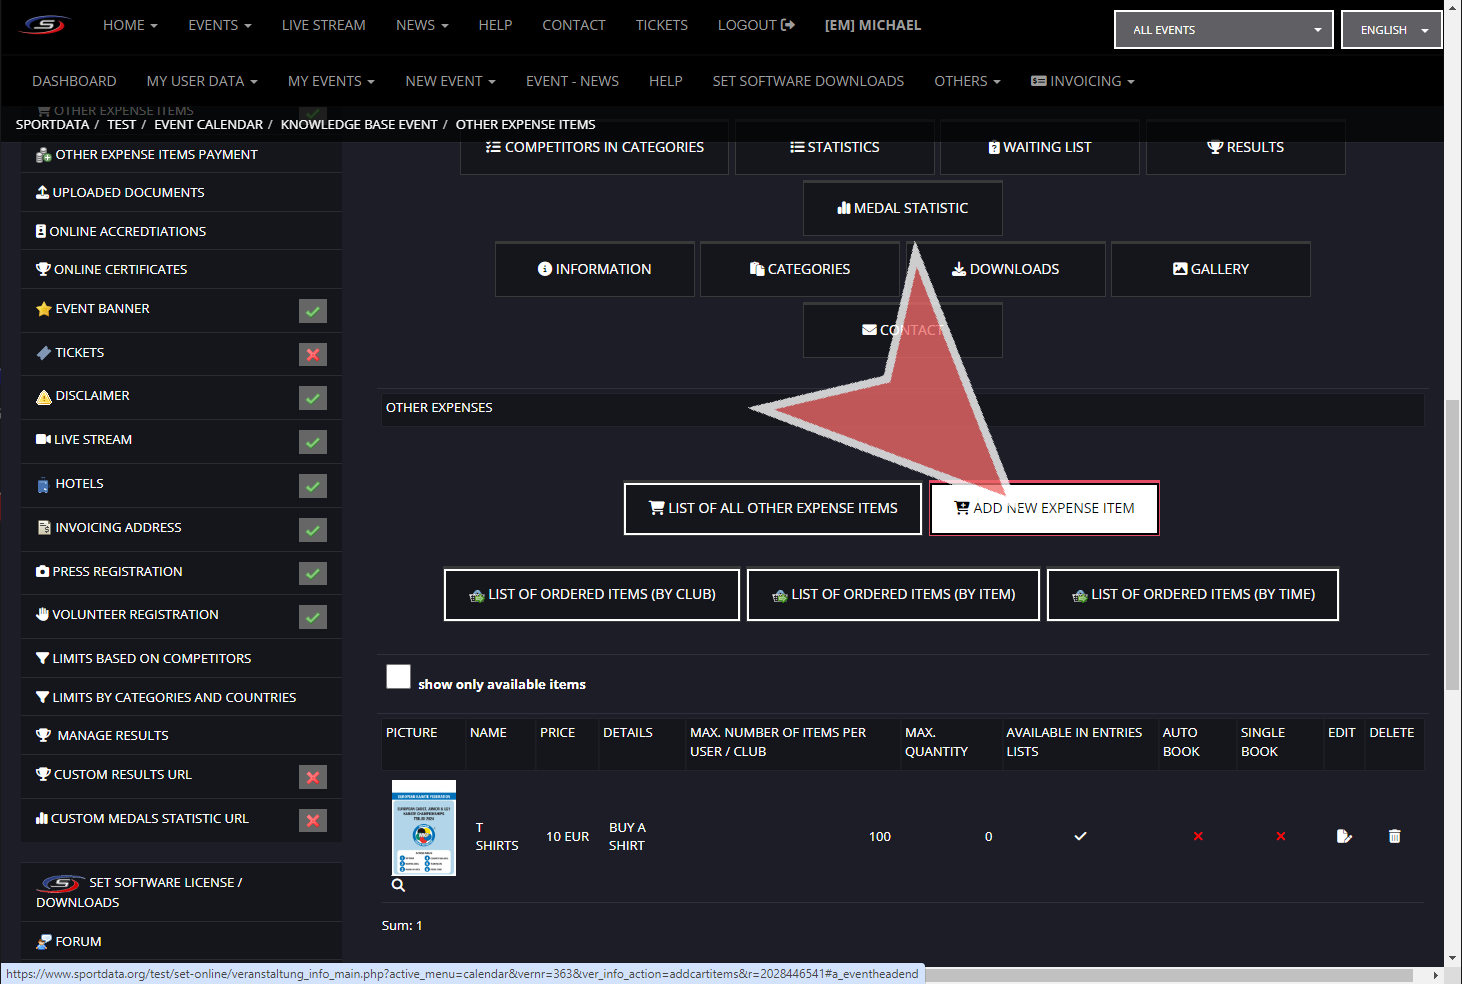
To add merchandising and products that you would either like your attendees to reserve and or purchase online go to the panel on the left side of you event page while signed in on your event manager account and select Other Expense Items.


Add New Expense Item

On the other expenses page, you are immediately brought to the list of all items where you can review the currently listed items, download the list of ordered items (by club, item, or time) and ad new items.


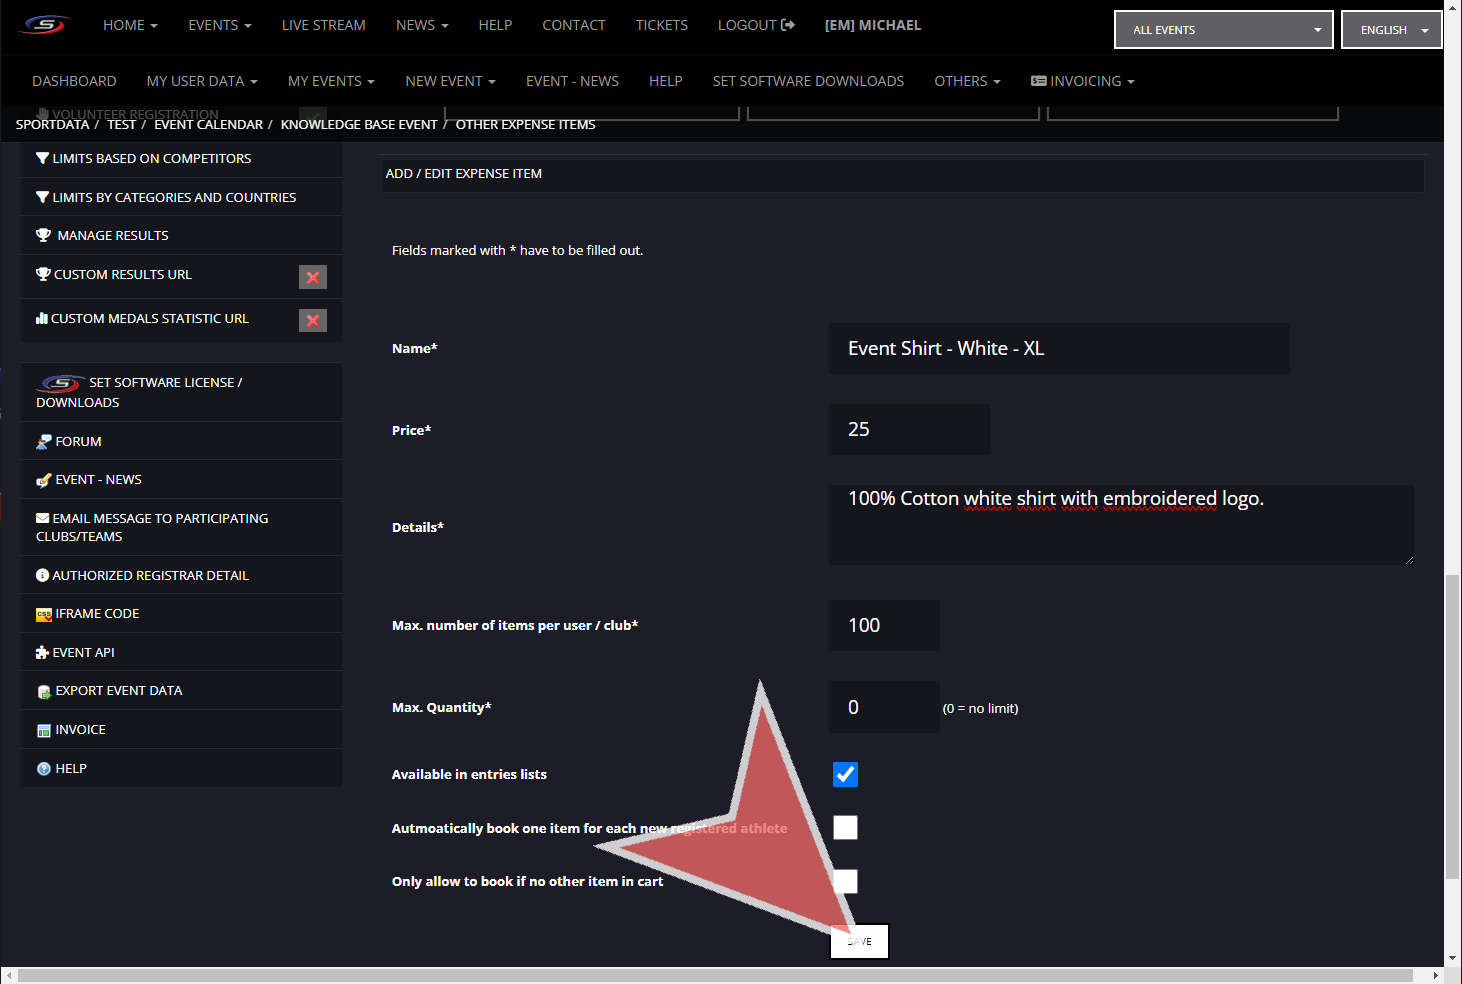
When adding a new item, the


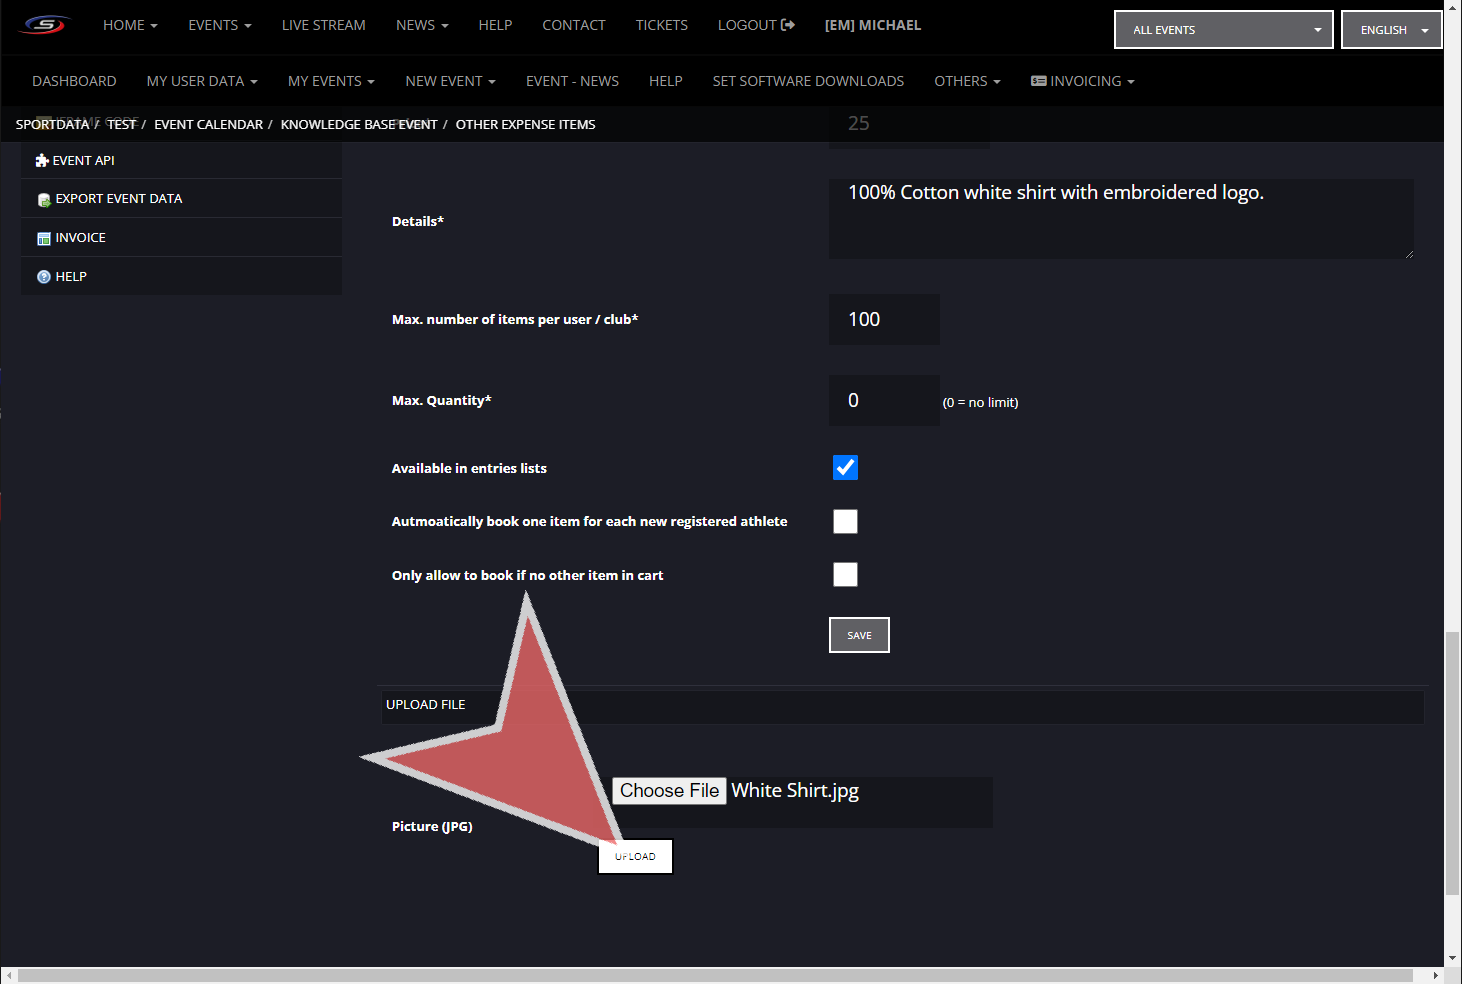
Once you have saved the the settings and description of the product upload a photo by choosing a file


Once you have saved the the settings and description of the product upload, the option to select a photo file will appear, and then you will click the upload button.


You will see your item uploaded in the main lists.


Set up Payment Methods

Interactive Demo


Event Manager – Event Page

In order to set up your payment options, you will need to sign in to you event manager account, and go to the specific event you would like to include your payment options. You will see the different options on the left hand panel with the option to use Paypal, Stripe, Gestpay, Bank Account, or a Custom Payment Link. Once you have enabled the settings, you will notice that the red x turns to a green check mark.


Paypal

Tick the boxes to enable Paypal for the event, donations, or allow the user to enter the amount of fees to pay. Ensure to add the email address for your PayPal account. If you have extra fees you can either put it either in absolute (euro) or relative terms (%)

If no additional checks are required to approve an entry, then tick the box to automatically approve the waiting list entries on payment. To save all settings click save. Notifications of complete payment will be recorded and can be reviewed in entry fee payments, however refunds are not tracked.


Stripe

With Stripe, you will have multiple Stripe API keys, both the Public and Secret key that you will need to add in order to link your account. Ensure to tick enable payment via Stripe. Notifications of complete payment will be received by Sportdata and will be tracked and can be reviewed in entry fee payments, however refunds are not tracked.


Bank Account

For bank accounts transfers, you will need to provide your bank account information, and show bank account details for this event. Note, that the following Sportdata does not get any notifications from your bank and will not be able to track payments.


Custom Payment System

If you have another payment system, you can include the link in the field below and save. Note, that the following Sportdata does not get any notifications from your bank and will not be able to track payments.

Send an Email Message to Participants

Interactive Demo

After logging in to your Event Manager Account, go to My Events, and selecting the event you would like to use the email messaging, and scroll down.

Click on the Email Message to Participating Clubs/Teams.

Write your Title & Message.

Select to whom you want to send your message from one of the following options;

  • all entries,
  • select a specific group,
  • or select them individually.

After selecting the recipients you can click on the Save button to send the message.

Wait until the confirmation of the emails that received the message in green appear before changing the page.

Below you can find an Example email.

Compute Pool Winners in the Draw Records

Interactive Demo

How to compute pool winners in the draw records

With at least 2 pools, you will have the winners of each pool face off at a later stage and this is called the pool winner table.


A reminder to generate the draws, save them, and saving them as draw records.


By opening the draw records, you will be able to see the progression of the pools.


When 2 pools have finished, then you can compute the pool winner in the edit tab in the menu bar.


The system will perform a status check to see how many pools have ben completed with a minimum of 2 being the minimum requirement. Click compute pool winner table to proceed.


Once the pool winner is generated it will be in a single user edit mode which means only you can see this pool winner table.


To change the single edit user mode, go to file and save the pool winner table. You will then see the multi user edit mode in green which means it can be seen at any computer in the network.