Automatic Weigh-in with electronic Scale and Barcode Scanner

Barcode Scanner
Any 2D Barcode Scanner is supported, which supports USB Com to RS-232 simulation, and allows to send CR+LF (CR = Carriage Return and LF = Line Feed) at the end of each transmission. SET uses the CR+LF commands at the end of data transmission to detected the End of Transmission (EOT).
Here are some recommended and tested scanners:
User Manual 1 User Manual 2User Manual

Configure your Scanner
Example configuration of a Datalogic Barcode scanner:
The most important it to have the scanner sending CR+LF at the end of the barcode, as this tells the software that the barcode is complete.
- Connect the barcode scanner with the computer
- Setup the barcode scanner:
- Configure the scanner to enable USB COM to simulate RS-232 standard interface

- The default baudrate is 9600. Thats fine, we can keep it. Otherwise configure the scanner to use baudrate 9600
- The only thing thats needs to be configured, is to send LF+CR at the end of each scan, so SET knows that the transmitting is complete
- So you need to scan Enter Programming Mode:

- SET the Global Suffix

- Now you need to scan the ASCII Character for CR+LF -> 0D + 0A


- Exit the Programming mode:
- The scanner is now ready
- Connect the scanner with SET

- Now SET should receive qr codes you scan from accreditation
- In order to process them automatically, open the QR code scanner interface

- Select as default action : Weight/Size control – connected with Scale

- Keep this window open
- If you scan now a qr code, it will automatically open the weight control window. After weight control, you don’t need to close the weight control window, just scan a new qr code. FYI: the message console shows all the data scanned and also indicates if a barcode was found -> EOT Found!
- Next step is to connect the scale in order to receive automatically the stable weight and in order to set the status of the weight control
Scale
Any serial USB connectable scale can be used, which supports to send a stable weight with CR+LF (CR = Carriage Return and LF = Line Feed) at the end of each transmission. SET uses the CR+LF commands at the end of data transmission to detected the End of Transmission (EOT).
Here are some recommended and tested scales:
PCE-PB 150N

Driver: Download
Usermanual: Download
How to calibrate: Download
ZOT 3

https://www.fawag.pl/index.php?goto=oferta&idng=136&idg=183
Driver: Download
Usermanual: Download
Configure your Scale
Example configuration:
PCE-PB 150N
- Make sure you scale has the correct configuration
- – SEnd -> – STAb (means the scale will send only the stable weight)
- – bAUD -> 9600
- – Au-PO -> – oFF
ZOT 3
- Make sure you scale has the correct configuration
- F2 -> S U (means the scale will send only the stable weight)
- F3 -> P2
- F4 -> 9600 bauds, n81
Now in SET you use the following settings for connecting to the scale:
- Go to Panels -> Data Service
- There you find the Serial Interface for the Scale
- Make sure to use the same settings as the scale: 9600, 8,1, none
- Make also sure you use the correct Com port of the scale (if you are not sure just disconnect the scale and check which COM port is missing in the COM port drop-down)
- Click on Open Port, the button should now change to “Close”

- The scale will now send stable weight. You can see in the message console the transmitted weigh, and if SET detects it the right way (EOT Found)
- The function for the weight control is available int the Weight/Size Control list:

- Just double click an entry or select and click on the scale icon
- You will see now the weigh-in window, showing the
- Name
- Team
- Country
- International ID, Date of Birth
- Catetory and Status
- Comment (not empty if already exists a weigh-in attempt)
- Photo- Managment
- Weight
- Pass and Fail buttons
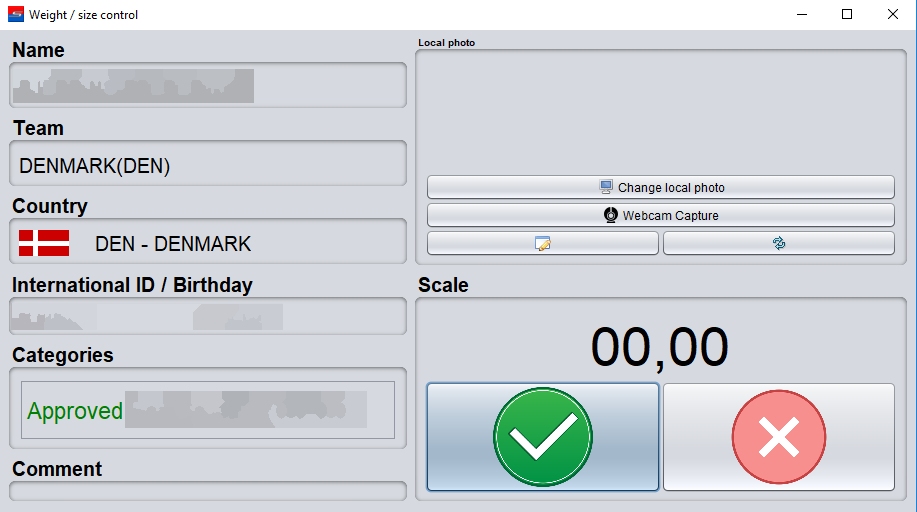
- The scale send the weight to this window, if open
- In order to have green (valid) and red (not valid) weight and automatic approval, you need to set the weight settings (min and max) for each category
- To do so, open this window : Other category Settings

- There you can define the max and min weight. You can do the same directly in Competitor Categories


- FYI: If there is no weight min or max set, you have to manually press the Red or Green Button to Approve or Deny the weigh-in attempt:
- For ITF Pattern, the system will set to Approved.
- For Sparring/Fighting it will set to Weighted if the weight is ok and you press Space or the green button, and Rejected if you press the Red button